A lot of Phoenix homeowners find crawl space problems the same way. They notice a stale, earthy smell near a hallway return vent, a closet, or the floor by the kitchen. They open windows, clean surfaces, maybe run the AC harder, and the odor still comes back.
That smell often points to a hidden moisture problem below the house. In a crawl space, wood framing, subfloor materials, insulation, dust, and organic debris can all hold moisture long enough for mold to take hold. In the desert, that catches people off guard. They assume Arizona is too dry for mold, but a single plumbing leak, poor drainage during monsoon season, or ground moisture under the home can create exactly the conditions mold needs.
Phoenix also has a local twist. Homes can swing from short periods of heavy moisture to long stretches of intense heat and dryness. That cycle can leave wood damaged in two ways at once. First from fungal growth when it stays damp, then from cracking, weakening, or dry rot related breakdown after the moisture event is ignored.
If you're trying to figure out whether this is a minor cleanup issue or a true crawl space mold remediation project, the answer depends less on the stain itself and more on what the moisture is doing now.
That Musty Smell from the Crawl Space What It Means
You walk into the house after a monsoon storm, and the odor is back. It is strongest near a floor register, a hall closet, or the spot above the crawl space access. You clean upstairs, run the AC, and maybe crack a window, but the smell keeps returning because the source is below the floor, not in the room where you notice it.
That odor usually means one thing. Moisture has stayed in the crawl space long enough to wet wood, insulation, dust, or stored debris, and microbial growth has started. In Phoenix, that catches homeowners off guard because outdoor air is dry much of the year. A crawl space is different. It can hold onto moisture after a plumbing leak, irrigation overspray, storm runoff, or humid monsoon air slips in and gets trapped.
Why smell is often the first warning
In real inspections, odor shows up before visible growth more often than staining at the access door. Crawl spaces are dark, tight, and easy to ignore. Moisture can stay active on the bottom of the subfloor, along joists, near supply lines, or around penetrations where condensate or small leaks go unnoticed.
Mold can begin growing quickly on wet materials after a water event, as the EPA notes in its guidance on mold cleanup and moisture control. In practice, that means a leak from the weekend can turn into a remediation issue by the time the smell reaches the living space.
If the odor started after a plumbing backup, heavy rain, or AC-related moisture, treat it like an active water problem until inspection proves otherwise.
Why Phoenix crawl spaces behave differently
Guides written for wetter climates often assume the crawl space stays damp for long stretches. Phoenix homes usually deal with a different pattern. The space gets wet fast during monsoon season or from a localized leak, then dries unevenly in extreme heat. That cycle can mislead people into thinking the problem corrected itself.
It often did not.
I see this in homes where the odor fades for a week, then returns when humidity rises or the HVAC starts pulling air through the house. The moisture event may be over, but the residue, damaged materials, and fungal growth remain. Wood can also take a double hit here. It gets wet enough to support mold first, then goes through repeated drying stress that contributes to cracking, fiber breakdown, and conditions homeowners often describe as dry rot.
If that pattern sounds familiar, this guide on what causes a musty smell in lower parts of the home helps explain why odor keeps returning even after surface cleaning.
A musty crawl space smell is an early field signal. It points to trapped moisture, hidden material damage, or both.
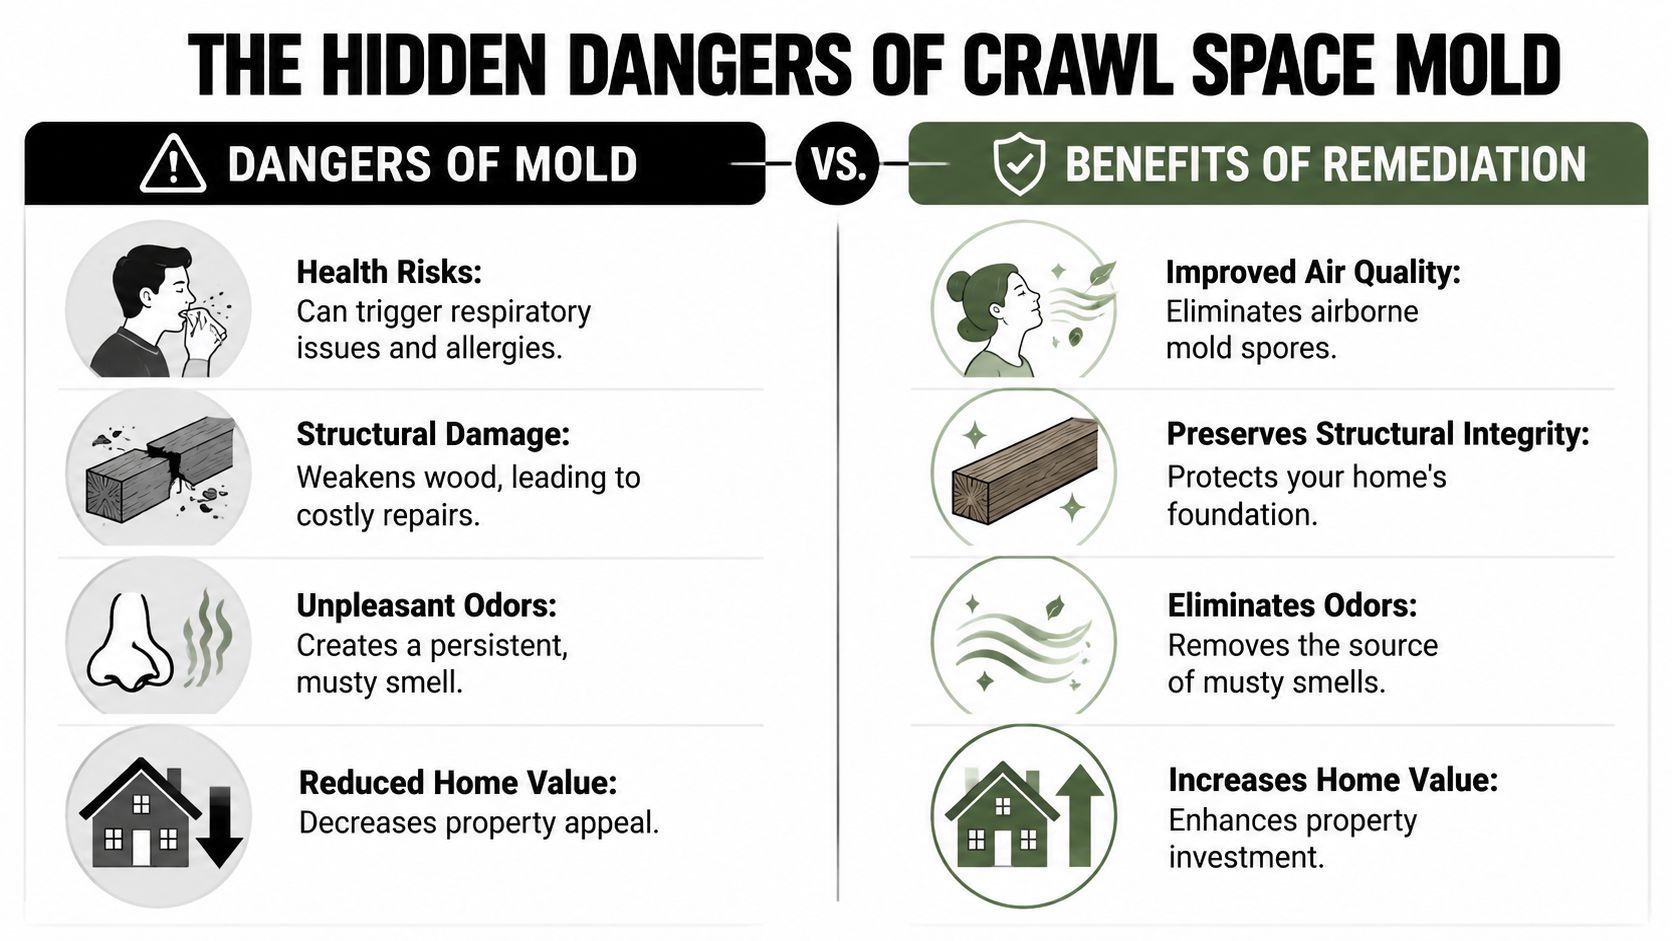
The Hidden Dangers of Crawl Space Mold
Once mold gets established below a home, the issue stops being cosmetic. Crawl space mold affects the house in two ways at the same time. It can degrade indoor air quality, and it can damage the materials holding up the floor above.
What it does to the air inside the home
A crawl space isn't isolated the way many homeowners think it is. Air moves. If mold is active below the house, spores and odor can work their way into living areas through framing cavities, utility openings, and HVAC leakage. People usually notice that as a lingering smell first, but the bigger concern is ongoing exposure to contaminated air.
That matters most in homes where someone already reacts to dust, damp environments, or respiratory irritants. Even when the mold is hidden, the house can still feel stale. Occupants may clean and deodorize upstairs for weeks without touching the actual source.
What it does to the structure
From a contractor's perspective, mold in a crawl space often behaves like a slow-motion structural warning. It feeds on organic material and thrives where moisture stays unchecked. Joists, rim areas, subfloor panels, and wood blocking can all become part of the problem.
The mold itself is one issue. The wet conditions that allowed it to grow are often the bigger one. If framing stays damp long enough, you're no longer talking only about discoloration. You may be dealing with soft wood, delamination, decay, corrosion on fasteners, and insulation that has lost its usefulness.
Mold in a crawl space is rarely just a cleaning problem. It usually means the house has a moisture management problem under the floor.
Why simple wiping usually fails
Superficial treatment often leads to failed jobs. Someone sprays a stain, wipes the surface, and assumes the problem is solved because the wood looks better. It isn't.
Crawl space mold remediation is primarily a moisture-control problem. If wood framing isn't dried to below 20% moisture content and relative humidity isn't kept below 60%, mold commonly returns even after visible growth is removed, as noted by this crawl space remediation guidance.
That's why competent remediation focuses on the full environment, not only the visible staining.
- Health protection: The goal is cleaner indoor air, not just a lighter-colored joist.
- Structural protection: The goal is dry, stable framing that isn't being repeatedly wetted.
- Odor removal: The smell goes away when the moisture source and contaminated material are addressed together.
- Property value: Buyers and inspectors pay attention to crawl space conditions because hidden moisture tends to raise bigger questions.
In Phoenix, those risks can be easy to underestimate because the house may look and feel dry upstairs. The crawl space can tell a very different story.
How to Spot a Crawl Space Mold Problem
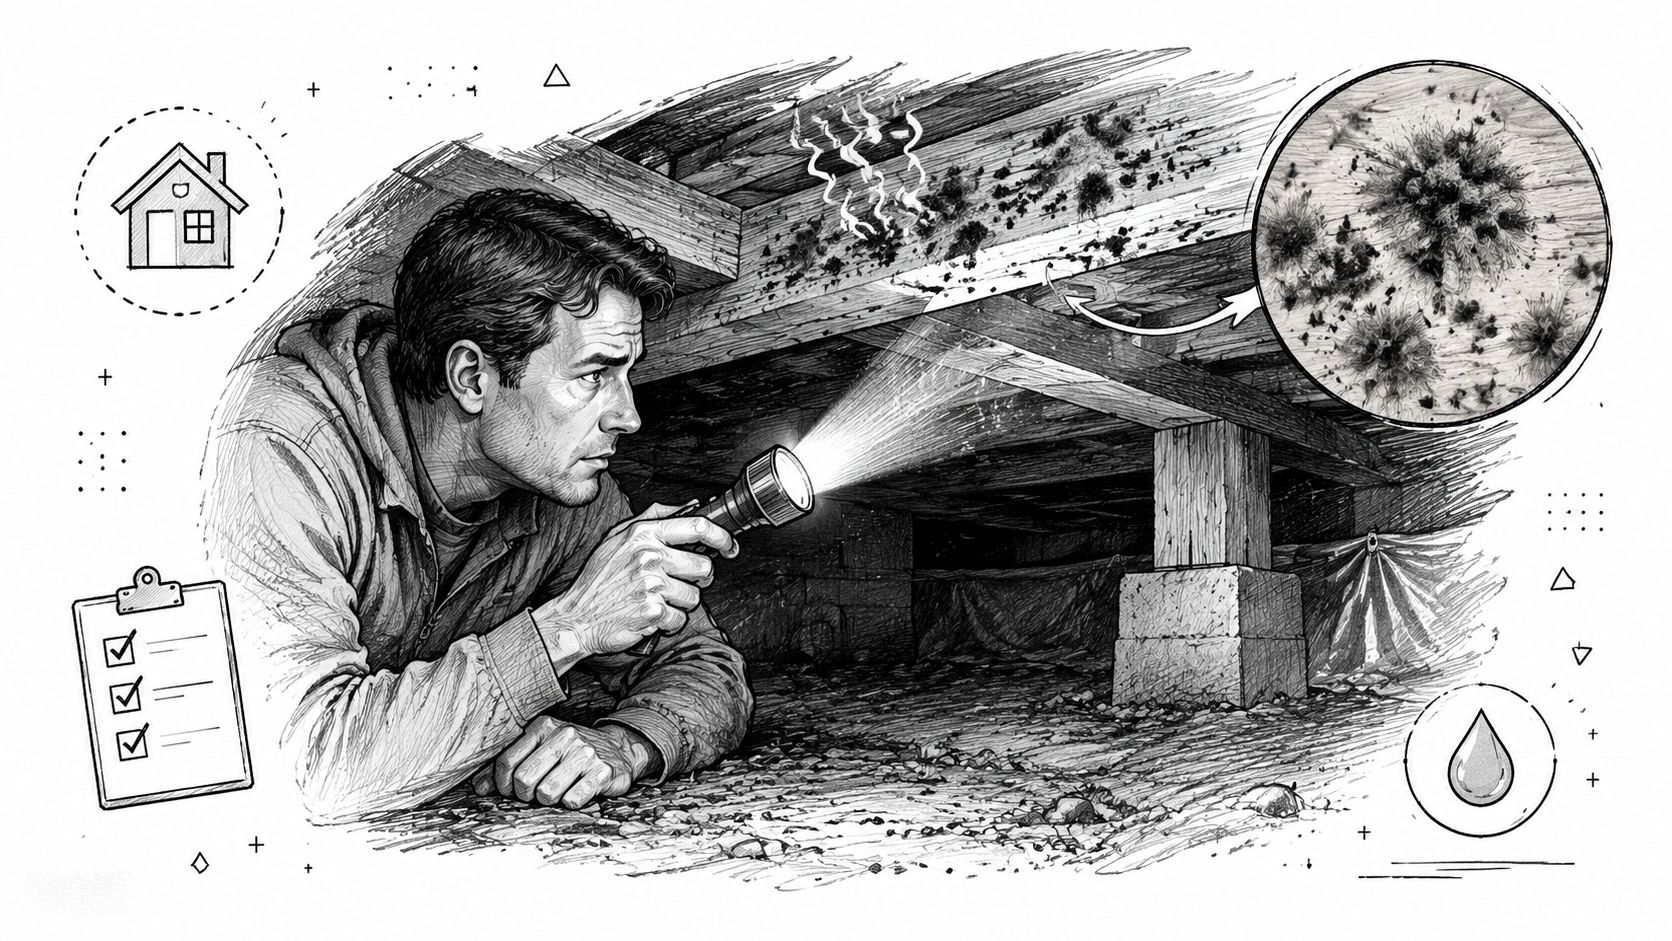
Most homeowners don't need to crawl deep under the house to tell whether something is wrong. A careful check from the access point can reveal a lot. The key is knowing what you can safely observe and when to stop.
Signs you can notice without entering fully
Start with your nose, then your eyes. If you open the crawl space access and the odor gets noticeably stronger, that tells you the source is likely active below the floor.
Look for these visible clues near the opening and with a strong flashlight:
- Wood staining: Dark, speckled, fuzzy, or patchy growth on joists or the underside of subflooring.
- Wet-looking surfaces: Condensation, darkened wood, or damp soil.
- Damaged insulation: Sagging batts, stained facings, or insulation that looks compressed and dirty.
- Rust or corrosion: Metal hangers, straps, or fasteners showing prolonged moisture exposure.
- Standing water or mud traces: Even if water isn't present now, residue can show where it entered.
- Movement in flooring above: Cupping, softness, or uneven feel underfoot can point to prolonged moisture below.
For a broader homeowner-level checklist, this guide on spotting mold in your house is useful because it connects hidden mold problems to the everyday clues people notice first.
What Phoenix conditions can hide
Arizona homes can fool you. A crawl space may not look swampy or obviously wet. In Phoenix, the issue is often intermittent moisture. Monsoon rain drives humidity up, an irrigation line leaks for weeks, or plumbing drips slowly into soil that never fully dries underneath the house.
Then summer heat dries the surface enough that people assume the problem is over. The staining remains, the odor lingers, and the wood may still hold hidden moisture deeper in the framing.
Safety note: If the access is tight, the space has visible heavy growth, there are signs of sagging wood, or you see standing water near electrical lines, stop the inspection and call a trained professional.
What a proper inspection adds
A professional inspection doesn't just answer “Is that mold?” It answers the more useful questions:
- Where is the moisture coming from
- How far has contamination spread
- Which materials can be cleaned and which need removal
- Whether the structure has been compromised
That's where a detailed mold inspection checklist becomes valuable. It helps homeowners understand the difference between a quick visual look and an actual remediation assessment.
The smartest first step is simple: observe from the entrance, document what you can, and avoid turning a hidden problem into an exposure problem by disturbing contaminated material without protection.
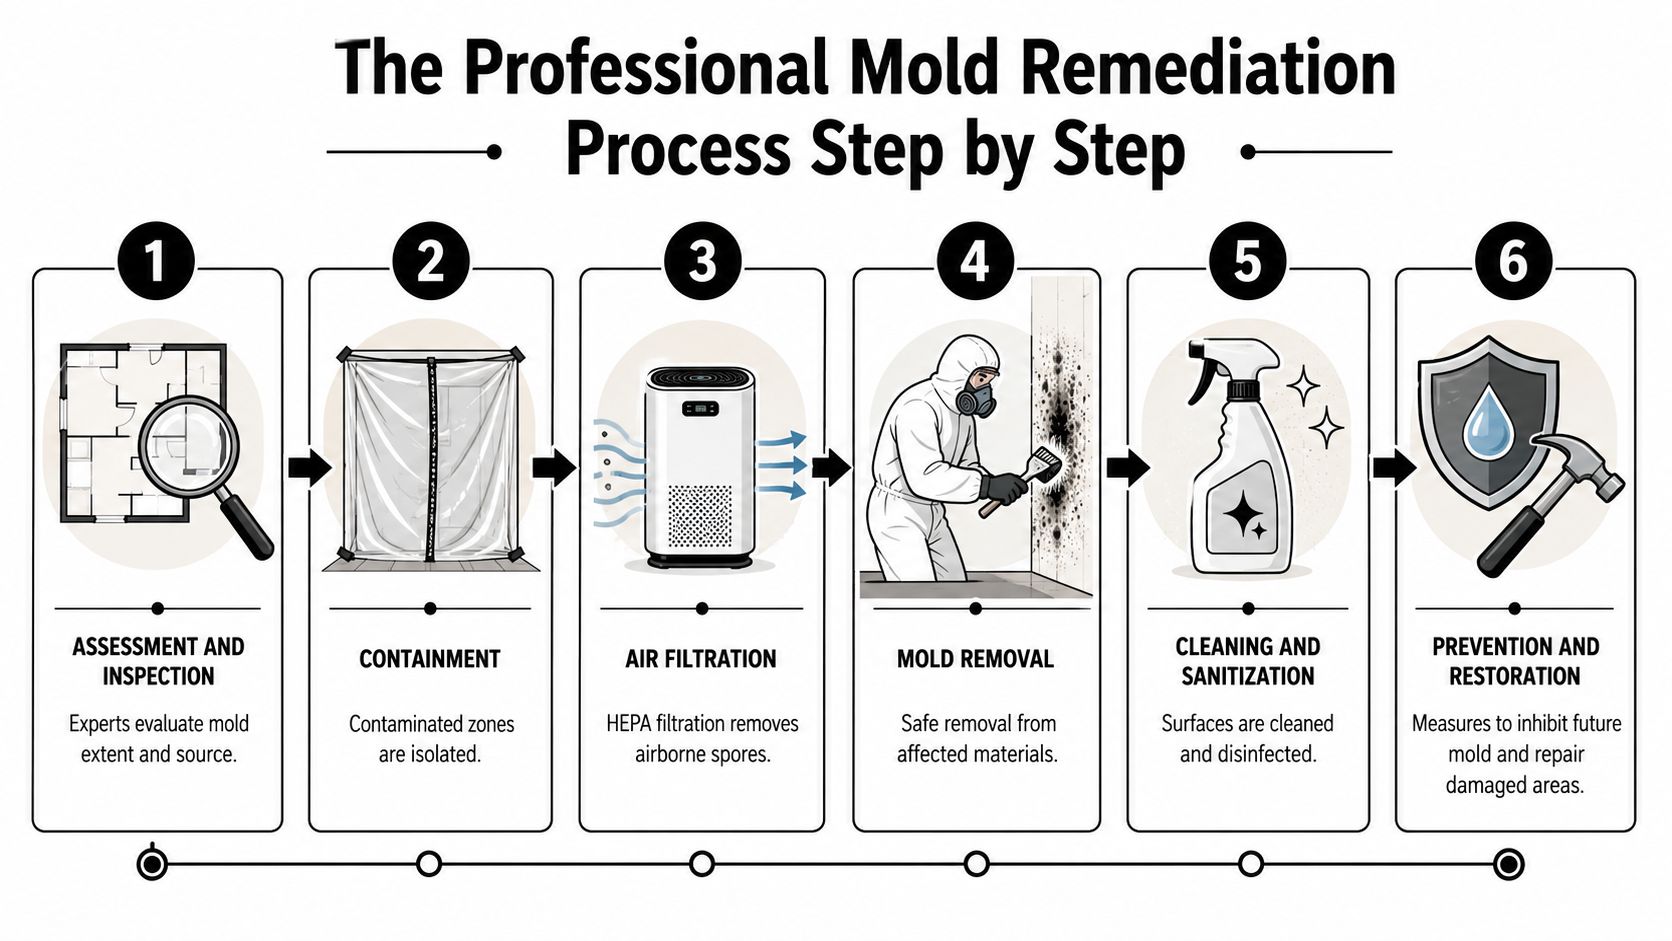
The Professional Mold Remediation Process Step by Step
A proper remediation job follows an order for a reason. If a crew skips containment or starts cleaning before the moisture source is understood, they can spread contamination and leave the root cause untouched.
Assessment and moisture mapping
The first step is to inspect the crawl space as a system. That means looking at framing, subfloor, plumbing, soil conditions, drainage patterns, insulation, ventilation details, and signs of prior water entry. Moisture meters matter here because staining alone doesn't tell you whether the environment is still supporting growth.
In Phoenix, I pay close attention to signs of seasonal wetting. Mud lines, efflorescence on masonry, damp pier bases, and staining around irrigation or plumbing penetrations can point to the source faster than the mold itself.
Containment before disturbance
Once active contamination is confirmed, the work area needs to be isolated. This keeps spores and dust from spreading into occupied parts of the home while contaminated material is being handled.
Professional remediation protocols tied to ANSI/IICRC S520 call for HEPA-filtered air scrubbers delivering about 4 to 6 air changes per hour, along with negative pressure to contain spores during removal, as described in the DoD/UFGS mold remediation specification.
That step is easy to underestimate until you see what happens on jobs where people skip it. Disturbing mold without containment can spread debris far beyond the crawl space.
A general overview of what a restoration company does helps homeowners understand why remediation crews bring more than cleaning supplies.
Removal and cleaning methods
After containment is stable, technicians remove unsalvageable porous material when needed. That can include insulation, debris, and wood materials that are too damaged to keep. Semi-porous and nonporous surfaces are usually addressed with HEPA vacuuming and damp wiping as baseline cleaning steps under professional protocols.
On wood framing, the exact method varies by condition. Some jobs call for detailed hand cleaning. Others need more aggressive surface removal because staining has penetrated the wood fibers. The right choice depends on whether the material is structurally sound, how extensive the growth is, and whether the moisture source has been corrected.
Here's a visual overview of the workflow homeowners usually find helpful before a project starts:
Drying, repair, and follow-up
Cleaning isn't the finish line. The crawl space has to be dried and stabilized so the conditions that supported mold aren't still present. That often includes leak repair, drainage correction, ground moisture control, dehumidification, and sometimes vapor barrier or encapsulation work depending on the construction and moisture pattern.
A typical professional sequence looks like this:
- Find and correct the moisture source
- Set containment and filtered airflow
- Remove contaminated debris and damaged porous material
- Clean remaining structural surfaces
- Dry the space to stable conditions
- Repair or protect materials as needed
If the contractor talks only about spraying a chemical and leaves out drying, moisture tracking, or containment, that's not a complete remediation plan.
The best jobs look boring when they're finished. No odor, no active growth, no wet framing, and no shortcuts hidden behind fresh coating.
DIY Cleaning vs Professional Remediation
Homeowners ask the right question all the time: can this be handled without hiring a remediation crew? Sometimes the answer is yes, but only for a narrow range of situations. The moment the problem involves confined-space risk, widespread contamination, active moisture, or damaged building materials, DIY stops being practical.
The useful question isn't “Can I clean mold?” The useful question is whether the issue is limited, dry, and accessible, or whether the house needs full crawl space mold remediation.
Where DIY can make sense
If staining is limited, the wood is dry now, the affected area is easy to reach, and there's no sign the contamination extends deeper into the crawl space, a homeowner may be able to address a small problem after fixing the moisture source. That's the nuance many articles miss.
One of the most important homeowner questions is whether full remediation is necessary for limited mold on joists, or whether the higher priority is moisture correction first, as discussed in this guidance on crawl space remediation decisions.
That said, crawl spaces are not the same as exterior trim or siding. If you're comparing tasks, something like removing mold from house siding is far more straightforward because the work happens in open air, with easier access and less chance of spreading contamination into the home.
Where DIY usually fails
DIY efforts usually go wrong in one of four places:
- Poor diagnosis: The visible stain gets cleaned, but the plumbing leak, drainage issue, or ground moisture remains.
- Unsafe disturbance: Scrubbing overhead growth in a confined crawl space sends spores and debris directly into the breathing zone.
- Wrong equipment: Household vacuums, fans, and spray products don't perform like commercial HEPA filtration and controlled drying equipment.
- No long-term control: The area looks cleaner for a while, then odor and growth come back because humidity and material moisture were never brought under control.
Side-by-side comparison
| Factor | DIY Approach | Professional Service |
|---|---|---|
| Safety | Limited protection in a tight, dirty space | Better control of exposure, containment, and debris handling |
| Moisture diagnosis | Often based on visible clues only | Uses inspection methods to identify source and spread |
| Equipment | Consumer cleaners, shop vacs, household fans | HEPA filtration, containment materials, commercial drying tools |
| Material decisions | Hard to tell what can stay | Better judgment on cleaning versus removal |
| Access | Tough in low-clearance crawl spaces | Crews are trained for confined-space conditions |
| Long-term result | Can work for small, dry, localized issues | Better suited for active, hidden, or recurring problems |
Field reality: A homeowner can sometimes clean a small isolated area. A homeowner usually can't self-perform a full remediation standard in a confined crawl space.
If you're trying to understand that line more clearly, a related article on how to clean basement mold gives useful context on where surface cleaning ends and remediation begins.
The honest answer is this: if you can't confidently explain the moisture source, you're not ready to decide on DIY.
Phoenix Crawl Space Prevention and Maintenance
Phoenix isn't Florida or Seattle, and that matters. Most crawl space advice online is written for wet climates where moisture is constant. In the Valley, moisture tends to be episodic but intense. A monsoon storm can push water where it normally never goes, then dry heat can mask the evidence before the homeowner checks under the house.
That pattern creates a false sense of safety. The crawl space may look dry during inspection, while the framing still shows the effects of repeated damp cycles.
What makes Phoenix different
Monsoon season is the big one. Poor drainage, clogged downspouts, low grading near the foundation, and roof runoff dumping too close to the home can all send water toward the crawl space. Add evaporative cooling equipment, condensate issues, or plumbing leaks, and you get the kind of hidden moisture problem Arizona homeowners don't expect.
Then the climate swings back. Long dry periods can leave previously wet wood brittle, cracked, or degraded. Homeowners sometimes refer to all of that as dry rot, but the practical takeaway is simpler. Wood that has been wet and ignored is less reliable, even if the crawl space no longer feels damp on the day you inspect it.
What to monitor routinely
Industry guidance commonly targets crawl space relative humidity in the 45% to 55% range and warns against conditions above 60%. It also treats wood moisture content above 20% as a key mold threshold, according to this crawl space moisture reference.
For Phoenix homes, that translates into a short maintenance list:
- Check drainage after storms: Make sure water leaves the foundation area instead of pooling near the crawl space.
- Watch irrigation patterns: Sprinklers aimed at walls or overwatered planting beds can create chronic hidden wetting.
- Inspect plumbing and condensate lines: Small leaks cause big problems when they drip for long periods.
- Maintain the ground cover system: A properly installed vapor barrier helps control moisture rising from the soil.
- Use dehumidification when needed: In enclosed or problem crawl spaces, humidity control may be part of the long-term fix.
A related moisture source many Phoenix homeowners overlook is hidden plumbing movement under or around the home. If you suspect that, this guide on understanding and addressing slab leaks is worth reading because leak symptoms often overlap with mold and moisture complaints.
In Phoenix, prevention isn't about fighting daily swamp conditions. It's about catching short moisture events before they become a long-term structural problem.
The houses that stay clean underneath are the ones where water is redirected quickly, leaks are fixed early, and the crawl space isn't left to “air out” on its own.
Finding a Contractor and Estimating Costs
A Phoenix crawl space can look dry at first glance and still have a mold problem after a monsoon, an irrigation leak, or condensation around ductwork. That is why contractor selection matters. The right company does more than wipe visible growth off framing. It identifies how moisture got in, whether wood has started to weaken, and what needs to happen so the problem does not return the next storm season.
Good remediation work starts with a clear diagnosis. In this climate, I want to hear a contractor talk about drainage, soil moisture, ventilation design, plumbing history, and the condition of the subfloor and joists. Phoenix homes do not usually deal with year-round saturation like homes in humid regions, but they do see short wetting events that get missed and then sit in a dark crawl space long enough to support mold and, in some cases, dry rot.
What to ask before hiring
Ask the contractor to explain the scope in plain language. They should be able to tell you what is mold growth, what is moisture staining, what materials can likely be cleaned, what materials may need removal, and how they will confirm the crawl space is drying effectively.
These questions help separate a remediation firm from a basic cleaning service:
- Training and credentials: Are they IICRC-certified for mold or water damage related work?
- Inspection method: Are they checking moisture levels in wood and other affected materials, not just looking at surface discoloration?
- Containment and filtration: Will they use containment, HEPA vacuuming, and air filtration if conditions call for it?
- Source correction: Who is responsible for fixing drainage, plumbing leaks, vapor barrier defects, or other moisture causes?
- Repair judgment: Can they identify when wood is still sound versus when fungal damage or dry rot has changed the repair scope?
- Written scope: Will you get a line-by-line estimate that separates remediation, drying, and repairs?
Homeowners comparing local companies can use this guide to mold removal companies near me to see what a qualified remediation contractor should explain before work starts.
What affects cost
No honest contractor can lock in a firm price from a few phone photos. Crawl spaces are too variable. The final number depends on how much access there is, how large the affected area is, whether insulation or vapor barrier materials have to be removed, and whether the framing only needs cleaning or has progressed into repair work.
In Phoenix, the moisture source often changes the price more than the mold itself. A one-time monsoon intrusion with limited growth is a very different job from a crawl space that has had months of irrigation overspray, a slow plumbing leak, or repeated humid air intrusion. Once wood starts to stay wet long enough for deterioration, costs rise because the job shifts from remediation into carpentry, drying, and prevention upgrades.
A useful estimate breaks the work into separate categories. One line should cover mold remediation. Another should cover moisture correction, such as drainage improvements, leak repair coordination, or vapor barrier replacement. A third should cover any rebuilding or wood replacement if damage is found. The EPA's guide on mold cleanup and remediation is also a good reference for understanding why fixing the water source has to be part of the scope, not an optional add-on.
If a bid is vague, very low, or focused on spraying chemicals without a moisture plan, keep looking.
If you need an expert opinion on a musty crawl space, visible growth, or hidden moisture under your home, Restore Heroes serves the Phoenix metro with licensed, bonded, insured, and IICRC-certified restoration support. A qualified team can inspect the crawl space, identify the moisture source, explain whether cleaning or full remediation makes sense, and help you make a sound repair decision.