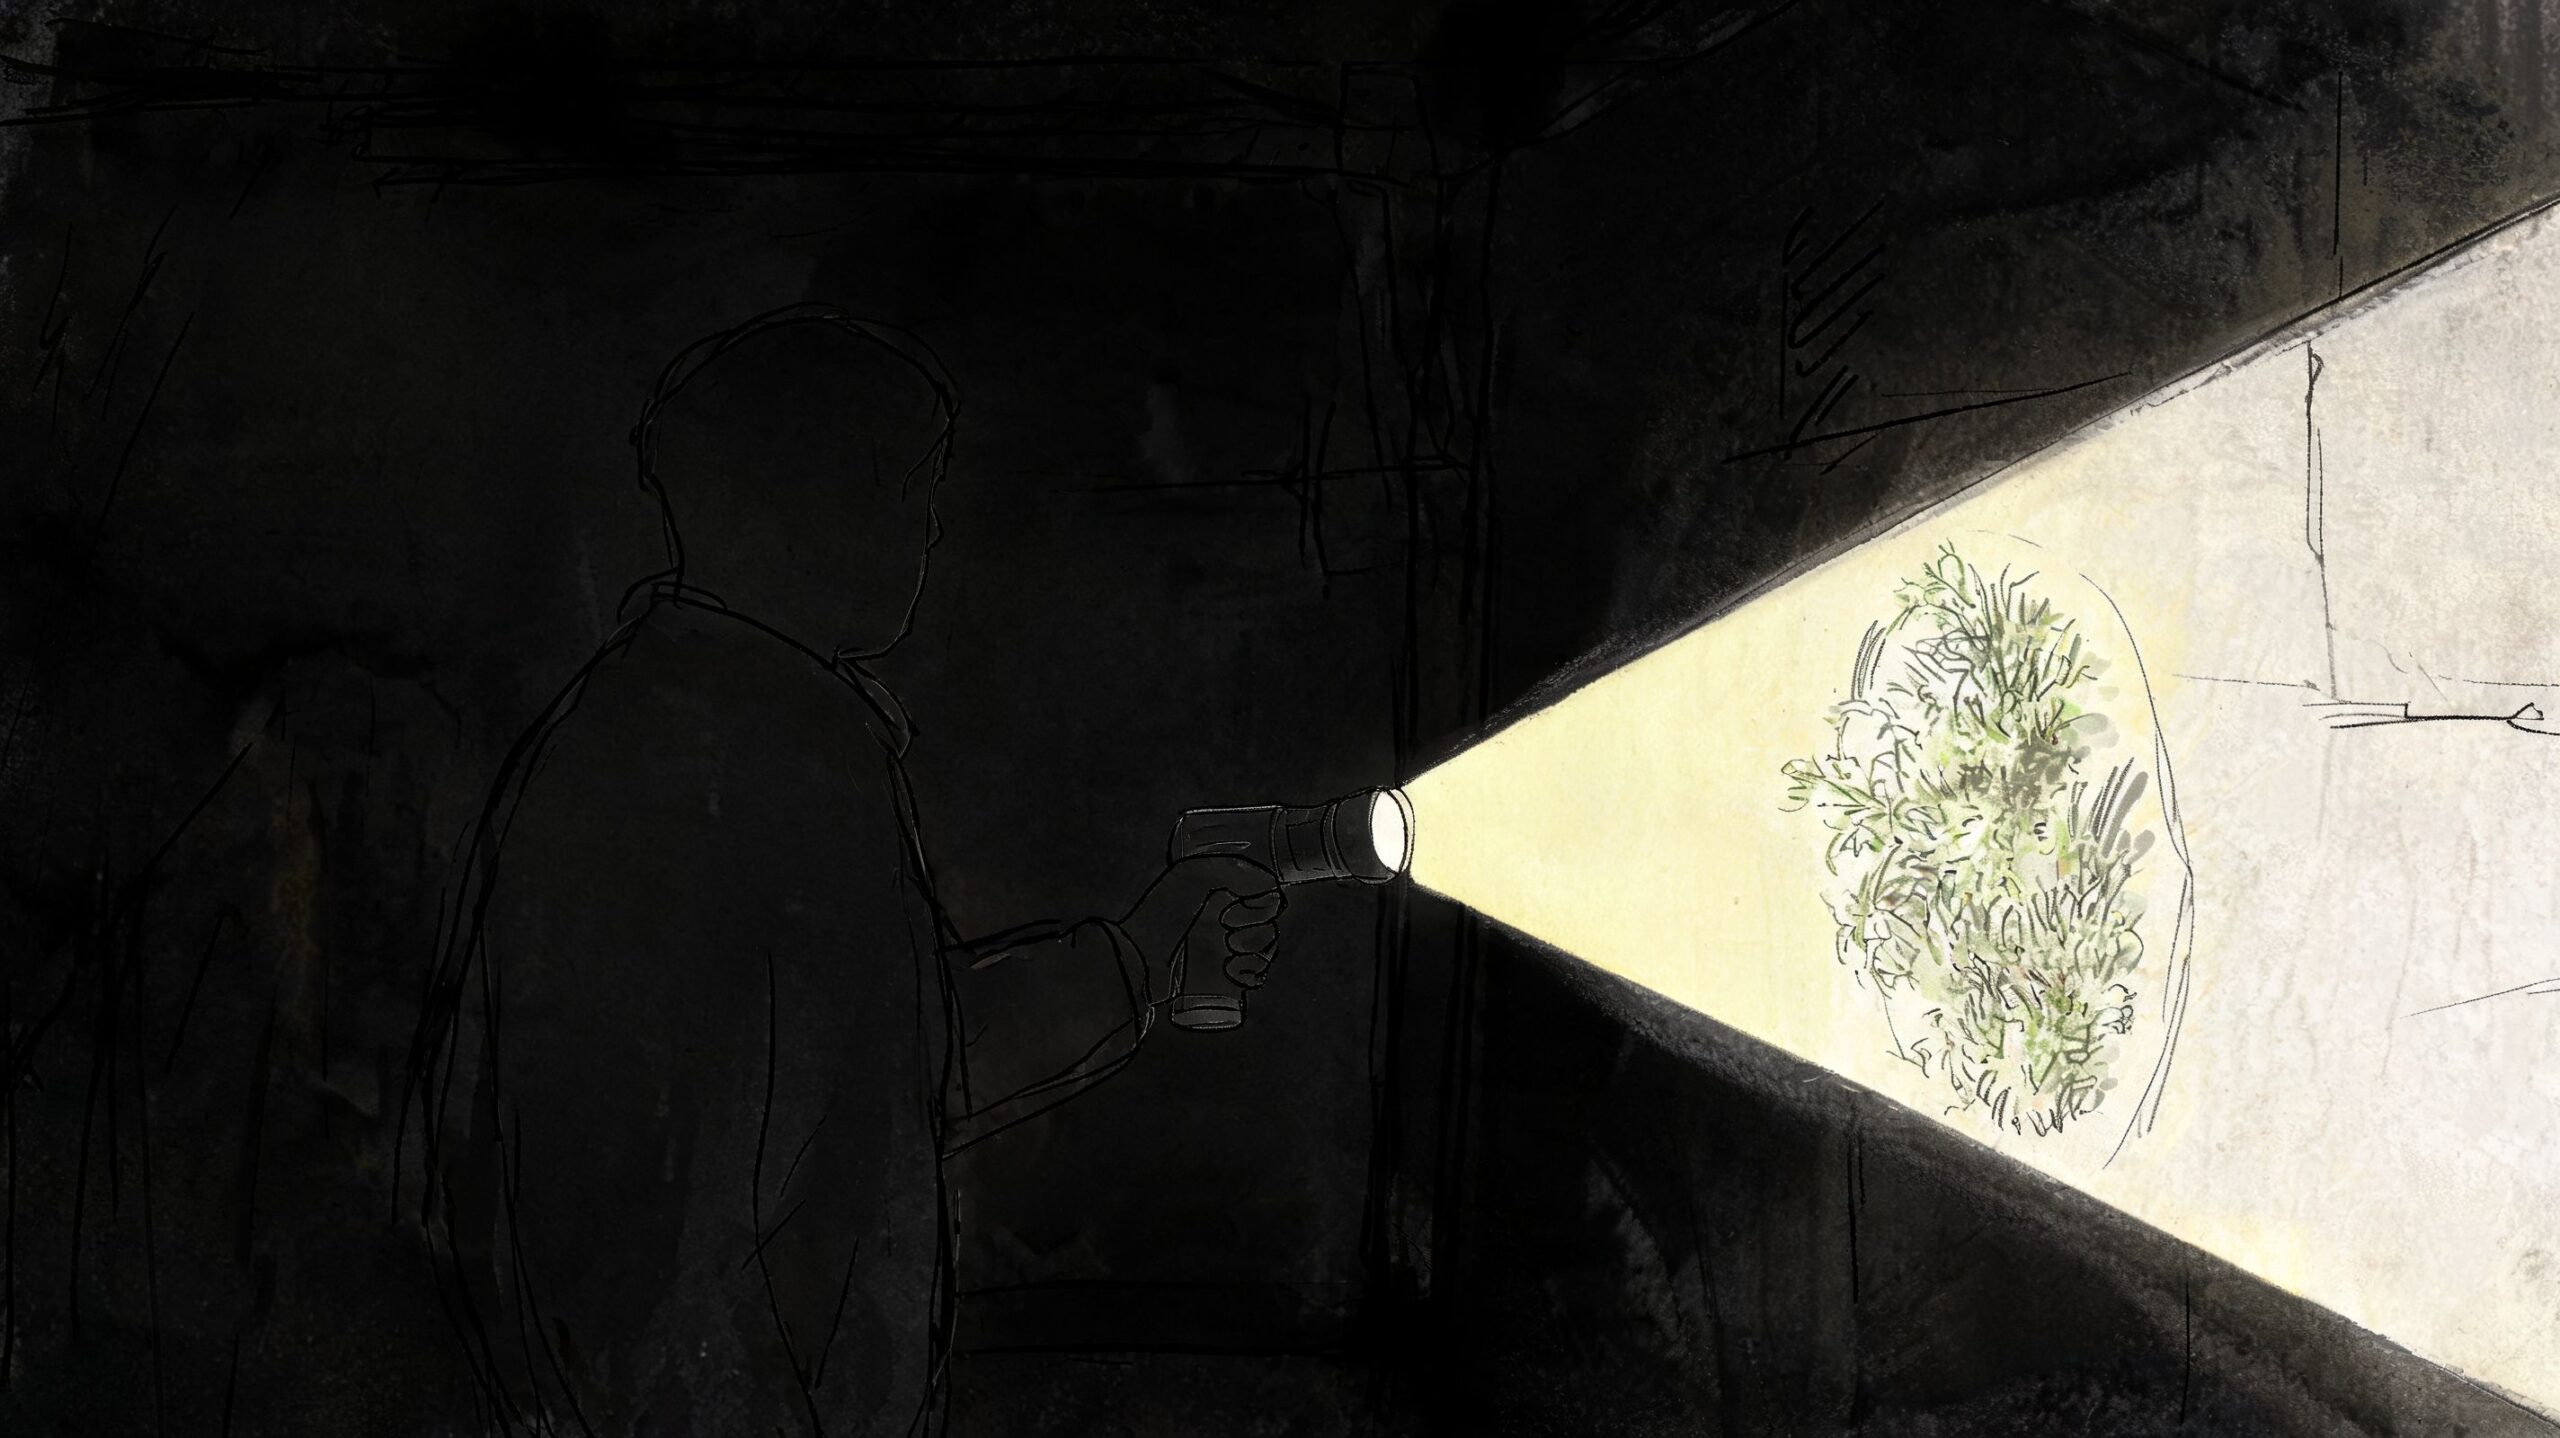
You go downstairs, open the basement door, and catch that stale, earthy smell that wasn't there a few weeks ago. Maybe it's stronger near stored boxes, around a water heater, or along the wall that always feels a little cooler during monsoon season. In Phoenix, that smell gets ignored too often because people assume our dry climate cancels out mold risk.
It doesn't.
A basement can trap moisture from a plumbing leak, slab-edge seepage, condensation, or a single storm event long after the rest of the house feels dry. If you want to test for mold in basement conditions the right way, start with what you can confirm safely, then use testing only where it helps you make a better decision. That's the practical approach an IICRC-certified technician takes on real jobs.
That Musty Basement Smell Is a Warning Sign
You head downstairs the morning after a monsoon storm, and the air feels different. Not soaked, not obviously wet, just earthy and stale. In Phoenix basements, that smell often shows up after moisture gets trapped in a space that stays cooler than the rest of the house, especially near slab edges, exterior walls, stored cardboard, or mechanical rooms with limited airflow.
That odor usually means damp materials have been sitting long enough for microbial growth to start, or long enough for organic building materials to begin breaking down. Drywall paper, wood trim, carpet pad, and dust on concrete all hold odor once they stay damp. You do not need visible black spotting for the basement to have a real moisture problem.
Phoenix homeowners get tripped up by the desert climate. Outdoor air is dry much of the year, but a basement behaves differently. Monsoon humidity, short-term water intrusion, irrigation near the foundation, and poor exterior grading can leave below-grade rooms damp long after the main living areas feel normal again. Caliche-heavy soils and slow drainage around some foundations can make that worse because water does not always move away from the structure as cleanly as people expect.
I see this mistake often. A homeowner assumes the smell is old boxes, closed-up air, or a floor drain. Sometimes that is true. Sometimes it is the first warning that moisture is hiding behind baseboards, along a finished wall, or under flooring where a DIY test alone will not tell the full story.
A musty odor is a reason to investigate, not panic. If you want help sorting out whether the smell points to mold, sewer gas, HVAC issues, or stored contents, this guide on why a basement smells musty gives useful context before you start testing. And while Phoenix moisture problems have their own pattern, some prevention basics still line up with advice on maintaining a dry basement in Southwest Michigan, especially drainage control, ventilation, and fixing small leaks before they keep feeding hidden growth.
Start with a Thorough Visual Inspection
Before you buy a kit, inspect the basement like a technician would. A careful visual check often tells you more than a cheap test plate.
What to bring
You don't need a truck full of gear to start. A few basic tools make a big difference:
- Bright flashlight: Side-lighting helps you spot fuzzy growth, staining, and texture changes.
- Moisture meter: Useful for checking drywall, trim, and framing near suspect areas.
- Gloves and an N95: Good practice if you're opening storage areas or checking dusty corners.
- Phone camera: Take photos before touching anything so you can track changes later.
- Small mirror: Handy behind water heaters, under stairs, and around pipe chases.
A printable mold inspection checklist for homeowners can help you move methodically instead of bouncing from one wall to the next.
Where mold hides in Phoenix basements
Focusing on the middle of the wall first is often misguided. That's rarely where the story starts. Check the edges and transitions.
Look closely at:
- Around plumbing penetrations: Supply lines, drain lines, and shutoff valves often create slow leaks.
- Behind stored boxes and furniture: Cardboard blocks airflow and absorbs moisture.
- At the base of exterior walls: Efflorescence, staining, and peeling paint can point to moisture migration.
- Under stairs and inside closets: Dark, low-ventilation zones trap humidity.
- Near HVAC equipment or duct runs: Condensation and dust buildup can feed growth.
- Around windows or window wells: Small flashing failures can wet framing over time.
What you're actually looking for
Visible mold isn't always black. It may appear white, green, gray, or brown. It can look powdery, velvety, speckled, or like a stain that keeps returning after cleaning.
Watch for these signs:
- Water marks: Yellowing, tide lines, or darkened drywall paper.
- Surface changes: Bubbling paint, warped baseboards, or soft drywall.
- Material breakdown: Crumbling wood fibers, rust on fasteners, or lifting flooring.
- Condensation patterns: Repeated moisture on pipes, ducts, or cool masonry.
- Odor concentration: Stronger smell in one corner usually points to a source nearby.
Practical rule: If you can see mold, you already have a mold problem. Testing may help identify it, but testing doesn't replace removal and moisture correction.
Skip the bleach swab trick
A lot of online advice still tells homeowners to dab a suspicious spot with bleach. That's not a reliable way to test for mold in basement materials.
The popular DIY bleach swab test is not recommended by professionals or health agencies like the CDC. Bleach may lighten the surface but doesn't kill roots or inactive spores, can miss hidden growth, can aerosolize harmful particles, and can't reliably distinguish mold from dirt (professional discussion of the bleach swab test).
That's why visual inspection comes first. You're not trying to win a chemistry experiment. You're trying to find moisture, track the likely source, and decide whether a simple cleanup is realistic or whether the problem is deeper than it looks.
How to Use a DIY Mold Test Kit Correctly
A DIY kit can help when you smell mold but can't find it, or when you want lab identification from a visible surface. It can also waste your time if you use the wrong type of kit for the wrong question.
Choose the kit based on the problem
Here's the simple breakdown.
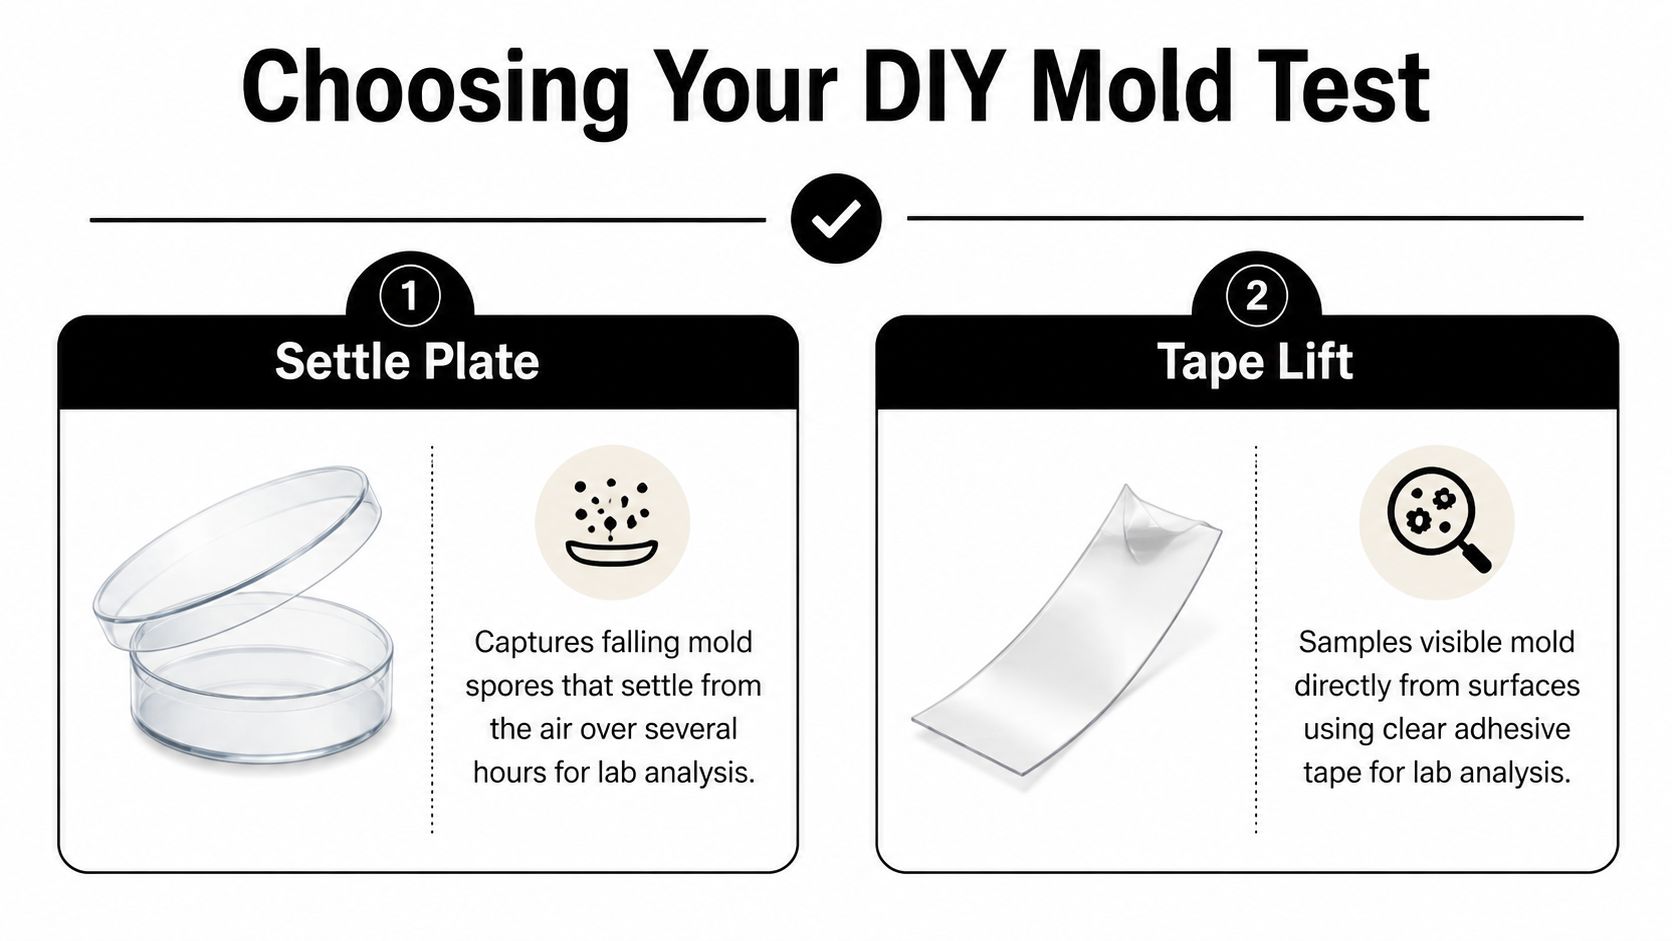
| Kit type | Best use | What it can tell you | Main limitation |
|---|---|---|---|
| Tape lift or swab test | Visible suspect growth on a surface | Whether the sampled material looks like mold and sometimes what type is present | It only reflects that exact spot |
| Settle plate | General curiosity about what falls out of the air | Whether something grows on the plate after exposure | It's highly affected by room activity and timing |
| Air sample kit | Odor with no visible growth | What airborne spores were captured during sampling | It's just a short snapshot |
If you already see growth on drywall, wood, cardboard, or caulk, a surface sample makes more sense than an air sample. If you smell mold but can't locate it, an air test may offer a clue, though it won't map the full extent of hidden contamination.
How to collect a surface sample
Surface sampling is best for visible spots that you haven't scrubbed yet. If you clean first, you may remove the evidence.
- Put on gloves and an N95. Disturb the area as little as possible.
- Label the sample before you start. Write down the room, wall, and height from the floor.
- Use the kit exactly as packaged. Some use clear tape, some use a sterile swab.
- Sample the edge of the growth. That transition area often captures the most useful material.
- Don't oversample. Pressing too hard or rubbing repeatedly can smear debris and reduce clarity.
- Seal it immediately. Keep each sample separate.
- Photograph the location. Include a wide shot and a close shot.
- Write down conditions. Musty odor, recent leak, monsoon water intrusion, or condensation all matter.
A surface sample answers a narrow question: what was on that spot. It does not tell you whether the wall cavity behind it is clean.
How to collect an air sample more carefully
Air kits are where DIY users make the most mistakes. The sample can be skewed by sweeping, opening doors, running fans, or even walking in and out too often.
Use better habits:
- Pick a normal day: Don't test right after heavy cleaning or after spraying anything scented.
- Close windows and exterior doors beforehand: Keep conditions stable.
- Place the sampler away from vents: Direct airflow can distort the result.
- Keep kids and pets out of the room: Less disturbance means a cleaner sample.
- Record the location precisely: Center of room, near stairs, or by an exterior wall all matter.
- Note recent events: Pipe leak, dehumidifier use, or storm moisture can change interpretation.
What DIY gets wrong most often
Phoenix homeowners sometimes assume the desert protects them, so they test late and sample casually. The bigger issue is not the kit itself. It's sample quality.
Common mistakes include:
- Testing after cleaning: You may get a misleadingly low result.
- Sampling only one room: Basement problems often migrate through adjacent spaces.
- Ignoring moisture evidence: A dry-looking wall can still read high on a meter.
- Treating a petri dish like a diagnosis: Mold grows everywhere in the environment. Context matters.
- Skipping documentation: A lab result without location notes is hard to act on.
DIY testing is most useful when it helps answer one specific question. “What is this spot?” or “Is there likely an airborne issue in this room?” It's much less useful when homeowners expect it to diagnose the whole basement.
What a more advanced inspection looks like
When a basement has a history of water intrusion, inspectors may go beyond consumer kits and use methods like targeted swab sampling, moisture mapping, cavity checks with a borescope, and structured air sampling. Some contractors, including Restore Heroes mold inspection services, use moisture detection and hidden-area inspection to identify where testing matters instead of collecting random samples.
That's the trade-off. DIY kits are fine for narrow questions. They're weak at finding concealed growth behind finish materials, under flooring edges, or inside a wall that wicked water and then dried on the surface.
Interpreting DIY Test Results and Their Limits
A DIY mold report can look precise and still leave a Phoenix homeowner with the wrong conclusion. I see that a lot after monsoon season, especially in basements or lower-level rooms with block walls, past seepage, or storage packed tight against exterior surfaces. The report gives names and numbers. The building conditions decide what those findings mean.
What the report terms mean
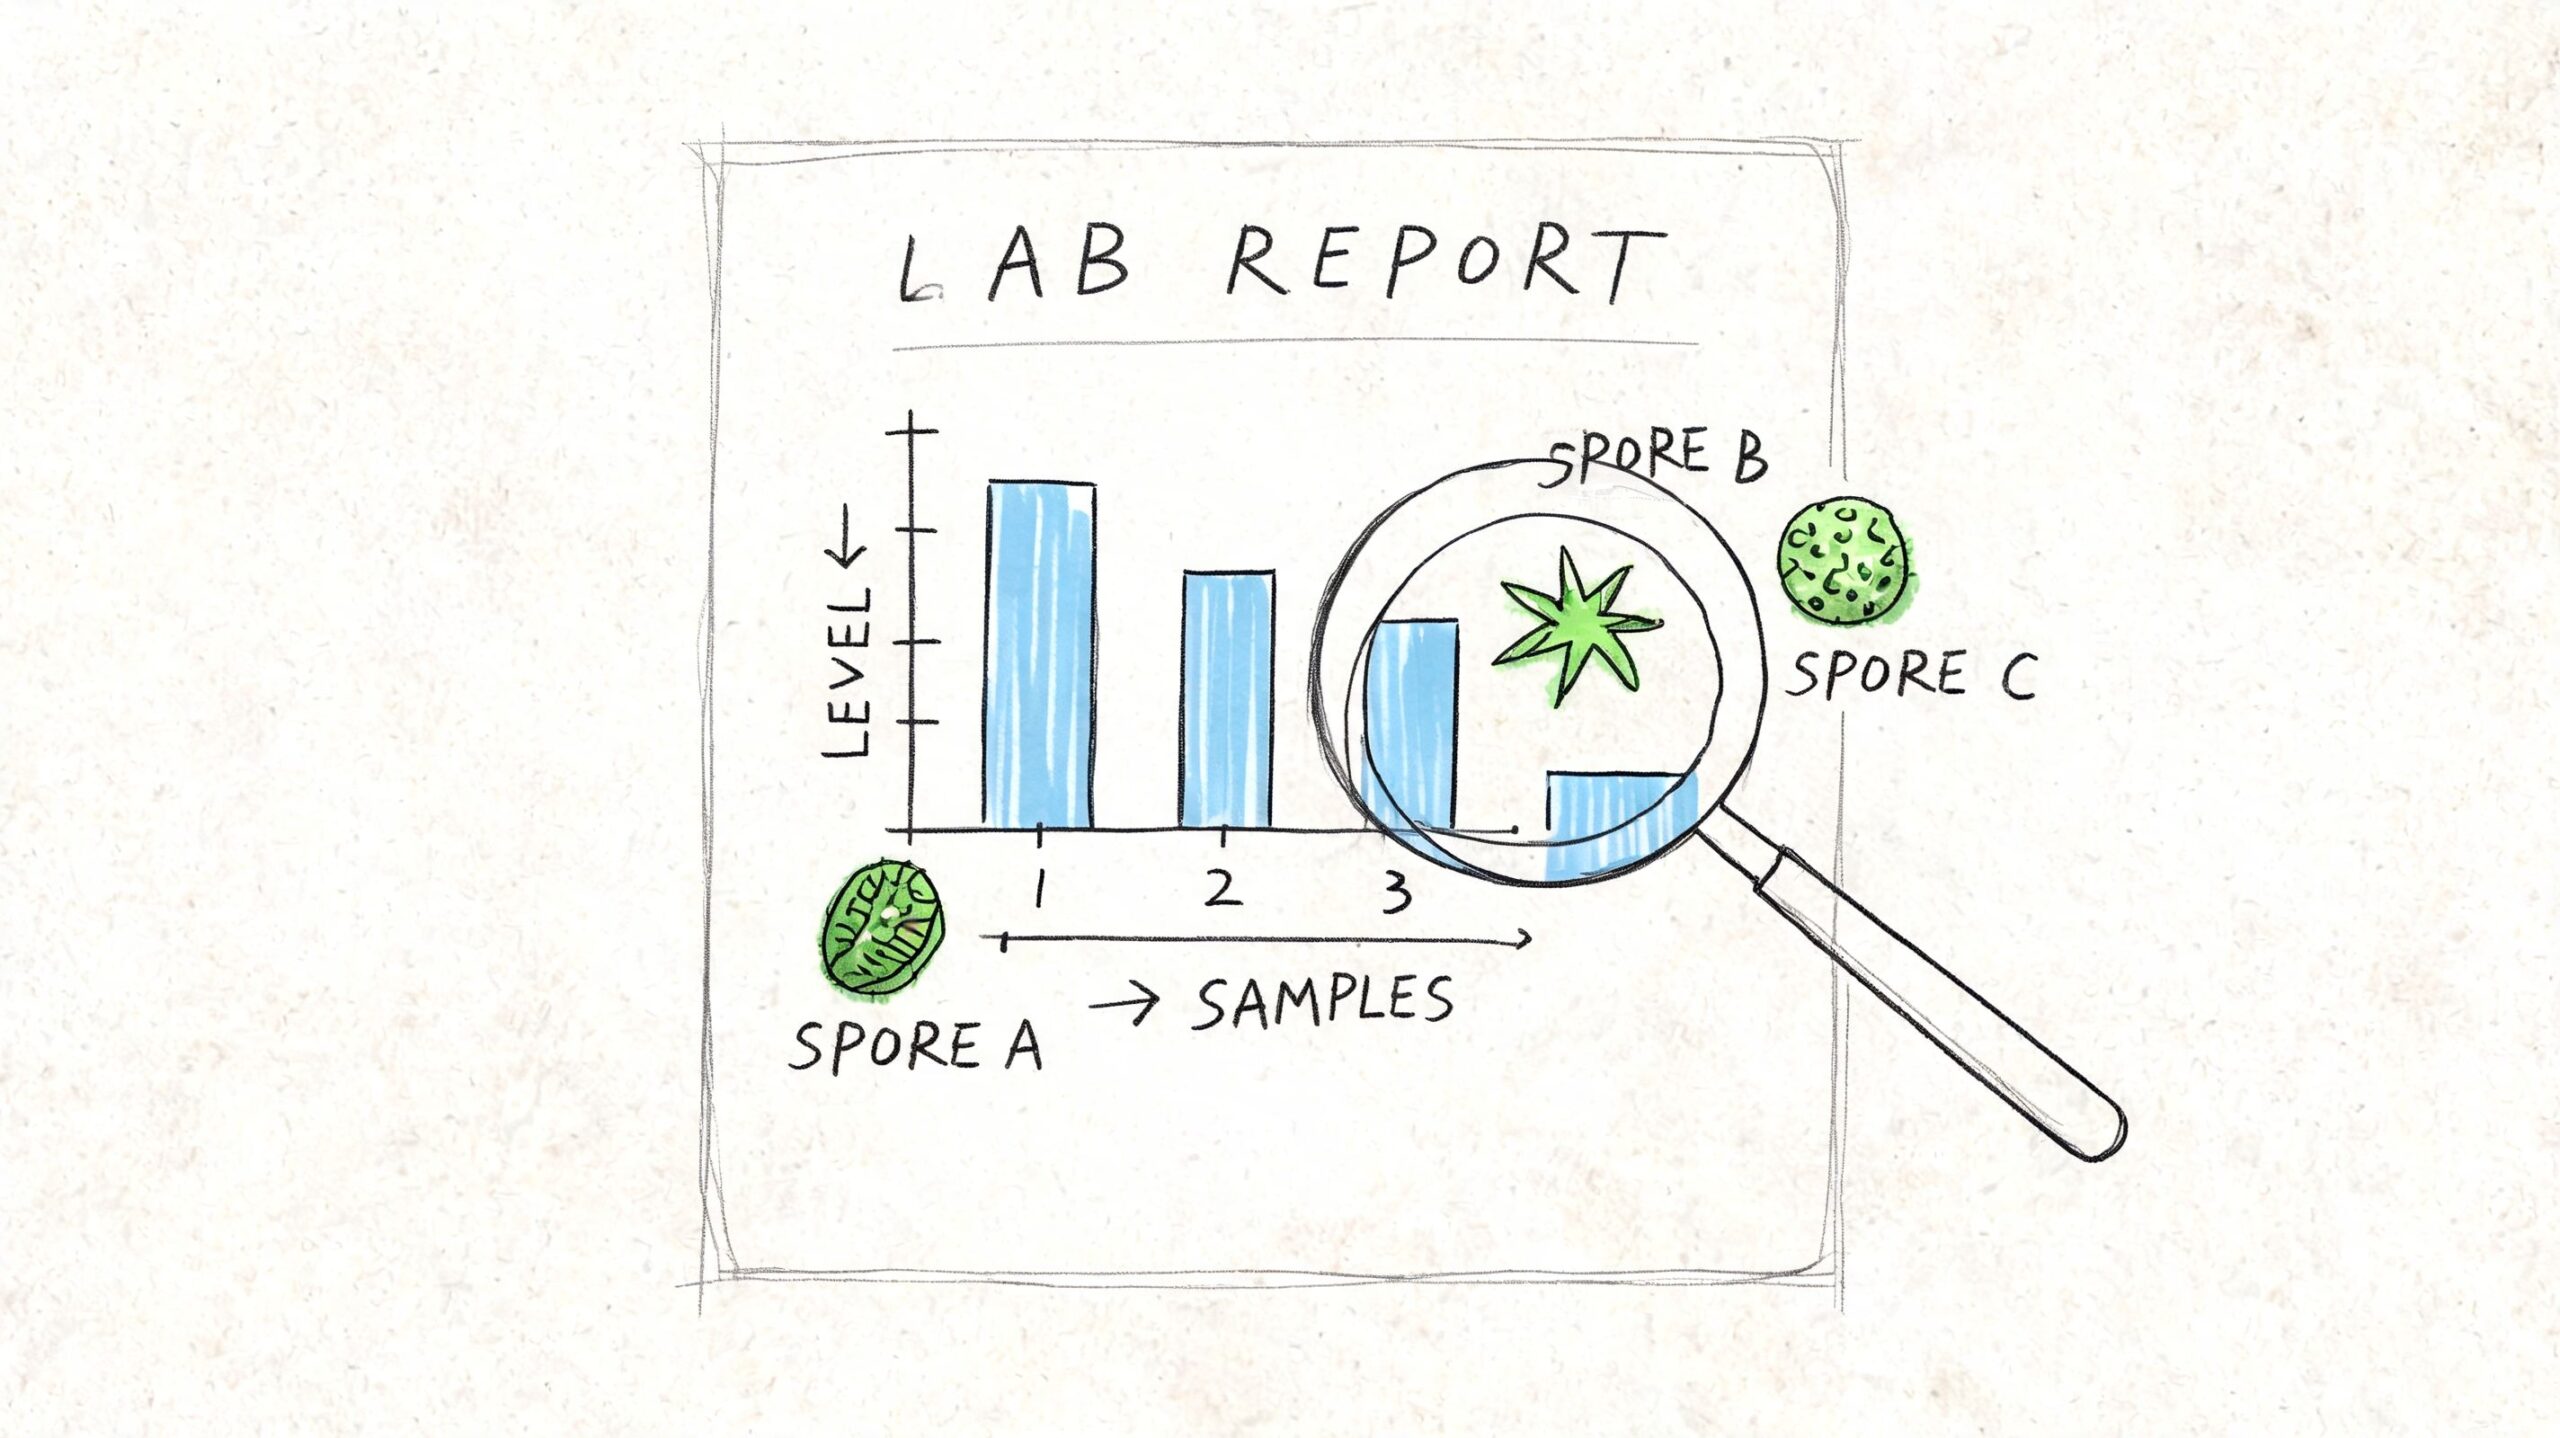
Labs usually use a few recurring terms, and homeowners tend to get hung up on the species name instead of the bigger pattern.
- Spore count: The amount of mold material found in an air sample.
- CFU: Colony-forming units. This shows what grew from a cultured sample.
- Hyphal fragments: Broken pieces of mold growth. These can suggest an active source nearby.
- Species or group names: Labels such as Aspergillus, Penicillium, or Stachybotrys.
Those labels matter, but only in context. A low-level finding in a dry room means something different than the same finding next to a stained baseboard, a damp corner, or a wall that took on moisture during a monsoon event. In Phoenix, that distinction matters because a basement can stay dry for long stretches, then pick up moisture fast from storm-driven humidity, poor drainage, or soil pressure against foundation walls.
How to read the result without overreading it
The first question is simple. Does the report match what the basement is telling you?
If a sample comes back with common indoor molds and the room also has musty odor, visible spotting, past water intrusion, or damp materials, the report supports the case for further inspection. If the report sounds alarming but the sample came from a dusty storage shelf with no moisture history, the result may be less meaningful than it first appears.
Air numbers can provide context, but DIY testing does not give a universal pass or fail line for a house. Sample timing, airflow, cleaning, HVAC operation, and where the cassette or dish sat all affect the outcome. A single result is a clue, not a diagnosis.
For homeowners who want help understanding species names and relative concern levels, this guide to dangerous molds in basements is a useful reference.
What the result cannot tell you
This is the part that frustrates homeowners. A report may confirm mold is present, yet still fail to answer the questions that affect cleanup cost and health risk.
A DIY test usually cannot tell you:
- How far the growth extends: A sample from open air does not show what is happening inside a wall cavity or under flooring.
- Whether the source is still active: Mold can remain after an old moisture event, or it can point to a current leak.
- What caused it: Testing identifies mold. It does not identify the drainage failure, vapor problem, condensation pattern, or plumbing issue feeding it.
- What should be removed versus cleaned: That depends on the material, the level of damage, and whether contamination reached porous surfaces.
- Whether the basement problem has spread: One sample from one corner does not clear the rest of the lower level.
A mold report is evidence. It is not a repair scope.
That same limitation shows up in real estate work. Buyers often ask for sampling when what they need is moisture mapping, hidden-area checks, and a clearer picture of the building history. Firms that provide comprehensive mold checks for home buyers usually pair lab data with inspection findings because the sample alone rarely answers the expensive questions.
False negatives and false confidence
DIY testing tends to fail in two predictable ways. It can pick up ordinary background mold and create unnecessary panic. It can also miss a concealed problem and reassure the homeowner too early.
Both happen often in Phoenix basements because our conditions are inconsistent. The room may be dry the day you test, yet the wall behind stored boxes may still hold moisture from a recent storm cycle. A settled-dust sample might grow mold that has little to do with the active issue. A surface swab can identify what is visible on a joist or drywall face while missing the wet material behind it.
Use the report as one piece of evidence. If the lab result lines up with odor, staining, dampness, or repeated water entry, take it seriously. If the report conflicts with obvious building evidence, trust the physical signs first and investigate further.
When to Skip DIY and Call a Certified Pro
Some basement situations are no longer a testing project. They're an inspection and remediation project.

Red flags that change the decision
Call a certified professional when any of these apply:
- The visible area is larger than 10 square feet: At that size, containment and safe removal become much more important.
- The basement had a burst pipe, monsoon flooding, or sewage-related water event: Contaminated or prolonged water exposure changes the risk.
- You suspect the HVAC system is involved: Air movement can spread particles beyond the original source area.
- Mold keeps coming back after cleaning: Recurrence usually means the moisture problem wasn't fixed or growth is hidden.
- Drywall, insulation, or carpet stayed wet: Porous materials often need closer evaluation than homeowners expect.
- Someone in the home has respiratory symptoms or a compromised immune system: The margin for DIY error is smaller.
Why professional help matters here
A certified technician doesn't just “test for mold in basement” air and leave. Value is found in combining sampling, moisture detection, hidden-area checks, and a remediation plan that fits the building.
That's especially important in Phoenix, where basement problems may start with a short moisture event and then hide behind finishes once the surface dries. What looks minor on painted drywall can be very different behind the baseboard or inside a stud bay.
Home buyers and sellers run into this often. If you're dealing with a transaction and need a clearer picture of condition, resources on comprehensive mold checks for home buyers can help you understand what a more formal inspection should include.
Here's a short walkthrough that shows why professional assessment becomes necessary in certain situations.
If the question is “Is there some mold here?” DIY may help. If the question is “How bad is it, where is it, and what has to come out?” call a pro.
Your Next Steps After Testing for Mold
Once you have enough evidence, act on the moisture problem first. Testing can identify a concern, but it doesn't solve it.
If the issue is minor and limited to a small, accessible non-porous surface, careful cleaning may be reasonable. If porous materials are affected, odor persists, or moisture keeps returning, remediation is usually the safer path. That process often includes containment to limit spread, removal of unsalvageable material, HEPA vacuuming, air scrubbing, detailed cleaning, and drying of the structure before rebuild begins.
What matters most is fixing the cause. That may be a plumbing leak, a drainage issue, condensation on cold lines, or seasonal humidity intrusion after a storm. Without that correction, cleaning alone usually turns into repeat cleaning.
A lot of homeowners also miss adjacent materials. Insulation, for example, may not look dramatic from the room side while still holding contamination or moisture history. If you're evaluating rebuild choices, this article on mold-resistant insulation solutions from Airtight is worth reviewing alongside your contractor's scope.
If you found visible growth and are comparing next steps, this guide on how to clean basement mold safely can help you understand what's realistic for DIY and what isn't.
If you're in the Phoenix area and you've found mold, recurring odor, or signs of hidden moisture in a basement, Restore Heroes can assess the condition, check for concealed damage, and help you understand what remediation would involve. A clear inspection is the fastest way to stop guessing and make a safe decision for the home.