
A lot of water-loss calls start before sunrise. You step onto a wet floor, see water wicking up the baseboards, and the first question is simple: how expensive is this about to get?
The answer depends heavily on time. In Phoenix, a small supply-line leak caught early can stay a drying job. The same loss left sitting through a hot day can spread into cabinets, drywall, insulation, and adjacent rooms, which changes the scope and the bill fast.
What catches homeowners off guard is that water mitigation charges are tied to actions, not just a single flat cleanup price. The invoice usually reflects emergency extraction, moisture mapping, equipment setup, monitoring visits, removal of unsalvageable materials, and the documentation your insurer will ask for. If you need immediate help, a professional emergency water mitigation service is meant to slow the loss before those line items multiply.
I tell clients the same thing on day one: the puddle you can see is only part of the job. The bigger cost driver is hidden moisture behind walls, under flooring, and inside materials that hold water longer than people expect. Waiting 24 hours to “see if it dries out” often turns a manageable invoice into a much larger mitigation and rebuild claim.
Some losses start with preventable plumbing failures, which is why basic maintenance still matters. These burst pipe prevention tips are useful for avoiding one of the most expensive emergency calls a homeowner can face.
What matters right now is getting the loss stabilized, understanding what the mitigation crew is billing for, and knowing which charges are usually part of the insurance conversation.
Your First 24 Hours After Water Damage
At 6 a.m., you step into a cold puddle and realize the water heater has been leaking for hours. By noon in Phoenix, that same loss can move from one wet utility area into baseboards, cabinets, drywall, and the rooms beside it. The first day has a direct effect on the bill.
In restoration, the first 24 hours are about stabilizing the property and documenting the loss well enough that the drying plan and the insurance paperwork match. Homeowners often expect one cleanup price. What shows up on a mitigation invoice is the work performed: emergency extraction, moisture readings, equipment setup, monitoring, selective tear-out if materials will not dry properly, and photo documentation.
What the first day usually looks like
A good first response is organized and fast:
- Stop the source: Shut off the supply line, appliance valve, or main water line if you can do it safely.
- Make the area safer: Keep people off slick floors and away from affected outlets, cords, or fixtures.
- Photograph before cleanup: Take clear photos and short videos of the source, affected rooms, flooring, walls, and contents.
- Call for drying, not guesses: Early moisture mapping and extraction usually keep the scope smaller than a wait-and-see approach.
A 24-hour delay changes more than the drying time. It can change what has to be removed, how many days equipment stays on site, and how many insurer-approved line items end up on the estimate. In hot climates, water does not disappear. It wicks, spreads, and gets trapped in materials people cannot see.
That is why box fans rarely solve the problem. They dry the surface you can touch. They do not confirm whether water reached the toe-kicks under cabinets, the pad under flooring, the drywall behind baseboards, or the insulation inside a wall cavity.
What helps is straightforward. Shut off the source. Protect valuables and furniture if it is safe to do so. Take photos before moving too much. Get a mitigation crew on site with meters, not just air movers. If you need immediate stabilization, a team that handles emergency water mitigation services is there for that first phase, which is to stop further damage and document conditions before the rebuild side is even discussed.
If the source was a plumbing failure, save any failed part if possible and keep a note of when you discovered the loss. That detail often matters during insurance review. For prevention after the emergency is handled, these burst pipe prevention tips are worth reviewing.
The short version is simple. Fast action usually means fewer wet materials, fewer demolition charges, fewer equipment days, and a cleaner insurance file.
What Drives Your Water Mitigation Bill
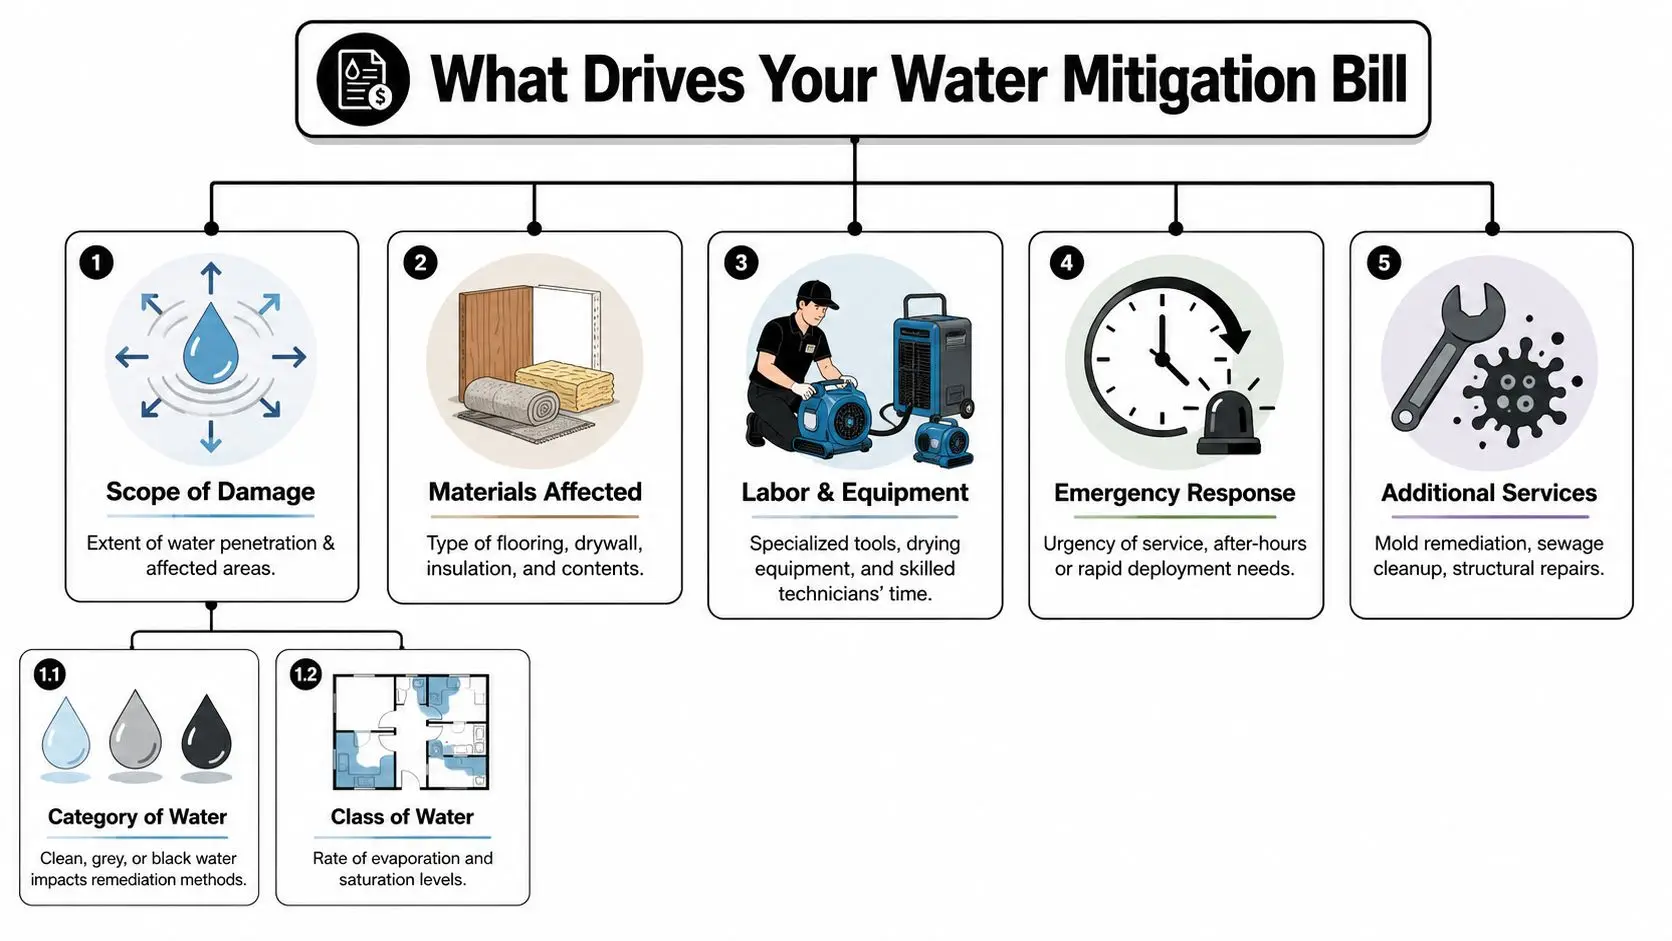
Water mitigation pricing works a lot like emergency room triage. The first question isn't “How big is the room?” It's “How serious is the condition?” A small sewage backup can cost more than a larger clean-water leak because the response is completely different.
Water category changes everything
The contamination level is one of the biggest cost drivers. Independent market references place Category 1 clean water mitigation around $3 to $4 per square foot, Category 2 gray water around $4 to $6.50 per square foot, and Category 3 black water around $7 to $7.50 per square foot because higher categories add sanitization, containment, and more material removal (water mitigation estimate benchmarks).
Here's the practical version:
- Clean water: Broken supply line, fresh pipe leak, sink line failure.
- Gray water: Appliance discharge, some overflow situations, water with more contamination risk.
- Black water: Sewage backup or floodwater. Porous materials often require disposal in these cases.
A homeowner sees water. A restoration team sees the protocol attached to that water.
Materials and spread matter more than appearances
Tile may survive what carpet pad won't. A small leak under laminate can create a much larger drying job than a visible spill in an open room. Water wicks into drywall, baseboards, insulation, cabinets, and subflooring. Once that happens, equipment counts rise and labor hours follow.
The hidden cost driver is spread. A puddle in one room often means moisture readings in two or three.
Time is the multiplier
This is the factor homeowners underestimate most. The longer water sits, the more likely it moves from extraction and drying into demolition, sanitation, and mold prevention. Independent guidance notes that the longer standing water remains, the more secondary damage occurs to drywall, insulation, flooring, and cabinets, and that rapid assessment with thermal imaging and targeted drying reduces tear-out and lowers the chance of costly mold remediation (water damage restoration cost guide).
Water mitigation cost often rises because the drying plan got bigger, not because the original leak looked dramatic.
What a contractor is evaluating on arrival
When a crew walks in, the estimate starts forming around a few field questions:
- What kind of water is this? Clean, gray, or black.
- How much structure is wet? Not just visibly wet.
- What materials are affected? Drywall, insulation, wood, carpet, cabinets.
- How long has it been wet? Overnight and “for a few days” are very different jobs.
- Is access simple or difficult? Tight bathroom walls, trapped cabinet voids, and multi-room spread complicate drying.
If you want a broader breakdown of pricing logic from the homeowner side, this guide on water damage repair cost helps separate common estimate components from guesswork.
Decoding Your Estimate a Line-Item Breakdown
Most frustration around water mitigation cost comes from one misunderstanding. Homeowners think they received one bill for one job. In reality, they're often looking at phase one of the loss.
Mitigation is the emergency phase. Rebuild is a different phase. Industry guidance makes that distinction clearly: mitigation includes water extraction, drying, containment, and sanitation, while rebuild work like drywall, flooring, and cabinets comes later. Mitigation-only pricing is often around $1,300 to $5,200, while full restoration can reach $16,000+ when reconstruction is included (water damage mitigation service pricing).
The line items most homeowners see first
A proper mitigation estimate usually includes several categories of work. The names can vary by software platform, but the functions are similar.
| Line Item | What it usually means | Why it appears |
|---|---|---|
| Water extraction | Removing standing water with pumps or extractors | Stops spread and lowers drying time |
| Moisture mapping | Meter readings and inspection of affected materials | Finds hidden moisture |
| Air movers and dehumidifiers | Structural drying equipment | Pulls moisture from materials and air |
| Controlled demolition | Removing unsalvageable drywall, pad, or other porous materials | Allows drying and prevents trapped moisture |
| Antimicrobial or sanitation work | Cleaning and treating affected areas | More common in gray or black water losses |
| Monitoring | Return visits to check drying progress | Confirms the structure is moving toward dry standards |
Mitigation versus rebuild
Sticker shock typically occurs at this stage. A homeowner sees drywall cut, baseboards removed, and flooring detached, then asks why the “repair” looks destructive. The answer is that mitigation isn't finish work. It's controlled access and drying.
If a contractor leaves wet materials in place just to keep the room looking intact, that can make the final loss worse.
After the structure is dry, rebuild pricing starts. That may include drywall replacement, texture, paint, flooring installation, trim, cabinetry, or finish carpentry. Some companies handle both phases. Others stop at dry-out.
For homeowners trying to understand where one trade ends and another begins, this explanation of what a restoration company does can help you read the estimate with the right expectations.
Estimated Water Mitigation Costs by Water Category
| Water Category | Common Sources | Estimated Cost per Sq. Ft. |
|---|---|---|
| Category 1 clean water | Broken supply lines, fresh plumbing leaks | $3 to $4 |
| Category 2 gray water | Appliance overflow, more contaminated discharge | $4 to $6.50 |
| Category 3 black water | Sewage backup, floodwater intrusion | $7 to $7.50 |
If you've ever wondered why rebuild estimates look different from mitigation invoices, trade estimating systems are part of the reason. Reconstruction pricing often gets built from material assemblies, labor, and finish scopes. Tools such as Exayard drywall estimating software show how detailed finish-phase estimating can be once the dry-out is complete and walls, ceilings, or soffits have to be put back together.
Real-World Scenarios and Cost Examples
At 8 a.m., a slow supply-line leak under a vanity is usually a small dry-out. At 8 a.m. the next day in Phoenix, after the cabinet base, drywall, and toe-kick have held heat and moisture for 24 more hours, that same loss often needs demolition, more equipment, and a longer monitoring cycle. That timing gap is one of the biggest cost drivers homeowners miss.
A small leak caught early
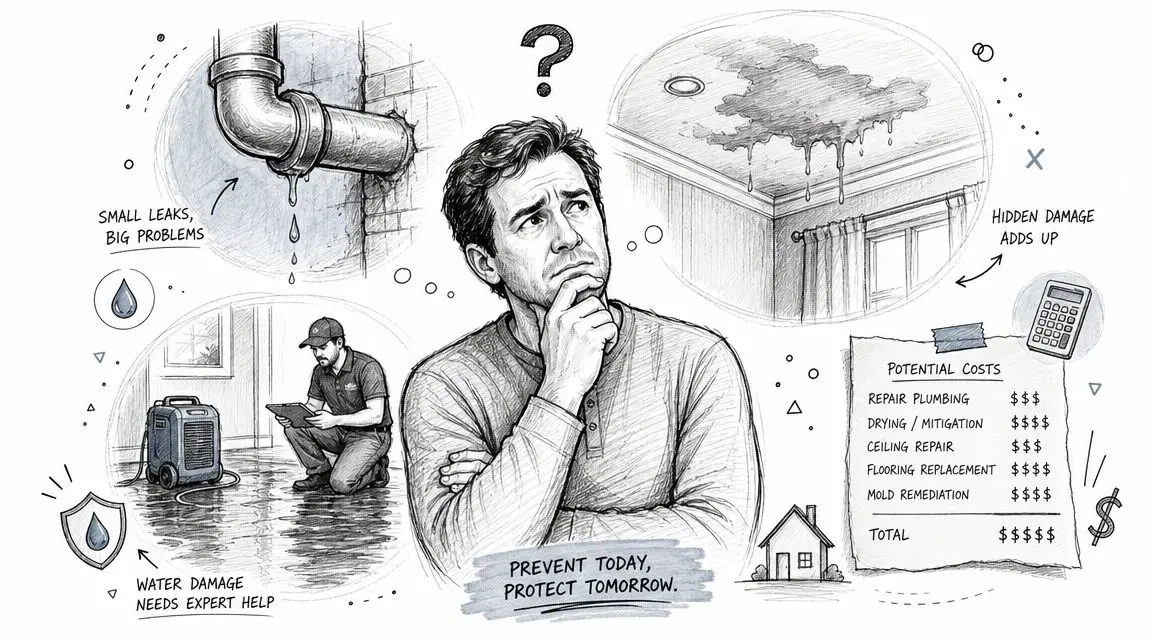
A supply line drips under a bathroom sink and the homeowner catches it the same day. The cabinet toe-kick is wet, the baseboard has minor swelling, and the water has not had much time to move into adjacent rooms. In that situation, mitigation may stay limited to moisture mapping, a small amount of controlled removal, airflow, and dehumidification.
The cost stays lower because the scope stays narrow. Crews can often save more material, use fewer equipment days, and finish documentation faster. For homeowners who may need to file a claim, early photos and a clean record of emergency steps make the billing side easier too. This practical guide to water damage insurance claim tips for homeowners helps explain what to document while the loss is still fresh.
An appliance leak found after several hours
A washing machine hose fails while no one is home. By the time anyone gets back, water has spread across the laundry room, into the hall, and under part of the flooring. Now the invoice usually expands beyond extraction.
In real jobs, costs climb in layers. A crew may need to detach baseboards, remove a strip of drywall to release trapped moisture, set more air movers, add dehumidification, and return for daily monitoring. If the floor assembly is holding water, drying can take several days instead of one visit. That extra time matters because mitigation invoices are built line by line. More affected area, more demolition, more equipment, and more technician visits usually mean a larger bill and a larger insurance submission.
A delayed or contaminated loss
A sewage backup, toilet overflow that sat too long, or storm-related intrusion is a different class of job. The focus shifts from saving finishes to protecting the home from contamination and removing materials that should not remain in place.
Costs rise quickly because the work changes. Containment may be needed to protect unaffected rooms. Porous materials often have to be removed and bagged. Cleaning is more detailed, and drying still has to happen after the unsafe material is out. Analysts at iPropertyManagement note that minor leaks can be inexpensive while severe flooding losses can run into five figures, depending on depth and spread (water damage statistics and examples). In the field, the reason is simple. Once contamination, demolition, and broader structural drying enter the scope, the labor and equipment count increase fast.
What these examples mean for your estimate
Homeowners often ask why two water losses that both started with "a leak" can have very different invoices. The answer is usually a mix of time, material response, and category of water.
A clean-water vanity leak caught early may stay limited. A laundry leak discovered after work can spread under flooring and require several days of drying. A sewage loss can trigger removal and sanitation protocols almost immediately.
From a contractor's side, that is also why insurance estimates and mitigation invoices can look so itemized. Each line usually ties back to a real step on site: extraction, tear-out, antimicrobial cleaning when appropriate, equipment setup, daily readings, and final documentation. The sooner the loss is inspected and drying starts, the better the chance of keeping those line items under control.
Navigating Insurance for Water Mitigation
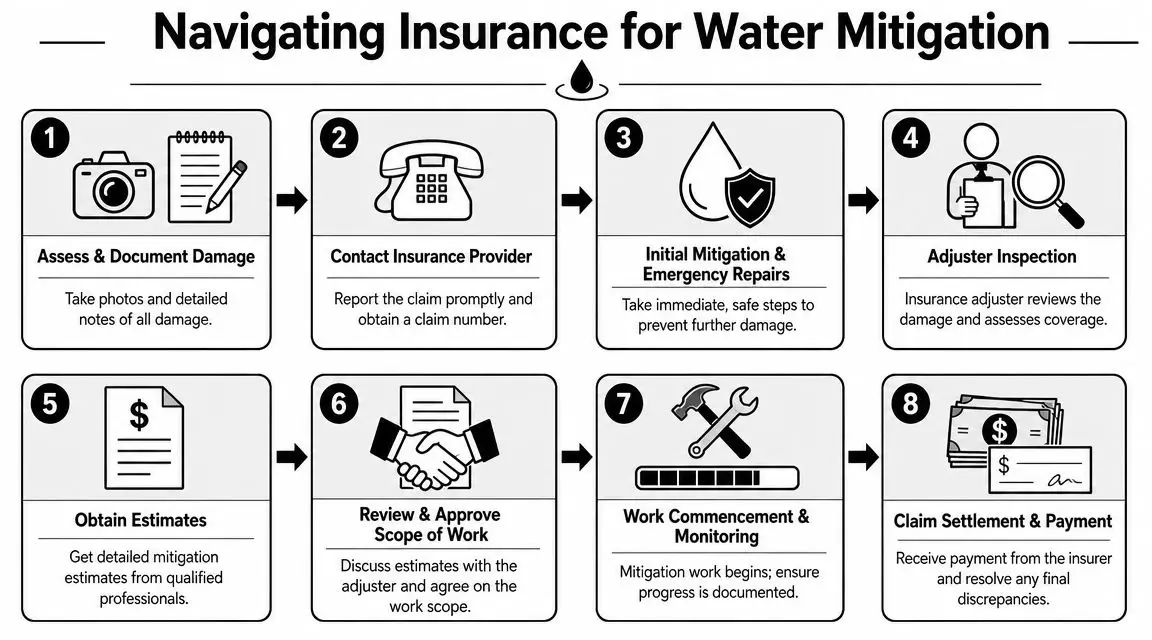
Insurance is where many homeowners feel the most stress, not because the process is impossible, but because the paperwork and vocabulary arrive while the house is still wet. From a contractor's side, the goal is usually straightforward. Document the loss thoroughly, show what emergency work was necessary, and keep the scope tied to actual moisture conditions.
A practical first read on policy language is this guide to water damage insurance claim tips, especially if you're trying to understand what to document before the adjuster arrives.
For a visual overview, this workflow helps:
What your insurer usually wants to see
In most water losses, a carrier wants clear evidence of cause, scope, and emergency action. That usually includes:
- Photos and video: Before cleanup changes the scene.
- Cause information: Appliance failure, supply line break, overflow, roof intrusion, or another source.
- Mitigation records: Moisture readings, equipment logs, demolition notes, and drying progress.
- A scope separated by phase: Emergency mitigation versus later repair.
What helps your claim is organized documentation. What hurts it is vague timelines, missing photos, or waiting too long to prevent further damage.
How contractors and adjusters read invoices
Adjusters don't just look at the bottom line. They look at whether the line items match the conditions. If the invoice includes extraction, drying equipment, containment, sanitation, and selective demolition, there should be field notes and moisture data supporting that work.
This is one reason many contractors use standardized estimating platforms and drying documentation. An IICRC-certified company should be able to explain why each charge exists in plain language. For example, if baseboards came off, the reason should be visible drying access, not cosmetic preference.
Here's a useful homeowner mindset: insurance review is often easier when the estimate reads like a record of necessary actions, not a vague package price.
Later in the process, some homeowners find it helpful to hear another contractor walk through insurance coordination and dry-out expectations. This video gives a simple overview:
Restore Heroes is one Phoenix-area option that handles emergency mitigation and works within insurer-facing documentation workflows, but the larger point is to choose a contractor who can explain the invoice clearly and keep mitigation separate from reconstruction when needed.
Why Water Mitigation in Phoenix Is Different
Phoenix changes the timing conversation. Homeowners often assume dry heat means less risk after a leak. In practice, trapped moisture inside walls, cabinets, and subfloors can still become an expensive problem if nobody addresses it quickly.
The key issue is not just outside temperature. It's the combination of hidden moisture, enclosed building materials, and delay. Industry guidance aimed at homeowners notes that the first 24 to 48 hours are critical, and that delays can add 50% or more to repair costs because moisture spreads into drywall, insulation, and subfloors. The same guidance notes this matters in hot climates like Phoenix, where accelerated drying may reduce mold risk and keep the project in a lower price band (water mitigation timing and cost).
Common Phoenix patterns
A lot of local water losses don't start with dramatic flooding. They start with things like:
- AC-related leaks: Especially when condensate lines clog or units drip into ceilings or walls.
- Water heater failures: Often discovered after overnight spread into adjacent rooms.
- Older plumbing in established neighborhoods: Angle stops, supply lines, and connections fail without much warning.
- Monsoon-related intrusion: Roof or window entry points become obvious fast.
Fast drying in Phoenix doesn't happen automatically. Exposed surfaces may dry quickly while hidden cavities stay wet.
Why local context matters to insurance too
Phoenix homeowners also deal with broader insurance questions around water, flood, and rate pressure. If you're trying to understand the wider policy environment, these FEMA insurance rate increase concerns offer context on why coverage conversations have become more important for property owners in general.
When moisture is trapped and the clock is running, the right response is targeted drying and verification. For losses where microbial concerns are part of the picture, water and mold mitigation becomes the more relevant conversation than cleanup alone.
Taking Control After Water Damage
Water mitigation cost feels unpredictable when you're standing in a wet room. It gets more manageable once you separate emergency dry-out from rebuild, understand what drives the invoice, and act before moisture spreads.
The practical takeaway is simple. Speed controls cost. Clear documentation helps insurance. And the right mitigation scope is the one that addresses the actual wet materials, not just what looks bad from the doorway.
If you're in Phoenix, don't wait for a wet wall or cabinet base to “air out” on its own. Water losses usually become more expensive when people lose a day deciding what to do.
If you need help stabilizing a water loss in the Phoenix area, Restore Heroes provides emergency mitigation, structural drying, and insurer-ready documentation so you can get the property assessed quickly and make decisions with clearer information.