You walk into the laundry room, bathroom, or garage and the first thing you notice is the smell. Then you see the water line on the baseboard, the swollen drywall, or the damp carpet spreading farther than it should. In Phoenix, that moment can be deceptive. Dry air makes people think the house will “air out” on its own.
Sometimes the visible water does disappear fast. The problem is that hidden moisture often doesn’t.
That’s where water and mold mitigation becomes different from simple cleanup. A wet floor can become a wall cavity problem. A small leak can turn into a flooring, insulation, or air quality issue. And because our desert climate speeds surface evaporation, Phoenix homes can look dry before they’re dry.
The right response is calm, fast, and methodical. Safety first. Source control second. Verified drying after that. If mold is already active, the job shifts from drying to containment, removal, cleaning, and post-remediation verification.
Your First 24 Hours After Water Damage
The first day matters more than most homeowners realize. Visible mold colonies can appear in 3-7 days after water exposure, and the EPA says water-damaged areas should be dried within 24-48 hours to interrupt that process, as noted in this mold timeline and drying guidance.
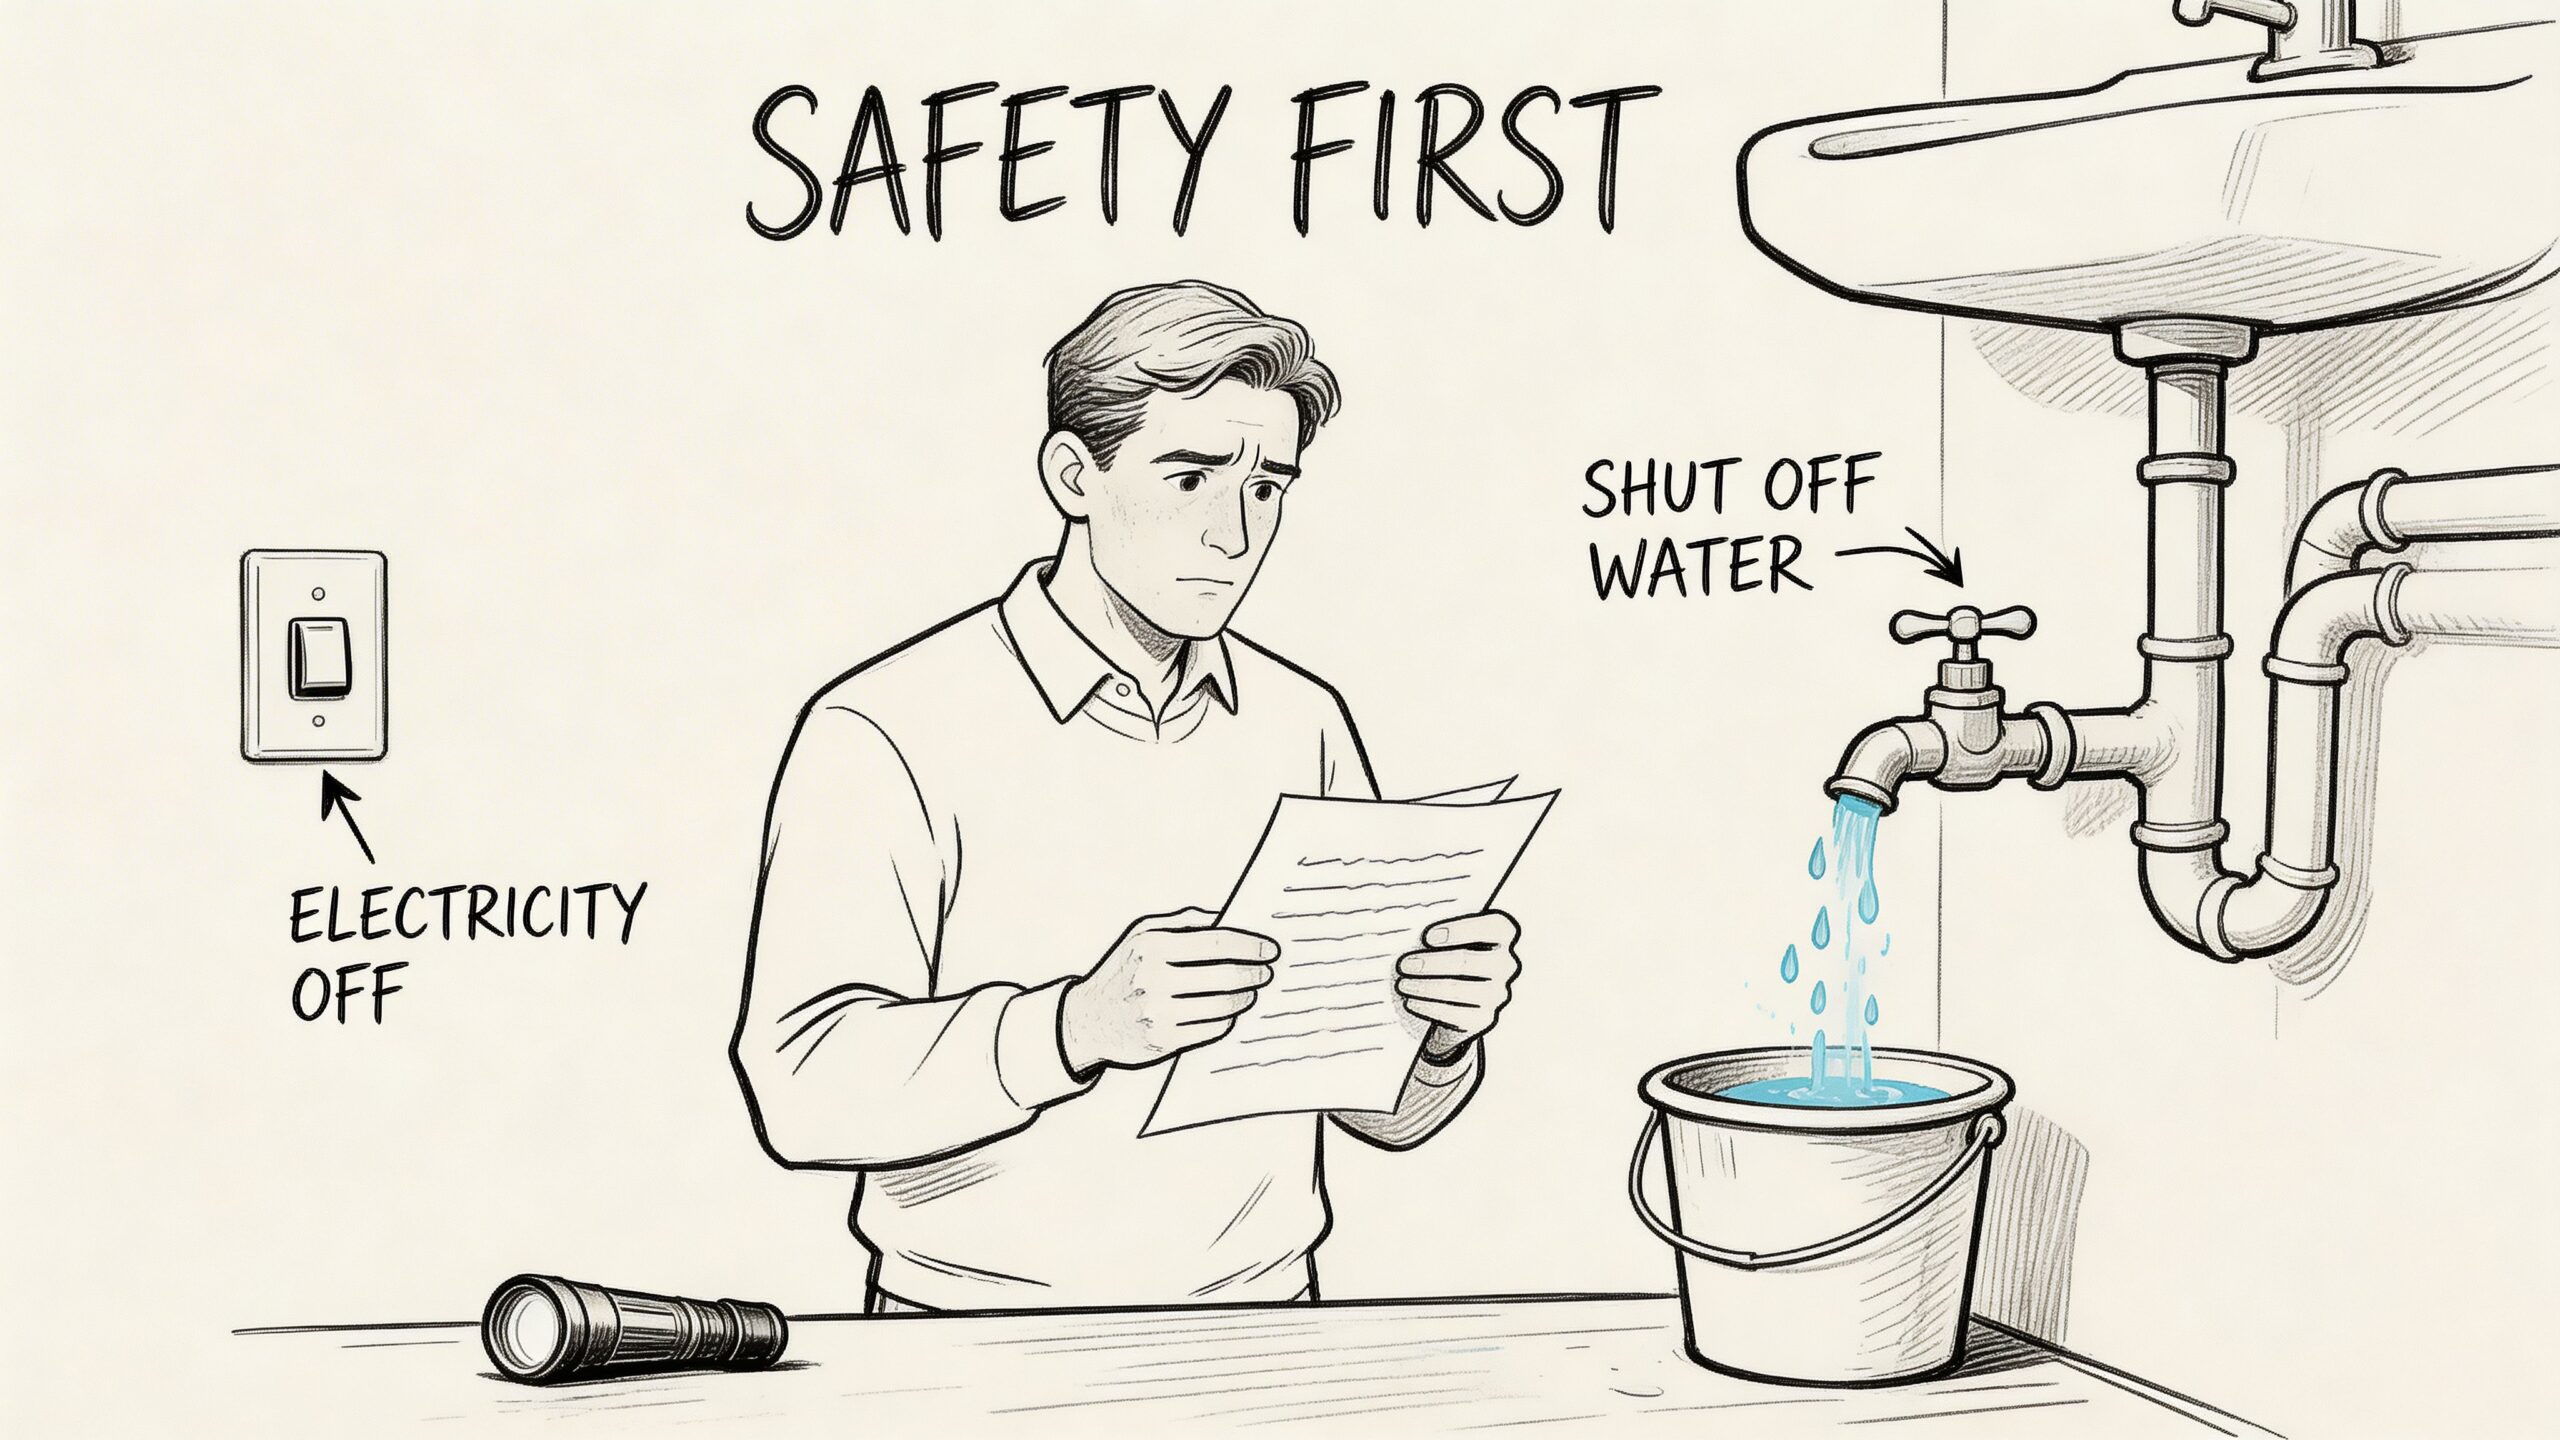
Start with safety, not cleanup
If water is near outlets, appliances, power strips, or electrical panels, stay out of the area until power is safely shut off. If you can reach the breaker without stepping into water, shut off the affected circuit. If you can't, wait for qualified help.
If the leak is active, shut off the local supply valve if one exists. If a pipe has burst or you can't isolate the source, shut off the home's main water supply.
Do not use a household vacuum to pick up water. It isn't built for standing water, and mixing electricity with flood conditions is a bad way to turn property damage into a medical emergency.
Practical rule: If you have to choose between saving belongings and making the space safe, make the space safe first.
What to do in the first few hours
Keep your first actions simple and ordered.
- Stop the source. Shut off water to the fixture, appliance, or the whole house if needed.
- Protect people and pets. Keep children, pets, and anyone with breathing issues away from the wet area.
- Document before moving too much. Take clear photos and short videos of floors, walls, ceilings, furniture, and the source if visible.
- Move what you can safely move. Pick up rugs, loose items, paper goods, and electronics if they can be removed without risk.
- Blot and contain, don’t improvise a full dry-out. Towels are fine for preventing spread. They are not a substitute for extraction and controlled drying.
- Call for emergency mitigation. If the area is more than a minor spill, get a professional team moving. Phoenix homeowners often start with emergency services like https://restoreheroesaz.com/emergency-water-mitigation/.
What usually makes the damage worse
Panic causes most early mistakes.
- Waiting to “see if it dries”. In Phoenix, the top layer may dry while moisture stays trapped under flooring or inside drywall.
- Running the HVAC without a plan. In some situations, that can circulate odor and particles through the house.
- Painting, spraying, or bleaching over stains. That hides evidence and can complicate proper assessment.
- Leaving wet carpet pad in place. Pad holds water and often needs a different response than the carpet itself.
If carpet is wet but the situation is limited and safe, a practical resource on how to dry wet carpet fast and prevent mould can help you avoid common homeowner mistakes while you wait for professional guidance.
Who to call first
Call a plumber if the source is an active pipe, valve, supply line, or appliance connection that still needs repair. Call a mitigation team if building materials are wet. In many jobs, both are needed.
If sewage, toilet overflow beyond a simple clean-water event, storm intrusion, or gray-to-black contamination is involved, skip DIY entirely. The issue is no longer just water. It becomes a health and containment problem.
Professional Damage Assessment and Containment
When a certified mitigation crew arrives, the first job isn't tearing things apart. It's figuring out where the water went, what category of water is involved, and what has to be isolated before drying starts.
Water damage gets more serious when people judge it by what they can see. Surface staining tells only part of the story. Technicians are looking for migration paths into baseboards, under cabinets, below vinyl plank, into insulation, and inside wall cavities.
That matters because dampness and mold in homes have real health consequences. An estimated 4.6 million asthma cases in the U.S. are attributable to dampness and mold exposure in the home, according to this mold and health summary.
Water category changes the plan
Professionals usually classify the loss by the source of the water.
| Water category | What it usually means | Why it matters |
|---|---|---|
| Category 1 | Clean water from a supply line or similar source | Materials may be salvageable if the response is fast |
| Category 2 | Water with significant contamination, such as some appliance discharges or overflow events | Cleaning, sanitation, and disposal needs increase |
| Category 3 | Grossly contaminated water, including sewage or serious flood contamination | Safety controls are much stricter, and porous materials often can't be saved |
Homeowners don't need to memorize labels. They do need to understand the trade-off. The dirtier the water, the less room there is for “dry it and keep it.”
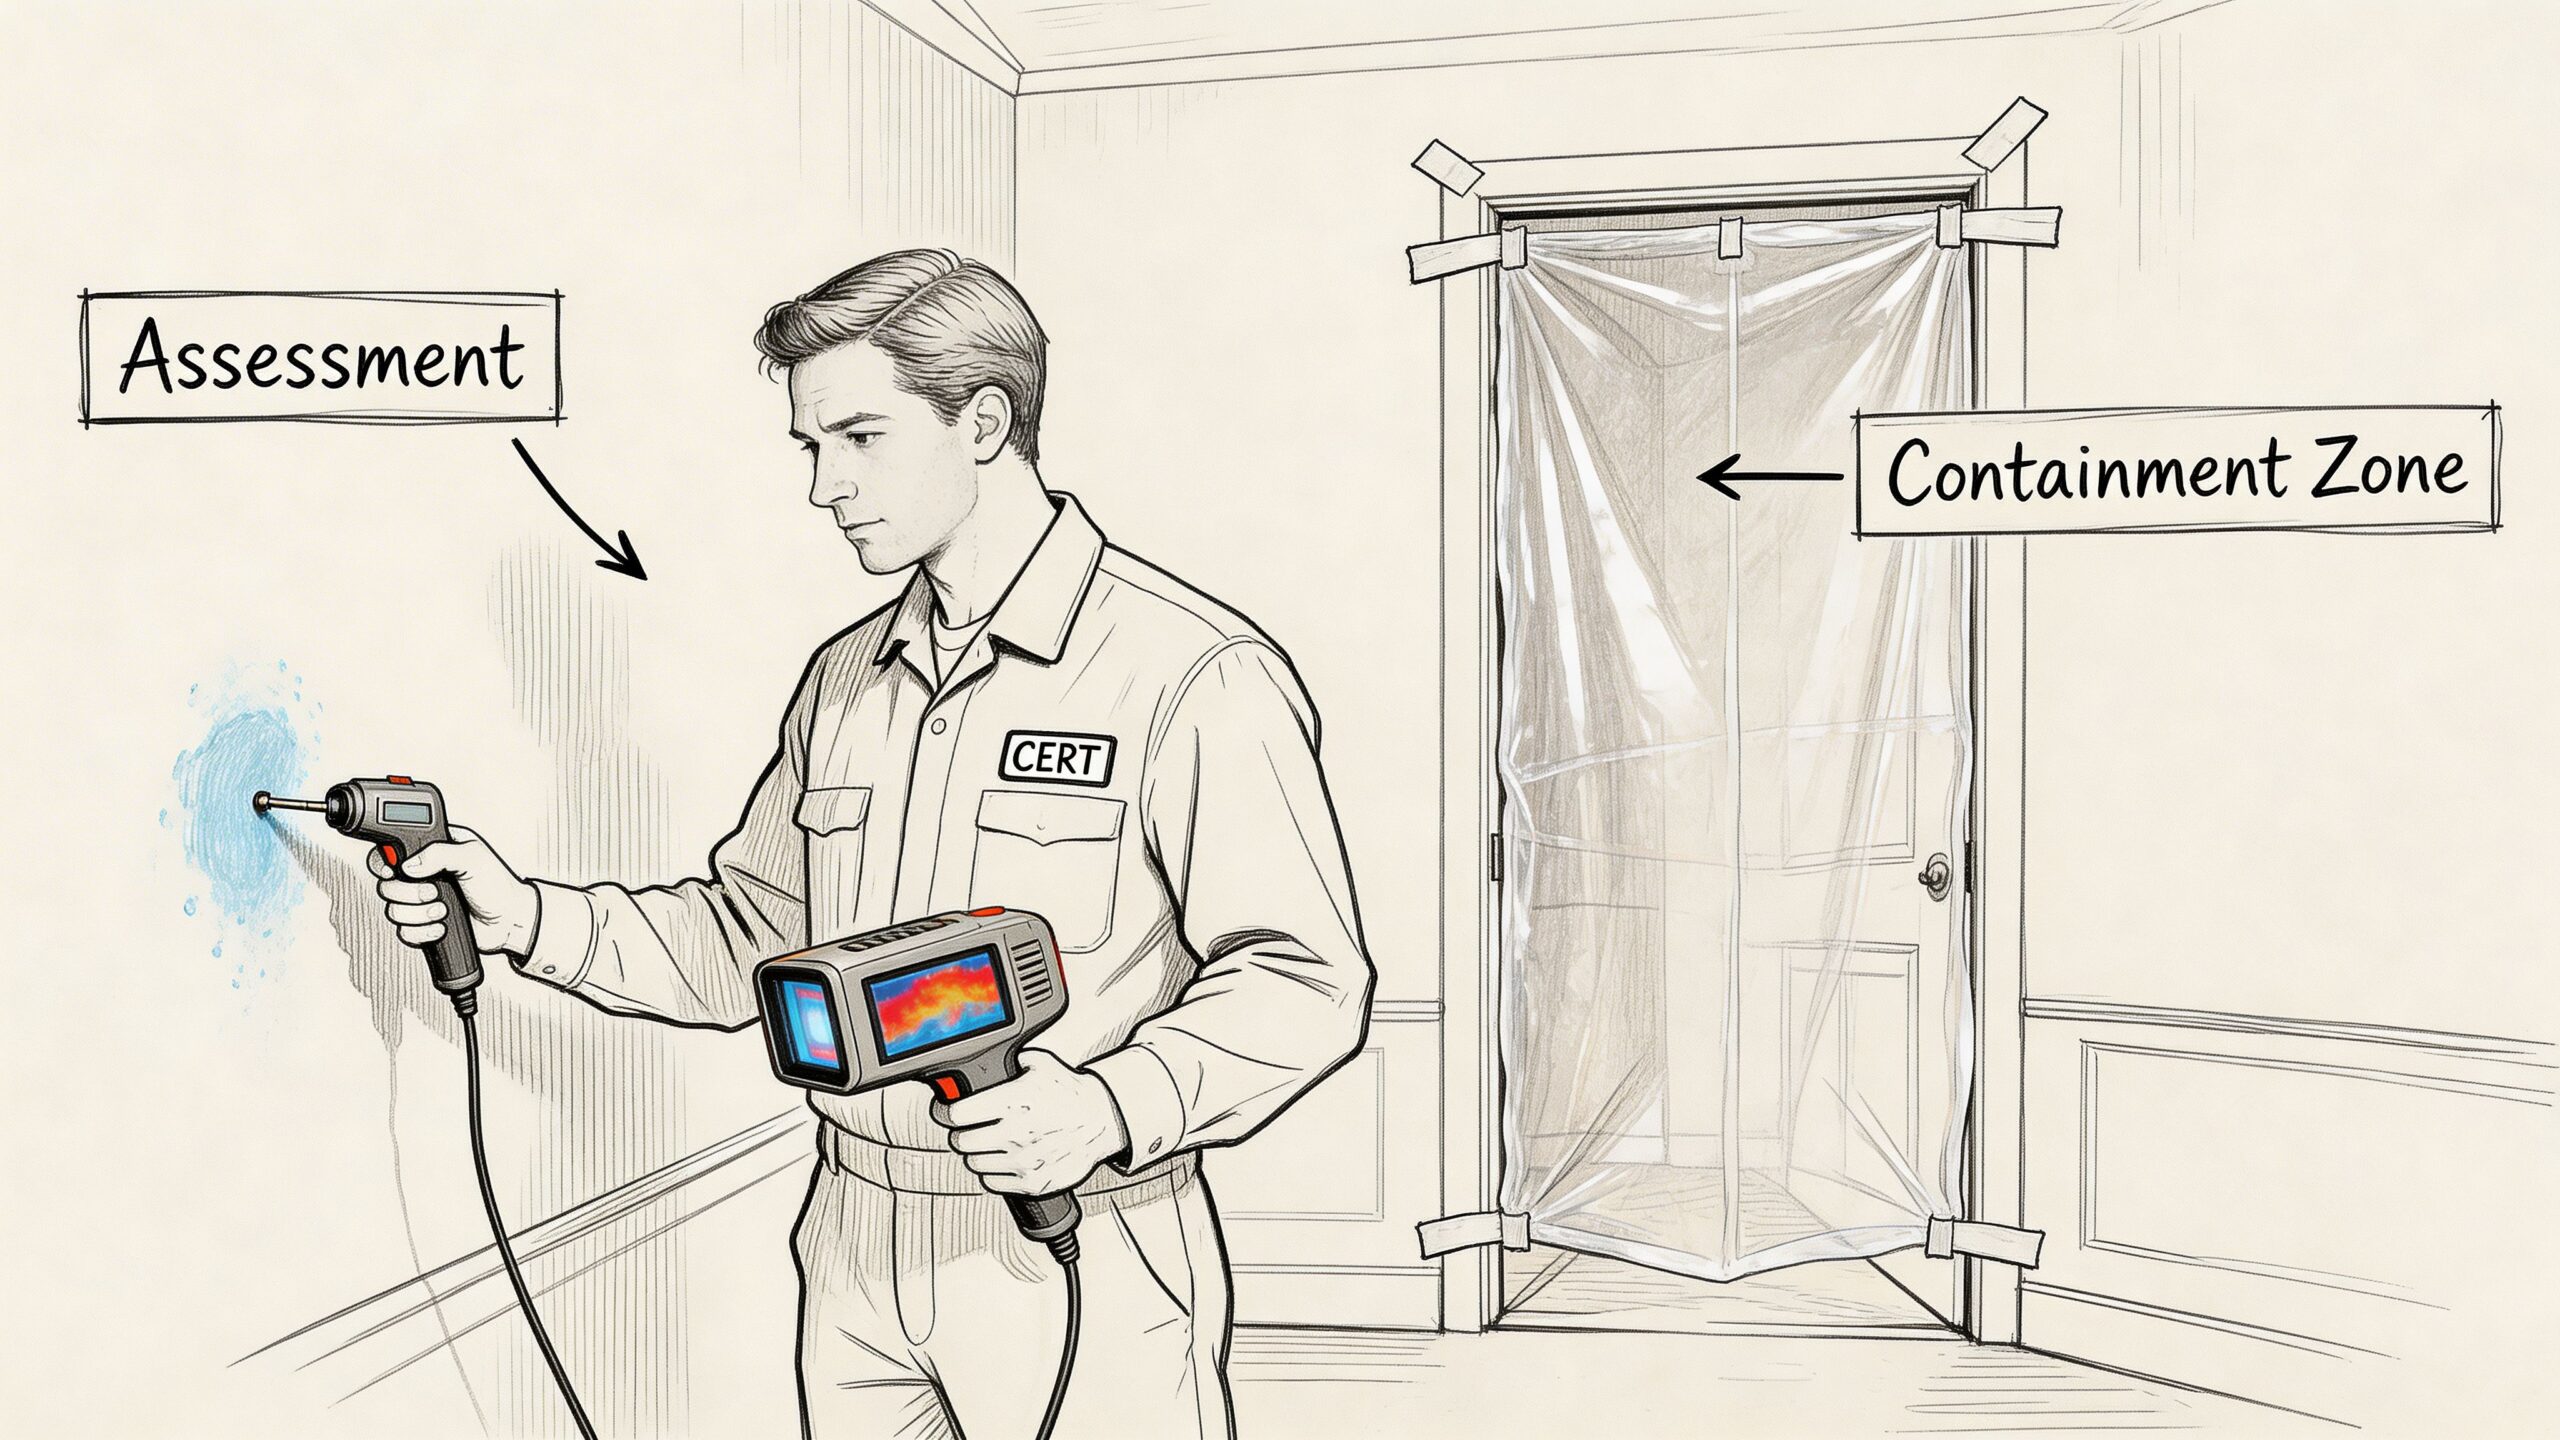
The tools that find what your eyes miss
Good assessment is instrument-based. A serious crew should be using a combination of:
- Moisture meters to check material moisture in drywall, wood, and trim
- Infrared cameras to identify temperature differences that suggest hidden moisture
- Hygrometers to read ambient humidity conditions
- Inspection openings when readings suggest moisture behind a wall or under built-ins
This is also where Phoenix creates confusion. Fast surface evaporation can make tile, drywall face paper, or paint look better than the wall cavity behind them is. A dry-looking room can still be holding moisture at the sill plate, under the tack strip, or behind vanity backs.
For homeowners trying to understand the broader role of a mitigation company, https://restoreheroesaz.com/what-does-a-restoration-company-do/ gives a useful overview of how assessment, drying, cleanup, and reconstruction fit together.
A short visual walkthrough helps make that process easier to picture.
Containment is not overkill
Once mold is suspected or confirmed, containment becomes part of the work. That's especially true if demolition is likely.
Containment usually includes plastic barriers, controlled entry, and negative air pressure so particles don't spread into clean rooms. Homeowners sometimes resist this because the setup looks dramatic. In practice, it's one of the most important parts of the job.
If you remove wet drywall without containment, you don't just disturb the damaged area. You can spread contamination into rooms that were still clean.
What a sound assessment should answer
Before drying equipment runs full scale, you should be able to get clear answers to a few practical questions:
- What was the source and has it been repaired?
- What materials are wet and which ones are likely salvageable?
- Is there evidence of hidden moisture behind walls, under flooring, or in cabinetry?
- Is contamination present that changes cleaning and disposal?
- Does the home need containment before demolition or mold work begins?
If those questions aren't being answered, the project isn't really under control yet. It's just noisy.
The Complete Mitigation and Remediation Process
Professional water and mold mitigation follows a sequence for a reason. Fast action using a structured process can achieve 50-80% cost reductions compared to delayed responses, according to this water mitigation process overview. The savings don't come from shortcuts. They come from stopping secondary damage before it spreads.
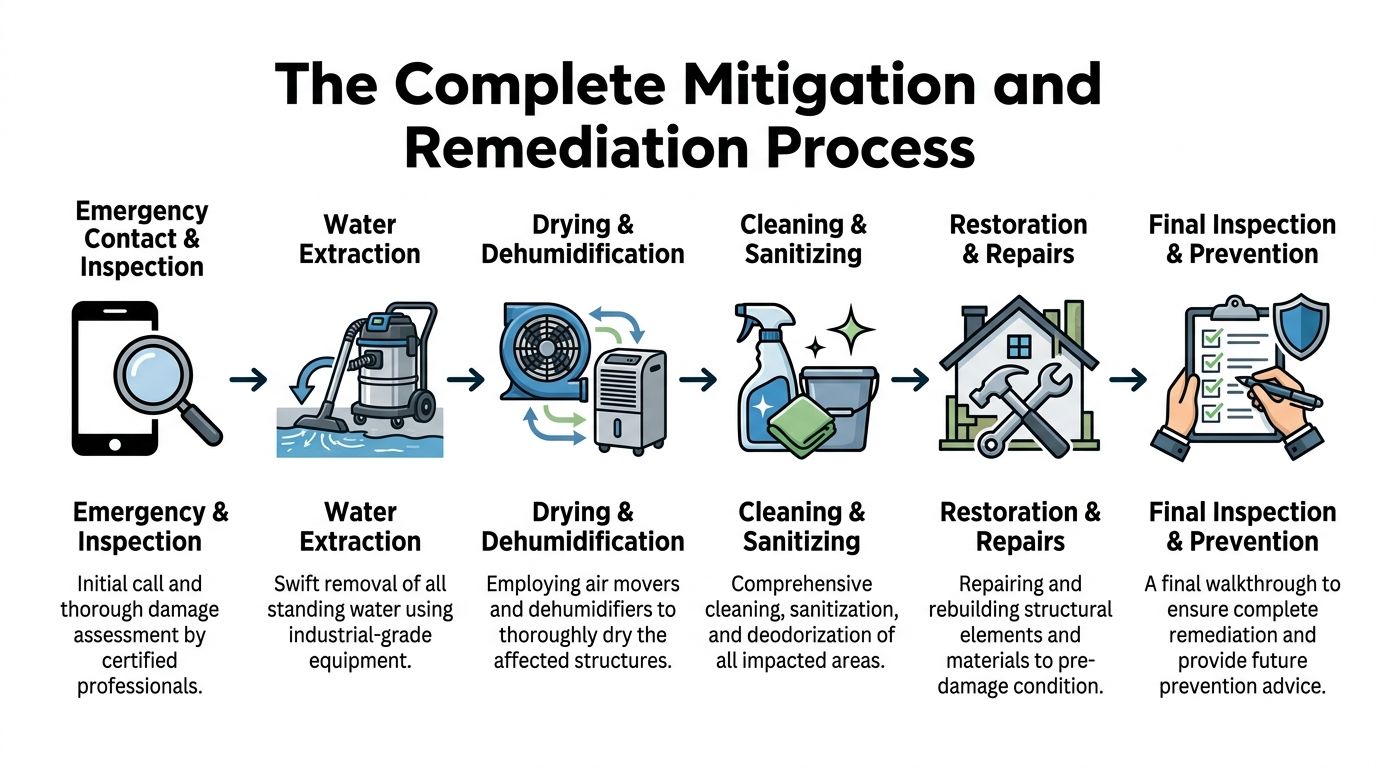
Step one is extraction, not fan placement
Many homeowners think drying starts with fans. It doesn't. The first real production step is water extraction.
Crews use truck-mounted or portable extraction units, weighted extractors for carpet, and specialty tools for hard surfaces and tight areas. Standing water has to come out before air movers and dehumidifiers can work efficiently.
If water remains trapped in pad, subfloor seams, or lower wall cavities, fans alone won't solve the problem. They can accelerate evaporation into the room while leaving hidden material moisture behind.
Drying is controlled, not improvised
After extraction, technicians build a drying plan around the structure and the materials involved.
That may include:
- Air movers directed to create evaporation across wet surfaces
- Low-grain refrigerant or desiccant dehumidifiers depending on conditions
- Moisture mapping to track what is and isn't responding
- Selective demolition when trapped moisture can't be dried in place
In Phoenix, dry outdoor air can help under the right conditions, but it isn't a substitute for controlled drying. Open doors and random box fans don't create a documented drying environment. They create airflow. Those aren't the same thing.
Mold remediation starts with source control
If mold growth is already present, drying alone is no longer enough. The moisture source must be corrected first. Then the affected area has to be contained, cleaned, and in many cases partially removed.
What that often looks like in a house:
| Stage | What happens |
|---|---|
| Moisture source correction | Pipe, roof, appliance, drain, or building envelope issue is repaired |
| Containment setup | Plastic barriers and air control isolate the work area |
| Material removal | Unsalvageable porous materials such as affected drywall or insulation are removed |
| Detailed cleaning | Remaining structural surfaces are cleaned, HEPA vacuumed, and treated as appropriate |
| Drying confirmation | The exposed framing and adjacent materials are dried to acceptable levels |
| Repair scope | Rebuild starts only after the environment is stable |
Homeowners often lose time trying to save the wrong materials. Painted drywall, insulation, particleboard cabinets, and carpet pad don't all respond the same way. A technician may be able to save one layer and remove the next.
What homeowners can sometimes handle, and what they shouldn't
A small, isolated surface issue is different from a wet wall assembly or a contaminated loss. The line matters.
DIY vs. Professional Water Mitigation Tasks
| Task | Generally DIY-Safe | Requires a Professional |
|---|---|---|
| Blotting a small clean-water spill on a hard surface | Yes | No |
| Moving dry belongings away from a wet area | Yes | No |
| Shutting off a fixture valve or main water supply | Yes, if safely accessible | No |
| Cleaning a very small amount of mold from a non-porous surface after the moisture source is fixed | Sometimes | If the area is spreading, recurring, or linked to hidden moisture |
| Extracting standing water from carpet, pad, subfloor, or wall cavities | No | Yes |
| Drying hardwood, drywall assemblies, insulation, or built-ins | No | Yes |
| Handling sewage, storm floodwater, or other contaminated water | No | Yes |
| Building containment and running negative air | No | Yes |
| Verifying dryness with moisture meters and thermal imaging | No | Yes |
If you need to ask whether the problem is “too much for DIY,” it usually is.
The best homeowner contribution is early documentation, safe source shutoff, and quick decisions. The technical drying and remediation work needs instruments, containment, and training.
What works and what usually doesn't
Some field decisions are straightforward.
What works
- Removing bulk water first
- Opening targeted areas when readings show trapped moisture
- Separating salvageable from unsalvageable materials early
- Logging moisture readings instead of guessing
- Treating mold as a contamination issue, not just a stain issue
What usually doesn't
- Spraying household products on visible mold and leaving wet materials in place
- Running a few store fans in a closed room and assuming that equals drying
- Reinstalling baseboards before the wall cavity has been verified dry
- Painting over staining before the structure is cleared
- Keeping carpet pad that stayed wet too long
For homeowners comparing service types, https://restoreheroesaz.com/water-damage-mitigation/ is one example of a page that outlines how emergency extraction, drying, and mitigation are typically handled in the Phoenix area.
Restoration is the last phase, not the first
People naturally want the house to look normal again. But rebuild is the last move, not the first.
Cabinet toe-kicks, drywall patches, trim replacement, texture, and paint should happen after drying and remediation are complete. If reconstruction starts too soon, wet materials get enclosed, and the job circles back into odor, staining, or regrowth.
The cleanest projects are the ones where nobody rushes the closing steps.
Navigating Insurance Claims and Project Costs
Water losses are stressful enough without coverage questions, adjuster calls, and a growing photo library on your phone. The easiest way to make the claim side harder is to stay informal. Insurance carriers respond better when the record is organized.
Start building that record immediately. Keep photos in date order. Save invoices, plumber reports, mitigation authorizations, moisture logs if provided, hotel receipts if displacement becomes necessary, and a running note of every conversation.
What your adjuster usually needs
Adjusters are trying to answer a practical set of questions. You should be prepared to show:
- Cause of loss. What happened, and when did you discover it?
- Scope of affected materials. Which rooms, finishes, and contents were impacted?
- Mitigation steps taken. What was done to prevent further damage?
- Condition before repairs. Clear photos before demolition help more than verbal descriptions.
- Vendor documentation. Work authorizations, drying records, and itemized scopes matter.
If you want a homeowner-focused breakdown of that process, https://restoreheroesaz.com/water-damage-insurance-claim-tips/ is a practical reference point.
Coverage language that often causes confusion
A few terms come up often.
| Term | Plain-English meaning |
|---|---|
| Sudden and accidental | A loss that happened unexpectedly, such as a burst supply line |
| Long-term seepage | Ongoing moisture over time, often scrutinized more heavily |
| Mitigation | Emergency steps taken to reduce further damage |
| Remediation | Work focused on removing contamination, such as mold |
| Flood | Water entering from rising ground water or storm conditions, which may require separate coverage |
Homeowners often assume “water damage” is one bucket. It isn't. The source matters. A broken supply line inside the home is different from outside floodwater entering through a door or foundation path.
What drives project cost
There isn't one standard price because the labor and equipment needs can vary a lot from one loss to the next. The estimate usually moves based on a handful of factors:
- Water category. Clean-water losses are handled differently than contaminated losses.
- Affected materials. Drywall, insulation, hardwood, cabinets, and carpet each respond differently.
- Extent of migration. Surface wetness is simpler than moisture under flooring or inside walls.
- Containment needs. Mold work and contaminated losses require more setup and safety measures.
- Access difficulty. Tight crawl spaces, built-ins, multi-room spread, and occupied homes add complexity.
- Reconstruction scope. Emergency mitigation and final repairs are related, but they are not the same line item.
A low estimate isn't automatically a good estimate. If it skips containment, moisture verification, or material handling, it may be incomplete.
Verification matters for claims and for the house
One reason good documentation matters is that post-remediation verification supports both health and claim clarity. According to this post-remediation verification overview, top-tier mold remediation firms that follow a multi-phase post-treatment verification protocol achieve 96% success rates.
That doesn't mean every job is simple. It means the firms that verify visually, confirm moisture elimination, assess air quality when appropriate, and re-check after treatment tend to produce more defensible results.
If a contractor can't explain how they'll prove the area is dry and clean enough to close, you're not looking at the full job yet.
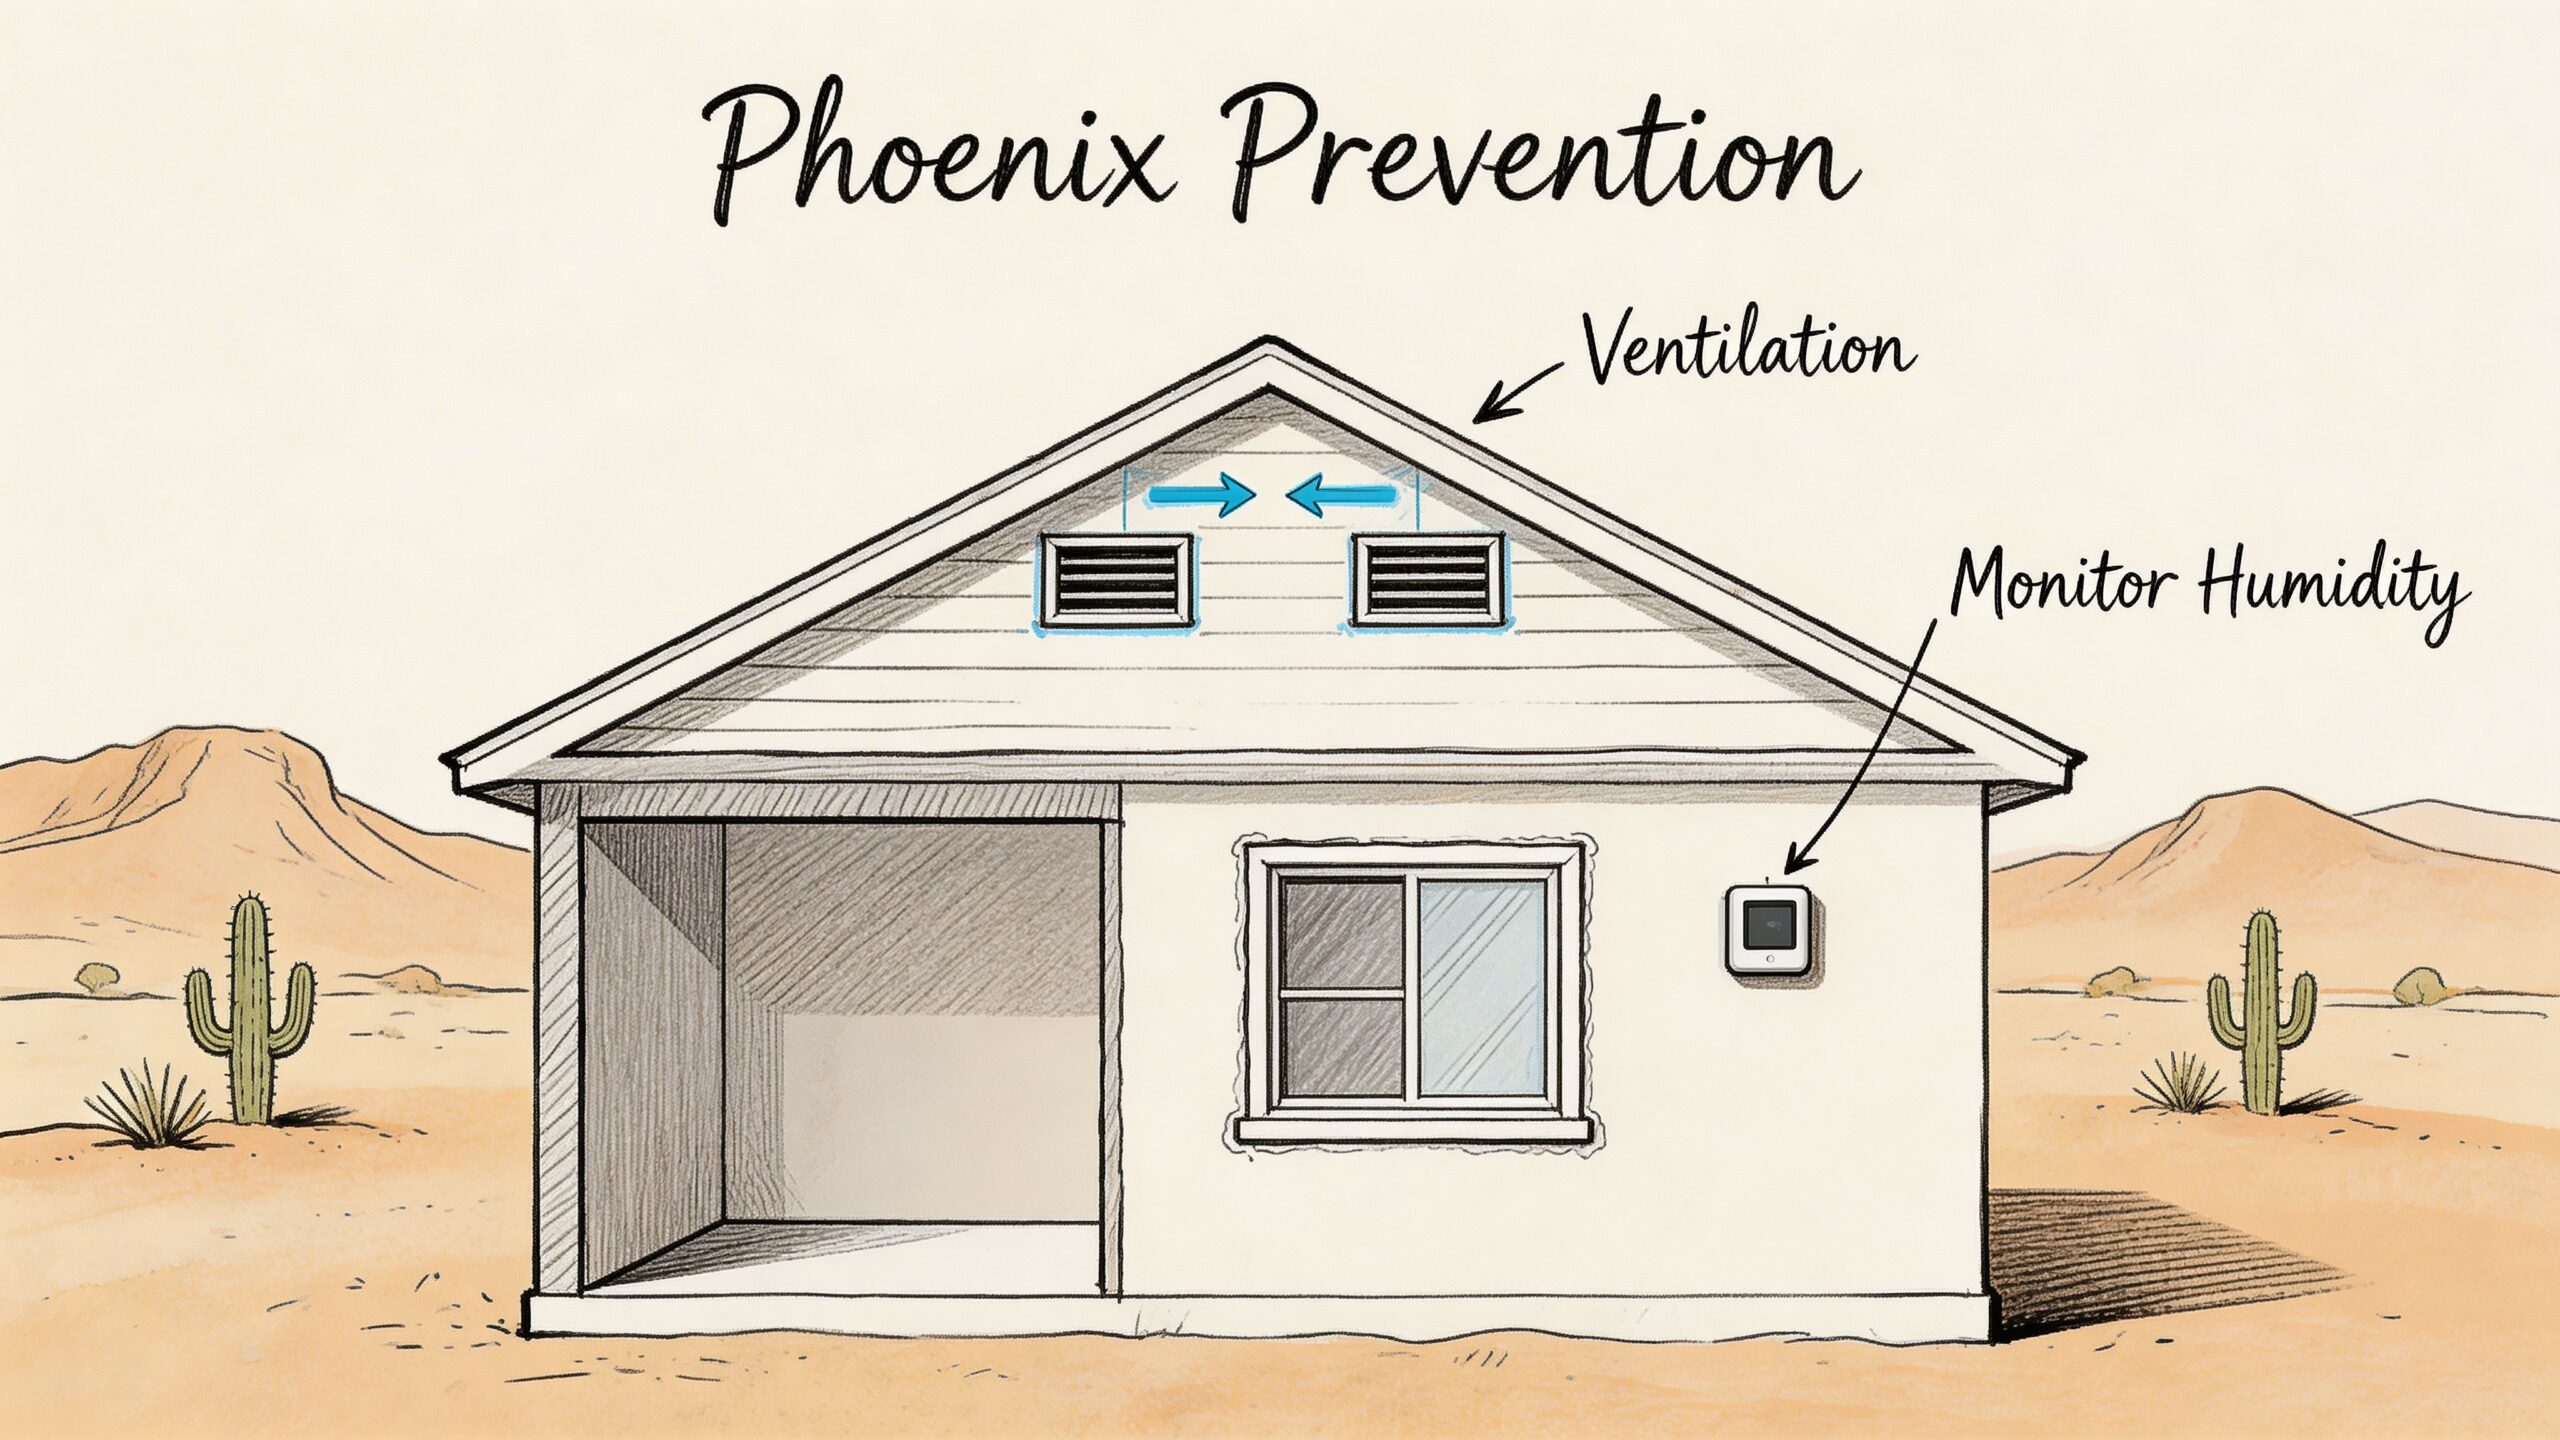
Preventing Future Mold Growth in Your Phoenix Home
Phoenix homeowners hear “low humidity” and assume mold is mostly someone else’s problem. That's a mistake. Desert homes still get mold after appliance failures, slab leaks, roof intrusions during monsoon season, poor bathroom ventilation, and HVAC condensation issues.
The local challenge isn't just moisture. It's false confidence.
In hot, arid climates like Phoenix, rapid evaporation can create false drying readings, and without 72-hour post-dry verification using thermal imaging, the risk of mold regrowth triples, according to this moisture and mold remediation guidance.
Why Phoenix homes need extra vigilance
A wall can feel dry to the touch while the cavity behind it is still damp. A garage baseboard can look fine while the sill plate is still carrying moisture from a monsoon intrusion. Evaporative drying on the surface can hide what matters underneath.
That means prevention after a loss isn't just about “keeping things dry.” It's about verifying that they stayed dry after equipment came out.
The maintenance habits that help most
You don't need a commercial restoration setup to reduce risk. You do need consistency.
- Check seals before storm season. Inspect windows, exterior doors, thresholds, and roof penetrations before summer storms start.
- Watch HVAC performance. Poor drainage, dirty coils, and airflow problems can create moisture where homeowners don't expect it.
- Use bathroom and laundry ventilation. Humid rooms are still humid in Arizona, especially in tightly sealed homes.
- Direct water away from the foundation. Hardscaping, irrigation overspray, and poor grading can keep moisture where it shouldn't be.
- Inspect under sinks and behind appliances. Slow leaks often stay hidden until cabinet bases swell or odor appears.
- Pay attention to musty smells. In Phoenix, odor often shows up before obvious staining.
A general homeowner guide on how to avoid mold in your home and damp buildings is a useful complement to those habits, especially for everyday moisture control between major inspections.
After a loss, don't stop at “looks dry”
This leads to many callbacks. Equipment comes out. Walls are closed. Then odor returns, or a stain line ghosts back through paint.
A better standard is to ask for post-dry verification and to stay alert after the work wraps. One local service example is https://restoreheroesaz.com/how-to-prevent-mold-after-a-flood/, which discusses practical flood-aftercare and prevention steps for Arizona properties.
Desert air helps, but it can also fool you. Prevention in Phoenix depends on follow-up, not just fast evaporation.
A simple Phoenix prevention checklist
Use this as a routine reset a few times a year.
| Area | What to check |
|---|---|
| Bathrooms | Exhaust fan use, caulk failures, toilet seal leaks |
| Kitchen | Sink base, dishwasher line, refrigerator supply line |
| Laundry | Washer hoses, drain pan condition, wall box leaks |
| Attic | Roof intrusion signs, ventilation performance, insulation disturbance |
| Exterior | Window seals, stucco cracks, drainage paths, irrigation spray |
| HVAC | Condensate drain, filter changes, signs of moisture near air handler |
You don't need to live on alert. You do need to treat moisture as a building issue, not just a housekeeping issue.
Frequently Asked Questions About Mitigation
Is a musty smell always mold?
Not always, but it should never be ignored. A musty odor usually means there has been moisture long enough for microbial activity, trapped damp materials, or both. Odor is a clue, not a diagnosis.
How long does water and mold mitigation take?
It depends on the source, how far the water migrated, what materials were affected, and whether mold is already present. A small clean-water event can move much faster than a multi-room loss with demolition and containment. For a general timing overview, https://restoreheroesaz.com/how-long-does-water-damage-restoration-take/ breaks down the factors that affect duration.
Can I stay in my home during the work?
Sometimes yes, sometimes no. If the loss is limited, contained, and not affecting critical living areas, you may be able to stay. If the water is contaminated, mold remediation is extensive, equipment noise is heavy, or sensitive occupants are in the home, temporary relocation may make more sense.
Can I just clean visible mold and be done?
Only if the issue is minor, isolated, on a non-porous surface, and the moisture source has been corrected. If mold keeps coming back, appears around baseboards, drywall, cabinets, or flooring transitions, or follows a leak, surface cleaning won't solve the problem.
What should I keep for insurance?
Keep photos, videos, plumber reports, invoices, work authorizations, email chains, and notes from calls with your carrier or adjuster. Organized documentation makes the process smoother and helps explain why mitigation decisions were necessary.
If you're dealing with an active leak, flood, or suspected mold problem in the Phoenix area, Restore Heroes is one local option for emergency restoration support. You can learn more about their services at Restore Heroes.