When you’re dealing with a flood, the clock starts ticking immediately. To head off a serious mold problem, you have to act decisively within the first 24 to 48 hours. This isn't just about mopping up the visible mess; it's a race to get everything dry before mold spores can take hold in damp drywall, carpet, and wood. Your actions in this critical window will determine whether you face a simple water cleanup or a major mold remediation project.
Your First 48 Hours: The Critical Window for Mold Prevention
After a flood, your home becomes a perfect incubator for mold, especially in a place like Phoenix where trapped indoor moisture can lead to explosive growth. Mold can start to colonize in as little as one day, making this initial two-day period a non-negotiable deadline for effective prevention.
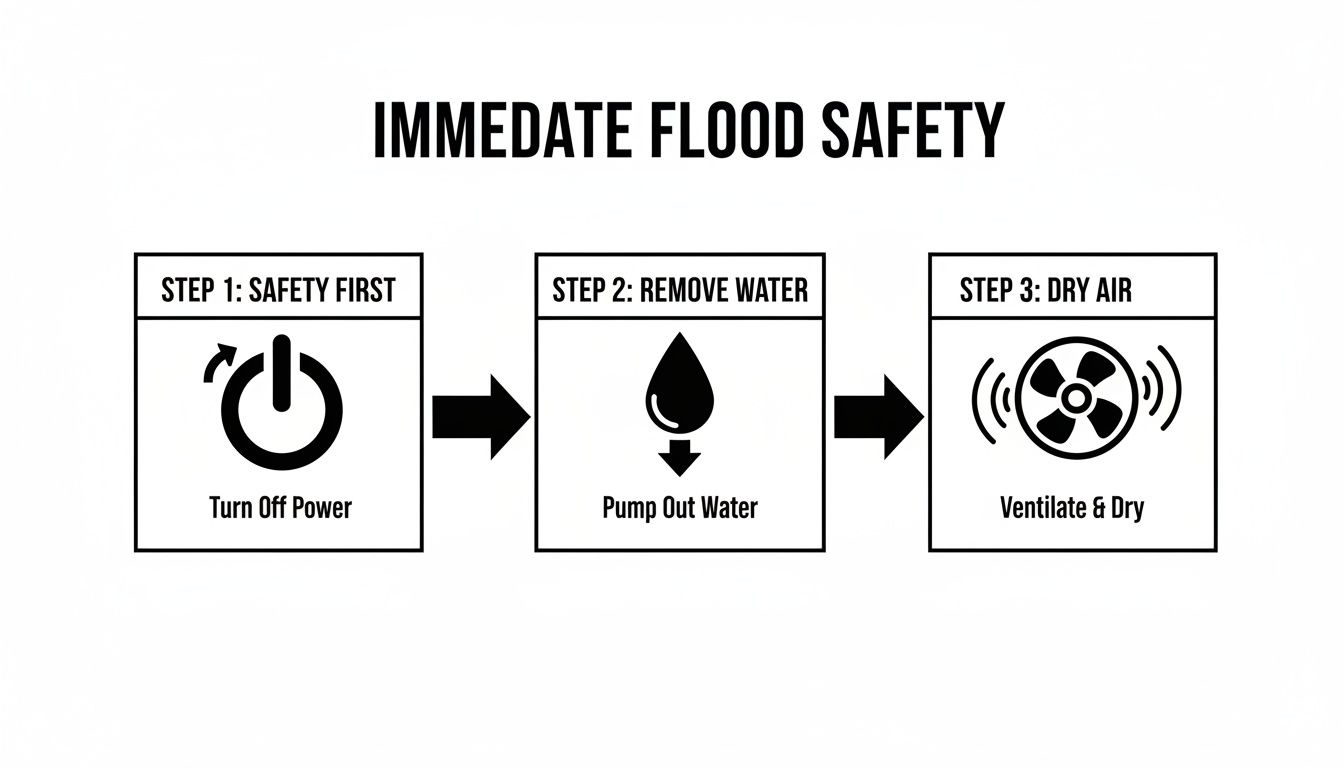
Acting with urgency isn't just a suggestion—it's a necessity. The mission is simple: make your home as hostile to mold as possible before it gets a foothold. This boils down to three core priorities: securing the area for safety, getting the bulk of the water out, and starting the drying process right away.
Prioritize Safety Above All Else
Before you touch anything, you have to make sure the area is safe. Floodwater is notorious for hiding serious dangers, from live electrical currents to structural damage. Your very first move must be to eliminate any immediate risks.
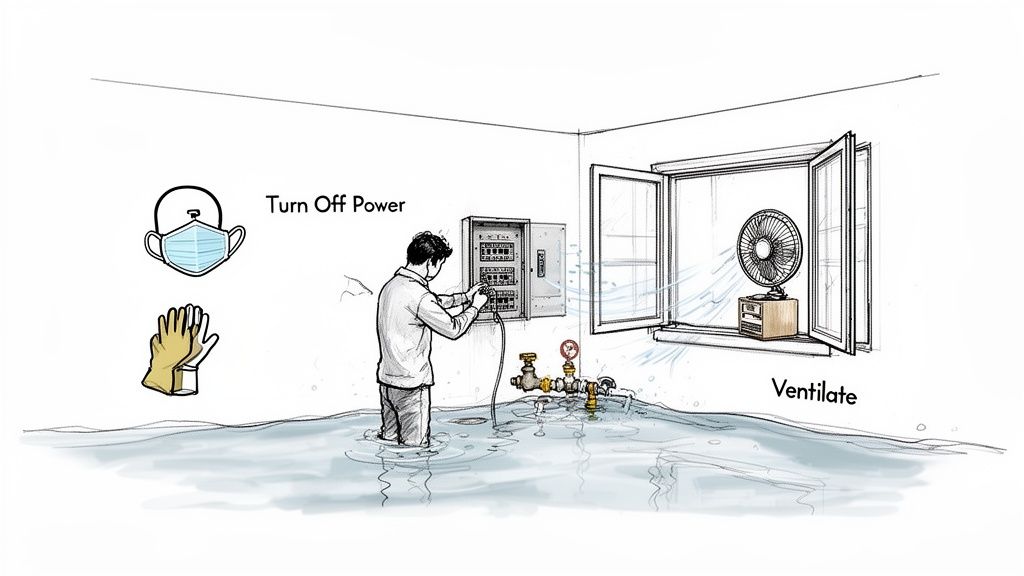
The most critical step is to shut off the electricity at the main breaker. Water and electricity are a deadly mix, so you must assume any standing water is live until you know for certain the power is off. If you have to wade through water to reach your breaker box, don't. Stop and call a professional. It’s never worth the risk.
Next, turn off the gas supply. Flooding can easily damage gas lines and cause dangerous leaks. Find your main gas shutoff valve and make sure it's turned off to prevent an even bigger disaster.
The Race Against Time: Removing the Water
Once the area is secure, it's all about getting the water out—and fast. Every second that water sits, it's soaking deeper into your home's structure, creating that perfect breeding ground for mold. How quickly you remove the water has a direct impact on your chances of avoiding a widespread mold infestation.
The U.S. Environmental Protection Agency (EPA) is clear on this: if you can get water-damaged areas and items thoroughly dried within 24-48 hours, mold growth is often prevented. That’s not a lot of time, which is why having a plan is so important.
When the stakes are this high, a checklist can help you stay focused. Here are the most critical actions to take as soon as it's safe to enter the property.
Immediate Flood Response Checklist
| Priority | Action Item | Reasoning |
|---|---|---|
| 1 (Highest) | Shut Off Main Power & Gas | Prevents electrocution and gas leaks, the most immediate life-threatening hazards. |
| 2 | Remove Standing Water | Uses pumps, wet/dry vacs, or buckets to remove the bulk water. The faster water is out, the less absorption occurs. |
| 3 | Open Windows & Doors | Promotes initial ventilation to start the drying process, but only if the outside air is less humid. |
| 4 | Move Wet Items Out | Relocate wet rugs, furniture, and belongings to a dry, well-ventilated area (like a garage or covered patio) to dry or be assessed. |
| 5 (Lowest) | Set Up Fans & Dehumidifiers | After bulk water is gone, this accelerates the drying of structural materials like drywall and subfloors. |
This checklist isn't exhaustive, but it covers the immediate, high-impact steps that set the stage for a successful recovery.
Jumpstart the Drying Process with Airflow
As soon as the standing water is gone, your focus shifts from water removal to moisture evaporation. You need to get air moving, and lots of it. Open up windows and doors to create cross-ventilation, but only if the air outside is drier than the air inside.
Bring in every fan you can find—box fans, industrial fans, anything that circulates air. Aim them directly at wet walls, floors, and other saturated surfaces to speed up the drying time. If you own or can rent dehumidifiers, get them running on full blast in the most affected rooms. This one-two punch of airflow and dehumidification is what starts pulling stubborn moisture out of the building materials. It’s a foundational step that will have a major impact on the overall water damage restoration timeline.
Extracting Water and Drying Everything Out
Once you’ve handled the immediate safety risks and the initial chaos subsides, the real work begins. This next phase is less about frantic action and more about a methodical, relentless campaign against moisture. Your mission, plain and simple, is to evict every last drop of water from your home. This is the single most critical step in preventing mold from taking hold after a flood.
The tools for this job depend entirely on the scale of the disaster. A small leak from an appliance might just need a wet/dry vac and a stack of old towels. But for serious flooding, you need to bring in the heavy machinery. Don't be afraid to escalate your equipment to match the problem.
Choosing Your Water Removal Tools
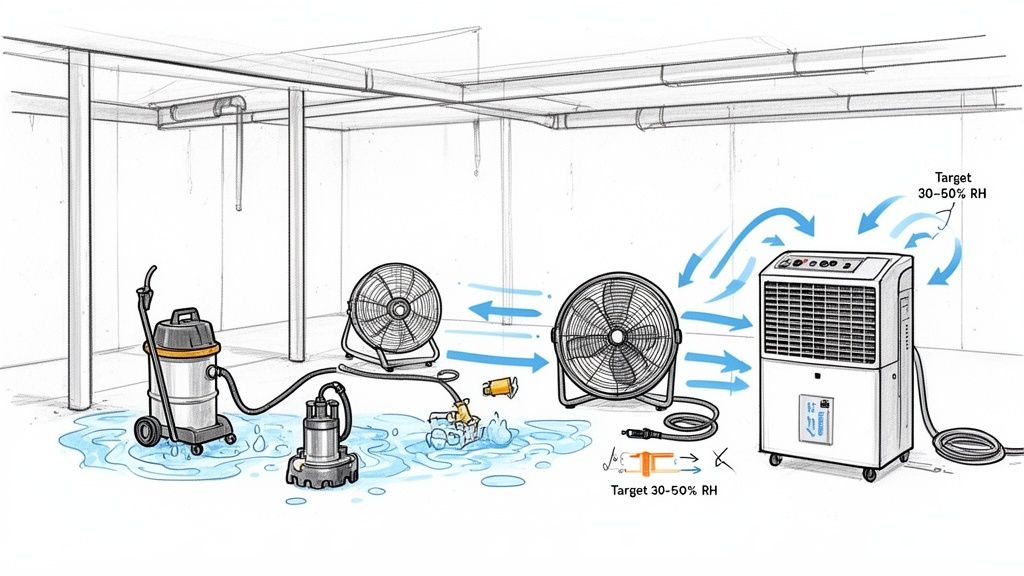
For a few inches of water in a single room, a good, high-capacity wet/dry vacuum is your best friend. It’s a workhorse for pulling water out of carpets and off hard floors. But if you’re looking at a basement with several feet of water, that same vac will feel like trying to empty a swimming pool with a teacup. You’ll be at it for days.
In severe cases, you absolutely need a submersible pump. You can rent these from most home improvement stores, and they’re built to move massive amounts of water fast. You just place the pump at the lowest point of the flooded area, run its discharge hose outside (and far away from your foundation), and let it do the heavy lifting.
The goal here is bulk water removal. You're not trying to get everything bone-dry just yet. You're getting rid of the standing water so the real drying process can begin. Every gallon you pump out is a huge win against mold.
After the pump has done its job, you can switch back to the wet/dry vac. Use it to suck up the remaining puddles and pull as much water as possible from saturated carpets and flooring. Making that transition from heavy pumping to detailed vacuuming is a key part of the process. If you're dealing with a below-grade space, our guide on how to dry out a flooded basement has more specific tips.
Creating an Aggressive Drying Environment
With the standing water gone, your focus shifts to the invisible enemy: moisture. It’s trapped in the air and soaked deep into porous materials like drywall, wood studs, and insulation. This is where you need to get strategic with air movers and dehumidifiers. Simply setting up a box fan in the corner won't cut it. You need to create a powerful vortex of dry, circulating air.
Here’s a practical setup I’ve used countless times:
- Arrange high-velocity fans (often called air movers) around the perimeter of the room. Aim them along the base of the walls at roughly a 45-degree angle. This pushes air right where you need it, drying the base of the walls and even getting under the carpet.
- Open up everything. Prop open interior doors, closet doors, and cabinet doors. You need air moving into every nook and cranny, because stagnant, humid air is exactly where mold loves to grow.
- Place a large, commercial-grade dehumidifier right in the middle of the mess. These machines are beasts, designed to pull an incredible amount of moisture from the air, which in turn encourages wet materials to release the water they’re holding onto.
Your target is to bring the indoor relative humidity down to between 30% and 50%. That's the sweet spot where materials dry out efficiently. You can track this easily with a cheap hygrometer from the hardware store.
Hunting for Hidden Moisture Pockets
Here’s one of the biggest mistakes people make during a DIY cleanup: they assume that if something feels dry, it is dry. I can't stress this enough—moisture is sneaky. It seeps behind baseboards, wicks up the inside of drywall like a candlewick, and saturates the insulation you can't even see. These hidden wet spots are ground zero for mold.
A moisture meter is your secret weapon for finding these trouble spots. It’s a simple tool with two prongs that gives you an objective reading of the moisture content inside materials. Probe around and pay special attention to:
- Wall Cavities: Check the drywall at the floor, then a foot up, then two feet up. You’ll be surprised how high water can climb.
- Underneath Flooring: If you can, pull up a corner of the carpet or a piece of flooring to check the subfloor underneath.
- Sill Plates: This is the horizontal wood beam at the very bottom of your wall framing. It sits on the foundation and acts like a sponge.
When you find a wet spot, aim your fans and drying equipment directly at it. You might need to remove baseboards to get better airflow or even drill a few small, targeted holes in the drywall to push dry air into the wall cavity. This level of thoroughness is what makes the difference between a successful dry-out and a major mold problem a few months down the road.
Deciding What to Toss and What to Clean
Once the standing water is gone, you’ve got to face the tough part: sorting through the damage. This is where you have to be ruthless. Holding onto waterlogged items is one of the fastest ways to lead to a future mold problem, and I’ve seen it happen countless times.
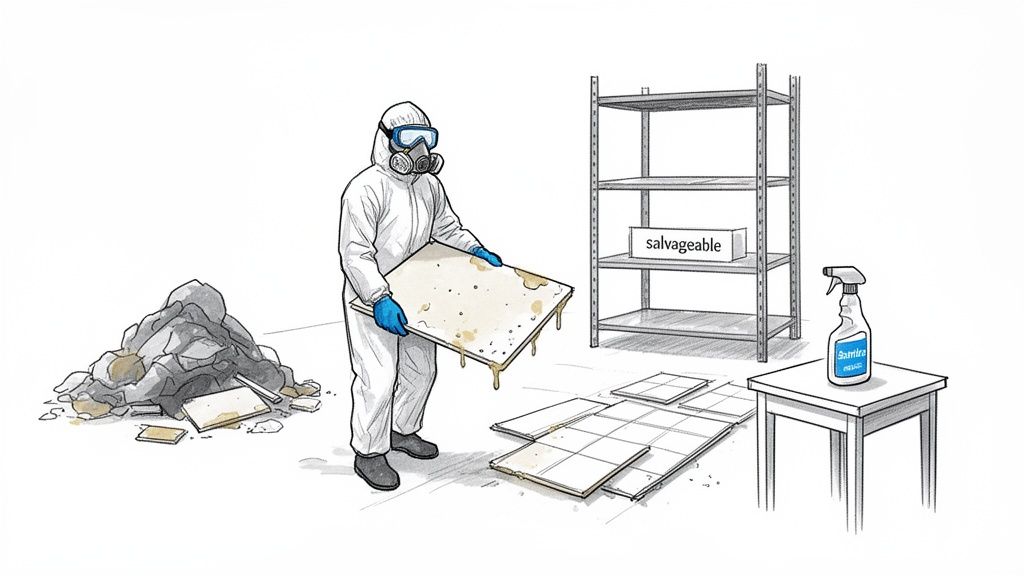
The big question for every single item is whether it's porous or not. Porous materials are basically sponges. Once floodwater—which is often full of dirt, bacteria, and who knows what else—soaks in, you may never truly get them clean or dry.
What Has to Go: The Unsalvageable List
Making the right call here is probably the most critical step you'll take in preventing mold. It hurts to throw things away, but it's necessary.
Here’s a look at what’s almost always a lost cause after a serious soaking:
- Carpet and Padding: Don't even think about trying to save it. The padding underneath is a giant sponge that will become a breeding ground for mold. It has to go.
- Drywall and Insulation: Water wicks up drywall like a paper towel. The insulation behind it traps moisture against the wood studs, creating a perfect hidden environment for mold to thrive.
- Upholstered Furniture and Mattresses: The fabric, foam, and cotton inside are impossible to sanitize properly. You'll never get the contamination out.
- Particle Board Furniture: That cheap bookshelf or desk? It will swell, crumble, and fall apart. It's done.
- Books, Papers, and Cardboard: Once saturated, they're gone. The paper will warp, and mold can start growing within a day.
When you're tearing this stuff out, get it into heavy-duty contractor bags immediately. Don't drag it through clean parts of your house, or you'll be spreading contaminants and mold spores everywhere.
Cleaning and Sanitizing What You Can Save
The good news is that hard, non-porous surfaces are usually salvageable. Things made of solid wood, metal, hard plastics, glass, and tile don’t absorb the nasty stuff. The contamination just sits on the surface, waiting to be cleaned off.
You'll need a two-step approach for these items. First, give everything a good scrub with hot water and a detergent (not ammonia-based) to get rid of all the mud and grime.
Then, it's time to sanitize. A go-to solution that works great is a simple mix of 1 cup of household bleach to 1 gallon of water.
A quick but important safety note: Always wear gloves and get some fresh air moving when you're using bleach. And never, ever mix bleach with ammonia—it creates a dangerous toxic gas.
Let that bleach solution sit on the surface for at least 10 minutes. That contact time is what actually kills the mold spores and bacteria. After that, you can rinse it or wipe it clean.
Your Safety Comes First—No Exceptions
Through all of this, you absolutely have to protect yourself. A flooded area is a hazardous environment. You're dealing with bacteria, potential electrical issues, and millions of airborne mold spores that can cause serious respiratory problems.
Personal Protective Equipment (PPE) isn't optional. It's essential.
Make sure you have, at a minimum:
- An N95 Respirator: A simple dust mask won't cut it. You need an N95 to filter out the microscopic mold spores.
- Safety Goggles: Protect your eyes from splashes and flying debris.
- Heavy-Duty Gloves: Keep the contaminated water off your skin.
- Waterproof Boots: Essential for protecting your feet from whatever is in that muck.
Tearing out soaked drywall, for example, is a messy job that kicks up a ton of dust and spores. If you're going to tackle that yourself, you need to be prepared. For a closer look at that specific task, you can learn more about how to safely remove black mold from drywall in our detailed guide. Protecting your health now prevents much bigger problems later.
Keep Air Moving and Humidity Down for the Long Haul
Once the standing water is gone and the major cleanup is done, it's tempting to breathe a sigh of relief. But don't get too comfortable. The immediate emergency might be over, but the real work of preventing a secondary disaster—a serious mold outbreak—is just beginning.
This is the point where you have to shift from a reactive mindset to a proactive one. Your new enemies are invisible: stagnant air and lingering humidity. Those are the two ingredients mold loves most, and it's your job to make sure it never gets a foothold.
Put Your Home’s Own Systems to Work
The good news is your house is already equipped with some of the best tools for the job. Your HVAC system and exhaust fans aren't just for comfort anymore; they are now your primary defense against moisture.
For the first few days after everything seems dry, run your HVAC system’s fan continuously. You don't need the A/C or heat on, just the fan. This simple action keeps air circulating everywhere, reaching into closets, corners, and behind furniture to stop damp, stagnant pockets from forming.
Get into the habit of using your kitchen and bathroom exhaust fans every single time you cook or shower. And don't just turn them off when you're done—let them run for an extra 20-30 minutes to pull all that humid air completely out of the house.
Why Ventilation Is a Game-Changer
It’s easy to dismiss a small exhaust fan, but its impact is huge. In fact, your home's ventilation can make or break your mold prevention efforts. Don't just take my word for it—research using machine learning has shown that a bathroom fan's airflow is one of the top predictors of indoor mold spore levels.
A 2025 Harvard study that looked at homes flooded by Hurricanes Ida and Ian made a stunning discovery. They found that fans capable of moving at least 50 cubic feet per minute (CFM) cut the predicted mold spore count by up to 35%. The only factor more significant was how deep the floodwater was in the first place. You can read more about how machine learning helps predict mold growth in the Harvard study.
Your goal is to create an environment where moisture has no chance to settle. Think of it like this: mold is an unwanted guest that can't stay if you never let it get comfortable. Constant airflow is like constantly showing that guest the door.
Making active air exchange a priority is the key to long-term success.
Bring in a Dehumidifier for Trouble Spots
Your HVAC handles the big picture, but some parts of a home are just naturally damp. Basements, crawl spaces, and even laundry rooms are notorious for trapping moisture. For these high-risk areas, a good dehumidifier isn't a luxury—it's a necessity.
Make sure you get a unit that's properly sized for the room. A dehumidifier that's too small will run nonstop without ever hitting the target, which just wastes electricity. You want to consistently keep the relative humidity in these spaces between 30% and 50%.
Look for a couple of features that make life easier:
- Built-in Humidistat: This lets you "set it and forget it." The machine will automatically cycle on and off to maintain the humidity level you choose.
- Continuous Drain Hose: A must-have feature. You can run a hose directly to a floor drain so you never have to worry about emptying a heavy, full water tank.
Placing a dehumidifier in the basement is one of the most powerful moves you can make. For more specific tips on that, check out our guide on how to avoid mold in basements. By turning these strategies into everyday habits, you truly win the war against mold.
Knowing When You Need Professional Help
Tackling the aftermath of a flood is a huge job. While you can definitely handle minor leaks yourself, some situations are just too big—or too hazardous—to go it alone. Recognizing when you're in over your head isn't giving up; it's the smartest move you can make for your property and your family's health.
Trying to manage a major flood without the right gear and training can easily backfire, leading to serious structural damage or a stubborn mold problem that just won't go away. The line between a DIY cleanup and a job for the pros really comes down to three things: the type of water, how long it’s been there, and the sheer scale of the mess.
Red Flags That Demand a Professional Response
Some situations are immediate deal-breakers. If you see any of these signs, don't "wait and see"—your first call should be to a certified restoration company.
- Contaminated Floodwater: All water is not created equal. If the flood came from a sewer backup, an overflowing toilet with solid waste, or from an outside storm surge, you're dealing with highly contaminated water. This is what we in the industry call Category 2 or 3 water, and it’s a nasty soup of bacteria, viruses, and chemicals you don't want to mess with.
- Water Standing for Over 48 Hours: Once water has been sitting for more than two days, the clock is ticking. The risk of aggressive mold growth and serious contamination shoots through the roof. The standing water itself becomes a breeding ground for microorganisms, turning your home into a hazardous environment.
- Mold Growth Exceeding 10 Square Feet: If you've found a patch of mold bigger than a small doormat (roughly a 3×3 foot area), the visible problem is likely just the tip of the iceberg. Trying to clean up a large mold colony without proper containment can release millions of spores into the air, spreading the problem everywhere.
Dealing with contaminated water requires specific training and protective gear. To really get a handle on the risks, you can learn more about the dangers of Category 3 water damage and see why it’s a job best left to the experts.
The Professional Advantage: Specialized Equipment and Techniques
Certified professionals, especially those with IICRC credentials, come equipped with tools and knowledge the average homeowner simply doesn't have. They don’t just dry what you can see; they use a scientific approach to make sure your home is truly, structurally dry.
They’ll use tools like moisture meters and thermal imaging cameras to pinpoint hidden water trapped behind walls, under floorboards, or in insulation. Their commercial-grade air movers and low-grain refrigerant dehumidifiers create a powerful drying vortex that pulls moisture from deep within materials—something a box fan from the hardware store could never accomplish.
Calling in a professional team is about getting the job done right the first time. They have the training to remove the water, stop mold in its tracks, and do it all safely, protecting your family from exposure to dangerous contaminants.
Help with the Insurance and Documentation Process
Beyond the physical cleanup, a good restoration company can be a significant ally when dealing with your insurance company. The claims process is often confusing and stressful, and it's the last thing you want to deal with after a flood.
A reputable company can provide the meticulous documentation your insurance adjuster may need to see.
- Detailed moisture readings and reports
- Photographic and video evidence of all damage
- A complete inventory of unsalvageable items
- Clear, itemized estimates for all restoration work
This level of detail gives your claim the factual backbone it needs, helping the adjuster understand the true scope of the damage. While no one can guarantee what your policy will cover, their professional assessment gives you a better chance at a smooth and fair claims process. That support alone can lift a massive weight off your shoulders.
Got Questions About Post-Flood Mold? Here Are Some Straight Answers
After a flood, your head is probably swimming with questions. It's a stressful, chaotic time, and you're forced to make big decisions fast. Let's cut through the noise and tackle some of the most common things homeowners worry about when it comes to mold.
Getting clear, practical answers is the first step toward taking back control.
How Fast Does Mold Really Grow?
This is probably the number one question I get, and for good reason. The answer is what drives the urgency of the entire cleanup process. Mold spores are literally everywhere, all the time, just waiting for a little moisture to spring to life.
Once water is introduced, you're on the clock. Mold can start growing in as little as 24 to 48 hours. Here in a warm climate like Phoenix, that process can happen even faster. This isn't just a guideline; it's a hard biological deadline. That's why getting the water out and starting the drying process immediately is absolutely critical.
Can't I Just Kill It With Bleach?
Ah, the bleach myth. It’s one of the most persistent and dangerous misconceptions in home cleanup. While bleach is a great disinfectant for hard, non-porous surfaces like a bathtub or a tile floor, it's the wrong tool for dealing with mold on materials like drywall, wood, or carpet.
There are a couple of big reasons why bleach fails:
- It Doesn't Get to the Root: Think of mold on drywall like a weed. The visible stuff on the surface is just part of the problem. The "roots," called mycelium, grow deep inside the porous material. Bleach can't penetrate that far, so it just kills the surface mold, leaving the root system to regrow.
- It Can Actually Make Things Worse: What's the main ingredient in household bleach? Water. When you soak drywall with a bleach solution, you're often just feeding more water to the mold's hidden roots.
- It's Nasty Stuff: Bleach gives off harsh fumes and can create toxic gas if accidentally mixed with other cleaners, like ammonia.
Using bleach on drywall is like giving a weed a haircut—you’re not getting rid of the root. When it comes to porous, moldy materials, the only real solution is physical removal.
What Actually Happens During a Professional Remediation?
Calling in the pros can feel like a big step, so it helps to know what you’re signing up for. A certified remediation company doesn't just show up and start spraying things. They follow a strict, methodical process to make sure the mold is gone for good and your home is safe.
While every job is different, here’s a look at the typical stages:
- Damage Assessment: The first thing a certified pro will do is a thorough inspection. They'll use tools like moisture meters and thermal imaging cameras to find out exactly how far the water traveled, often uncovering moisture hidden behind walls.
- Containment: This is crucial. The team will seal off the affected area with heavy plastic sheeting and set up special "negative air" machines. This creates a vacuum that prevents microscopic mold spores from escaping and contaminating the rest of your house during the removal process.
- Removal of Contaminated Materials: Now the real work begins. Wearing full protective gear (PPE), technicians will cut out and bag all materials that are moldy or too water-damaged to save. This typically includes drywall, insulation, carpeting, and baseboards.
- Drying Everything Out: Once the bad stuff is gone, they bring in the big guns: powerful, commercial-grade air movers and dehumidifiers. They run this equipment until the wood studs and other structural materials are back to acceptable moisture levels, checking constantly with their meters.
- Cleaning and Disinfecting: Every remaining surface in the contained area—from wood framing to concrete slabs—is meticulously cleaned with special antimicrobial agents to kill any lingering spores. They often use a HEPA vacuum as well to capture any stray particles.
- Clearance Testing: To prove the job was done right, many projects conclude with a third-party clearance test. An independent industrial hygienist comes in to take air samples and confirm that your home's air quality is back to a safe and normal level.
It’s a detailed, science-based process. It's not just about cleaning up a mess; it's about restoring your home's health and giving you peace of mind.
When disaster strikes, you need a team you can trust to respond immediately and handle the job right. Restore Heroes is IICRC-certified and ready 24/7 to help you navigate water damage and prevent mold. For an onsite inspection and expert guidance, visit us at https://www.restoreheroesaz.com.