
You've mopped the floor, the towels are in the wash, and the room looks normal again. That's the moment many homeowners relax. It's also the moment a water damage and mold inspection matters most, because water rarely stays where you first saw it.
Think of moisture like water in a houseplant. The top of the soil can look dry while the roots below stay soaked. Walls, floors, and cabinets work the same way. An inspection finds where water went, how long it's been there, and whether materials can dry or need to come out. The mold species matters less than those three facts.
Why the First 48 Hours Decide the Outcome
Say a supply line lets go under a bathroom sink on a Friday evening. You shut off the valve, towel up the water, and run a box fan. By Monday the tile feels dry and the cabinet looks fine.
Underneath, though, water has soaked into the subfloor and the bottom plate of the wall. You can't see it, and the fan never reached it. That hidden gap between looks dry and is dry is where mold gets its start.
The U.S. Environmental Protection Agency mold course advises drying wet building materials and furnishings within 24-48 hours to help prevent mold growth, and the CDC similarly recommends drying wetted materials within 48 hours or removing them when drying isn't feasible. That's a guideline, not a guarantee. Mold can start sooner on some materials and later on others, depending on temperature, porosity, and airflow.
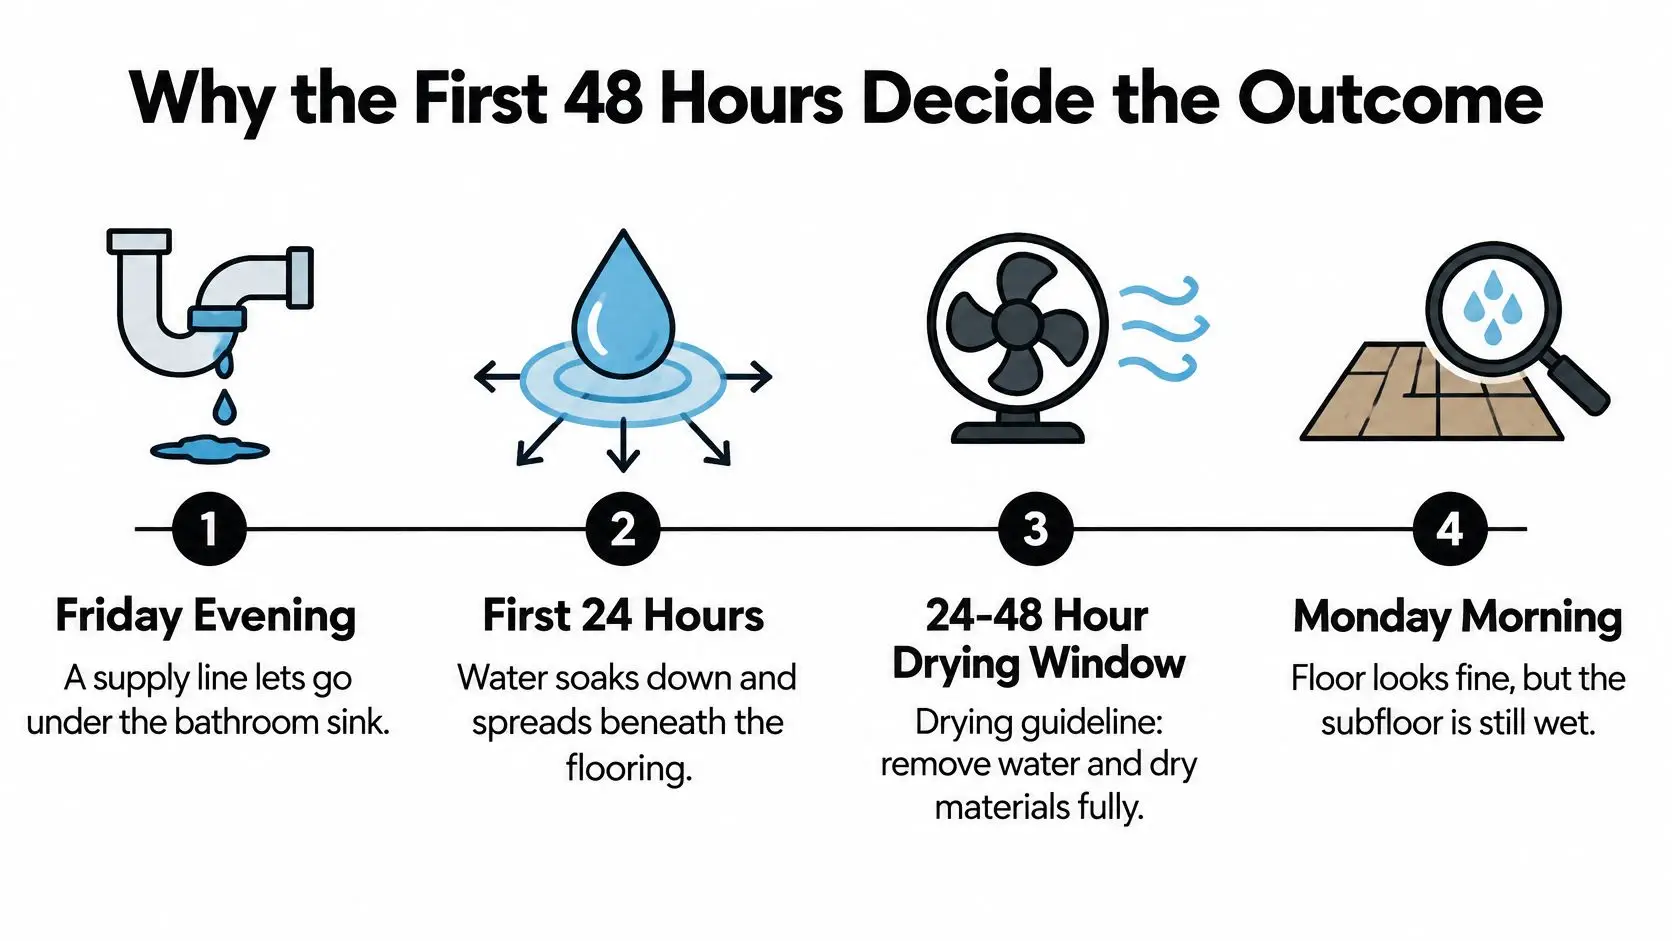
Water damage timeline from loss to inspection
| Time since loss | What is happening | What the inspector does |
|---|---|---|
| 0-24 hours | Standing water and wet surfaces; drying is most effective now | Stop the source, extract water, start drying and take first moisture readings |
| 24-48 hours | Water moves into drywall, insulation and subfloor; mold can begin on wet materials | Map moisture beyond visible damage and confirm drying progress |
| 48-72 hours | Porous materials wet this long are often past ordinary drying | Decide which materials are removed rather than dried |
| After 72 hours | Visible growth may already be present and spread risk rises | Full assessment, containment and a remediation scope |
In your first hour, do three things. Stop the water at the shutoff if you can do it safely. Photograph everything before you move it. Note the time you found the leak, because the inspector's whole timeline starts from that note.
Signs of Hidden Water and Mold to Watch For
This problem is common, not rare. A CDC-supported evidence summary citing a World Health Organization review concluded dampness and mold affect an estimated 10%-50% of indoor environments across regions including Europe, North America, Australia, India, and Japan. The same summary reported a 2007 meta-analysis of 33 studies associated household dampness and mold with approximately 30%-50% higher risks for several asthma outcomes.
No single sign proves hidden mold. Inspectors look for a cluster.
What you can see, smell, and feel
- Musty odor that returns: It fades after cleaning, then comes back in the same room or cabinet.
- Brown or yellow rings: Stains on ceilings, walls, or baseboards often mark repeated wetting.
- Bubbling or peeling paint: Moisture behind the surface pushes the finish loose.
- Soft drywall: It dents easily, crumbles at the base, or feels spongy near the floor.
- Cupped or buckled flooring: Boards lift at the edges or vinyl bubbles after water gets underneath.
- Condensation: Fogged windows or sweating cold pipes point to excess indoor moisture.
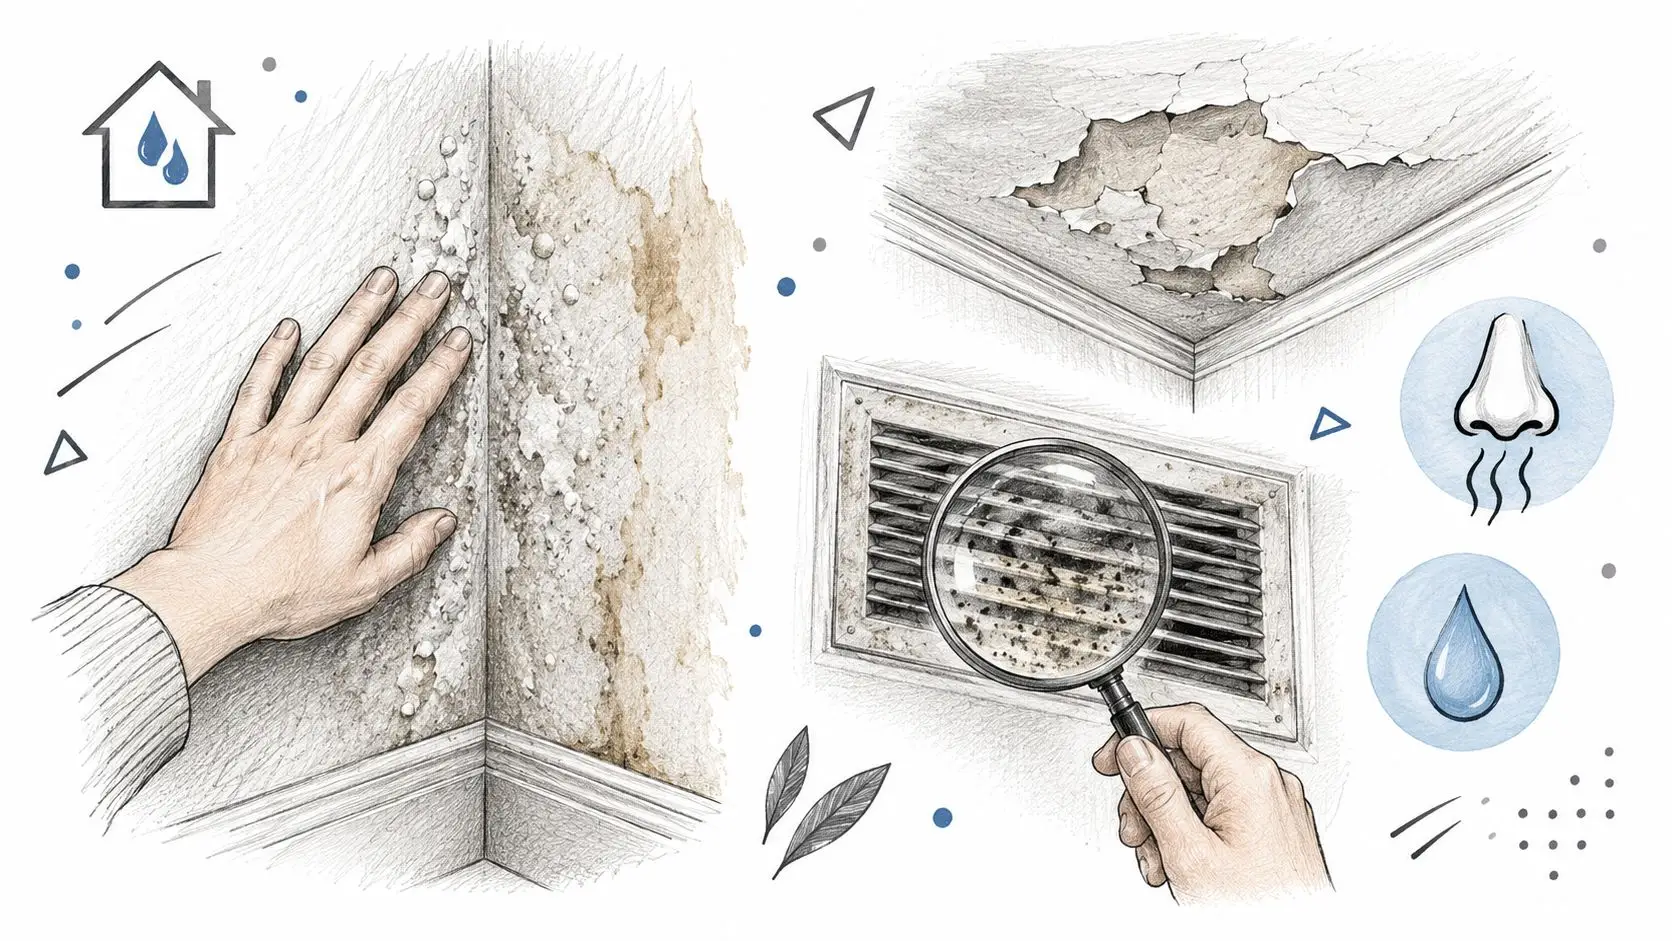
A sudden rise in your water bill with no visible leak also belongs on the list, along with any history of leaks or flooding in that room. If you're chasing that kind of hidden supply problem in Texas, a resource on slab leak repair in San Antonio explains how plumbers locate leaks under a foundation.
In Phoenix homes, check three quieter sources too. Air-conditioning condensate lines clog and overflow into ceilings and closets. Slab and ceiling leaks can run for weeks inside assemblies. Unused rooms with closed vents let humidity build unnoticed. If you suspect growth inside a wall assembly, these common warning signs of mold in walls can help you describe what you're seeing.
Tell the inspector about occupant patterns too, such as a stuffy nose, coughing, or eye irritation that eases when you leave the house. That's useful history. It isn't a diagnosis, and an inspector shouldn't treat it as one.
Tools Inspectors Use and What Their Readings Mean
An inspector measures water the way a doctor measures temperature. The number matters only when it's compared with a normal reading from the same kind of material in a dry part of your home. That comparison point is called a dry reference.
A pin meter is like a meat thermometer. It probes the material itself. A pinless meter is more like a stud finder, scanning across a surface quickly. An infrared camera works like night-vision for temperature, showing cool patches where evaporation may be happening. None of these tools sees mold. They find the moisture mold needs.
Humidity in plain terms
Relative humidity is how full the air is with water vapor compared with how much it could hold at that temperature. The ASHRAE handbook chapter on moisture and mold identifies approximately 40-60% relative humidity as a preferred range for health and comfort, while noting mold can generally be avoided when surface relative humidity above 80% is limited to short periods. It also notes 100% relative humidity can produce condensation.
That word "surface" is key. Your hallway air might read 45% while the inside face of a wet wall cavity sits far higher. That's why a comfortable, dry-looking room can still hide growth behind cabinets or under flooring.
Inspection tools and what their readings mean
| Tool | What it measures | What the reading tells you | Main limit |
|---|---|---|---|
| Pin moisture meter | Moisture content in wood, drywall and framing by probing | Much higher than a dry reference means wet material | Leaves small holes; reads only at the probe depth |
| Pinless moisture meter | Moisture near the surface without holes | Quick mapping of floors and walls | Shallow reach; less precise on some materials |
| Thermo-hygrometer | Air temperature and relative humidity | Indoor RH near 40-60% is typical; sustained surface RH above 80% favors mold | Shows air, not moisture inside materials |
| Infrared camera | Surface temperature differences | Cold patches can mark evaporating water | Cannot confirm wetness alone; needs a meter |
| Borescope | Inside of a wall or floor cavity through a small opening | Shows wet insulation, staining or growth | Disturbance can spread mold if handled poorly |
If you want to follow along during a visit, this plain-language guide to interpreting moisture meter readings explains how inspectors compare wet readings with dry ones.
A meter number by itself means little. The same number can be normal for one material and soaked for another, which is why the dry reference comes first.
Ask the inspector to show you both readings side by side. When a wall base reads far above an undamaged wall of the same construction, you've found a real difference, not a sales pitch. When readings match, that material is likely dry, whatever the stain looks like.
How Moisture Mapping Works Step by Step
Water in a building behaves like a stain spreading through a paper towel. The wettest spot isn't always where the drip landed, and the visible edge isn't the true edge. Moisture mapping follows that wet edge outward until readings return to normal.
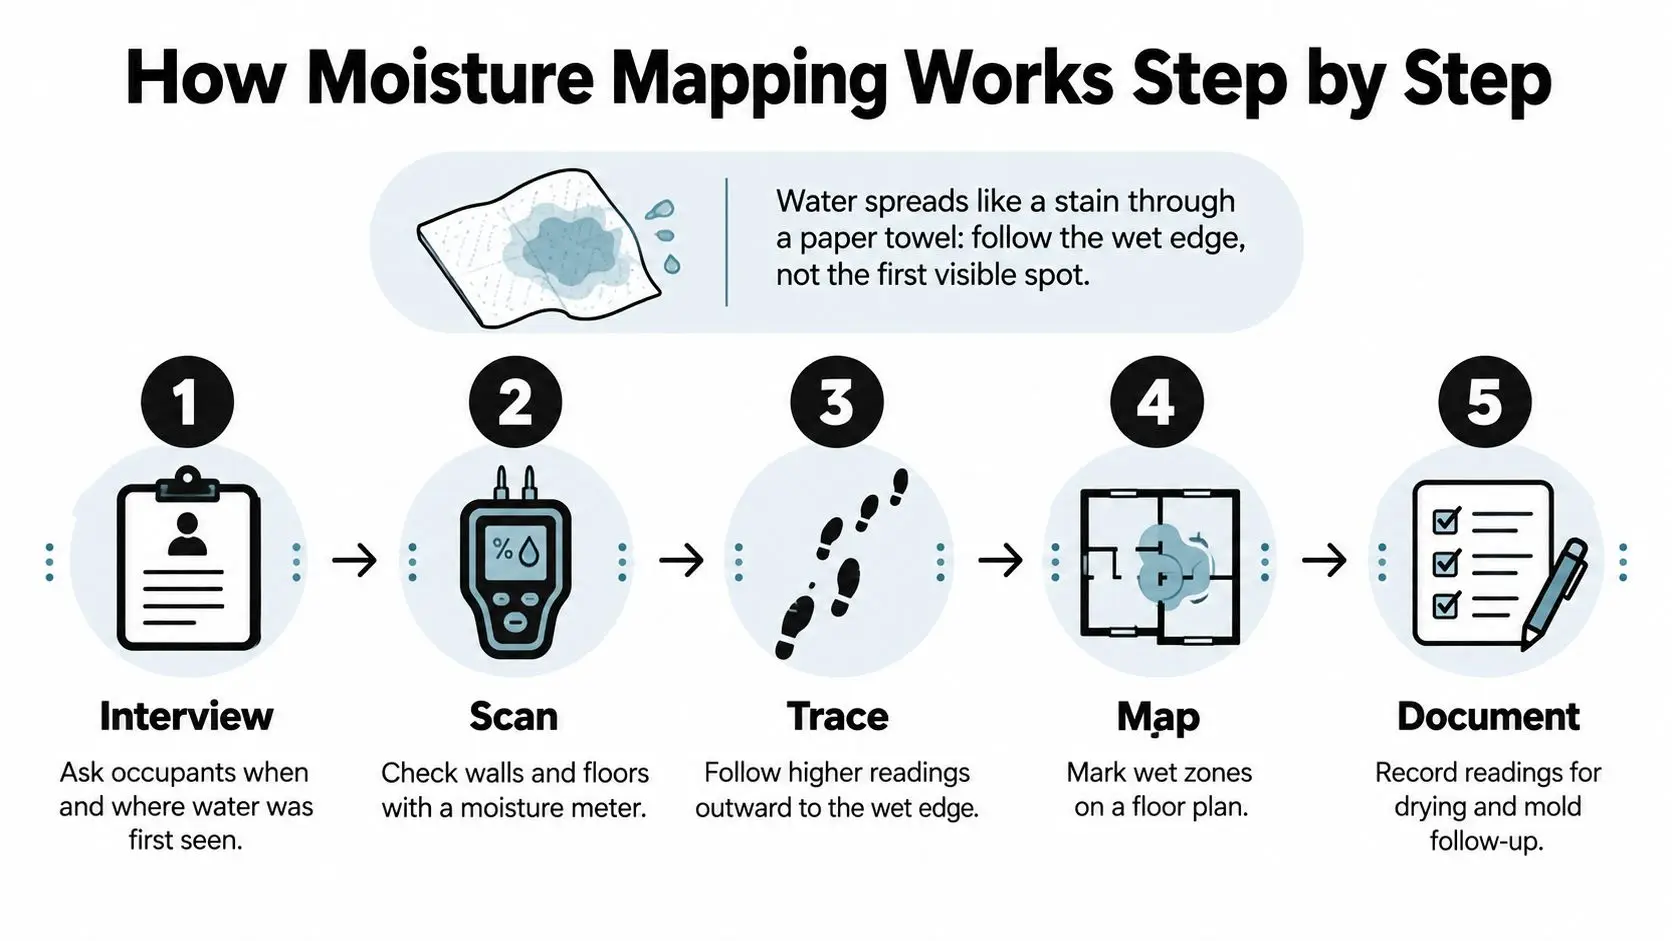
The mapping procedure
Confirm the source and stop active water. Mapping a moving leak wastes everyone's time, since the wet area keeps growing. The common slip is drying before a slow supply leak is actually repaired.
Record the time since the loss and the water type. Clean supply water and sewage backup call for different safety and cleaning steps. Guessing the start time later weakens both the drying plan and any claim file.
Take dry reference readings in an undamaged area. Use the same material, such as drywall in the next room. Skipping this step leaves every later number open to argument.
Start at the source and work outward in rings. Readings should fall as you move away, then level off at the dry reference. Stopping at the visible stain misses water that traveled under flooring.
Probe floors, baseboards, cabinet bases, and wall bottoms at set spacing. Water collects low and hides behind trim. The cabinet kick plate is a classic miss, because the cabinet front looks fine while the base underneath stays wet.
Check cavities where readings stand out. A borescope or small inspection hole shows wet insulation or staining inside the wall. Opening cavities everywhere without a reason adds damage, so readings decide where to look.
Log air temperature and relative humidity in each room. Drying equipment changes these numbers, and the log shows whether it's working. One reading at the front door doesn't describe a closed bathroom.
Mark a moisture map with readings, date, and location. Tape marks or a floor-plan sketch let the next visit check the exact same points. Memory isn't a record.
Re-read daily until materials reach the dry reference. Drying is finished when numbers match, not when surfaces feel dry. Pulling equipment early because the room feels better is how subfloors stay wet.
Mold Testing Types and When Each One Helps
Many homeowners assume an air test is the obvious next step. It often isn't. A lab report can name spores, but it can't tell you where the water is hiding or whether your wall has dried.
The EPA mold guide for schools and commercial buildings states that when visible mold is present, sampling is usually unnecessary, and that no federal mold-spore limits exist for determining whether a building is compliant. CDC and NIOSH guidance in that same discussion reports finding and correcting dampness is more effective for preventing health problems than collecting and analyzing indoor-air samples.
That doesn't make testing useless. It makes testing a tool for specific questions.
Mold testing methods compared
| Method | What it shows | Best used when | Main limit |
|---|---|---|---|
| Visual and moisture assessment | Growth location and the moisture pathway | Almost always the first step | Cannot name a species |
| Surface swab or tape lift | Mold on one specific surface | Checking a suspected spot | A snapshot of one place |
| Air sample | Spores in the air at one moment | A specific question, such as an occupant concern | Counts change hour to hour; no federal limits |
| Bulk material sample | Growth on a removed piece of material, analyzed in a lab | Confirming growth on removed material | Requires removing material; destructive |
What a lab report cannot decide
A species name doesn't by itself establish your health risk, your remediation scope, or your insurance coverage. Two homes with the same species can need very different work, because one has a small patch on tile grout and the other has wet insulation across a whole wall. Location and extent drive the job.
There's also a handling caution. Investigating hidden mold means disturbing materials, and careless disturbance can spread spores into clean areas. That's another reason inspectors start with meters and small, targeted openings rather than tearing into walls to collect samples.
If you're comparing options, these mold testing services and what they include show how testing fits inside a broader inspection.
Practical rule: Ask where the water is, how far it spread, and whether the structure has dried. If a test doesn't help answer one of those, you probably don't need it yet.
Which Materials Dry and Which Must Be Removed
A wet sponge can be wrung out and used again. A wet paper bag can't be made whole, even after it dries. Building materials sort the same way. Dense, solid materials often dry in place. Soft, porous materials hold water deep inside, and mold can grow through them where cleaning can't reach.
Time matters as much as material. The EPA remediation guidance on cleanup methods and materials notes wet carpet and backing should be dried within 24-48 hours using water extraction, reduced humidity, and fans, while upholstered furniture may be difficult to dry completely within 48 hours. It also directs owners to remediation guidance when mold is present or materials have been wet for more than 48 hours, rather than assuming ordinary drying is sufficient.
Common materials and their likely outcome
| Material | Usual approach | Drying window | Signs it may need removal |
|---|---|---|---|
| Carpet and pad | Water extraction, reduced humidity and fans | Within 24-48 hours | Wet longer than 48 hours or contaminated backing |
| Hardwood flooring | Dehumidifiers, gentle heat and fans; caution with finish | Start immediately; monitor daily until readings match the dry reference | Cupping that does not recover or loose boards |
| Drywall | Dry cavity; pull back paneling where needed | Within 48 hours where possible | Swollen, soft, seam-damaged or moldy |
| Fiberglass insulation | Usually not dried in place | No reliable in-place drying window once saturated | Wet insulation is usually removed |
| Upholstered furniture | Clean and dry with airflow | Often hard to dry fully within 48 hours | Heavy saturation or visible growth |
| Wood framing | Dry in place and monitor readings | Until readings match the dry reference | Soft wood or ongoing high readings |
Drywall confuses people most, because the painted face can look sound while the paper backing inside the cavity stays wet and feeds growth. This explanation of what happens when drywall gets wet walks through why inspectors sometimes cut a small section at the base.
Removal isn't a failure of drying. For saturated insulation or swollen drywall, removal is often the faster, cheaper path, because it opens the cavity so framing behind it can dry out.
What the Written Report Contains and Remediation Next Steps
A verbal "it's wet over there" won't help you next week. A written report from a water damage and mold inspection should let you, a contractor, a property manager, or an insurer see exactly what was found and what changed.
What to request in the report
- Source and time of loss: Where the water came from and when it started or was found.
- Water category: Whether it was clean supply water or contaminated water needing extra safety steps.
- Affected assemblies: Each wall, floor, ceiling, and cabinet base that got wet.
- Moisture map: Readings by location and date, with dry-reference values beside them.
- Air logs: Indoor temperature and relative humidity recorded during drying.
- Visible growth locations: Noted separately from suspected hidden moisture.
- Dry versus remove list: Each material assigned to one outcome, with the reason.
- Verification readings and dated photos: Proof of the final condition at each marked point.
The remediation sequence
- Confirm the source is stopped or repaired. No drying plan outruns an active leak.
- Begin drying to the scope and log readings at each visit. Equipment placement follows the moisture map.
- Remove materials marked for removal under containment. Plastic barriers and controlled airflow keep spores out of clean rooms.
- Clean or treat surfaces that can be salvaged. Solid framing and hard surfaces usually fall here.
- Re-read every marked location until it matches its dry reference. Feel and appearance don't close the job.
- Record clearance readings and file them with the report. That closing record is what you hand to an insurer or a future buyer.
An inspection itself is often completed in one visit. Drying verification can take several days, depending on materials, the size of the wet area, and access to cavities. Anyone who promises a fixed finish date before taking first readings is guessing.
What Inspection Costs and How Insurance Fits In
There's no honest single price for every property, since the work changes with what the water did. The useful question is what drives your bill up or down.
What changes the cost
- Size of the affected area: One bathroom needs fewer readings, less equipment, and fewer drying days than a whole first floor.
- Hidden spread: Opening cavities and removing wet insulation or drywall adds labor compared with surface drying.
- Water type: Sewage or other contaminated water needs extra cleaning and safety steps that a supply line leak doesn't.
- Visible mold: Once growth is found, containment and remediation join the scope.
- Response timing: Same-day extraction often limits removal, while a week of delay can push materials past drying.
- Documentation: Photos, logs, and moisture records for a claim take time to build properly.
Ask for a written estimate that lists inspection, moisture mapping, drying, and any testing as separate lines. That way you can see what you're paying for and question a line you don't need. These water damage insurance claim tips explain what adjusters typically want to see in that file.
On coverage, FEMA guidance on mold and flood insurance states National Flood Insurance Program policies generally do not cover mold damage, while FEMA's Individuals and Households Program may provide Home Repair funds for cleanup, removal, or remediation of disaster-caused mold. FEMA also advises documenting damage and consulting a flood adjuster or insurer before signing a cleaning or remediation contract to confirm whether proposed services are covered.
Coverage depends on your policy, the cause of loss, your documentation, and program rules. No provider can promise that your insurer will pay, and you should be cautious with anyone who does.
When to Call a Pro and Confirm Your Next Step
Some small, clean-water spills on tile dry safely with towels and a fan. Call a professional promptly when any of these apply.
- Water has sat more than 48 hours, or you don't know when the leak started.
- Mold covers more than a small area. EPA's rule of thumb is about 10 square feet.
- Sewage or other contaminated water is involved.
- The leak is hidden behind walls, under floors, or inside a ceiling.
- An occupant has asthma, a mold allergy, a weakened immune system, or chronic lung disease.
This short video shows what an inspector looks for during an onsite visit.
The CDC and NIOSH overview of mold health problems reports exposure may cause no health effects or may produce symptoms such as a stuffy nose, sore throat, coughing, wheezing, burning eyes, or skin rash, while people with asthma or mold allergies can experience severe reactions. Bring symptoms to a healthcare provider. An inspection documents building conditions. It doesn't diagnose anyone, and it can't promise a health outcome.
Your next four steps
- Call a licensed, bonded, and insured provider with IICRC-certified technicians.
- Ask for an onsite inspection that ends in a written moisture map, not just a verbal summary.
- Share your time-of-loss note and photos so the timeline is documented from the start.
- Confirm coverage with your insurer before signing any remediation contract.
Here's an inspector checking a water-damaged ceiling with a meter during that kind of visit.
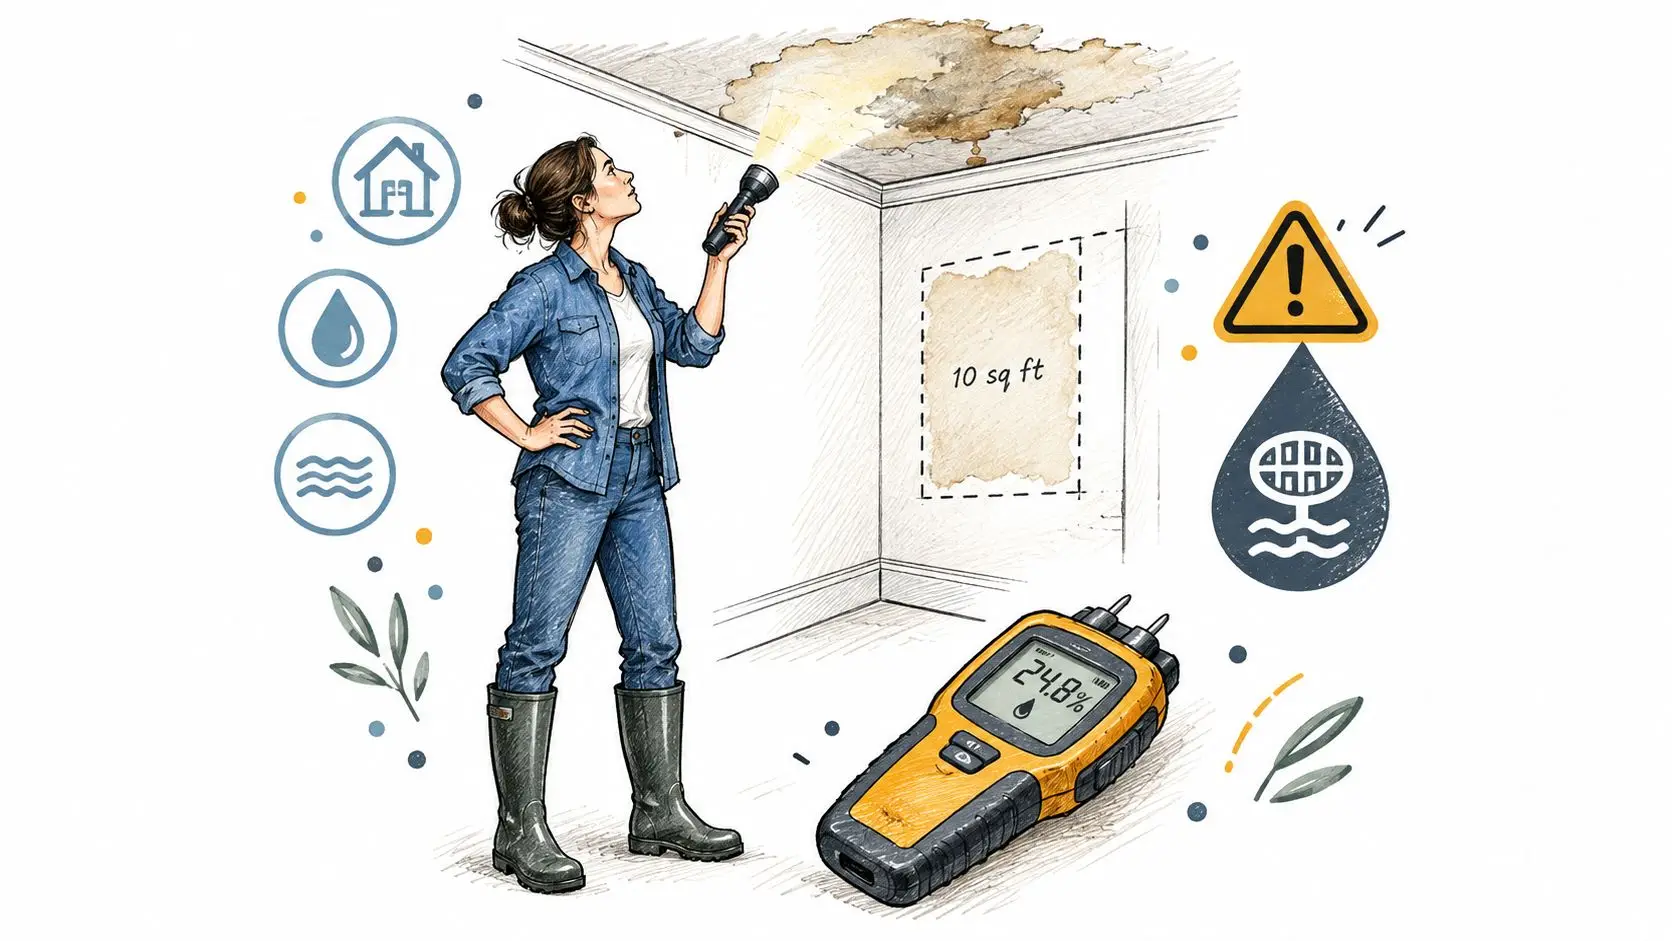
Restore Heroes offers onsite inspections and moisture mapping in the Phoenix area, while coverage decisions rest with your insurer and your policy.
If you're within that first 48 hours, or you suspect water is still hiding in a wall or floor, don't wait for a stain to settle the question. Restore Heroes provides water damage and mold inspection with onsite moisture mapping across the Phoenix area, so you get readings and a written record instead of guesswork. Visit Restore Heroes to request an inspection and confirm your next step.