
You hear water running, but every faucet is off. Then you spot a spreading puddle beneath a cabinet or a dark patch on the ceiling. If you're searching for an emergency plumber, burst pipe repair starts with a safer, simpler task: stop incoming water without putting yourself at risk.
Treat the first hour as two jobs happening together. Control the leak, then preserve the photographs, notes, and moisture records that will help the plumber, restoration crew, and insurer understand what happened. You don't need to diagnose everything before calling.
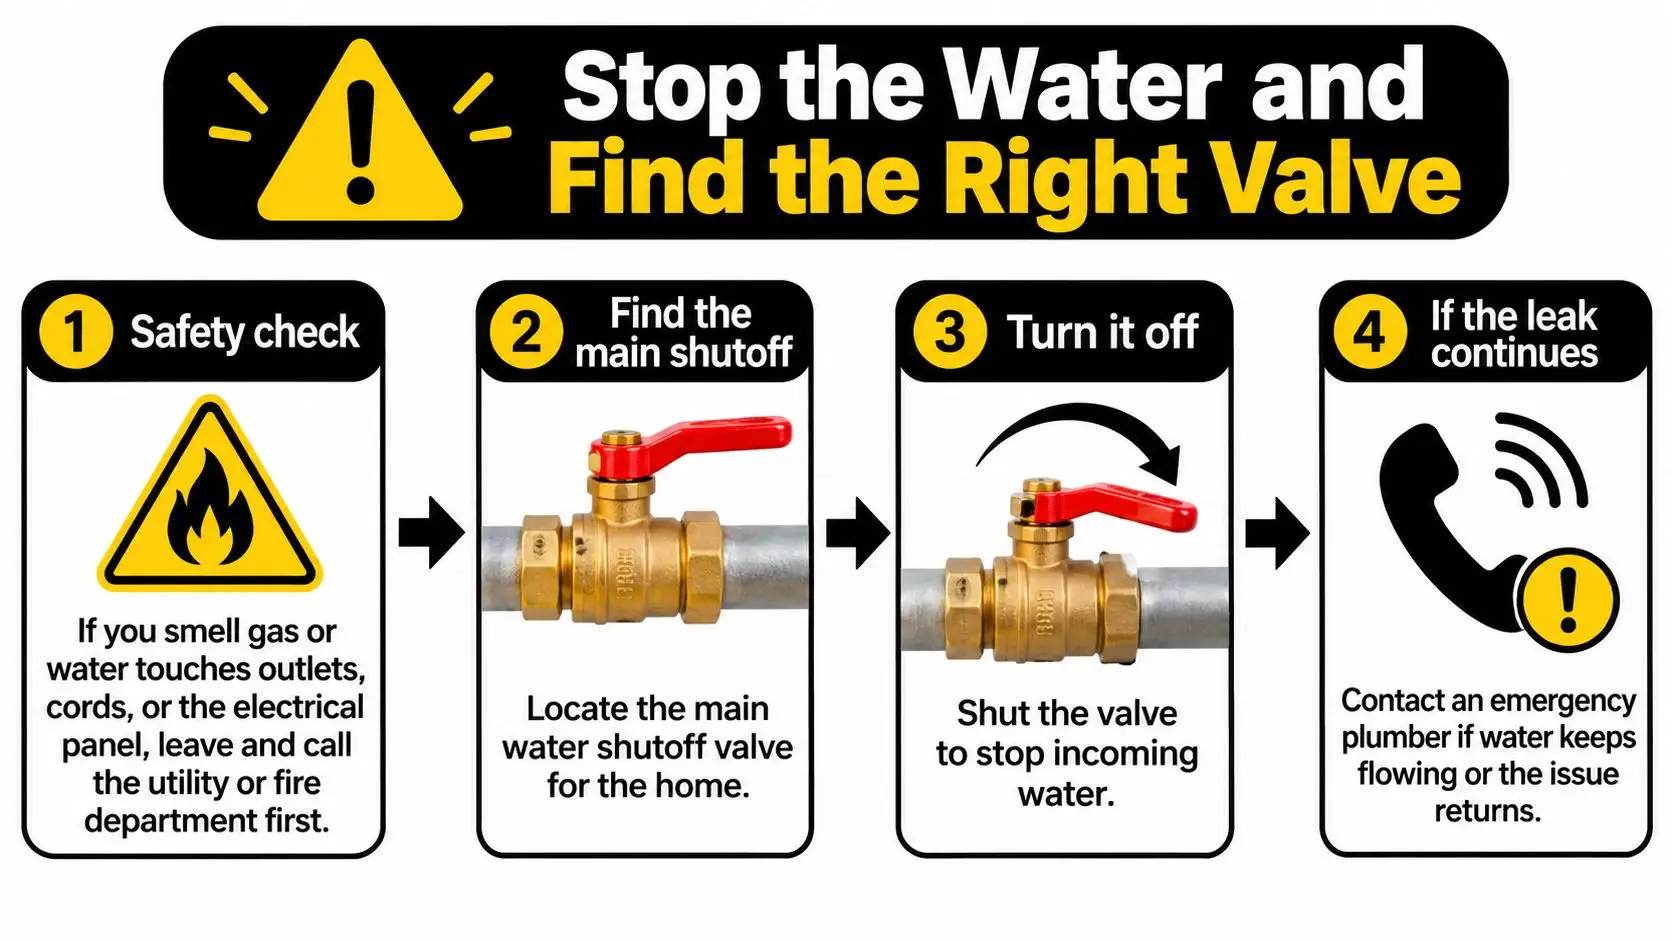
Stop the Water and Find the Right Valve
If you smell gas, or water touches outlets, cords, or the electrical panel, leave and call the utility or fire department first. Don't cross standing water to reach a breaker, touch wet switches, or operate a gas control when you suspect a gas leak. Keep people away from sagging ceilings and flooded rooms.
Shut off the supply safely
Follow this sequence only where access is safe. If another adult is available, have them call for help while you isolate the water.
- Find the main shutoff. Look where the water line enters the house, near the meter, or in a garage or utility closet. Turn a wheel-style handle clockwise until it stops without forcing it. For a lever-style valve, move the handle perpendicular to the pipe.
- Isolate a leaking water heater. Close its cold-water inlet and turn off its energy supply using the appropriate breaker or gas control, provided you can reach it safely. Don't drain the tank or operate its relief valve yourself.
- Open the lowest accessible cold-water faucet. This releases pressure and lets water remaining in the pipes drain through a fixture rather than the break.
- Use a local valve if the main is difficult to reach. Close the valve under the sink, behind the toilet, or serving the refrigerator, then reach the main when possible. Don't pull a heavy refrigerator through water to find its valve.
- Disconnect power to affected rooms only from a dry, safe panel. If the panel or your route is wet, leave electrical isolation to the utility or emergency responders.
- Contain and document. Place towels, buckets, and tarps without approaching electrical hazards. Lift valuables off the floor, then photograph the failed pipe, escaping water, and affected materials before cleanup changes the scene.
- Call an emergency plumber and check the flow. With fixtures off, look for continued meter movement. Report movement or persistent flow, which may mean the valve hasn't isolated the failure.
For help identifying the control, use our emergency water shutoff location guide. WhatsDemand's guide to how to turn off your water also explains the shutoff process.
Keep this visual sequence handy while someone locates the valve.
Match the leak to the valve
Burst pipe locations, signs and the first valve to close
| Where it happens | Signs you will notice | First valve to close |
|---|---|---|
| Water heater | Puddle at the base, dripping relief valve | Heater cold-water inlet valve, then power off |
| Under-sink or toilet supply line | Wet cabinet floor, spray from a fitting | Local shutoff under the sink or behind the toilet |
| Ice maker or fridge water line | Damp floor in front of the fridge | Local valve behind the fridge, or the main shutoff |
| Exposed pipe in garage, attic or crawlspace | Hissing, dripping, ceiling stain | Main shutoff, then drain the lowest faucet |
| Wall or slab line | Damp drywall, warm or soft floor, higher water bill | Main shutoff, then wait for plumber leak detection |
| Main supply line | Water flowing with every fixture off, low pressure | Main shutoff at the meter or house entry |
A fixture valve isolates one fixture, not necessarily an entire room. When the source is uncertain, close the main and leave it off until the plumber confirms the repair. If the break is upstream of the house valve, contact the water utility rather than forcing utility-owned equipment.
Practical rule: Don't delay shutoff to take photographs. Stop the water first, then document what you can safely reach.
Phoenix's warm weather doesn't eliminate freeze-related failures in exposed plumbing. Illustrating the risk outside traditionally cold regions, State Farm reported more than $472 million in frozen-pipe claim payments in 2021, with Texas its highest-loss state that year. A rupture can mean damaged building materials, lost belongings, mold risk, and time away from home.
When to Call an Emergency Plumber and What to Ask
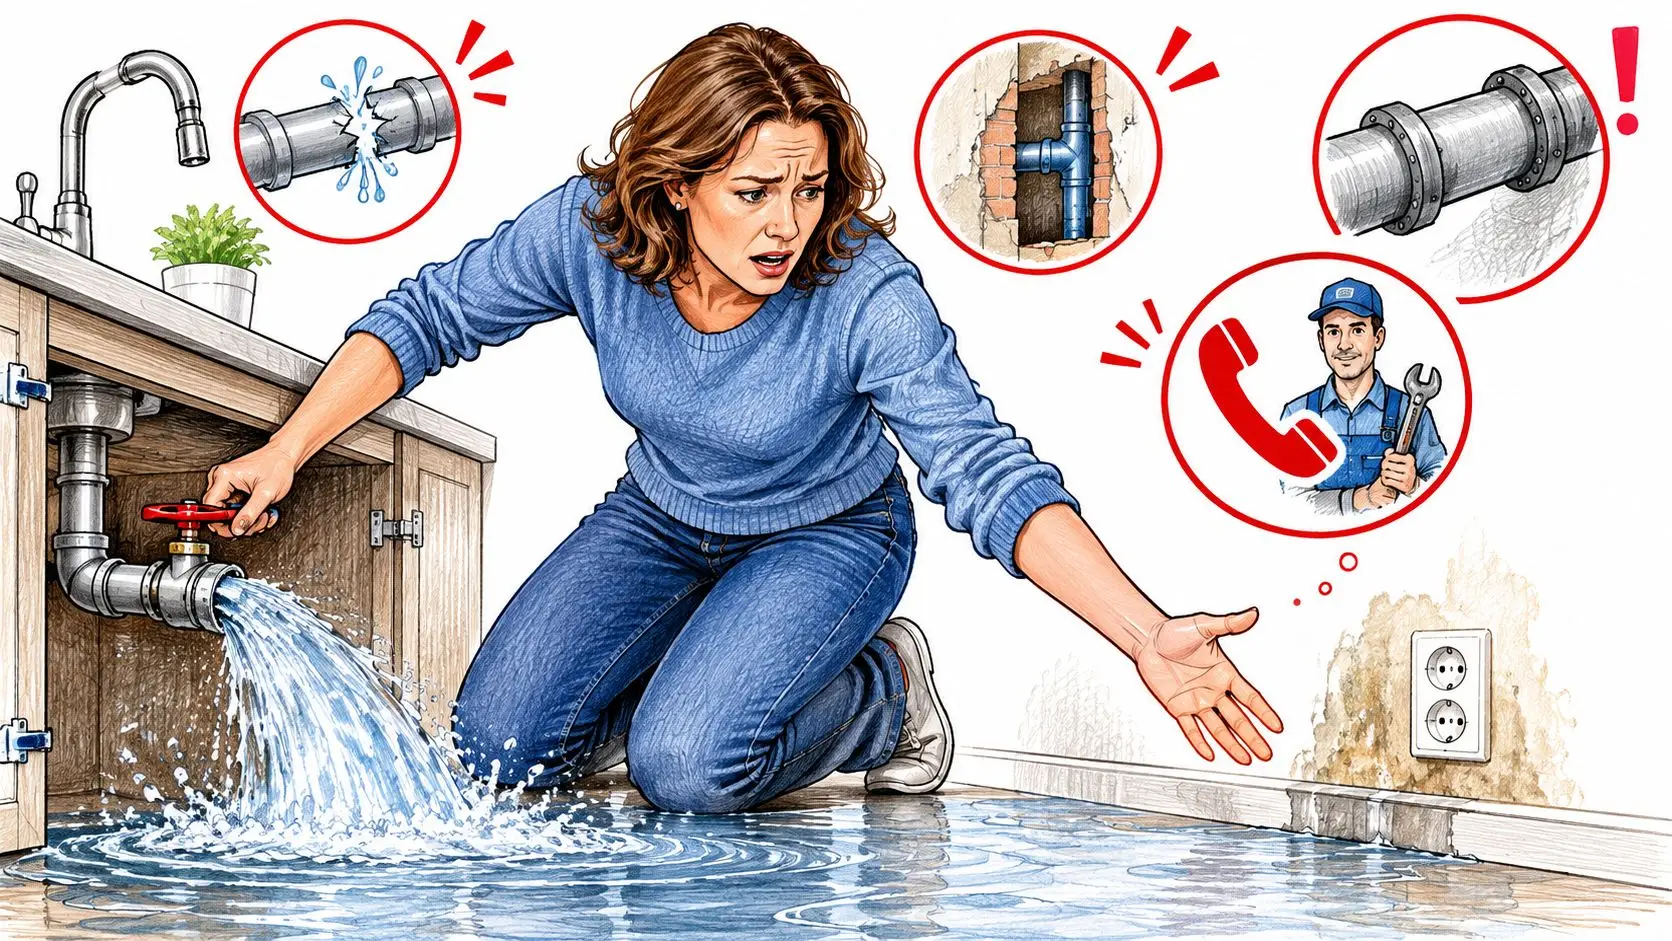
Call immediately if water won't stop, a concealed line has failed, the main supply is leaking, or a repaired leak returns. Water near outlets or the panel requires emergency safety assistance first, followed by plumbing work once responders say access is safe. Don't wait for a visible wall opening to confirm a suspected hidden burst.
Make calls from a dry location, away from the affected room.
Questions to read aloud
Tell the dispatcher where the water appeared, which valve you closed, whether flow continues, and whether electrical hazards are present. Then ask:
- Arrival: How soon can someone arrive, and will you update me if that changes?
- Charges: What's the call-out fee, hourly rate, and any after-hours charge?
- Authorization: Will you provide a written estimate before permanent repairs?
- Documentation: Can you photograph the source and record the emergency stabilization work?
- Licensing: What's your license number, and which classification covers this work?
- Protection: Do you carry liability insurance and a bond, and can you provide the insurance certificate and bond details?
Write down the company name, call time, quoted terms, and expected arrival time. If you're a landlord or facility manager, identify who can authorize work and arrange safe access before the technician arrives.
Emergency availability isn't a fixed arrival time, fixed price, or guaranteed repair outcome.
At Restore Heroes, we're available 24/7 for emergency response. Our team arrives quickly to assess damage, stabilize the property, and begin restoration to help prevent additional loss once the plumbing source is stopped or controlled. Actual arrival timing depends on location and the situation; a restoration crew's role shouldn't be confused with the plumber's source repair.
This video provides an additional visual reference while you arrange professional help.
What the Emergency Visit Covers and What It May Cost
Say water is spreading from behind a bathroom vanity. The plumber shouldn't assume the nearest fitting caused it: water can travel along a pipe, framing member, or cabinet edge before becoming visible. The visit begins by confirming the source and checking whether water is still entering the damaged section.
Next, the plumber isolates that section and drains residual water. If access requires opening the wall, the opening should be limited to what diagnosis and repair require, with concealed conditions recorded before materials are removed. A temporary isolation measure may be appropriate while the permanent repair is planned.
From access to a tested repair
The plumber removes the failed component and installs pipe and fittings compatible with the existing system. Matching the material is often appropriate, but approved transition fittings may be needed when connecting different materials. Ask the plumber to explain the cause of failure and whether nearby pipe shows similar deterioration.
Before anyone closes the opening, the plumber should pressure-test the repair and check connections for leakage. The handoff should include written findings, a parts list, an itemized invoice, and clear identification of any remaining work.
- Plumbing scope: Diagnosis, isolation, access, pipe replacement, and testing.
- Restoration scope: Extraction, drying, material removal where necessary, and moisture verification.
- Finish repairs: Drywall, paint, cabinetry, flooring, or other reconstruction authorized separately.
Understanding the estimate
According to HomeGuide, emergency burst-pipe repairs in the United States were estimated at $500 to $5,000 in 2025, depending on pipe size, material, and location. That's a national estimate, not a Phoenix quote or a complete restoration budget.
After-hours labor, difficult access through finished surfaces, and pipe material can push the plumbing bill higher. Extraction, drying, and reconstruction may be separate charges rather than part of the pipe-repair price. Our water damage repair cost guide can help you identify those additional categories.
Before authorizing permanent work: Get the scope, exclusions, and process for approving additional charges in writing.
Ask whether the estimate includes opening surfaces, disposing of debris, testing, and returning for follow-up work. A price range can help you prepare, but only a property-specific written quote defines the proposed job.
Drying the Area and Finding Hidden Moisture
A room can look dry while carpet padding, insulation, or the underside of flooring remains wet. Drying has two jobs at once: remove the moisture and create a record that shows where it went. That map helps the plumber explain access damage, helps restoration technicians decide whether materials can stay, and gives the insurer a timeline.
Begin after water and electrical hazards are controlled and initial photographs are taken.
- Extract standing water with professional extraction equipment or a wet vacuum where electrical use is safe. Never use an ordinary household vacuum.
- Set air movers to move air across wet surfaces, rather than blowing directly into wet cavities. Suspected mold or contamination needs assessment before fans spread material.
- Run dehumidification matched to the moisture load, with condensate draining safely.
- Map moisture using a calibrated meter across flooring, baseboards, drywall, accessible insulation, and framing. Record each location and the material tested.
- Compare readings with similar materials in an unaffected room, using the appropriate meter setting.
- Continue until materials return to suitable background conditions, not merely until the carpet feels dry.
Check materials, not just room air
Room air can dry faster than the materials behind it. A dehumidifier may make the space feel normal while drywall still holds enough moisture to feed mold later.
ASHRAE's guidance on moisture and mold recommends repairing leaks quickly and drying accumulated water within 24–48 hours, and identifies material water activity below 0.8, approximately 80% equilibrium surface relative humidity, as a condition where mold growth is rarely a problem. Some soaked materials need removal rather than in-place drying.
ASHRAE's dampness guidance identifies consistently high gypsum-board readings above 15% moisture-content equivalent and indoor dew point above 60°F as early warning indicators. These are different measurements for different questions: surface activity estimates mold risk, moisture-content equivalent tracks a specific material, and dew point shows whether indoor air is close to condensation.
Moisture reference values after a burst pipe
| Indicator | Reference value | What it tells you |
|---|---|---|
| Drying window after a leak | Within 24–48 hours | Extraction and drying need prompt attention |
| Interior material water activity | Below 0.8, about 80% equilibrium surface relative humidity | Mold growth is rarely a problem below this level |
| Gypsum board moisture | Warning level: above 15% moisture-content equivalent | Consistently elevated readings warn of dampness |
| Indoor dew point | Warning level: above 60°F | An early warning of dampness |
| Comparison readings | Match appropriate unaffected material readings | Supports verification that materials, not just air, have dried |
Investigate moisture you can't see
Allstate's burst-pipe guidance identifies discolored walls, peeling paint, musty odors, unusual water bills, and unexplained running-water sounds as possible signs of concealed leakage. Electrical hazards, visible mold, or moisture you can't trace call for professional assessment.
Our thermal imaging inspection guide explains a useful screening tool, but temperature patterns need confirmation with moisture measurements. For suspected slab failures, Piper Plumbing's explanation of repairing leaks beneath your foundation helps distinguish source access from drying nearby materials.
Phoenix's hot, dry outdoor air can be misleading. Do not assume open windows will dry enclosed assemblies; use controlled dehumidification and targeted airflow, and retain daily readings before authorizing closure.
Insurance and Licensing Checks Before Repairs
Calling immediately doesn't guarantee insurance coverage. As Allstate explains, policies generally distinguish sudden, accidental discharge from gradual leakage, seepage, and maintenance-related damage. The cause of the failure matters, whether it involves freezing, corrosion, an aging fitting, or an appliance supply line.
The Maryland Insurance Administration's consumer guidance also distinguishes resulting water damage from replacement of the broken pipe, and notes that occupancy and maintaining heat can affect coverage. Your own policy controls the decision. Ask the adjuster to separate emergency mitigation, cleanup, drying, pipe repair, and reconstruction rather than assuming they receive identical treatment.
Preserve the claim evidence
- Photographs: Capture the failed component and affected rooms before disposal. Ask whether the damaged part should be retained.
- Timeline: Record when you discovered the leak, what you observed, and when you stopped the supply.
- Work records: Keep invoices, moisture logs, equipment records, and written findings together.
- Insurer instructions: Ask whether emergency mitigation is authorized before permanent repairs, and request applicable deductibles, exclusions, and limits.
Don't leave active damage unaddressed while waiting for a coverage answer. Document reasonable emergency actions and distinguish them from elective or permanent work.
Verify the contractor separately
The Arizona Registrar of Contractors' classification guidance states that a license is generally required when the total project cost, including labor and materials, exceeds $1,000, or when a local permit is required regardless of price. Check that the classification covers the actual plumbing, restoration, or reconstruction work being contracted.
The Registrar's before-hire guidance makes clear that licensing doesn't itself establish liability insurance. Review an insurance certificate and confirm bond details separately; our bonded and insured contractor guide explains the distinction. We're IICRC certified, licensed, bonded, and insured.
The Registrar's consumer guidance recommends checking that the license is current on the day you sign and describes its free administrative complaint process for workmanship problems involving licensed contractors. That process is a regulatory option, not guaranteed reimbursement or a promised resolution.
Next Steps Before Final Sign-Off
Before the job moves from emergency response to permanent repairs, put the approvals and closeout requirements in one place. Use our final walkthrough checklist to organize the handoff.
- Separate the estimate. Require distinct line items for stopping damage, drying, and pipe repair, with written approval for scope changes.
- Confirm the contractor's identity, current license, and classification against the agreement before signing.
- Send the claim package. Give your insurer photographs, plumber invoices, and moisture logs, and obtain instructions before repairs proceed further.
- Before walls or flooring are closed, obtain the pressure-test result and final material readings compared with unaffected areas.
- Collect protection records. Request the insurance certificate and bond details in writing rather than relying on a license number alone.
For Phoenix metro properties, our contact form accepts Water Damage, Fire & Smoke Damage, Mold Removal, Trauma & Biohazard Cleanup, or Others. Select Water Damage for a burst-pipe incident and describe whether the source is controlled.
Finish your incident note with three answers: which valve you closed, what you wrote down, and who you called next. Give that note to whoever takes responsibility for the next stage.
We offer 24/7 emergency response throughout the Phoenix metro area, with a free onsite inspection and estimate to assess burst-pipe water damage after the source is controlled. Call 480-690-5277 or visit Restore Heroes to request help with drying and documentation, and discuss the proposed scope, price, and expected results before authorizing work. Your insurer determines coverage, and neither timing nor outcomes should be assumed.