
You're sweeping out the garage in Phoenix when a dark line catches your eye, running across the concrete floor. It looks small enough to ignore, but then you notice a matching crack near the base of a wall, a door that sticks, or a faint damp mark after a storm. In the desert, those details deserve attention before you cover them with paint or caulk.
Foundation crack repair starts with diagnosis, not a tube of sealant. Phoenix homes deal with expansive soils, intense heat, sudden monsoon moisture, dry spells, drainage problems, and construction conditions that can move a slab or wall in different ways. Some cracks are harmless shrinkage. Others point to settlement, lateral pressure, or water intrusion. The repair that works depends on the crack's width, pattern, location, moisture, and movement.
Why Phoenix Foundations Crack Differently
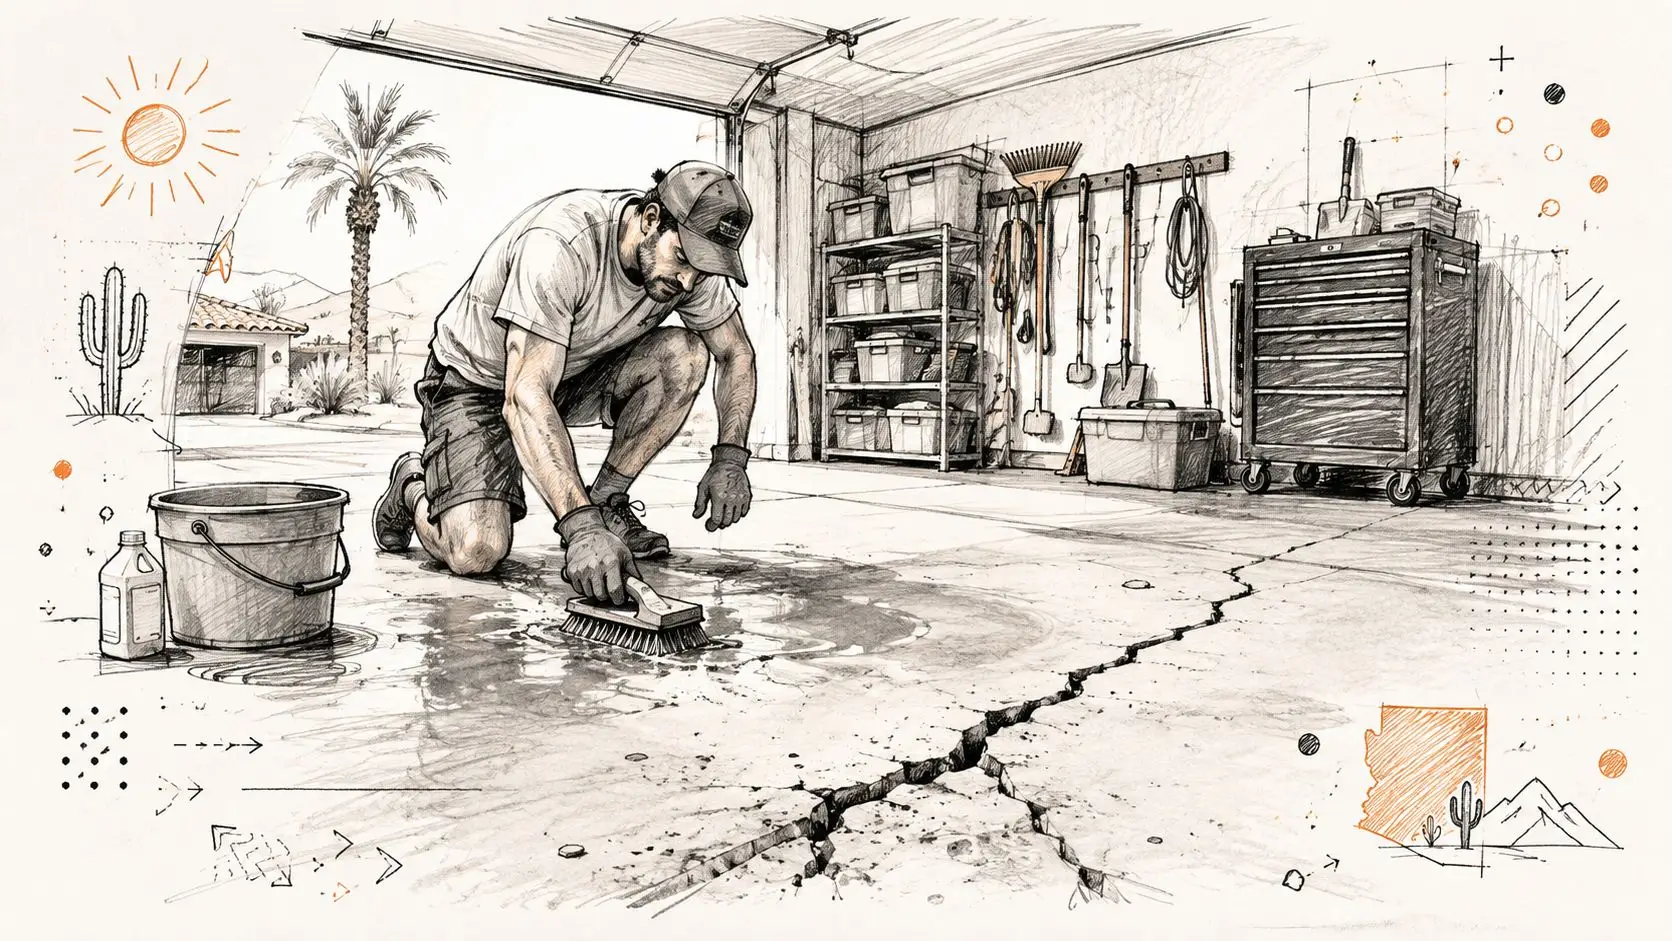
You scrub the garage floor, rinse away dust, and watch water collect in a thin line where the slab has opened. That scene is familiar around the Valley. A garage crack may be a concrete shrinkage issue, but it may also reflect movement below the slab, especially when soil conditions and drainage keep changing.
Phoenix foundations sit in an environment that alternates between prolonged dryness and intense rainfall. Expansive clay soils can swell when monsoon water reaches them and shrink during extended dry weather. That repeated volume change pushes against concrete, releases pressure, and can contribute to uneven support beneath slabs and footings. Soil movement is one reason foundation cracks in Phoenix shouldn't be judged by appearance alone.
Heat, rain, and uneven moisture
Concrete also responds to temperature. A slab exposed to hot summer conditions can expand and contract as temperatures change, while shaded areas, irrigated landscaping, and roof runoff create different moisture conditions around the same structure. A downspout that discharges beside the foundation can saturate one area while the rest of the soil remains dry.
Monsoon rain creates a different challenge from steady seasonal moisture. Water can arrive quickly, collect against a wall, and enter through an existing crack before the surrounding soil has time to drain. If grading directs runoff toward the house, even a narrow opening can become a recurring leak path.
Practical rule: In Phoenix, control water first. A repaired crack can reopen if drainage continues to load the same soil or wall.
The broader repair industry reflects how common these problems are. The global foundation repair services market is estimated at US$3.0 billion in 2026 and projected to reach US$4.1 billion by 2033, with a projected 4.6% compound annual growth rate from 2026 to 2033, according to Persistence Market Research's foundation repair services analysis. That scale doesn't mean every Phoenix crack is severe. It does show that foundation movement is a substantial repair concern, not an unusual homeowner complaint.
A small crack deserves more urgency when it grows, branches, leaks, appears with sticking doors, or shows up in several parts of the structure. Before deciding whether water intrusion creates a broader property risk, homeowners can use a Phoenix flood risk assessment to examine how surrounding drainage and storm exposure may affect the structure.
Reading Your Foundation Cracks Like a Pro
Crack width is useful, but it isn't a diagnosis by itself. A vertical crack in a poured wall, a horizontal crack across a block wall, and a diagonal crack from a window corner can have different causes even when they look similar. Read the crack using three screening points: width, pattern, and location.
Start with measurement. Clean the area gently, place a ruler beside the widest part, and photograph it with a date and a fixed reference point. A credit card can help you visualize a very narrow opening, but it shouldn't replace a ruler or crack gauge. Don't press filler into the opening before measuring, because that removes evidence of how the crack behaves.
Width gives you a starting point
A commonly used classification places hairline cracks below 0.2 mm, fine cracks from 0.2 to 0.5 mm, and medium cracks from 0.5 to 2.0 mm, as summarized in this structural versus non-structural foundation crack guide. Another practical framework often treats cracks wider than 1/8 inch, or 3 mm, as structural, while cracks no more than 3 mm are generally considered non-structural within that framework. Width alone doesn't prove severity, but it tells you how carefully to investigate.
| Crack Width | Severity Level | Recommended Action |
|---|---|---|
| Under 0.2 mm | Often cosmetic or hairline | Photograph, measure, and monitor for change |
| 0.2 to 0.5 mm | Fine crack | Inspect location and moisture, then monitor |
| 0.5 to 2.0 mm | Medium crack | Arrange closer evaluation, especially if it grows or leaks |
| Wider than 1/8 inch, or 3 mm | Potentially structural | Seek professional assessment before sealing |
A vertical crack may result from shrinkage or localized settlement, particularly when it stays narrow and dry. A horizontal crack in a foundation wall deserves more concern because soil pressure can push the wall inward. In concrete masonry walls, a stair-step crack can follow mortar joints as sections settle or shift.
Pattern and location change the decision
Diagonal cracks extending from the corners of windows or doors can indicate stress concentration or differential movement. Cracks across a slab may reflect shrinkage, but a vertical offset, uneven floor, or crack that continues into a wall changes the picture. Water staining, efflorescence, rust marks, and fresh widening all raise the priority.
A professional structural integrity assessment can help connect those observations to the building's overall condition. Treat your measurement as a screening step, not a structural certification.
Assessing Whether You Can DIY or Need Professional Help
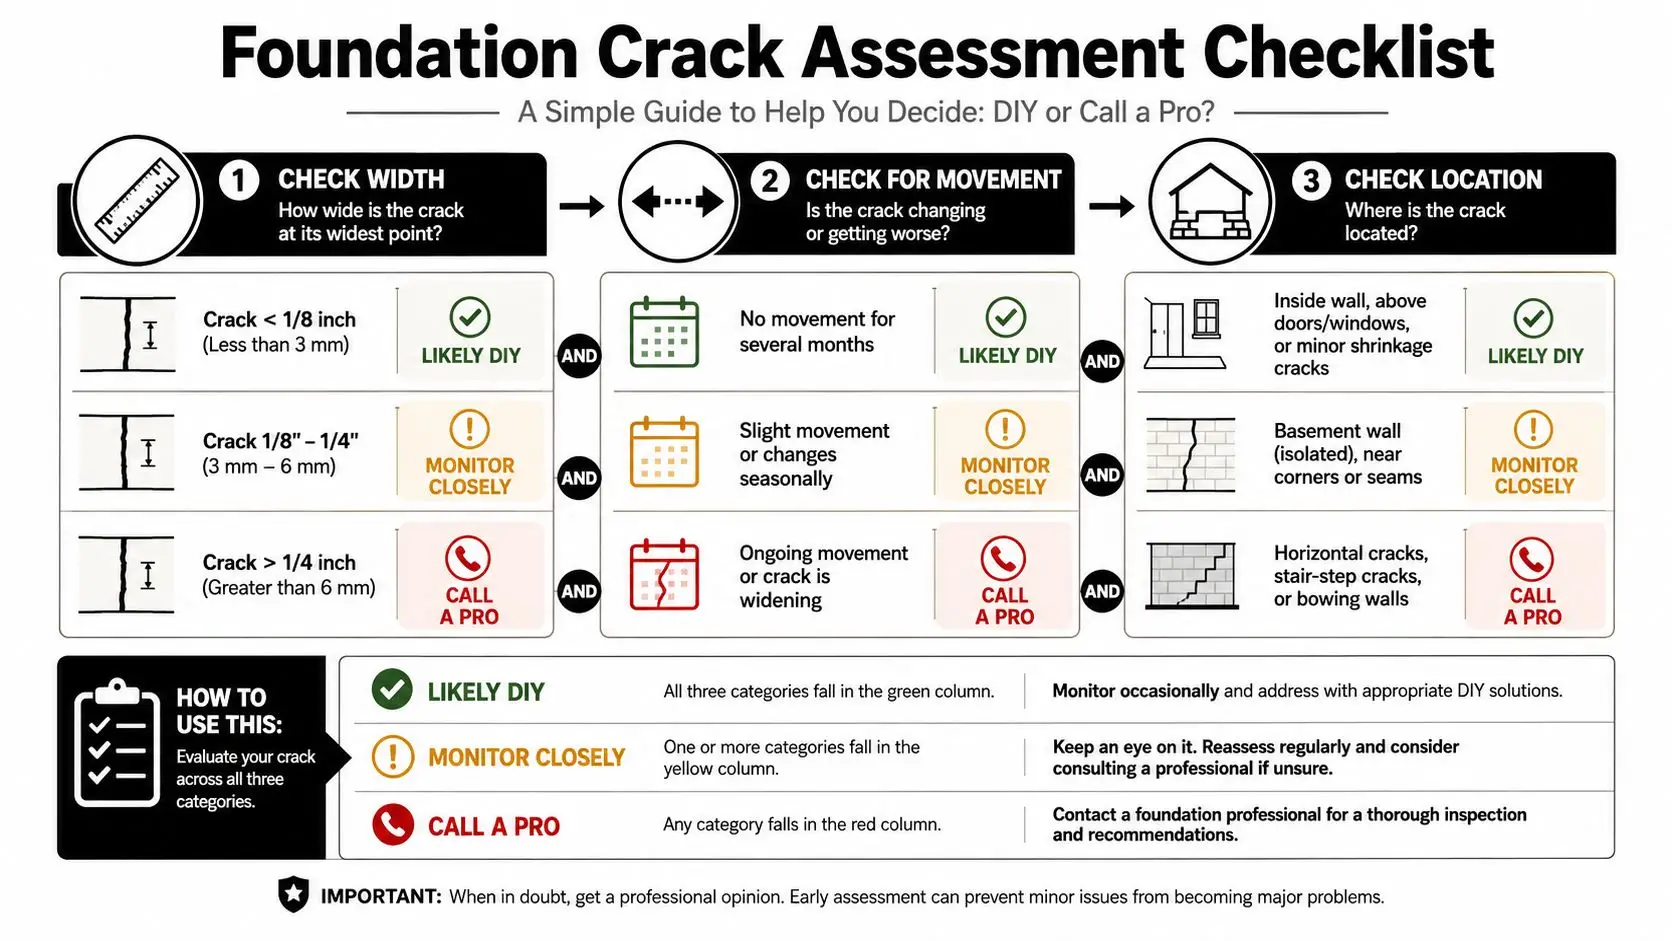
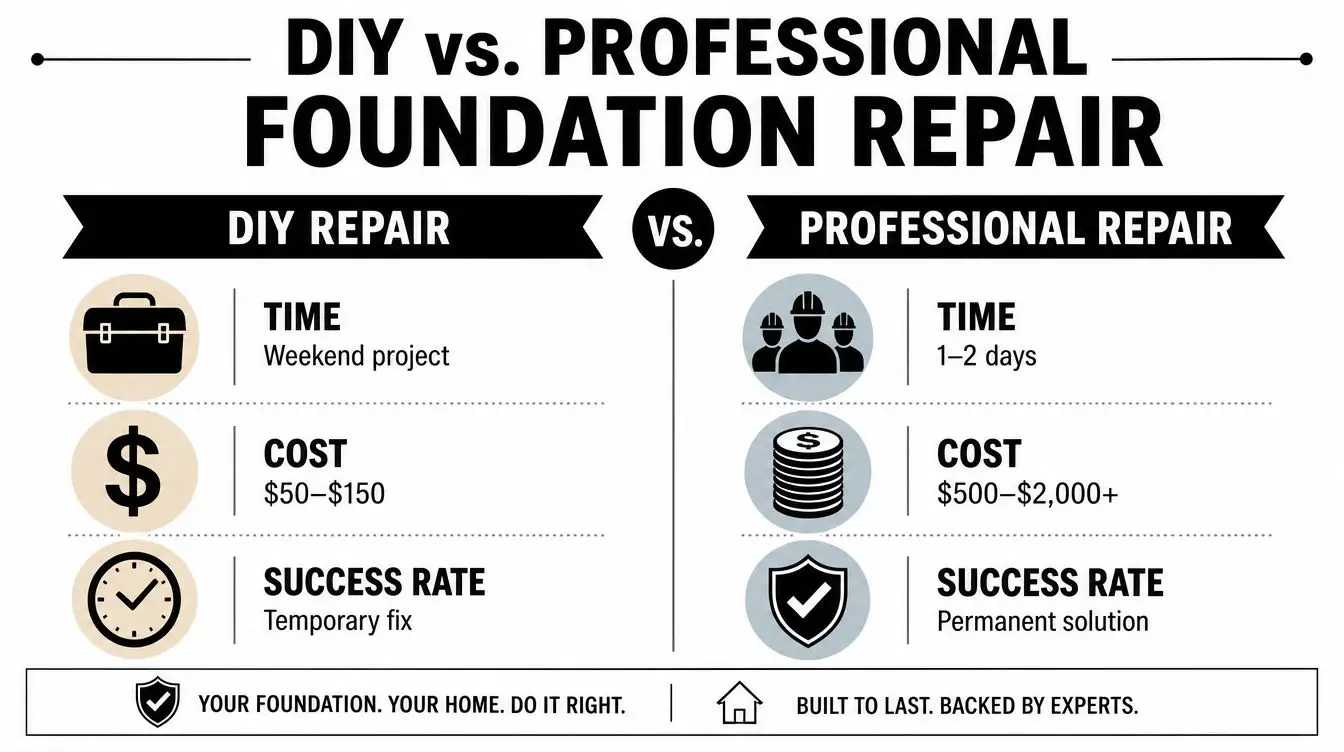
The safest DIY decision comes from separating surface sealing from structural correction. You may be able to seal a narrow, dry, dormant crack in an accessible area. You can't correct soil movement, a failing footing, a bowed wall, or a sinking section of foundation with caulk alone.
Use this sequence before buying an epoxy kit.
Check the crack itself
Measure the widest point and inspect both ends. If the crack is narrow, dry, stable, and limited to a non-structural surface, a homeowner may reasonably consider a compatible epoxy or polyurethane product. If it exceeds 1/4 inch, treat that as a call-a-professional condition. The commonly cited industry summary identifies cracks wider than 1/4 inch as structural warning signs in about 30% of cases, so that width shouldn't be dismissed even though it isn't conclusive by itself. See the foundation repair industry summary for that screening context.
Check for movement
Mark the crack ends with pencil and record its width. Photograph it during dry conditions and after significant rain. If the opening grows, develops a step, shifts out of plane, or reappears after sealing, stop treating it as a simple cosmetic repair.
Check the location and symptoms
Call a professional before attempting repair if you find:
- Horizontal wall cracks: These can reflect lateral soil pressure.
- Stair-step masonry cracks: The pattern may indicate differential movement.
- Multiple connected cracks: Several affected areas suggest a broader movement pattern.
- Water intrusion: Repeated seepage can damage finishes and complicate bonding.
- Uneven floors or wall displacement: A sealant won't restore lost support.
- Sticking doors and windows: Movement elsewhere in the house may accompany foundation change.
A moisture meter can add useful information around a suspicious wall or floor, but readings need context. Homeowners researching moisture meter readings should remember that the tool measures moisture conditions, not the cause of foundation movement.
Hydraulic jacks, pier systems, excavation, and structural reinforcement belong to trained contractors who can evaluate load paths and movement. A DIY patch can make a wall look finished while leaving the underlying problem hidden, which complicates later inspection and may increase the repair scope.
Comparing DIY Methods and Professional Repair Options
The right method depends on what you need the repair to accomplish. Epoxy bonds dormant concrete and can restore structural continuity. Polyurethane and chemical grouts are better suited to sealing certain wet or moving leaks. Neither product can stabilize soil or lift a settled foundation.
| Method | Appropriate Use | Main Advantage | Main Limitation |
|---|---|---|---|
| DIY surface sealant | Narrow, dry, accessible cracks | Low equipment demand | Doesn't address movement |
| Epoxy injection | Dormant structural cracks | Deep bonding and moisture reduction | Needs clean, dry preparation and controlled injection |
| Chemical grout | Active or water-carrying cracks | Seals leaks and can accommodate specified conditions | Material must match moisture and movement |
| Carbon fiber reinforcement | Selected wall movement conditions | Adds localized reinforcement | Requires professional design and installation |
| Steel or helical pier systems | Settlement or footing support problems | Transfers or improves support when properly designed | Excavation, engineering judgment, and significant installation work may be required |
Epoxy injection can be technically precise. Public specifications describe a workflow that includes cleaning the crack, installing entry ports at intervals no less than the member thickness, sealing the surface between ports, and pressure-injecting a two-component epoxy. The metering and mixing equipment should maintain the manufacturer's ratio within ±5% by volume, with discharge pressure control up to 200 psi, as outlined in this ACI epoxy injection specification preview. A hardware-store kit rarely provides the same level of control.
Very narrow cracks can still be candidates for injection. TxDOT notes epoxy use on cracks as narrow as 0.002 inches, while low-viscosity systems are commonly specified around 200 to 350 cps at 73°F for cracks up to 1/4 inch, according to the same specification source. The ACI repair guide also supports epoxy injection for concrete cracks 0.002 inch and wider, with low-viscosity resin needed for tight openings (ACI crack repair guide).
Polyurethane or chemical grout makes more sense when the primary objective is water sealing. ASTM D8109 describes chemical grouting for sealing leaks in concrete walls and slabs, while EN 1504-5 classifies injection materials by whether they transmit force, remain ductile, or swell. Using epoxy in an actively wet leak can produce poor adhesion or an unsuitable repair.
For homeowners evaluating property value or sale decisions, Red Rock Properties' guide to foundation issues offers useful context about disclosure and foundation concerns in Arizona. Water-related damage also deserves separate attention, and this resource on fixing water damage to a foundation explains why drying and remediation may be necessary alongside crack work.
Step-by-Step Repair Process for Common Foundation Cracks
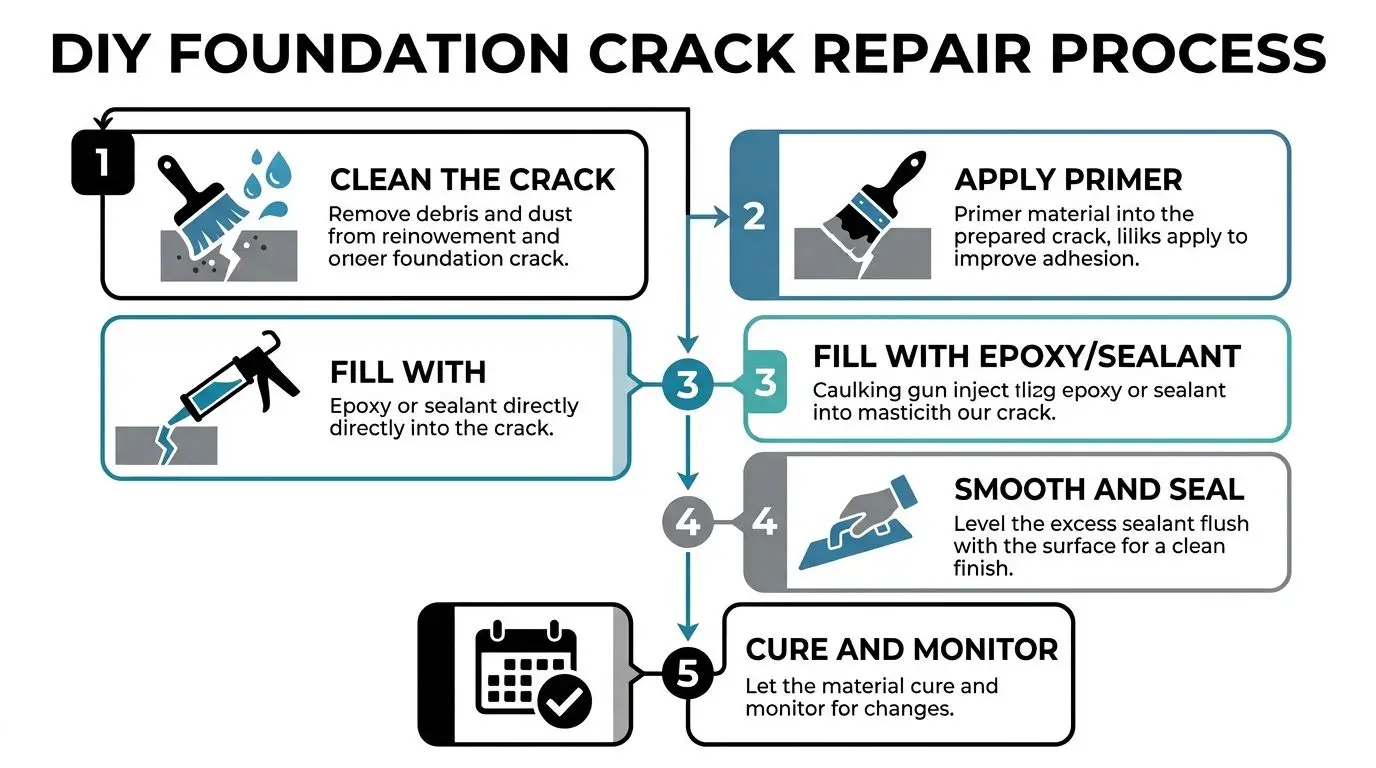
This process applies only to a crack you've already identified as narrow, accessible, dormant, and appropriate for the selected product. If the crack is widening, displaced, structurally connected to a wall, or actively leaking beyond the product's instructions, stop before opening the cartridge.
Prepare the concrete
Remove paint, dust, loose cement, and old sealant from the crack and the surrounding surface. Use a stiff brush, vacuum, and manufacturer-approved cleaner, then allow the area to reach the dryness required by the product. Surface preparation matters more than choosing a premium label over a compatible one.
Plan the work during stable weather rather than immediately before a forecast monsoon event or during a visibly damp condition. Read the product's temperature and cure requirements. Phoenix heat can shorten working time, while a shaded or cooled interior may cure differently from an exposed exterior slab.
Apply the repair material
For an injection system, install ports according to the manufacturer's spacing instructions, seal the surface between ports, and allow the surface seal to harden before testing. Inject slowly from the lowest port or the sequence specified by the system, watching for resin movement into the next port and stopping if the seal blows out or material escapes.
For a surface repair, apply primer only when the product calls for it. Push epoxy or sealant into the opening rather than brushing a thin film over the face. A surface smear can hide the crack without filling it.
The GSA technical guide identifies dormant crack injection applications as narrow as 0.002 inches, or 0.05 mm, and says a calculated maximum crack width in that application shouldn't exceed 0.3 mm. It also identifies low-viscosity epoxy at 500 cps or less for cracks 0.010 inch, or 0.3 mm, or smaller, as explained in this GSA epoxy crack repair guide. A practical field guide describes epoxy injection across a broader range, from about 0.002 inch to roughly 0.5 inch, with resin grade matched to the opening (ACI-based field guidance on epoxy crack injection).
Finish, cure, and inspect
Tool the surface only as directed. Don't disturb the repair while it cures, and don't cover it with paint until the product permits it. After curing, photograph the repaired area and continue watching nearby joints, walls, doors, and floors.
Common failures have recognizable causes:
- Poor adhesion: The concrete was dusty, damp, or contaminated.
- Resin loss: The surface seal or injection pressure wasn't controlled.
- Incomplete penetration: The resin was too thick, the crack was too tight, or ports were poorly placed.
- Reopening: The crack is active, and the repair addressed the opening rather than the movement.
This residential concrete and masonry repair resource provides additional background on broader concrete repair work. For a visual overview of the sequence, use the video below.
When to Call Restore Heroes for Professional Foundation Assessment
A foundation crack deserves professional attention when it comes with evidence that the house is moving, the wall is carrying pressure, or water is reaching finished spaces. Look beyond the line itself. Doors and windows that suddenly stick, sloping floors, gaps between walls and ceilings, displaced masonry, and cracks that appear in several rooms can indicate a condition that a surface patch won't solve.
Active water changes the repair question. A crack may need injection, drainage correction, drying, or broader water-damage remediation. If wall finishes feel damp, paint is bubbling, insulation is wet, or musty odors persist, water damage restoration contractor services may be part of the response after the source has been assessed.
What a useful inspection should answer
A serious evaluation should identify where the crack begins and ends, whether the concrete has shifted, whether the opening is active, and whether drainage or soil conditions are contributing. The technician should also examine related symptoms rather than treating the crack as an isolated defect.
Ask for clear explanations of:
- Movement: Is the crack changing, or is it dormant?
- Structure: Does it affect a wall, footing, slab, or masonry joint?
- Moisture: Is water entering, and what route does it follow?
- Scope: Is sealing enough, or is stabilization required?
- Verification: How will the repair be checked after installation?
That last question matters. Public guidance emphasizes inspection, preparation, ratio control, pressure testing, and conformity testing where injection systems require them. A professional shouldn't select epoxy for an active wet leak without considering a swelling or ductile grout, and material choice must account for moisture and service temperature.
Homebuyers should be especially cautious. A crack found during a purchase inspection may need an independent structural opinion before closing, particularly when the seller has already applied a cosmetic patch. A repair estimate isn't the same as a diagnosis.
The distinction between crack sealing and slab stabilization also matters outside Arizona. Information about concrete slab lifting in Ottawa illustrates why a settled slab may require a lifting or support strategy rather than filler alone. Phoenix homeowners face different soil and climate conditions, but the principle remains the same: match the repair to the movement.
Restore Heroes offers free onsite inspections, emergency availability, and restoration services that can include assessment, extraction, structural drying, odor removal, and sanitation for water-affected properties. No contractor can guarantee that a particular crack needs only one treatment, so get the condition documented before choosing a repair.
If you've found a leaking, widening, or suspicious foundation crack in the Phoenix area, visit Restore Heroes to request an onsite assessment. Their team can evaluate related water damage, begin mitigation when needed, and help you determine whether the next step is drying, sealing, or a structural foundation specialist.