
A faint musty smell hangs around the kitchen. One section of flooring feels warmer than the rest. You check under the sink, find nothing, and start wondering whether the problem is coming from inside the walls.
That's a common water damage surprise in Phoenix. Heat, monsoon storms, hard water, aging plumbing, and heavily used cooling equipment create failure points in places homeowners rarely inspect. A leak may begin in a utility closet, behind a refrigerator, under a slab, or above a ceiling. By the time you see staining, the moisture may already have reached flooring, drywall, insulation, cabinetry, or framing.
The eight sources below are organized by where they hide in and around a Phoenix home. Each one includes a quick homeowner check and a practical point where professional inspection makes sense. If you're already tracing an unexplained odor, stain, or soft spot, you can also browse leak detection options before opening walls or removing finishes.
1. Water Heater Expansion Tank Failure
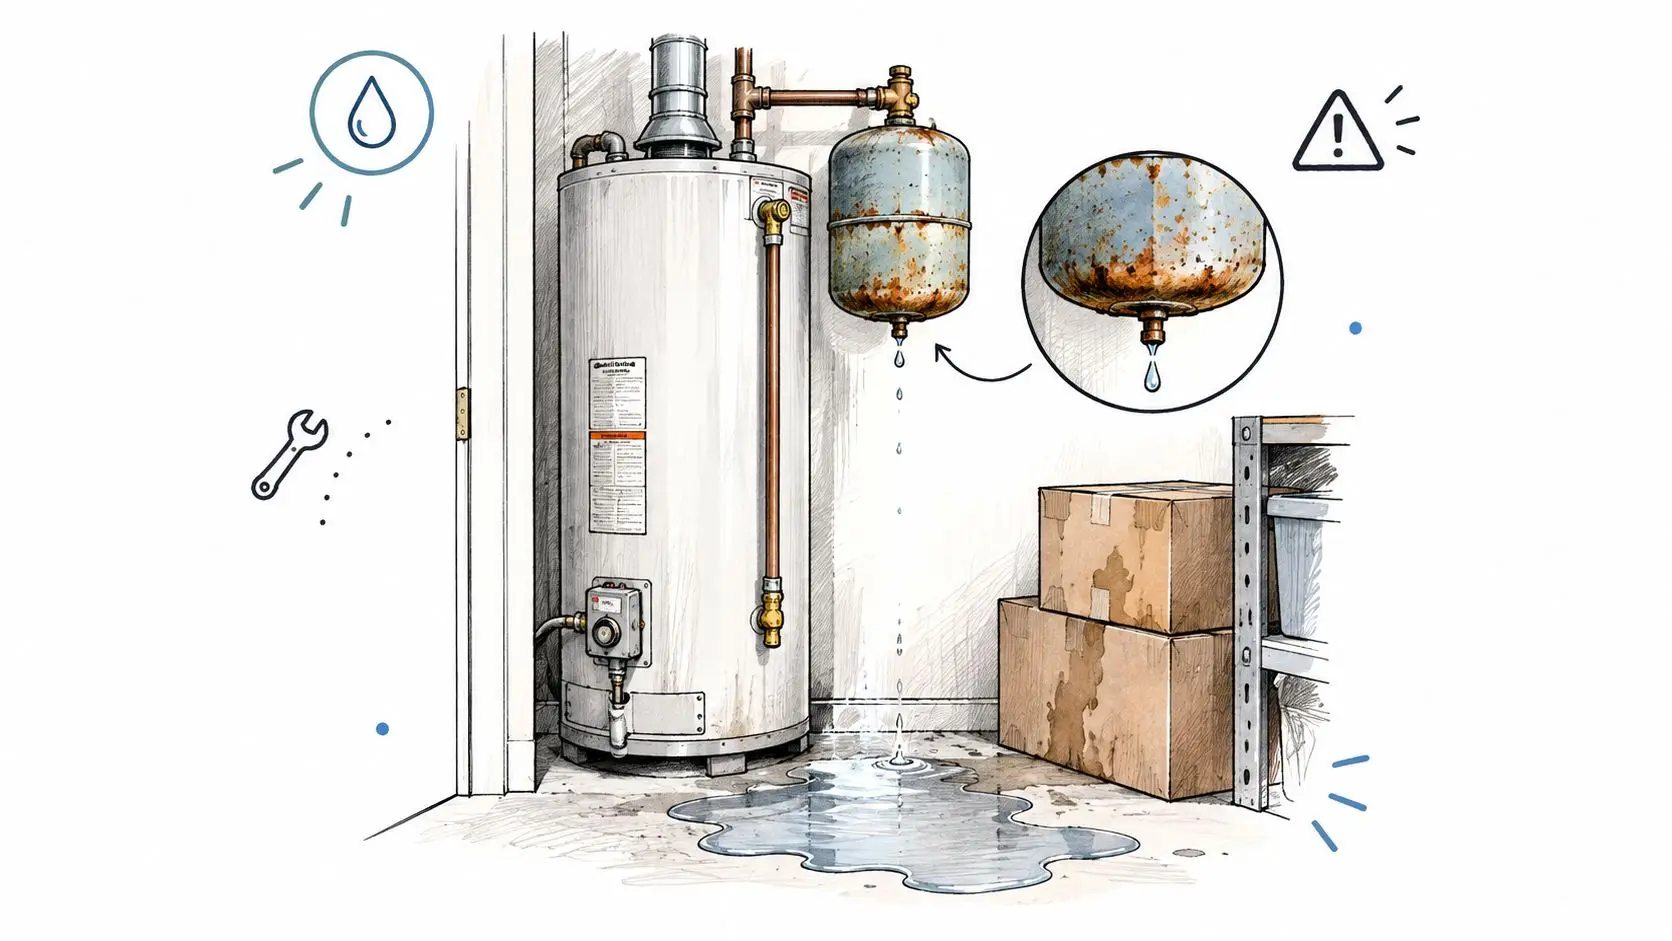
A water heater expansion tank sits near the main tank and absorbs pressure changes in a closed plumbing system. Its internal bladder can fail, or the tank itself can corrode. Once it stops working correctly, pressure can strain the water heater and nearby connections.
Utility closets and garages are common trouble spots because homeowners may not enter them often. A slow release can soak stored boxes, flooring, baseboards, and drywall before anyone notices. A failed tank can also cause a larger rupture, turning a maintenance issue into a rapid flood.
Start with a visual check. Look for rust, mineral deposits, dampness around fittings, a sagging support, or water on the floor beneath the tank. Check whether the pressure reading is above 80 PSI, which can indicate a plumbing pressure problem that deserves attention. Don't rely on the absence of standing water. A tank can be deteriorating internally while the surrounding floor still looks dry.
Practical rule: Keep cardboard storage, photographs, and electrical equipment away from the immediate area around a water heater.
Expansion tanks commonly require replacement during the life of a water-heating system. Have a plumber inspect the tank as part of regular water-heater maintenance, and consider a leak sensor in a garage or utility room. A sensor won't stop every failure, but it can shorten the time between a leak and your response.
If water is actively flowing, shut off the water supply and, if safe, the water heater. Avoid walking through standing water near electrical equipment. For a professional assessment of a suspected water-heater loss, water heater leak repair may help determine whether the source is still active and whether nearby materials need drying.
2. Condensation From HVAC Systems and Evaporative Coolers
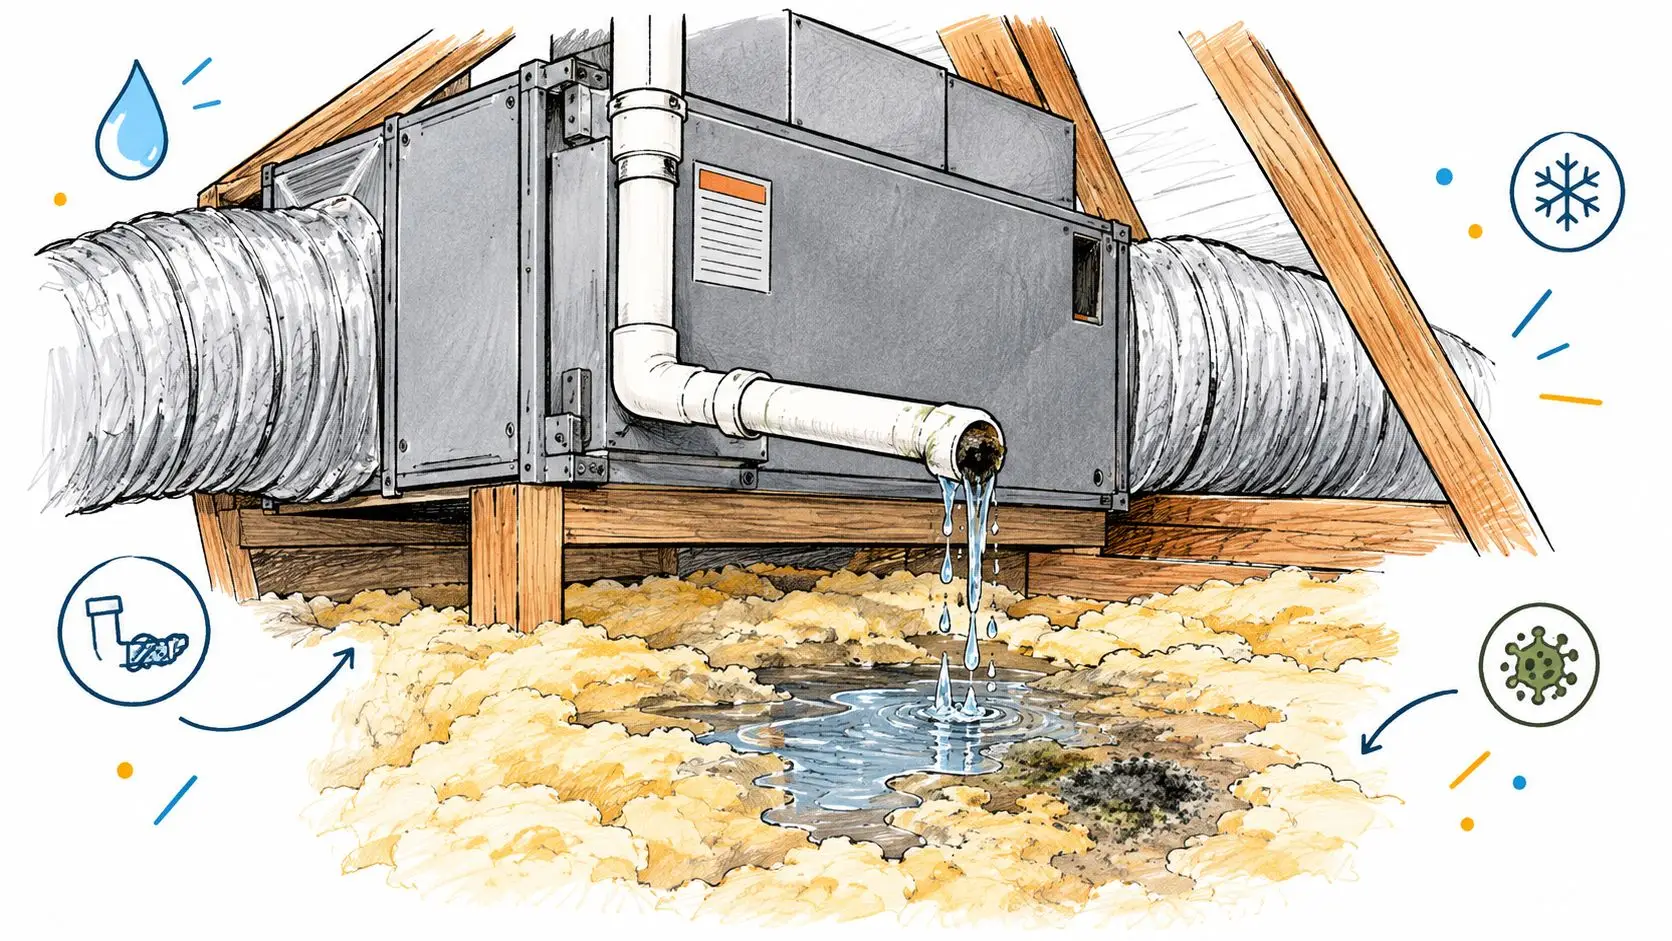
Phoenix cooling systems make water as they operate. Central air conditioners produce condensate, and evaporative coolers use water as part of the cooling process. That water normally travels through pans, drains, and discharge lines. A clogged line, damaged pan, poor slope, frozen coil, or disconnected fitting can redirect it into an attic, wall, ceiling, or duct chase.
The first signs aren't always dramatic. You may notice a ceiling stain below an attic unit, a musty smell near a return grille, damp insulation, or paint bubbling several weeks after a cooling problem began. Hot outdoor conditions don't guarantee that enclosed building materials will dry. A wall cavity or attic can hold moisture long after the visible drip stops.
Check the accessible parts of the system during spring and fall, then repeat the inspection after periods of heavy use. Look for water in the drain pan, algae or sludge around the primary drain, kinked tubing, wet insulation, and staining on nearby framing. Don't pour an unapproved chemical into a condensate line. Some treatments can damage equipment or fail to address a badly routed drain.
A useful HVAC drainage check
- Inspect the primary line: Confirm it drains toward the intended discharge point and isn't blocked.
- Look for a secondary safeguard: A secondary pan or drain with a float switch can alert you when the primary path fails.
- Check the ceiling below: Discoloration, peeling paint, or a soft area deserves investigation even if the HVAC unit is currently operating.
- Watch for repeated symptoms: A recurring stain usually points to a source problem, not a cosmetic defect.
A professional HVAC technician should inspect drainage before the hottest part of the year. If insulation, drywall, or framing has become damp, the dehumidification process is part of a broader drying plan. Moisture readings can show whether the problem is limited to the surface or has moved into concealed assemblies.
3. Washing Machine Inlet Hose Rupture
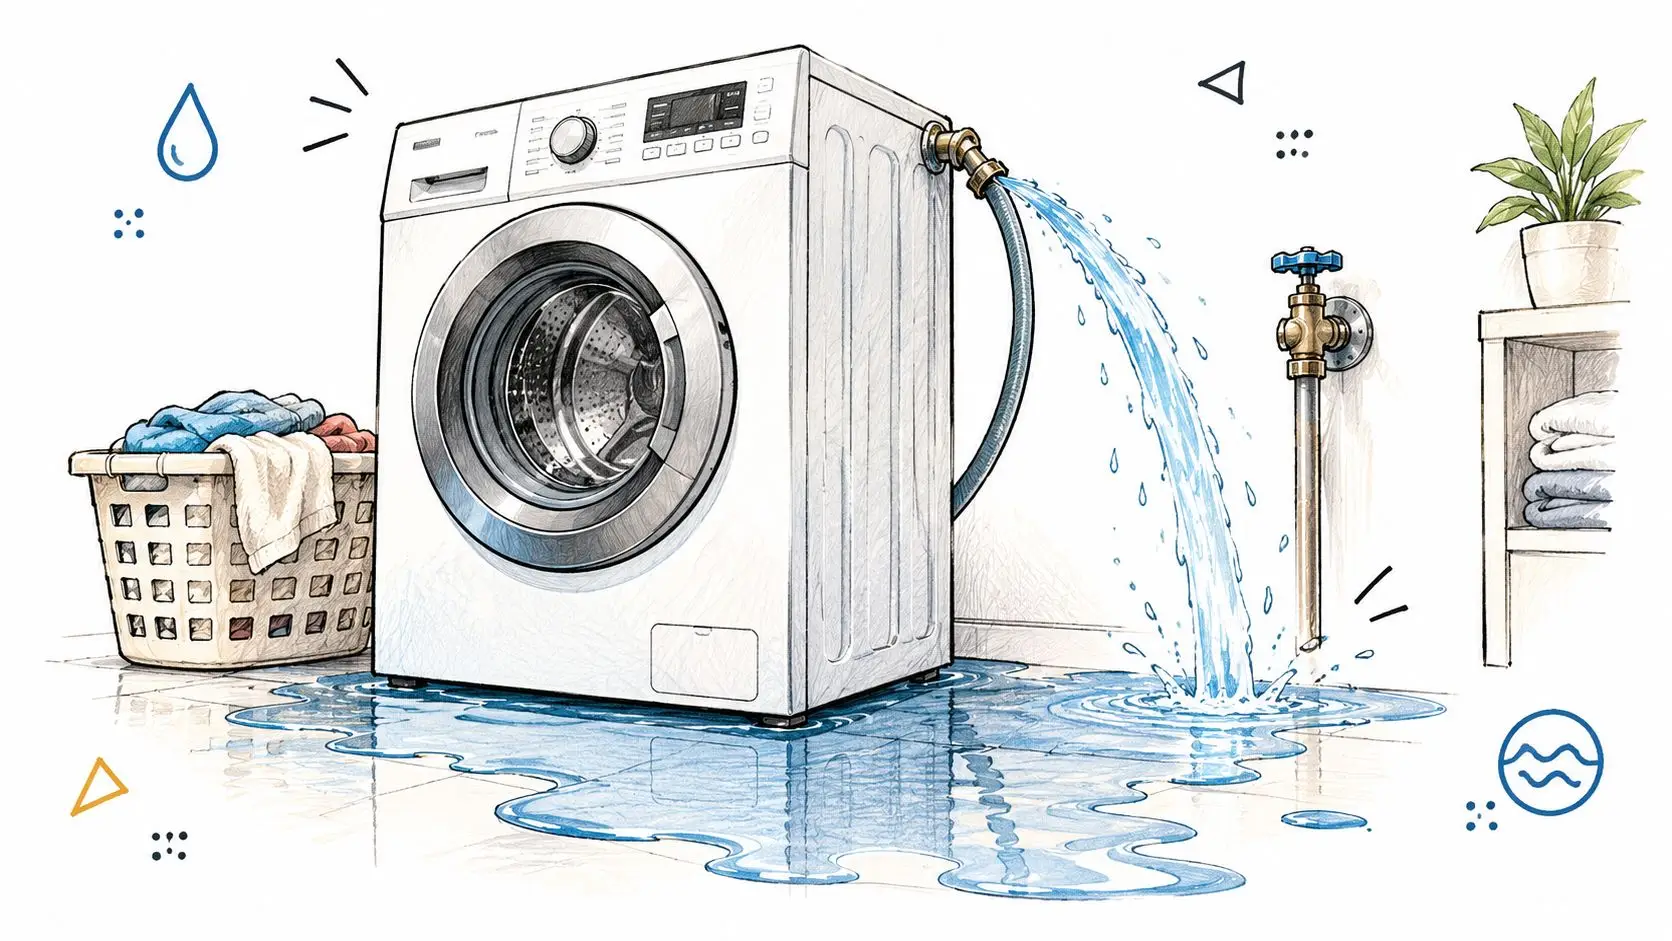
A washing machine hose can look fine until it fails at a connection or along the hose wall. Rubber and plastic components face repeated pressure changes, movement, heat, and chemical exposure. The failure often happens while the washer is filling, so water can continue flowing until someone reaches the shutoff valve.
Laundry rooms create an especially difficult path for water. They may share a wall with a kitchen, sit beside a bedroom, or occupy an upper floor above finished space. Water can move under the machine, through flooring joints, into cabinets, and down to a ceiling below. A homeowner returning from work may find more damage outside the laundry room than inside it.
Look behind the washer for bulges, cracks, discoloration, corrosion, or a connection that has shifted. Check the floor around the machine and use a flashlight to inspect the rear corners. Turn the supply valves off when the washer won't be used for an extended period. That step reduces exposure, but it isn't a substitute for replacing visibly damaged hoses.
Braided stainless-steel hoses can offer more resistance than basic rubber or plastic lines, but every hose still needs inspection. A leak sensor or automatic shutoff device under the washer can reduce the amount of water released after a rupture. Keep the machine accessible. Storing items tightly around it makes the first inspection harder and can hide a small leak.
A washing machine leak is a plumbing failure and a building-material problem at the same time. Stopping the supply is only the first step.
After an incident, photograph the hose, valves, flooring, cabinets, and nearby walls before disposal or demolition. Then arrange a moisture inspection. A detailed plumbing inspection checklist can help identify affected connections and nearby areas that need testing.
A short video can help you recognize the location and appearance of common hose failures before you inspect your own laundry area.
4. Refrigerator and Ice Maker Line Leaks
The water line behind a refrigerator has an easy-to-miss job. It supplies an ice maker or dispenser, often while sitting in a tight space where vibration, heat, and repeated movement affect the connection. A pinhole leak may release only a small amount at a time, but the water can wick under flooring and into cabinet bases for months.
Pull the refrigerator forward carefully and inspect the line, wall valve, connection, and floor. Look for a damp ring, white mineral residue, warped flooring, swelling at cabinet edges, or a soft transition between the appliance and the adjacent cabinets. Check both ends of the line. A dry floor at the front doesn't prove the rear connection is sound.
A level refrigerator helps keep pressure off its supply connection. Don't push the appliance so tightly against the wall that the line kinks. If the line is brittle, flattened, or discolored, replace it rather than waiting for a visible failure. A braided line may provide more durability than a basic plastic tube, but the fittings still need to be checked.
Where the hidden damage travels
Water under a refrigerator can move laterally beneath flooring. It may reach cabinetry before it becomes visible, then migrate into a subfloor or lower crawl space. A home inspection for sale can uncover the problem after the damage has already affected several materials.
Use a sensor beneath or behind the appliance if the layout allows it. Check the area monthly, especially after moving or cleaning the refrigerator. If you find soft flooring, swelling cabinets, or an odor that persists after the appliance is pulled out, stop treating the issue as a simple appliance repair. Refrigerator water damage guidance can help frame the next inspection and drying steps.
5. Clogged or Overflowing Gutters During Monsoon Season
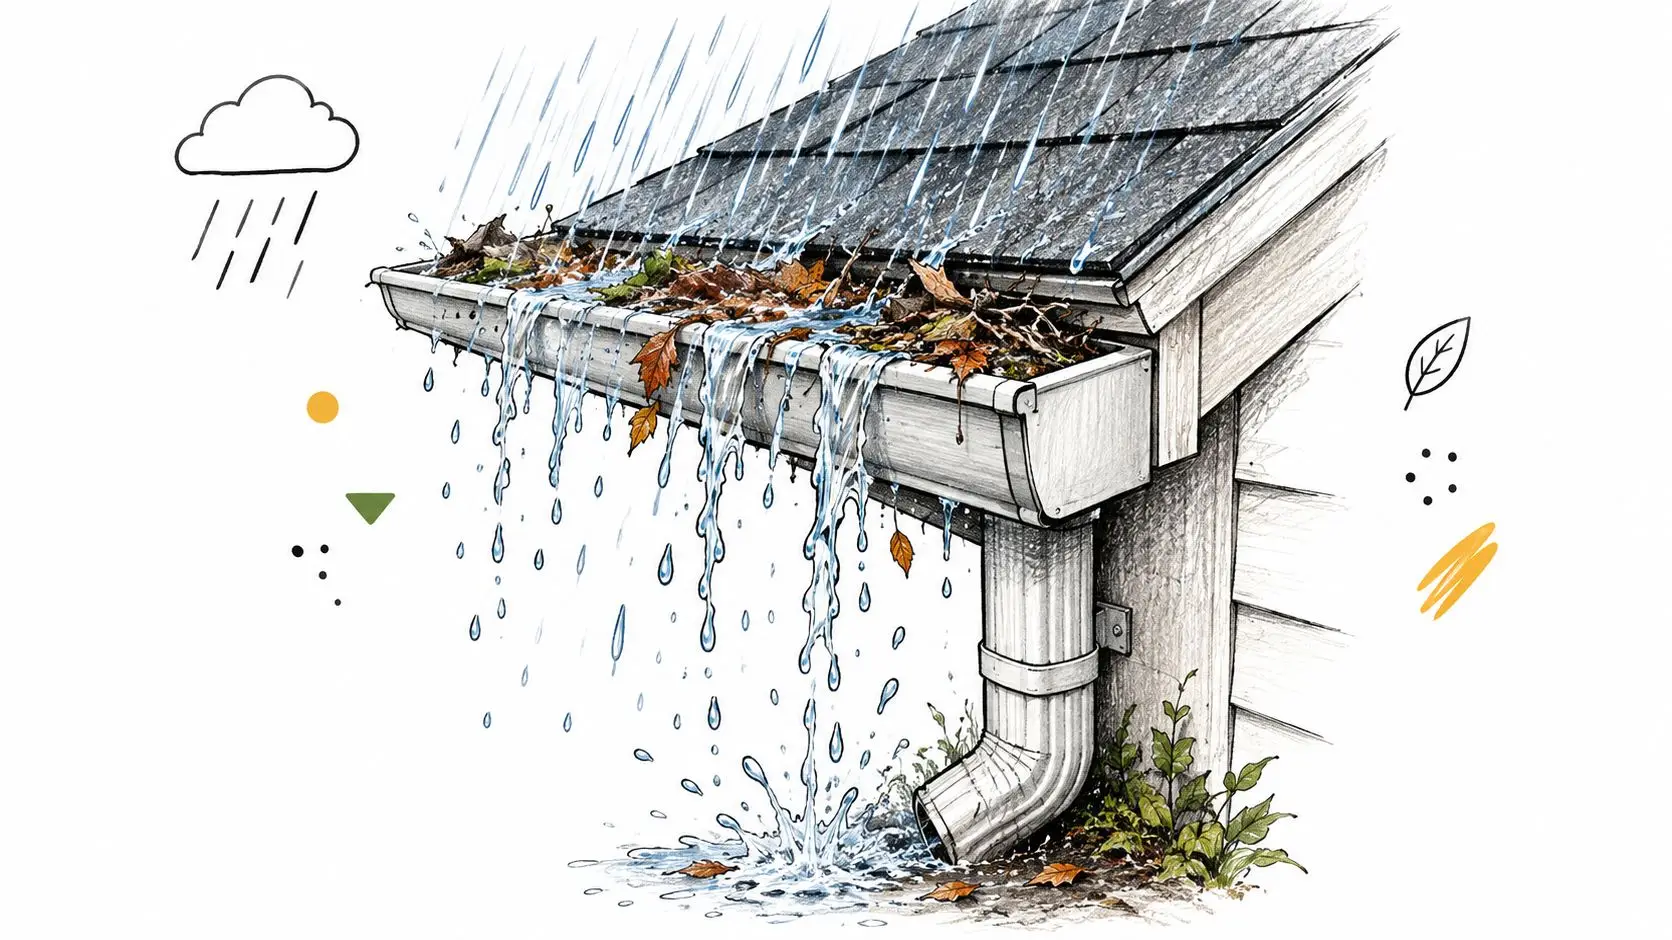
A gutter problem becomes an interior problem when runoff lands beside the house instead of moving away from it. Leaves, roof grit, nests, sagging sections, undersized channels, and poorly positioned downspouts can all redirect water toward walls and foundations. During Phoenix monsoon storms, a short period of intense rainfall can expose a drainage weakness that stayed invisible through dry weather.
Start at ground level. After a storm, look for water stains on exterior walls, washed soil beside the foundation, puddling near downspouts, and dampness in any storage or living area below grade. Check gutters for standing water and low spots. A clean gutter that still overflows may have a slope, capacity, or discharge problem rather than a debris problem.
A seasonal gutter routine
- Before monsoon weather: Clear the channels and confirm that each downspout is connected.
- After a severe storm: Look for debris, separated joints, sagging sections, and new stains.
- At the discharge point: Make sure extensions direct water away from the foundation rather than stopping beside it.
- Inside the property: Inspect lower walls, floors, and storage areas for dampness or a musty smell.
Gutter guards can reduce debris, but they don't eliminate maintenance. They can also create a false sense of security if the underlying slope or downspout layout is wrong. If water has entered the structure, dry the affected materials promptly and have the foundation area assessed. Moisture damage repair may involve extraction, drying, and inspection of materials that aren't visibly wet.
For homeowners who need a local drainage reference, downspout service for Flagstaff homes offers a useful comparison point for how downspout maintenance is approached in another Arizona environment.
6. Water Softener Tank Failure and Brine Line Leaks
Hard water makes water softeners common in Phoenix homes, but the equipment adds another tank, valve assembly, drain line, and brine connection to the property. Mineral buildup and aging components can cause slow leaks around fittings. A cracked tank or failed valve can release a much larger amount of water into a garage or utility room.
Inspect the floor around the main tank and brine container. Look for salt residue, damp cardboard, white mineral trails, corroded fittings, and discoloration along the brine line. A salty taste or salt bridging in the brine tank can indicate that the system isn't operating correctly. Those signs don't identify the exact leak, but they justify a technician's inspection.
Keep the area clear enough to see the base of every tank. Stored items can hide a wet floor and may also absorb water before you notice it. Place a water sensor beside the equipment, not only in front of it. A leak can begin behind the tank where a front-facing sensor has limited value.
The equipment doesn't need to look old to deserve inspection. Connections, valves, and drain lines can fail before the main tank shows obvious corrosion.
An annual service visit can check the tank, control head, bypass valve, drain routing, and brine line. Confirm that the floor slopes toward an appropriate drain where possible, and don't place electrical equipment or irreplaceable storage beside the system. If water reaches the garage wall, HVAC equipment, electrical panel, or adjacent rooms, shut off the supply if it's safe and arrange a professional moisture assessment.
7. Exterior Seal and Flashing Failures
Exterior openings rarely fail in one dramatic moment. Sunlight dries and cracks caulk. Temperature changes move joints. Monsoon rain tests window frames, door thresholds, roof penetrations, skylights, and flashing details. Water can enter at one location, travel inside a wall or roof assembly, and appear far from the original opening.
Inspect windows and sliding doors after storm weather. Look for cracked sealant, missing caulk, peeling paint, swollen trim, staining at corners, and debris trapped where water should drain. In the attic, check for wet insulation, darkened sheathing, or water marks around vents and roof penetrations. A dry day doesn't rule out an intrusion. Some materials hold moisture after the exterior surface has dried.
Roof flashing deserves a closer look than a general roof glance. Ask whether the inspection includes skylights, vents, chimneys, wall intersections, and other penetrations. Replacing interior drywall without correcting the flashing leaves the source in place. Re-caulking a symptom also won't fix a flashing detail that was installed with the wrong overlap or slope.
When a professional inspection makes sense
Call for a closer inspection when staining returns after painting, a wall feels soft, insulation is damp, an odor becomes stronger after rain, or the location of the interior damage doesn't match the nearest opening. Thermal imaging and moisture meters can help trace a wet area, but the tools still need to be interpreted alongside roof, window, and wall construction.
Use a UV-resistant exterior sealant where appropriate, replace compressed weatherstripping, and keep drainage paths clear. If you're comparing repair approaches, compare window flashing solutions before choosing a patch that may not address the underlying water path.
8. Slab Leaks From Underground Water Lines
A slab leak can begin beneath the home, where there's no visible pipe to inspect. Supply lines under a concrete foundation may corrode, crack, or shift as the plumbing and surrounding soil change. Water can saturate soil below the slab, move upward into flooring, and create symptoms that seem unrelated to plumbing.
The early clues are often practical rather than dramatic. Watch for an unexplained increase in water use, a warm patch on a floor, damp flooring, a new crack in tile or concrete, or the sound of water when every fixture is off. A warm spot may point toward a hot-water line, but it doesn't identify the source by itself. Don't break concrete based on a single clue.
Walk through kitchens, bathrooms, hallways, and other areas above plumbing lines. Feel for soft flooring and compare suspicious areas with nearby surfaces. Check whether the water meter continues moving when all fixtures and appliances are off. If the result suggests an active leak, turn off the appropriate supply and call a plumber who uses electronic detection equipment rather than guessing through repeated demolition.
A slab leak needs two investigations. The plumber locates and repairs the pipe. The restoration professional determines whether moisture remains in flooring, cabinets, walls, or the soil-side assembly.
Thermal imaging can identify temperature differences in the slab and help narrow the search, but it isn't a complete diagnosis on its own. After repair, continue watching the floor, odor, and water use. If flooring remains damp or begins to warp, drying and material removal may be needed even though the pipe has been fixed.
Unexpected Water Damage: 8-Point Comparison
| Failure Type | 🔄 Implementation Complexity | ⚡ Resource Requirements | 📊 Expected Outcomes / Impact | Ideal Locations / Use Cases | ⭐ Key Advantages & Prevention (brief) |
|---|---|---|---|---|---|
| Water Heater Expansion Tank Failure | Moderate, plumbing replacement and inspection; hidden until failure | Low–Medium, inexpensive tank + plumber; sensors optional | High localized flooding risk; structural, electrical, and contents damage if unnoticed | Utility closets, garages, basements near water heater | ⭐ Preventive replacement inexpensive; 💡 Inspect annually, replace every 5–10 yrs, install leak sensors |
| Condensation from HVAC & Evaporative Coolers | Moderate, requires HVAC technician for diagnosis and drain work | Low, quarterly drain cleaning, enzymatic treatments, float switches | Slow, hidden moisture → mold, insulation degradation, attic/wall rot | Attics, ductwork, walls, evaporative cooler areas (cooling season risk) | ⭐ Simple prevention via maintenance; 💡 Clean drains quarterly, add secondary drain/float switch |
| Washing Machine Inlet Hose Rupture | Low to implement (DIY replacement) but urgent response required | Low, braided hoses $15–50; shutoff valves; leak detectors | Very rapid, high-volume discharge; multi-room flooding; mold within 24–48 hrs | Laundry rooms, adjacent kitchens/bedrooms, multi-story homes | ⭐ Affordable upgrade (braided hoses); 💡 Replace hoses every 5 yrs, shut off supply when not in use, install auto shutoff sensors |
| Refrigerator & Ice Maker Line Leaks | Low, replacement straightforward but leaks are often hidden | Low, replacement lines or braided upgrades; leak sensors under unit | Slow continuous leaks causing cabinet and subfloor damage; long-term mold | Behind/beneath refrigerators, kitchen cabinets, floors above basements | ⭐ Easy, low-cost upgrades; 💡 Inspect monthly, replace lines every 5–7 yrs, use detection sensors |
| Clogged / Overflowing Gutters (Monsoon) | Low, routine cleaning; moderate if gutter resizing or re-pitching needed | Low–Medium, seasonal cleaning, gutter guards, downspout extensions | Rapid foundation runoff → basement seepage, foundation cracks, fast flooding during storms | Roof edges, eaves, foundation perimeter (monsoon-prone) | ⭐ Effective preventive maintenance; 💡 Clean before monsoon, extend downspouts 4–6 ft, consider guards |
| Water Softener Tank Failure & Brine Line Leaks | Medium–High, large tanks and valve systems; professional service | High, tank replacement $1,500–3,000 installed; sensors recommended | Large-volume discharge (40–80 gal) → extensive garage/utility damage and costly restoration | Garages, utility rooms where softeners are installed | ⭐ Newer systems have monitoring; 💡 Annual inspection, replace tanks every 10–15 yrs, install detection mats/sensors |
| Exterior Seal & Flashing Failures (Windows/Doors/Roof) | Medium, inspection and targeted sealing/roof work by pros | Low–Medium, re-caulking, flashing repair, possible roof work | Slow, hidden infiltration → mold, rot, insulation damage; can progress for years | Window/door perimeters, roof penetrations, skylights, wall cavities | ⭐ Resealing is relatively inexpensive; 💡 Re-caulk every 5–7 yrs, professional roof inspection every 2–3 yrs |
| Slab Leaks from Underground Water Lines | High, specialized detection and potentially invasive repair | High, electronic/thermal detection, concrete repair, plumbing replacement | Long-term soil saturation → foundation compromise, huge water loss, extensive repair costs | Homes on concrete slabs; under kitchens/baths and foundation areas | ⭐ Modern detection reduces excavation; 💡 Monitor water bills, use thermal/acoustic detection, inspect older slabs promptly |
What to Do Next When Hidden Water Shows Up
Most hidden water damage starts small and out of sight. A hose connection drips behind an appliance. A condensate line backs up into insulation. A gutter sends runoff toward a wall. A slab leak warms one section of flooring before it creates a visible puddle. The first symptom often appears somewhere other than the source.
Use a simple seasonal routine. Before hot weather, inspect HVAC drains, pans, attic insulation, water heaters, softeners, and appliance connections. Before monsoon conditions, clear gutters, check downspouts, inspect exterior seals, and look for roof or window vulnerabilities. After severe weather, repeat the exterior and attic checks instead of assuming a dry interior means the structure stayed dry.
Your response should match the sign you find. A small, isolated drip at an accessible fitting may need a plumber. Staining, soft flooring, a sudden bill increase, a lingering odor, wet insulation, or damage across more than one room calls for a broader inspection. Don't cover the area with new flooring or paint until someone has checked the moisture beneath the surface.
The EPA recommends drying wet or damp materials within 24 to 48 hours because faster drying generally reduces the conditions that support mold growth. The agency also identifies moisture meters as useful tools for checking materials such as carpet, wallboard, wood, brick, and concrete. That matters because visible water removal doesn't prove that a wall cavity, cabinet base, subfloor, or insulation has dried.
Indoor humidity matters too. The EPA recommends keeping indoor humidity below 60%, preferably between 30% and 50%. Phoenix's dry reputation doesn't eliminate enclosed moisture problems. A wall cavity, attic, cabinet void, or underfloor assembly can hold a different moisture condition from the air in the room.
Insurance adds another decision point. Sudden and accidental events, such as a burst pipe or broken washing-machine hose, are generally treated differently from long-term seepage, repeated leakage, and maintenance problems. Texas Department of Insurance guidance explains these distinctions, but your policy's wording, exclusions, deductibles, notice requirements, and endorsements control the result. Document the source, date, affected materials, meter readings, emergency work, and anything you remove. Don't assume that a hidden leak is automatically covered or that mold cleanup is included.
Flood coverage has separate limits and conditions. Standard homeowners insurance generally doesn't cover flood damage, and a National Flood Insurance Program policy may exclude preventable mold, temporary housing, business-interruption losses, many outdoor items, and certain sewer-backup situations, as described in NFIP coverage materials. Newly purchased flood insurance also typically has a 30-day waiting period, subject to policy rules and stated exceptions, according to FEMA flood-insurance guidance. Don't wait until water is entering the property to investigate coverage.
Restore Heroes is a licensed and IICRC-certified restoration company serving the Phoenix metro area. Its onsite inspections can include moisture detection and thermal imaging, followed by extraction, structural drying, sanitation, odor treatment, and repairs when appropriate. Property owners can request an assessment when a quick check turns up staining, soft flooring, a sudden water-use increase, or a persistent odor.
Restore Heroes provides emergency water extraction, moisture assessment, structural drying, and related restoration services for Phoenix-area homes and commercial properties. If you've found a hidden leak or signs of moisture, visit Restore Heroes to request an onsite assessment and discuss the next practical step.