
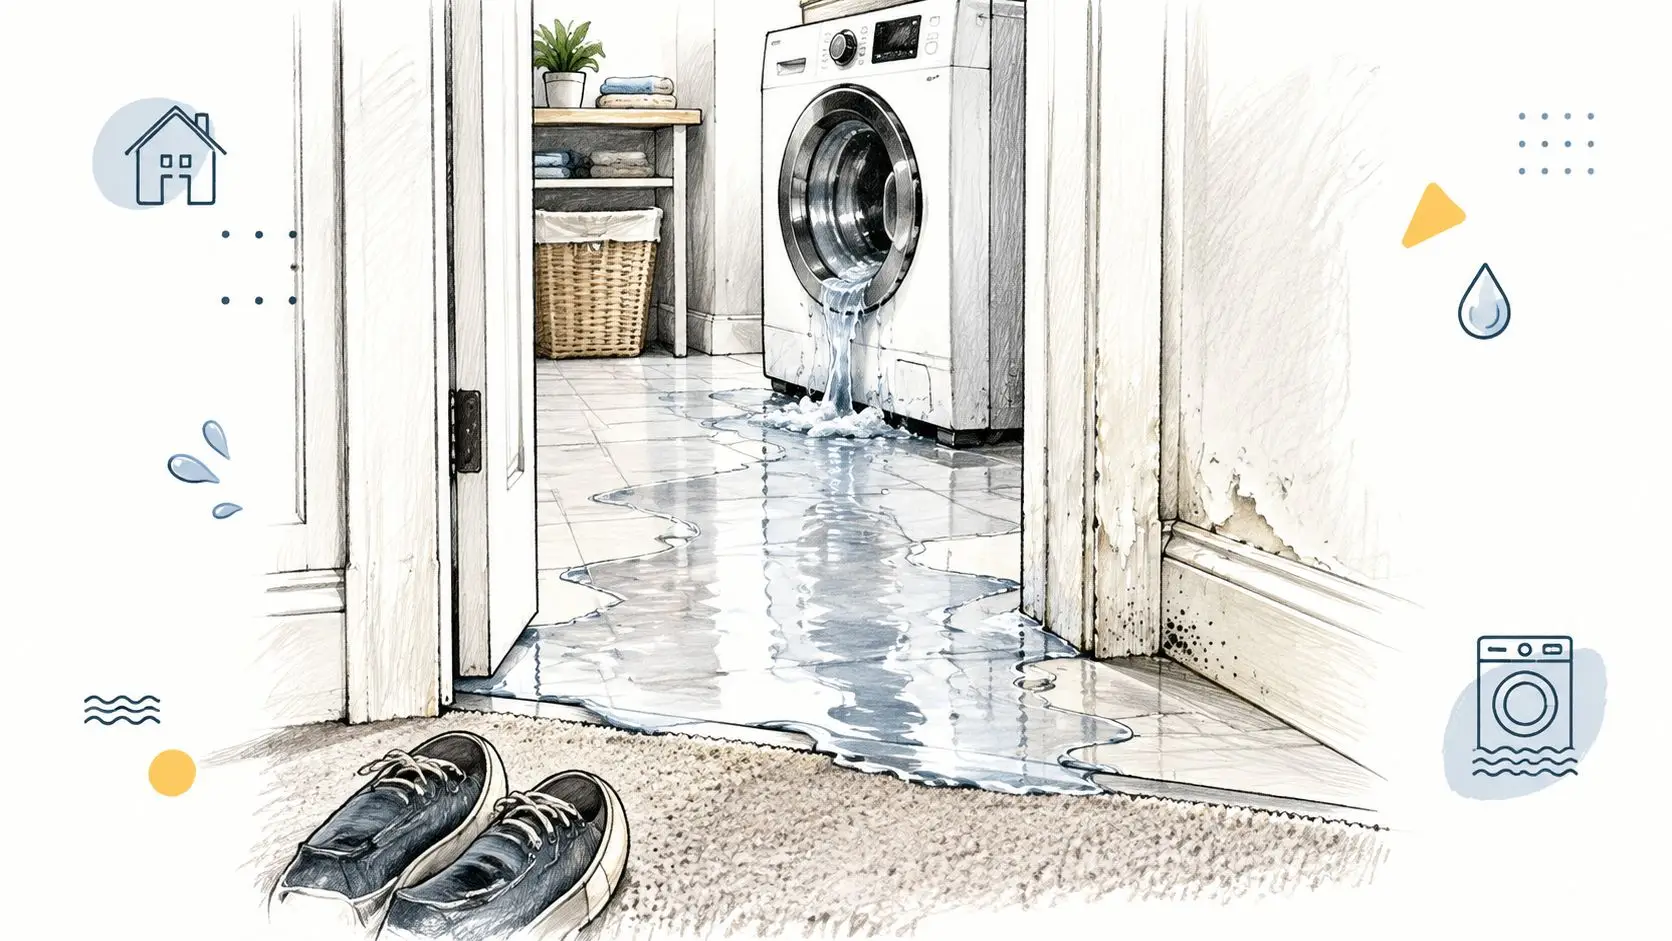
You open the laundry-room door after running errands and find water sliding across the tile toward the hallway. The washer is quiet now, but the floor around it is wet, the bottom of the baseboard looks darker, and a laundry basket is standing in a shallow pool. In Phoenix, that water may not disappear just because the air feels hot. It can move sideways across the slab, under floating flooring, and into wall materials where a mop can't reach.
Treat the first hour as a safety and containment window. Cut electrical power before touching standing water, stop the supply, document what happened, and begin safe extraction. Then decide whether the affected materials need professional drying, because a surface that feels dry can still hold moisture underneath.
What Washing Machine Water Damage Actually Looks Like
A Phoenix homeowner may first notice the obvious signs, a puddle beneath the washer, water creeping across laundry-room tile, or a wet path leading toward the hallway carpet. The less obvious signs often matter more. Water can seep beneath baseboards, dampen the drywall behind the machine, darken the edge of carpet tack strip, or collect under luxury vinyl and laminate planks.
Floating floors are especially deceptive. The top surface may look normal while water remains trapped in the foam underlayment below. On a slab foundation, there isn't a basement for water to drain into. Instead, moisture travels laterally along the concrete and follows gaps, floor transitions, wall penetrations, and uneven areas beneath finished flooring.
The signs beyond the puddle
Look past the appliance before you start moving furniture or pulling flooring. Check for:
- Baseboard changes: Softness, swelling, darkened edges, or paint separation can indicate that water traveled behind the trim.
- Floor movement: Warped laminate, lifted luxury vinyl, spongy carpet, or separated seams suggest moisture below the finish.
- Grout changes: Efflorescence along grout lines can appear when moisture moves through masonry or concrete and leaves mineral deposits behind.
- Nearby cabinetry: The bottom edges of cabinets may swell before the upper surfaces show any visible damage.
- Room-to-room tracking: Follow the wet edge into hallways, closets, bedrooms, and rooms sharing the same slab.
Phoenix heat can help exposed water evaporate faster, but it can also create false confidence. Heat dries the surface while trapped moisture remains under flooring or inside drywall. During monsoon season, indoor humidity rises and the slab may not release moisture quickly, which can lengthen the drying window.
Field observation: If the room smells faintly musty after the puddle is gone, assume moisture remains somewhere concealed until meter readings show otherwise.
For more guidance on distinguishing fresh wetting from older staining, use this guide to identifying whether water damage is new or old. The key is to inspect the entire travel path, not just the place where the washer stands.
First 60 Minutes of Emergency Response
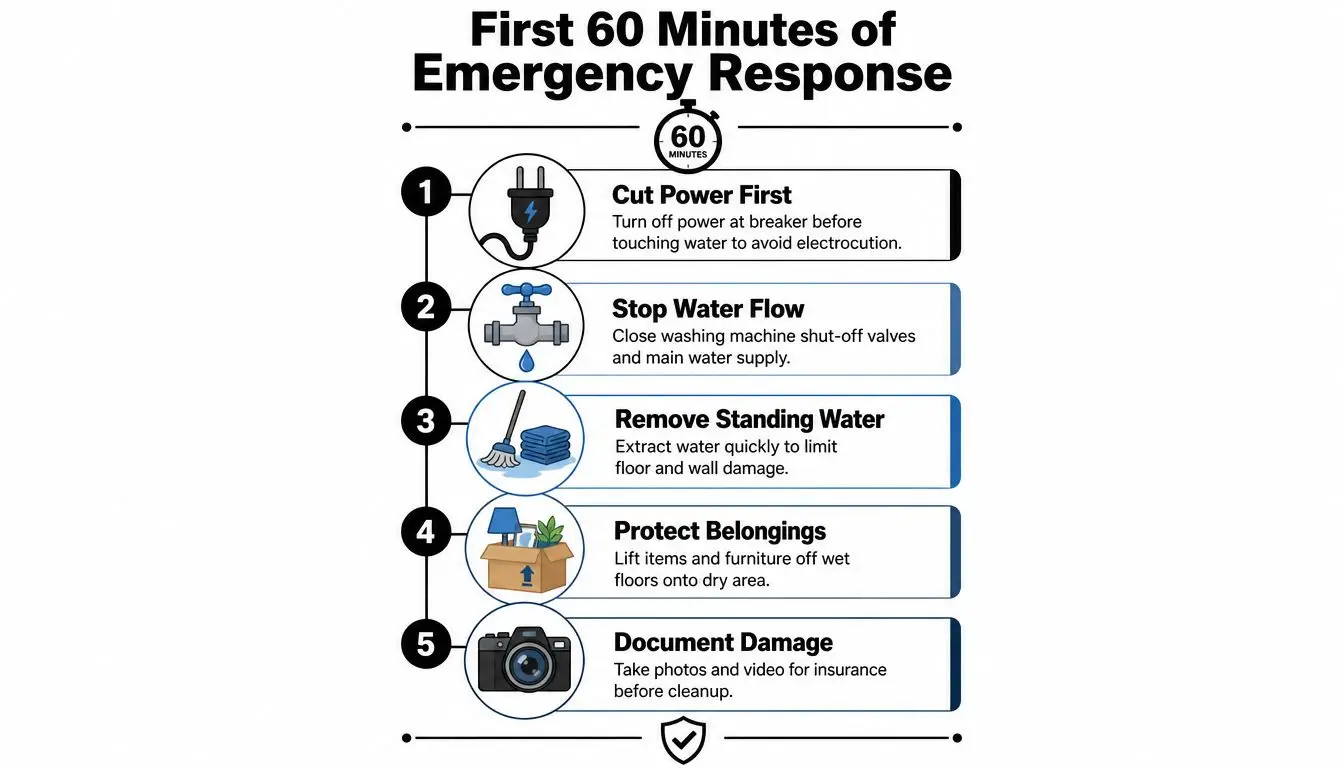
The priority order is electricity first, water second, documentation third. Don't step into standing water to reach the washer, a floor-level outlet, or a power strip. If water has reached the laundry-room receptacle, appliance cord, dryer connection, or nearby wiring, shut off the laundry-room GFCI or the breaker that feeds the area before you touch the floor.
Once the power is safely off, close the supply valves behind the machine. Turn each valve clockwise until it feels firm, without forcing a corroded valve. If the leak is active and you can't control the local valves, use the home's emergency shutoff. This emergency water shutoff guide can help you locate the right control before a leak occurs.
Contain what you can safely reach
Don't restart the washer to test it. If the machine is safe, the water is controlled, and the electrical circuit is isolated, a brief drain cycle may relieve pressure or clear remaining water. Stop immediately if water returns or the appliance behaves unexpectedly.
Move soaked laundry, baskets, detergent boxes, cardboard, rugs, and loose belongings into a dry area. Place rolled towels at the laundry-room threshold to slow water from reaching carpet or hardwood. A wet/dry vacuum or mop and bucket can remove surface water, but only use powered equipment if the electrical hazard has been eliminated and the equipment is appropriate for wet pickup.
Open interior doors to improve airflow. Running the home's AC fan may help move air through the house, but it won't replace extraction or dehumidification when water has reached the slab.
Take photographs and video before cleanup changes the scene. Capture the failed hose or valve, the washer connection, waterlines on walls, flooring transitions, nearby cabinets, and damaged contents. Photograph the room from several angles, then keep receipts and notes for every mitigation action.
For a visual overview of immediate response priorities, this short emergency water damage video can reinforce the sequence. If the water touched electrical components, stop DIY work and wait for qualified help.
What You Can Handle Yourself and What Needs a Pro
Homeowners can stabilize a small, fresh spill. They can remove surface water with a wet/dry vacuum, lift belongings from the floor, place towels at doorways, and photograph the loss. A detachable baseboard can sometimes be removed carefully, and a clearly saturated section of floating flooring may be lifted if doing so won't damage adjoining areas or destroy evidence needed for the claim.
The boundary changes when moisture moves below the finish. Water under tile, inside a slab-edge transition, through more than a small patch of drywall, or into carpet and pad requires a documented drying plan. A certified restoration crew can use truck-mounted extraction, commercial low-grain refrigerant or desiccant dehumidifiers, air movers, moisture meters, thermal imaging, and controlled demolition where materials won't dry in place.
| Task | Homeowner DIY | Certified Pro Required |
|---|---|---|
| Surface water removal | Wet/dry vacuum or mop when power is safe | Weighted extraction equipment for broad or deep saturation |
| Belongings | Move loose items to a dry area and photograph them | Contents manipulation, inventory, and specialized drying |
| Flooring | Lift a small, clearly saturated floating section with care | Moisture mapping beneath tile, laminate, vinyl, or carpet |
| Air movement | Open doors and use safe household fans | Equipment sizing, dehumidification, and psychrometric monitoring |
| Wall materials | Photograph and avoid unnecessary demolition | Moisture readings inside drywall and controlled removal |
| Documentation | Timestamped photos, videos, and receipts | Moisture maps, drying logs, scope, and completion records |
The practical cutoff: DIY extraction can remove what you see. Professional restoration verifies what you can't see.
Skipping verification is the mistake that creates callbacks. A room may feel dry while the slab, underlayment, pad, or wall cavity remains wet. When you compare restoration options, look for documented moisture readings rather than promises about fast results. The same attention to qualified, detail-focused contractors applies to unrelated property maintenance, such as choosing a provider for professional window cleaning for commercial properties.
Restore Heroes is one Phoenix-area option for emergency water extraction, structural drying, and contamination-aware cleanup. Whatever company you choose, confirm that the crew can document the affected areas and explain what readings support the decision to remove equipment.
How Professionals Dry and Verify the Repair
A professional drying job starts with mapping, not equipment placement. The technician records visible conditions, identifies the suspected source, and checks moisture in the floor, baseboards, drywall, adjacent rooms, and unaffected comparison materials. Moisture meters locate readings, while thermal imaging can help reveal temperature patterns associated with concealed dampness.
The crew then extracts standing water with weighted extractors suited to the floor covering. Air movers direct airflow across wet surfaces, while low-grain refrigerant dehumidifiers remove vapor from the room. In difficult conditions, a desiccant system may be appropriate. Equipment placement should reflect the affected volume and materials, not a one-size-fits-all arrangement.
Surface dry isn't structurally dry
A dry-looking floor can still hold water underneath. On a Phoenix slab, technicians track moisture along the concrete and around transitions rather than assuming the visible puddle marked the full loss. Water can travel into neighboring areas and appear later as a raised reading, odor, or flooring change.
Daily readings show whether the equipment is working. A psychrometric log records temperature, relative humidity, and related drying conditions, helping the crew determine whether the room can continue releasing moisture or whether equipment placement needs to change. The objective is to return materials to their pre-loss equilibrium moisture content, supported by comparison readings rather than touch alone.
| Stage | Target Moisture Reading | Equipment Used |
|---|---|---|
| Initial inspection | Establish affected and unaffected baseline readings | Moisture meter, thermal camera when useful |
| After extraction | Standing water removed and readings trending downward | Weighted extractor, wet vacuum |
| Active structural drying | Materials steadily approach comparison readings | Air movers, LGR dehumidifiers, or desiccant systems |
| Daily monitoring | No hidden area remains elevated without explanation | Moisture meter, thermal imaging, psychrometric log |
| Clearance | Readings align with appropriate unaffected materials | Final meter readings and documented drying report |
Don't approve repairs because the flooring looks better. Ask for the moisture map, daily readings, equipment record, affected-material scope, and final clearance documentation. The post-remediation verification process provides useful context for why confirmation matters after cleanup.
Insurance, Documentation, and the Coverage Gray Area
The coverage question usually turns on how and when the water escaped. Sudden and accidental appliance failures are commonly treated differently from gradual seepage, poor maintenance, or neglect. A burst supply hose that floods the laundry room may fit the sudden-loss category, while a slow drip behind the washer that leaves a long-standing stain may be treated as maintenance-related.
The washing machine itself is another separate issue. Standard homeowners coverage may address resulting damage to floors, drywall, baseboards, cabinets, and contents while excluding the failed appliance or worn component. Your policy language controls, so don't assume that approval of the surrounding repairs means the washer will be replaced.
Build the claim record before the scene changes
Photograph first, then mitigate safely. Your file should include:
- Timestamped photos and video: Show the source, water path, affected rooms, wall marks, flooring, contents, and appliance connections.
- A plumber's report: Ask the plumber to identify the failure point and describe whether the event appears abrupt or associated with a deteriorated connection.
- A restoration scope: Keep the written description of extraction, demolition, drying, cleaning, and repairs.
- Moisture documentation: Preserve maps and daily readings that show which materials were wet and how the crew verified drying.
- Receipts and communication: Save emergency purchases, mitigation invoices, messages, and claim reference details.
Delayed reporting can affect coverage because the insurer may question why damage continued after discovery or whether the condition developed gradually. DIY demolition can create a second problem if it removes the evidence an adjuster needs to evaluate the cause, extent, and timing of the loss.
The water damage insurance claim tips can help you organize the call and records. Don't promise yourself that every wet material will be covered, and don't accept a verbal conclusion without asking what policy language supports it.
Stopping the Next Leak Before It Starts
The most useful prevention work happens at the water delivery path, not in the washer's brand name. Insurance claim studies cited by the American Appliance Repair overview found that washing machine supply hose failures accounted for 55% of washing-machine water damage claims, while overflowed drums or backed-up drain lines accounted for 28%. The same study reported an average failed machine age of 8.6 years, and only 6% of claims occurred in unattended homes. Those unattended incidents caused nearly 2.5 times as much damage as other claims because water remained undiscovered longer.
That evidence supports a simple conclusion. Inspect hoses, connectors, valves, and drain routing before you worry about replacing the appliance.
A practical maintenance routine
- Inspect during regular use: Look for kinks, bulges, cracks, corrosion, loose fittings, or moisture around the supply and drain connections.
- Replace aging hoses: Many maintenance guides recommend replacing washer hoses about every 5 years, and stainless-steel braided hoses are commonly recommended as a more durable alternative. See this washing machine water damage prevention guide for inspection and replacement considerations.
- Exercise the valves: Turn shutoff valves carefully and confirm they operate before an emergency. A valve that won't close is a problem discovered too late.
- Add automatic detection: A leak sensor under the washer or drip pan can alert you, and compatible systems may close the supply automatically.
- Reduce overflow risk: Common causes include overloading, excessive detergent, faulty inlet or outlet hoses, faulty valves, and plumbing failures. One restoration guide recommends loading no more than two-thirds of the drum, filled loosely, to reduce overflow risk. Review its washing machine overflow guidance for the operating details.
Monsoon preparation is a good time to check valves and connections because a small failure is harder to dry when indoor humidity rises. A plumbing inspection checklist can help you review the shutoffs and visible supply points before the next load runs.
A Clear Plan for the Next 24 Hours
The first day comes down to a few decisions. Cut power before touching water, stop the source, document the scene, and bring in qualified drying help before hidden moisture turns into a larger repair. Start the insurance conversation early, but let the policy and the documented facts determine coverage.
A normal Phoenix response may look like this:
- Morning discovery: Isolate electrical power if water reached outlets or appliances, close the washer valves, move belongings, and photograph the loss.
- Midday mitigation call: Contact a plumber and a certified restoration company. Describe the source, affected rooms, flooring, drywall, and how long the water may have been present.
- Afternoon extraction: The crew inspects, maps moisture, removes standing water, and identifies materials that can dry in place.
- Evening equipment setup: Air movers and dehumidifiers begin controlled structural drying, with equipment positioned according to the affected footprint.
- Next morning review: The crew takes new readings and adjusts the drying plan based on actual progress.
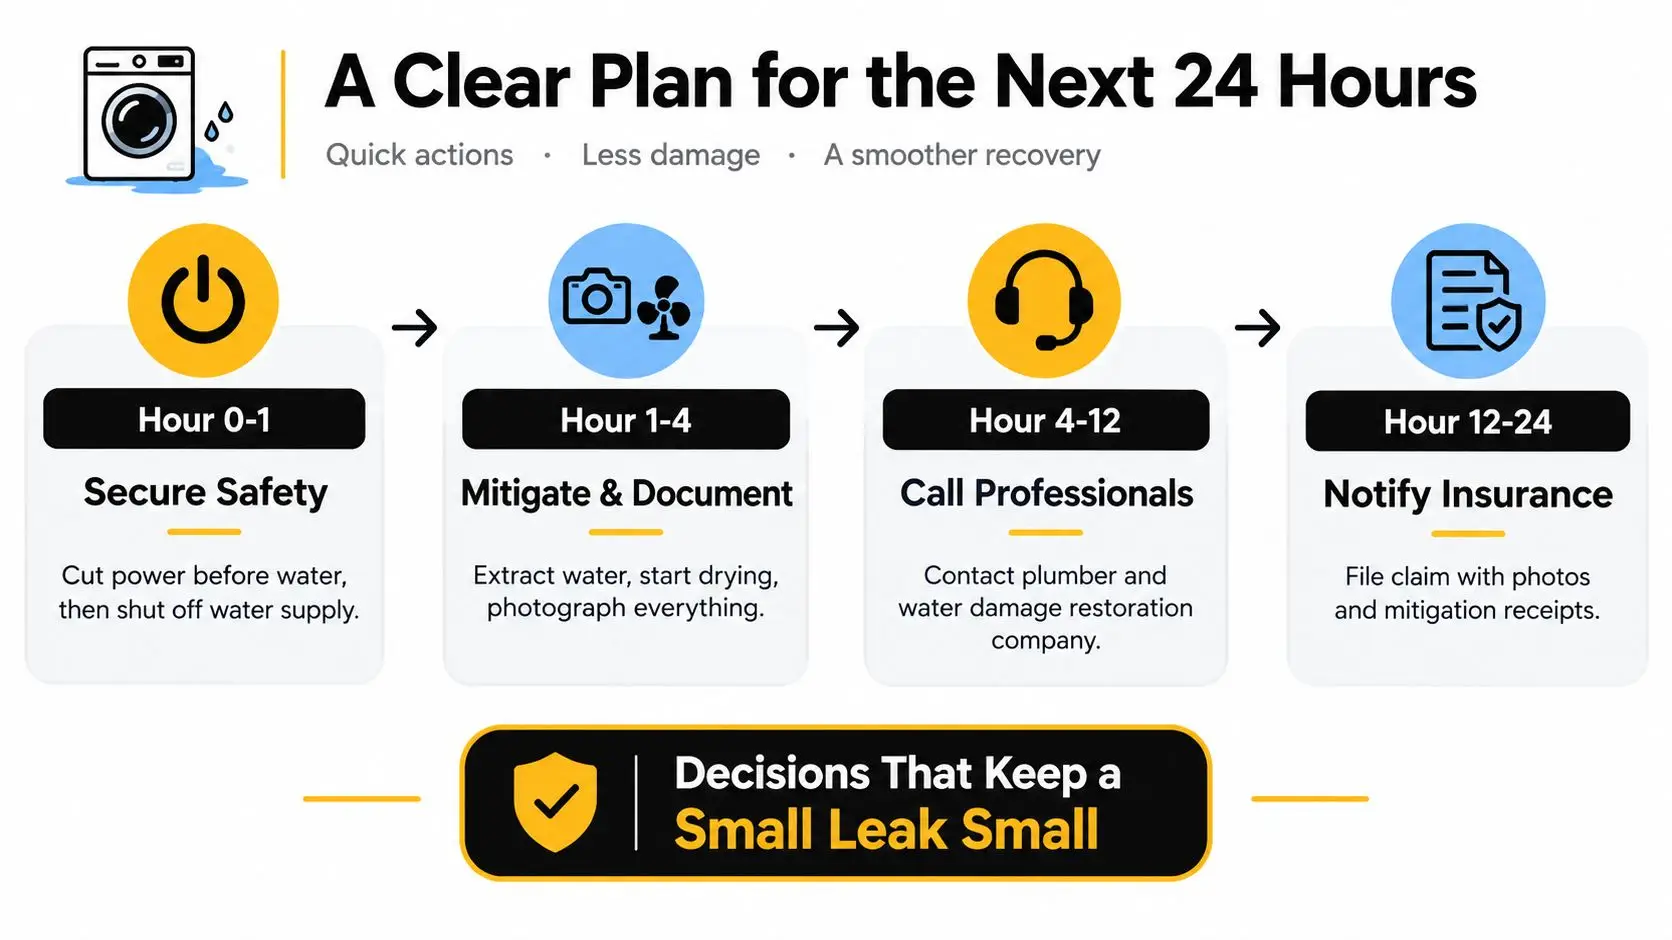
A slow response leaves more time for water to move under flooring and into porous materials. A rushed response that skips electrical safety or documentation creates its own risks. The minimum viable response is clear: shut off the supply valves, kill the breaker if water reached the laundry outlet, photograph everything, and book an IICRC-certified crew before you go to bed.
Restore Heroes provides emergency washing machine water damage response in the Phoenix metro area, including water extraction, structural drying, moisture documentation, and cleanup coordination with insurers. Visit Restore Heroes to request help assessing the affected materials and starting a documented mitigation plan.