
You notice the smell before you see the problem. The basement feels damp, the sink cabinet is swollen, and there's that musty odor that hangs in the air long after the water stops dripping. If you're trying to figure out how to Mold Remediation should start, the first move is usually not cleaning, it's deciding whether the space can be cleaned at all, and what caused the moisture in the first place.
A lot of homeowners rush straight to scrubbing. That's how the same problem comes back. Mold cleanup only holds when the leak, seepage, humidity, or hidden wetness is fixed first, because moisture control is the key to mold control (EPA home moisture and mold guidance).
Deciding Whether Mold Remediation Should Start at All
You're standing in a basement, and the smell is stronger near the sink wall than anywhere else. That's the kind of moment where people want to grab a sponge and bleach, but the better move is to slow down and ask a few basic questions first. The EPA's diagnostic approach centers on whether there's visible growth, a persistent musty odor, past or current moisture, and whether people in the home are reporting health issues or irritation (EPA mold course, chapter 4).
Start With the Moisture Source
If the pipe under the sink leaked, that leak matters more than the stain on the wall. Cleaning mold on a surface that's still wet is wasted effort, because the growth can return quickly once the material stays damp again. NIH moisture-and-mold guidance is blunt about this point, remediation shouldn't begin until the source of the water intrusion has been fixed, or the problem may reoccur (CDC-cited moisture and mold guidance).
Practical rule: fix the water path first, then decide what can be cleaned, what needs to be removed, and what should be handed off to a professional.
A small, dry patch of surface growth on a non-porous item is a different problem from mold that has rooted into wet drywall, carpet padding, or insulation. Surface spotting can sometimes be handled with careful cleanup after drying. Once the material itself is saturated, soft, or hidden behind a finish layer, the job shifts from wiping to containment and removal.
The EPA's school and commercial building framework, published in 2001, became a standard way to think about mold work in nonresidential buildings, and that model still matters because it treats mold as a moisture-driven building-health problem, not a stain to scrub away (EPA guide chapter 1). In plain terms, that means you diagnose the size, location, and cause before you decide whether to clean, contain, or call in help.
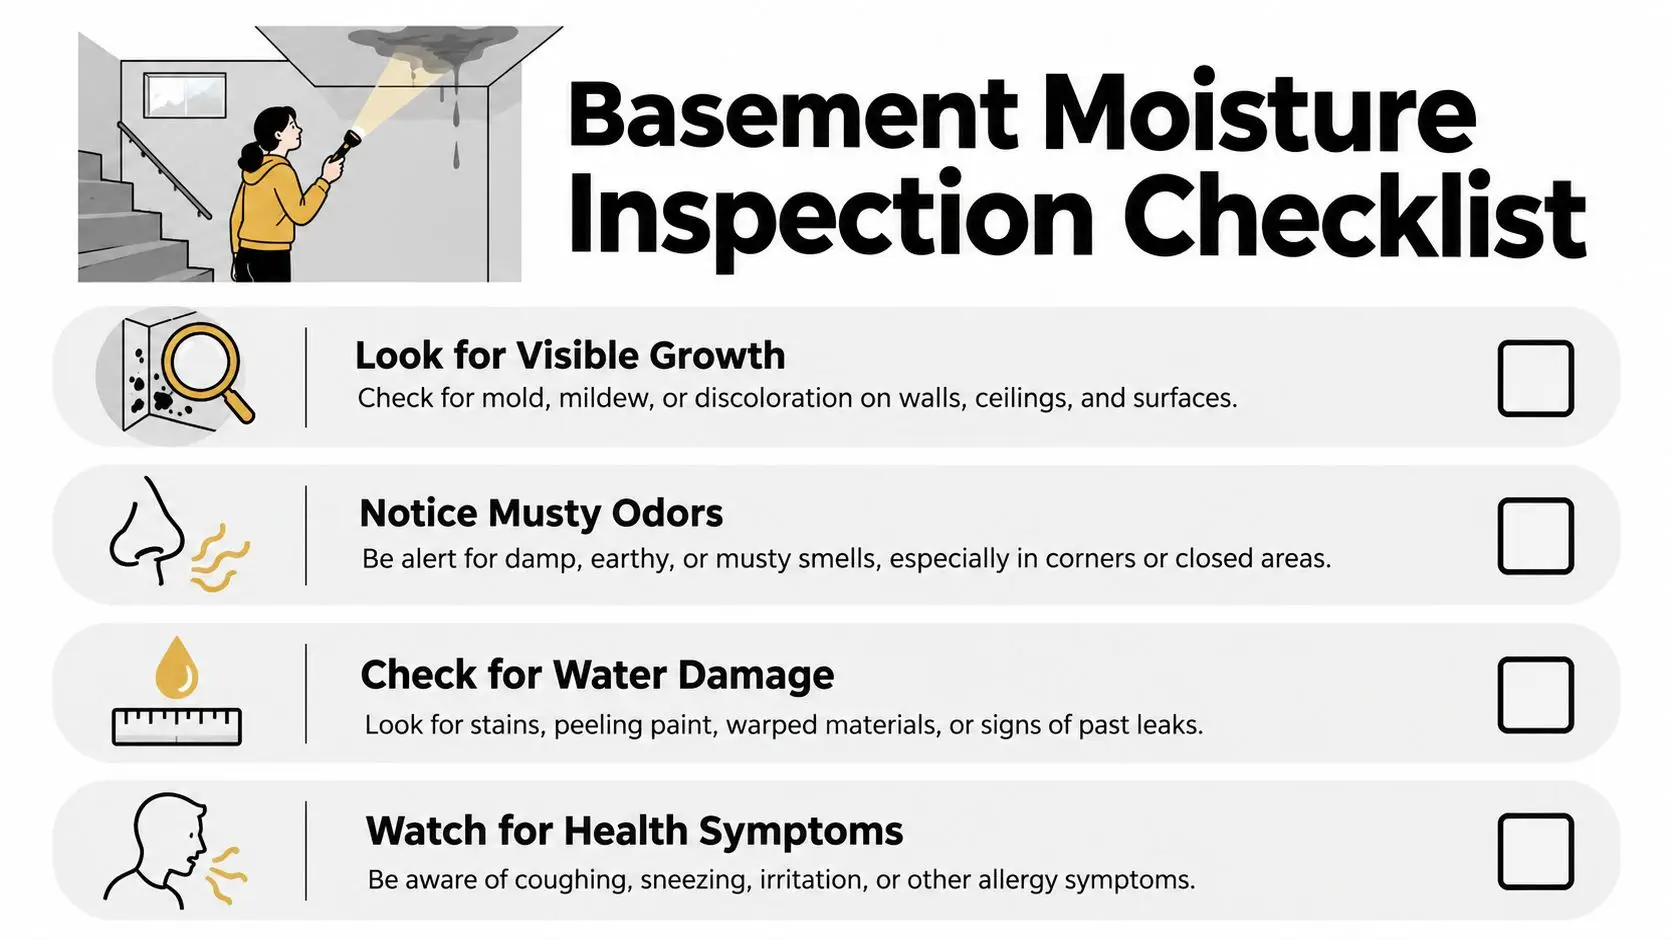
If you want a simple worksheet version of that first-pass inspection, this mold inspection checklist is a useful place to compare what you're seeing with what professionals look for.
Gearing Up With the Right PPE and Safety Basics
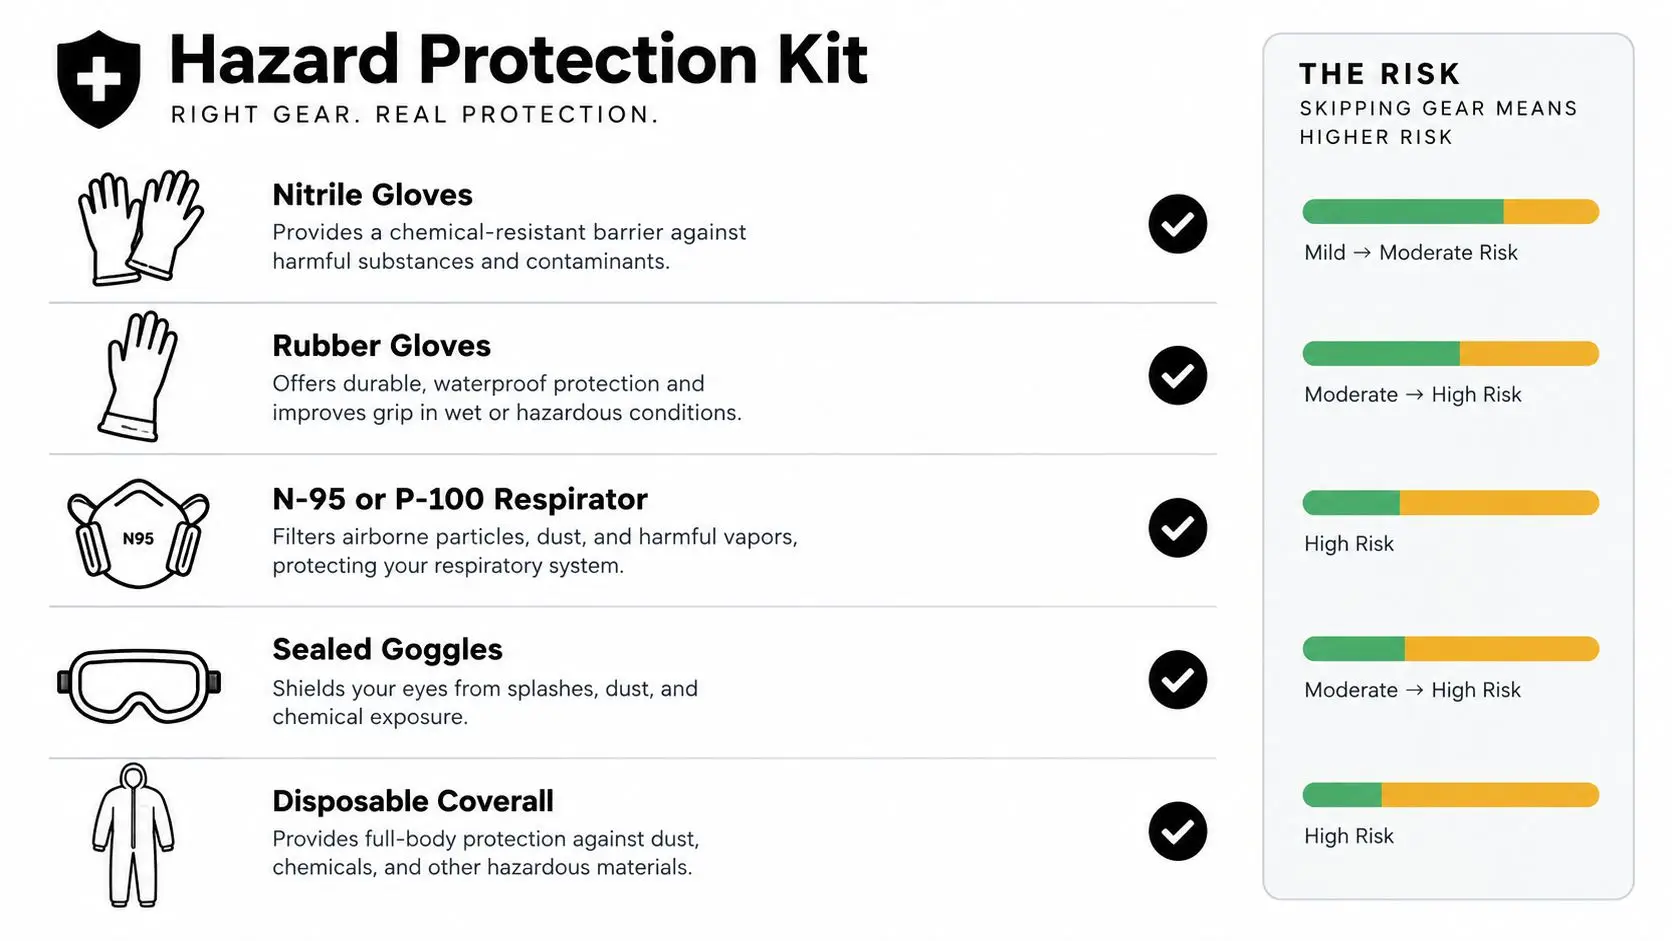
The first safety mistake is thinking a quick cleanup doesn't need gear. Once you disturb moldy dust, you're no longer looking at a stain, you're handling particles that can get into your eyes, nose, and lungs. The CDC recommends at minimum an N-95 respirator, goggles, and protective gloves during cleanup, and warns that bleach should never be mixed with ammonia because it can create toxic vapors (CDC cleanup guidance).
Wear Protection Before You Touch Anything
Use nitrile or rubber gloves, sealed goggles, a respirator that fits properly, long sleeves, and shoe covers. If you're dealing with a larger area or a job that kicks up more debris, a full-face respirator gives broader protection because it shields both breathing and eye exposure. That matters once the work stops being a light wipe-down and becomes demolition, scraping, or removal.
Open windows when the weather and the job allow it, but don't run a household fan that can blow spores into other rooms or toward the HVAC return. Ventilation should help you isolate the work area, not push contamination through the house. The point is controlled air movement, not more air movement everywhere.
Skip this completely: bleach as a substitute for removal on porous material. It can sanitize a surface, but it won't pull mold out of drywall, carpet padding, or other absorbent material.
For a pre-work door checklist, tape a note that says: gear on, windows open if appropriate, HVAC off in the work zone, no mixing chemicals, bags ready, and a disposal route that doesn't cross clean space. If you want a reference for biological cleanup safety before a job starts, this biological clean-up resource is a reasonable place to compare your setup to a professional workflow.
Containing the Work Area and Removing Contaminated Materials
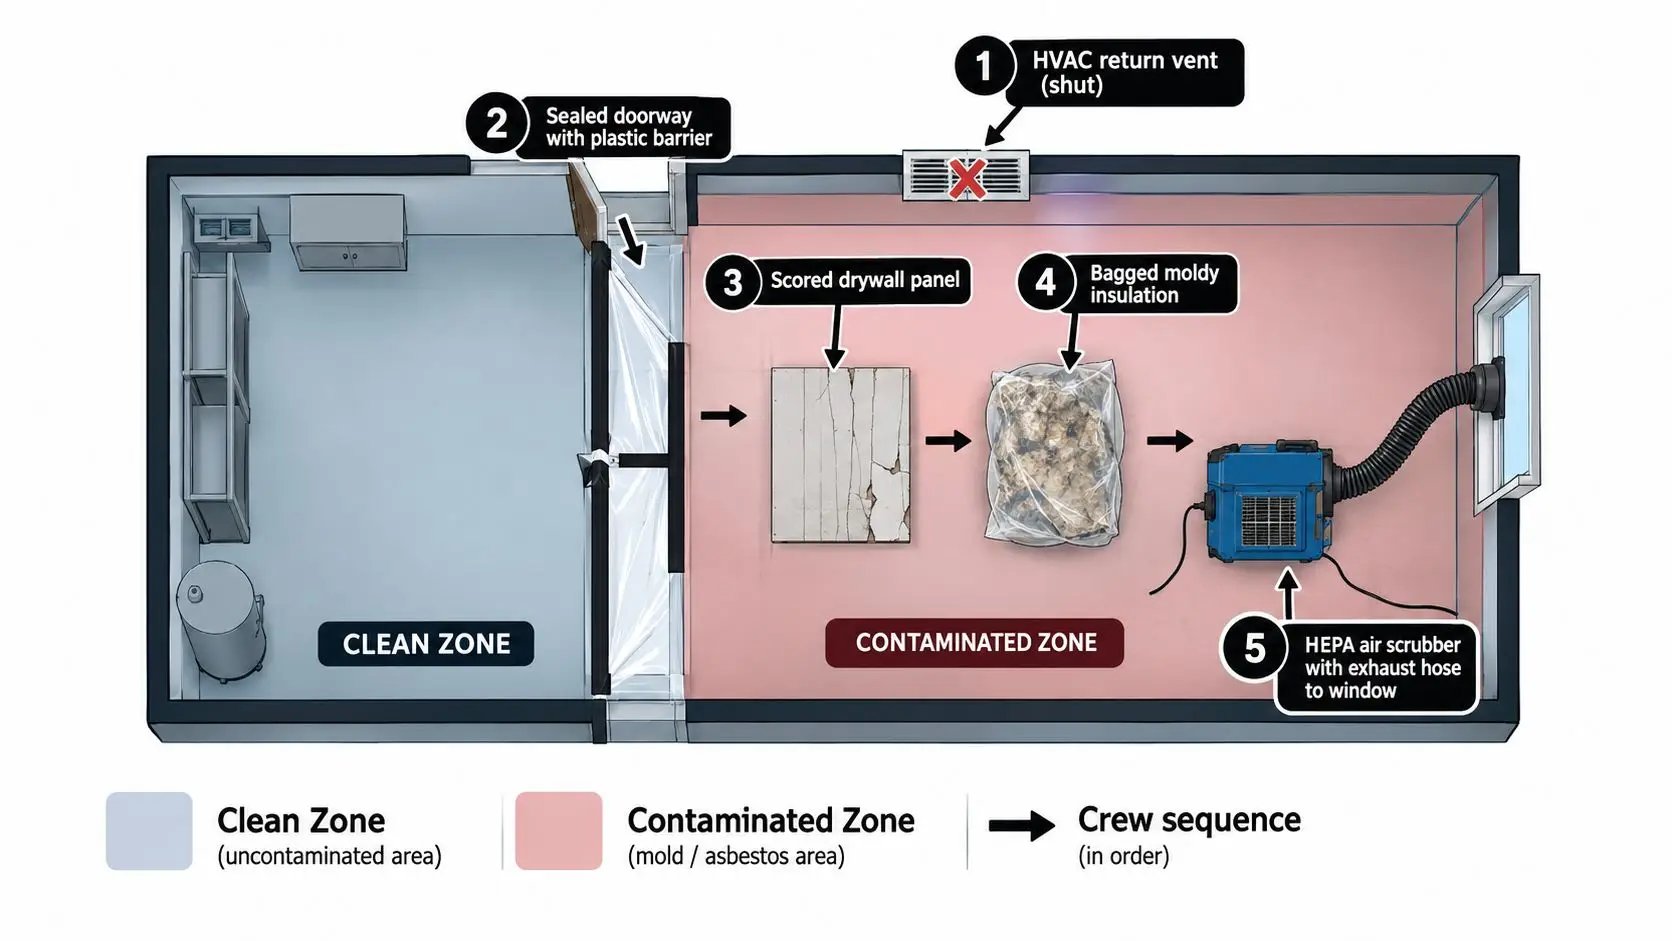
A proper cleanup starts by stopping spread, not by grabbing a scrub brush. In a bedroom, bathroom, or basement room, the first move is to shut down the HVAC return serving that space so disturbed particles don't travel through ductwork. From there, build containment if the job needs it, especially when the affected area is larger, harder to isolate, or tied to hidden damage.
Build the Barrier, Then Sort the Contents
The EPA says full containment is recommended when mold-contaminated surface areas are greater than 100 square feet, using a single layer of 6-mil fire-retardant polyethylene sheeting (EPA school and commercial guidance, chapter 3). For smaller residential work, the same principle still applies, seal the doorway, keep traffic out, and create a clean-to-dirty path so debris never crosses through the rest of the home.
Inside the room, sort items into three buckets:
- Non-porous items like metal or plastic, which can usually be cleaned.
- Semi-porous items that need judgment, depending on how far the growth went.
- Porous items like carpet padding, ceiling tiles, and paper-backed drywall, which often need to be bagged and discarded when they've been moldy.
After that, HEPA-vacuum hard surfaces before any wet wiping. The sequence matters. Vacuuming lifts loose debris first, then damp wiping with detergent and a second clean cloth removes what the vacuum missed. That approach lines up with professional guidance that puts source removal, containment, and cleanup in order instead of treating all surfaces the same (IICRC S520 overview).
A clean exit matters as much as a clean room. Seal disposal bags inside the work area, wipe them down, and remove them last so contaminated material doesn't drag through clean space on the way out.
If you're trying to reach hidden cavities or decide whether a wall should be opened, the practical details in how to remove mold from behind walls help show why sealed removal is different from surface cleanup.
Drying the Structure Within the Critical Window
Drying is the pivot point. If the structure stays wet, you're not really done, you're just waiting for mold to return. U.S. guidance treats 48 hours as a critical benchmark, because mold growth has been shown on materials that stay wet for 48 to 72 hours, and the CDC says wet materials should be dried within 24 to 48 hours if possible (CDC cleanup guide).
Dry the Material, Not Just the Surface
Use LGR dehumidifiers to pull moisture out of the air and air movers to push airflow across wet surfaces. The goal is steady movement across the material, not a blast that just stirs dust. In practice, that means placing movers so air travels in a counter-parallel pattern over floors, baseboards, and exposed framing until the moisture has left the structure.
Temperature matters too. A warm room helps drying because it lowers vapor pressure and lets moisture leave materials more efficiently. Keep the space in a workable warm range, then confirm the progress with a pin or pinless moisture meter instead of guessing by touch.
Check the Hidden Wet Spots
Don't trust a wall just because the paint feels dry. Moisture hides behind baseboards, inside wall cavities, and under vinyl flooring, and those pockets can stay wet after the surface looks fine. That's why rebuild decisions should wait for consistent readings, not just one good-looking inspection.
Dryness is a verification step, not a feeling. If you rebuild too early, you can trap moisture inside and restart the entire problem.
A solid handoff point is three consecutive days of dry readings before you prime, seal, or reinstall insulation. On wood, the target is generally dry enough to read as sufficiently low on the meter for rebuild decisions, and gypsum should be dry to the touch and stable across checks. If you want a deeper look at how movers and drying equipment fit into that phase, water-damage fans gives a practical equipment reference.
Knowing When to Call IICRC-Certified Professionals
Some jobs stay small and contained. Others cross the line fast, and trying to save them with household tools usually turns into a bigger repair later. A good rule is to stop and call a certified pro when the affected area is larger than a modest patch, when moisture is trapped where you can't reach it, when leaks keep coming back, or when someone in the home starts having respiratory symptoms.
Compare the Job Before You Start
| Factor | DIY Is Reasonable | Call a Certified Pro |
|---|---|---|
| Area size | Small, visible, and limited to a manageable patch | Larger spread or more than a simple cleanup area |
| Moisture source | Easy to identify and already fixed | Hidden behind walls, under flooring, or still active |
| Material type | Non-porous or cleanable surfaces | Drywall, carpet padding, insulation, or structural cavities |
| Health impact | No one in the home is reacting to it | Anyone has respiratory symptoms or ongoing irritation |
| Leak pattern | One-time event with a clear cause | Recurring leak or unresolved building defect |
The IICRC S520 covers inspection, containment, structural remediation, HVAC remediation, contents remediation, and post-remediation verification, which is a good sign you've crossed from cleanup into technical restoration (IICRC S520). If you're interviewing companies, ask for certification numbers, proof of liability and mold-specific insurance, and a written scope that explains source correction, containment, removal, and verification.
If you're comparing contractors in the Phoenix area, one option is Restore Heroes, which provides inspection, moisture detection, containment, removal of mold-damaged materials, cleaning, deodorizing, and restoration when appropriate. That kind of end-to-end scope matters most when a job has moved past surface cleaning and into building repair.
FAQs on Testing, Insurance, and Preventing Mold From Returning
Homeowners often ask if they need testing before they act. Visual inspection is still the standard starting point, and swab or air samples are situational tools rather than automatic requirements. Infrared thermography can flag temperature patterns that suggest moisture, while a moisture meter confirms whether the material is indeed wet.
Insurance usually gets confusing fast, so keep the rule simple. Standard homeowners policies often cover sudden and accidental water damage, but they usually exclude long-term leaks, and mold coverage often depends on the underlying water claim. That's why documentation, prompt reporting, and a clear repair timeline matter as much as the cleanup itself.
For prevention, focus on the basics that hold up over time. Keep humidity under control, repair plumbing quickly, vent bathrooms outdoors, grade soil away from the foundation, and check the same problem spots seasonally so a small drip doesn't become a bigger hidden issue. If you're dealing with a dry climate and want a homeowner-friendly reminder list, mold prevention for Arizona homes is a useful companion piece for the prevention side of the job.
If you're staring at a damp wall, a musty room, or a leak that keeps coming back, Restore Heroes can assess the moisture source, contain the affected area, remove damaged materials, and dry the structure so you're not guessing at the next step. Visit Restore Heroes to get help with mold remediation, water damage, and the cleanup work that has to be done right the first time.