
Bleach isn't the starting point for bathroom mold removal. It may lighten a stain, but it won't repair a leaking pipe, dry the paper behind painted drywall, or make a recirculating fan exhaust outdoors. The area affected, the material underneath, and the moisture source decide the job.
A small patch on a glass shower door is a different problem from dark spots bleeding through a ceiling. Before you pick a cleaner, decide whether you can safely wash the surface or whether disturbing it could expose a larger problem.
Bathroom Mold You Can Handle Yourself
A dark grout line often sends homeowners straight to the cleaning cabinet. Start with an inspection instead. Look at the whole affected area, check whether the surface is sound, and notice whether moisture extends into nearby walls or cabinets.
The EPA's home mold cleanup guidance says occupants can generally handle areas smaller than about 10 square feet, while larger problems require more extensive precautions. That's a starting point, not permission to tackle every small patch. Hidden damage, contaminated water, and vulnerable occupants can make even a compact area unsuitable for DIY work.
Identify the surface problem
Mold can look fuzzy, speckled, or slimy, with green, black, or white patches. Soap scum is more often an even, greasy film that loosens with soap and water. These clues help you inspect, but appearance alone can't confirm the organism or the extent of damage.
Color also doesn't tell you whether the cleanup is safe. So-called black mold isn't a separate decision category. A soft wall, musty cabinet, or recurring patch matters more than the shade of the stain.
When bathroom mold is DIY and when to stop
| Situation | Action | Why it matters |
|---|---|---|
| About 10 sq ft or less on hard tile, glass, or metal | Clean it yourself with PPE | EPA treats small areas as occupant cleanup |
| Roughly 10 to 100 sq ft | Use limited containment or hire | Single layer of fire-retardant 6-mil poly |
| More than about 100 sq ft | Stop and hire | Full containment with double poly barriers |
| Wet drywall, insulation, or ceiling tile | Remove the material, often with a pro | Porous pieces cannot be reliably cleaned |
| Spots return within weeks | Stop scrubbing and find the water | Recurrence signals an unresolved moisture problem |
| Sewage water, HVAC growth, or a vulnerable occupant | Stop disturbing it | Exposure concerns exceed those of a surface grout stain |
| Humidity stays above 60 percent | Correct moisture with or before cleaning | Sustained humidity supports new growth |
| Materials still wet after 48 hours | Begin drying immediately or call for help | Prolonged wetness increases the opportunity for growth |
Use the containment rows as professional planning benchmarks, not as instructions to build a barrier without training. The moisture rows identify conditions that need correction even when the visible patch is small.
Check beyond the visible patch
Look inside the vanity, around supply connections, and along the tub edge without pulling apart contaminated materials. Understanding what causes mold in bathrooms helps you distinguish shower condensation from a plumbing or wall-cavity problem.
The CDC's mold guidance recommends indoor relative humidity no higher than 50% throughout the day and drying water-damaged contents within 24–48 hours whenever possible. Don't wait for an air test before investigating an obvious leak. Testing can't replace finding the water or deciding whether damaged material can be dried.
Practical rule: If you can't see the full affected area, don't assume the visible patch is the whole job.
Surfaces to Scrub and Materials to Remove
Dark film on a glass door and dark staining above a shower may look similar, but they call for different decisions. You can usually wash the glass and inspect both sides. Staining that emerges through paint may require an assessment of what's happening behind the wall.
The product matters less than the material's condition. A cleaner can reach an exposed tile face. It can't reliably reach contamination inside damaged paper-faced board or insulation.
Separate washable surfaces from damaged assemblies
The EPA's guidance on mold and moisture recommends detergent and water for hard surfaces, followed by complete drying. It also notes that moldy absorbent materials, including ceiling tiles, may need replacement because complete cleaning can be difficult or impossible.
Bathroom materials to clean or remove
| Material | Action | Limit |
|---|---|---|
| Tile, glass, metal, sealed counters | Detergent and water, then dry | Bleach only if compatible, max 1 cup per gallon |
| Hard, sound grout | Scrub and dry | Replace if it turns sandy or stays damp |
| Caulk and silicone | Cut out damaged or persistently moldy material after controlling moisture | Never caulk over visible mold |
| Drywall | Cut back to dry, clean board and bag it | Paint does not remove growth inside the paper |
| Ceiling tile | Remove and replace when moldy | Absorbent tile cannot be reliably cleaned |
| Fiberglass insulation | Remove if wet or moldy | It cannot be cleaned in place |
| Wood trim that stayed damp | Often remove | Bleach will not dry the core |
| Paint stain coming from behind the wall | Have the cavity assessed, opened as needed, and dried | A wipe misses the source |
The bleach limit is a safety ceiling, not a reason to use bleach on every washable surface. Check the finish and product compatibility before applying any chemical.
Sound grout can tolerate careful brushing, but grout isn't the same as glazed tile. If it crumbles, stays damp, or separates from surrounding material, stop treating it as a cosmetic stain. The joint or backing may need repair.
Don't turn a surface cleanup into uncontrolled demolition
A persistent stain doesn't automatically prove a wall cavity contains mold. However, soft board, peeling paper, moisture, or an ongoing musty odor deserves investigation before repainting. Guidance on mold on bathroom drywall can help you recognize when a wall needs more than washing.
Don't cut into a suspect wall just to see what's there. Concealed pipes, wiring, and contaminated debris make exploratory demolition a different task from cleaning tile.
Make separate working lists before starting:
- Stays and gets washed: Sound glass, tile faces, metal fixtures, sinks, and intact sealed counters.
- Needs removal or assessment: Moldy absorbent board, damaged ceiling tile, wet insulation, failed sealant, and trim that won't dry.
Covering visible growth with paint or fresh caulk hides the inspection surface. It doesn't remove the contamination underneath.
How to Clean Hard Bathroom Surfaces
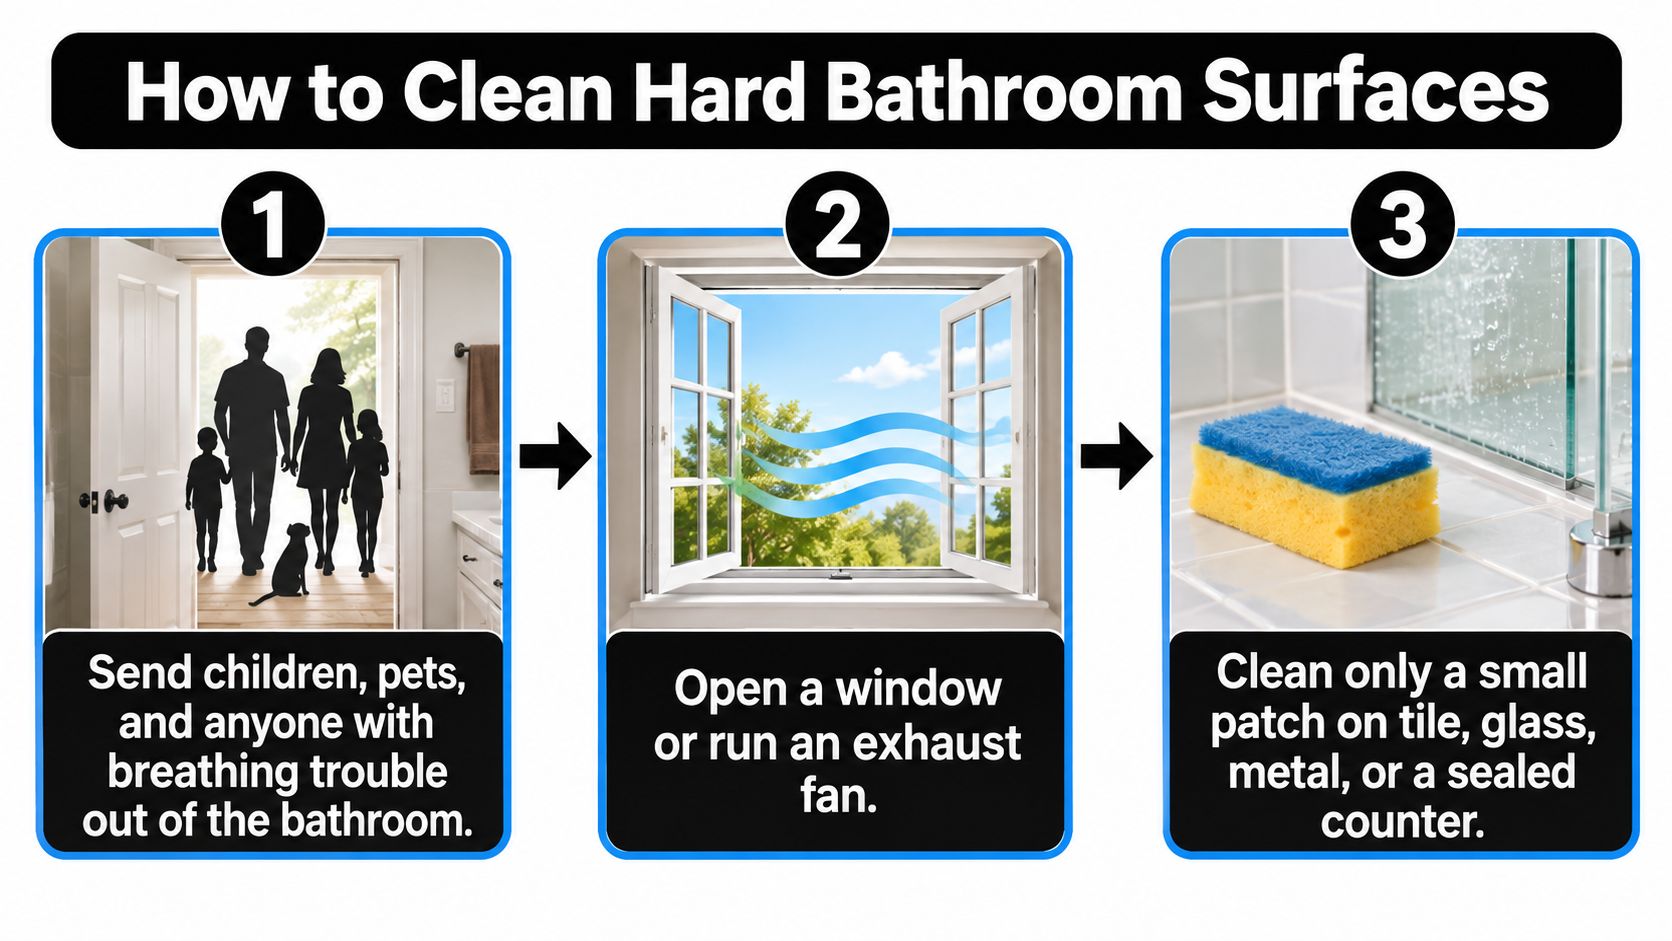
A clean surface is not proof that mold is gone. For a small, fully visible patch on sound tile, glass, metal, or a sealed counter, wash away the growth and residue, then dry the surface. Stop if cleaning reveals soft backing or a larger affected area. The moisture source and material condition determine whether scrubbing is suitable.
Before disturbing the patch, keep others away and establish ventilation.
Prepare before applying cleaner
Move other occupants out. Keep children, pets, and anyone with breathing trouble away from the bathroom. Don't use the room as a passageway while you work.
Ventilate outdoors. Open a suitable window or run an exhaust fan that discharges outdoors. A fan that only recirculates air doesn't remove moisture or cleaning-product vapors.
Wear protective equipment. Use at least a NIOSH-approved N95 respirator, gloves, and protective goggles, following the CDC's cleanup precautions. Choose goggles that protect against splashes, and check the respirator's fit. An N95 filters particles, not chemical gases, so keep ventilation in place.
Remove loose, damaged items carefully. Bag a moldy bathmat or another unsalvageable porous item before scrubbing nearby surfaces. If taking an item out would tear contaminated wall material, leave it for removal with suitable containment.
Gather separate cleaning and drying supplies. Set out dish detergent, water, a nylon brush or sponge, clean cloths, and a waste bag. Avoid abrasive tools that can scratch sealed finishes.
Remove residue, then dry
Wash with detergent and water. Scrub the surface, including corners and fixture edges. Wipe up loosened material instead of spreading it around, and switch to a clean cloth face as it gets dirty.
Treat bleach as optional. For sound hard surfaces, detergent cleaning followed by thorough drying is the routine approach. Bleach is not a required step, and a lighter-looking stain does not confirm that mold or its moisture source has been addressed.
Use bleach only when the surface and product directions allow it. The CDC's limit is 1 cup, or 8 fluid ounces, of household laundry bleach per gallon of water. Never mix bleach with ammonia or another cleaner. Remove detergent residue before a separate bleach application, and avoid saturating drywall, wood assemblies, grout backing, or caulk that cannot be rinsed and dried.
Rinse as appropriate and dry thoroughly. Follow the product directions for removing residue, then use clean cloths to remove standing water. Keep ventilation operating until the remaining dampness has dried.
This video shows another approach to bathroom mold cleaning. Apply the material limits and chemical precautions above.
- Inspect before using the room again. Check for residue, damp joints, or damage exposed during cleaning. If the wall feels soft, the patch extends beyond what you first saw, or a musty odor remains, stop adding cleaner and arrange an assessment of the underlying material.
How to Contain Mold Before You Scrub
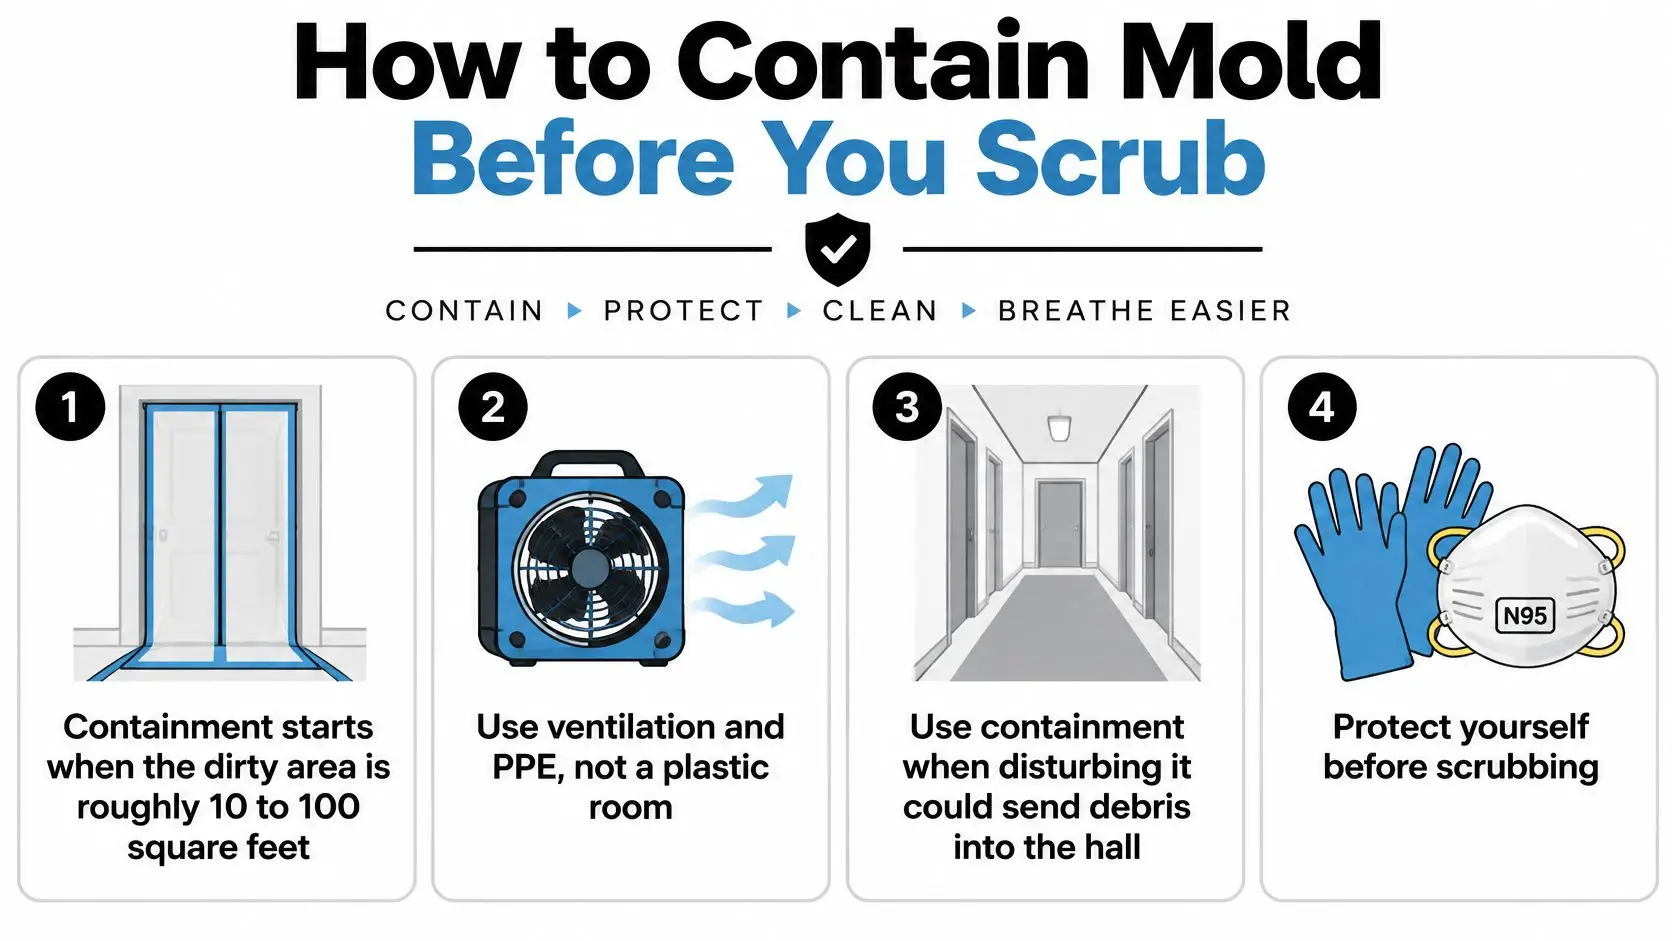
A small patch on intact grout generally needs controlled cleaning, ventilation, and protective equipment, not a plastic room. Larger areas and debris-producing work need a different setup.
Don't point a box fan through the bathroom doorway before containment is established. That can move contaminated dust into the hall. Controlled exhaust and random air movement aren't interchangeable.
Match the barrier to the disturbance
The EPA's remediation guide for schools and commercial buildings generally recommends limited containment for approximately 10–100 square feet, using a single layer of fire-retardant 6-mil polyethylene with a controlled entry flap. For areas exceeding 100 square feet, or work that could spread contamination, it generally calls for full containment with double polyethylene barriers.
These are remediation planning guidelines, not a universal legal threshold or a substitute for judgment. A small area of crumbling material can release debris beyond its footprint, while an intact washable surface presents a different disturbance.
The checklist distinguishes basic small-spot precautions from work that requires a barrier.
Keep the dirty work inside the work zone
A controlled workflow starts before anyone scrubs or cuts:
- Correct the water problem first. Stop the leak or address the condensation and exhaust failure. Otherwise, workers may clean surfaces while hidden material continues getting wet.
- Define the affected area. Include damaged material, the working space needed for removal, and a controlled route for bagged waste.
- Establish directed airflow. Air should move from clean areas toward the work zone and exhaust outdoors where feasible. Don't improvise an arrangement that blows across growth into occupied rooms.
- Bag material before carrying it out. Saturated drywall, insulation, and contaminated ceiling tile belong in sealed bags inside containment, not loose in a hallway.
- Clean salvageable surfaces and residue. Washing the visible patch isn't enough if cutting or removal has left contaminated dust on nearby surfaces.
Professional mold damage mitigation combines these controls with removal and structural drying. The barrier is only useful when workers also manage entry, waste handling, and airflow.
Judge completion by conditions, not color
A practical completion check asks whether the moisture source is corrected, the retained materials are dry, and no settled dust or debris remains outside containment. The bathroom should be usable without an unresolved musty odor or visible recurrence.
That check isn't a promise that a building contains no mold spores. It evaluates whether the identified problem has been addressed.
A vanished stain is evidence that the surface looks different. It isn't proof that a damp cavity has been cleaned and dried.
If growth appears connected to a supply or return pathway, avoid operating a potentially contaminated HVAC system until it has been professionally evaluated. Don't use the home's ventilation system to pull air through a contaminated work zone.
Tips to Keep Bathroom Mold from Returning
Start with the exhaust fan and a hygrometer, not a stronger spray. If spots keep appearing after showers, you need to learn where moisture accumulates and how it leaves.
Hold a tissue near the fan grille while the fan runs. It should draw toward the grille rather than blow back into the room. This confirms some suction, but it doesn't prove the duct reaches outdoors or that the fan removes enough moisture.
Measure what the bathroom actually does
Check the duct termination where it can be inspected safely. An outlet into an attic or ceiling space isn't outdoor discharge. A fan can sound normal while a blocked, disconnected, or poorly routed duct limits performance.
Place an inexpensive hygrometer away from direct spray and read it during ordinary use as well as after showers. The EPA's moisture prevention guidance recommends humidity below 60%, ideally 30–50%, and drying wet materials within 24–48 hours. Use the readings to evaluate whether your ventilation routine works, rather than relying only on a clear mirror.
Run the exhaust during showering and afterward until moisture readings settle and wet surfaces dry. If that takes unusually long, investigate the fan and duct rather than assuming a longer timer is the whole solution.
Repair the source and reduce surface water
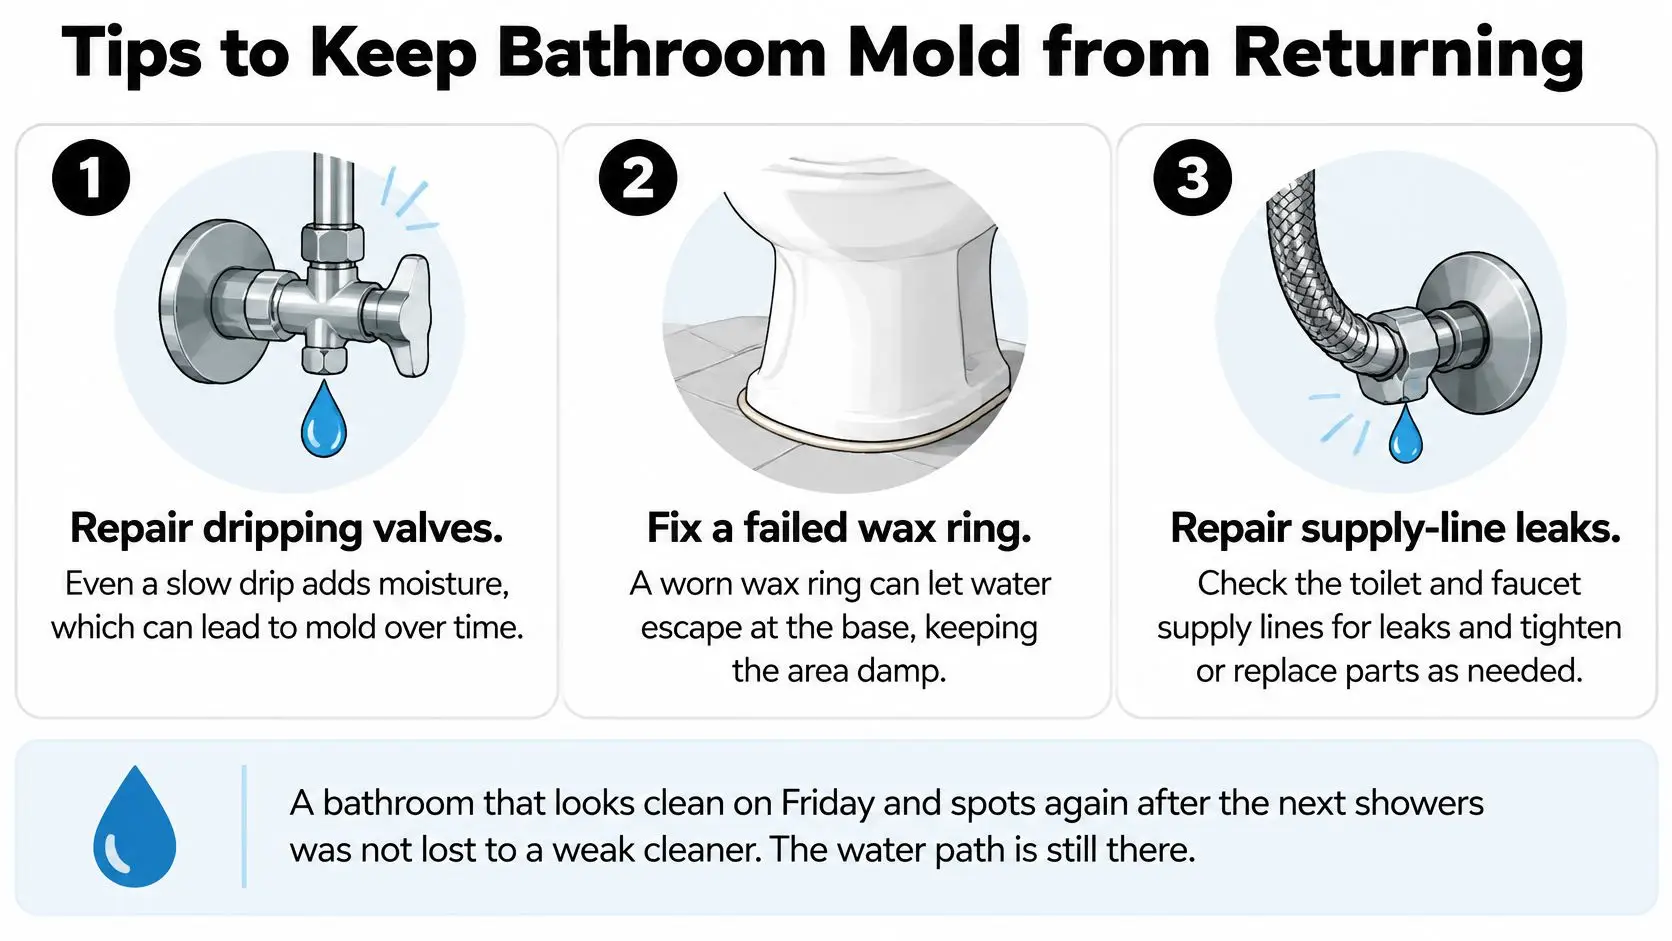
Repair dripping valves, toilet-base leaks, and supply-line leaks promptly. A suspected failed wax ring needs attention to the toilet connection and any wet surrounding material, not just fresh caulk around the base.
These fixes address water sources that surface cleaning can't correct.
In Phoenix, an air-conditioned home can feel dry while steam remains trapped in a closed bathroom. After the fan has exhausted shower air, leaving the door ajar can improve circulation. Squeegee glass and tile, spread curtains so they can dry, and inspect vanity interiors and the ceiling beneath an upstairs bathroom.
Why bathroom mold comes back
| What you see | Likely cause | What to do |
|---|---|---|
| Grout spots return within days | Fan runs too briefly or doesn't vent outdoors | Confirm outdoor discharge and extend operation until moisture clears |
| Mirror stays fogged with the fan on | Inadequate extraction, possibly recirculating air | Inspect and repair the duct so it exhausts outdoors |
| Ceiling stain under the bath | Drain, valve, or shower-pan leak | Stop using the affected fixture and arrange cavity drying |
| Musty smell in the vanity | Supply leak or splash behind the cabinet | Empty it, dry the box, and repair the source |
| Soft drywall along the tub | Failed joint feeding the wall | Remove damaged board and redo the joint after drying |
| New growth near a supply vent | Possible HVAC contamination | Leave the system off and have it evaluated |
| Condensation on a cold outside wall | Excess humidity or a cold-surface problem | Reduce humidity and assess the wall if condensation persists |
These are diagnostic clues, not confirmed diagnoses. A fogged mirror alone doesn't establish that a fan recirculates, and a ceiling stain doesn't identify which plumbing connection leaks.
For broader household checks, Purified Air Duct Cleaning's resource on how to prevent mold at home complements bathroom-specific habits. Keep a simple bathroom mold prevention routine focused on ventilation, dry joints, and visible leak checks, rather than repeatedly treating the same stain.
When to Hire Certified Mold Remediation
Hire help when the work involves hidden cavities, substantial growth, sewage-contaminated water, suspected HVAC contamination, or materials that remain damp despite drying efforts. A household member with asthma or immune suppression also changes the exposure decision. You don't need to attempt a cleanup before requesting an assessment.
Request a defined plan
A useful assessment should identify the moisture source and distinguish washable surfaces from damaged materials. The work plan should explain containment, removal, drying, waste handling, and how completion will be checked.
- Describe the location: Explain whether growth is on shower tile, inside a vanity, through paint, or near a vent.
- Explain the pattern: Note whether it follows showers, a known leak, or repeated cleaning.
- Flag exposure concerns: Mention breathing conditions and whether the bathroom connects to occupied rooms or shared ventilation.
Our professionals assess the extent of damage, develop a customized restoration plan, and address moisture removal. When reviewing mold remediation specialists, focus on a clear scope that addresses the wet assembly, not just the visible discoloration.
For a small, accessible patch on sound glass or tile, careful cleaning and verified drying may be enough. For uncertain or concealed damage, request an inspection plan before authorizing disturbance. Get the proposed scope and any payment or insurance details in writing rather than assuming an outcome.
Restore Heroes offers bathroom mold remediation and restoration with assessment, containment, removal, and drying matched to the affected materials. Visit Restore Heroes to request an inspection and explain where the mold appears, whether it returns, and what moisture problems you've noticed.