
Opening the windows and wiping everything with a wet rag isn't a reliable kitchen fire cleanup plan. A damp cloth can smear soot into a finish, and fresh air won't remove residue inside cabinets, on dishes, or along the route smoke took into the hallway.
Cleanup scope follows smoke travel, not the size of the burn. Even when the fire stayed in the pan, you need to check what the smoke touched before you cook, restock the pantry, or switch the air conditioning back on.
Why Kitchen Fire Cleanup Outruns the Burn Mark
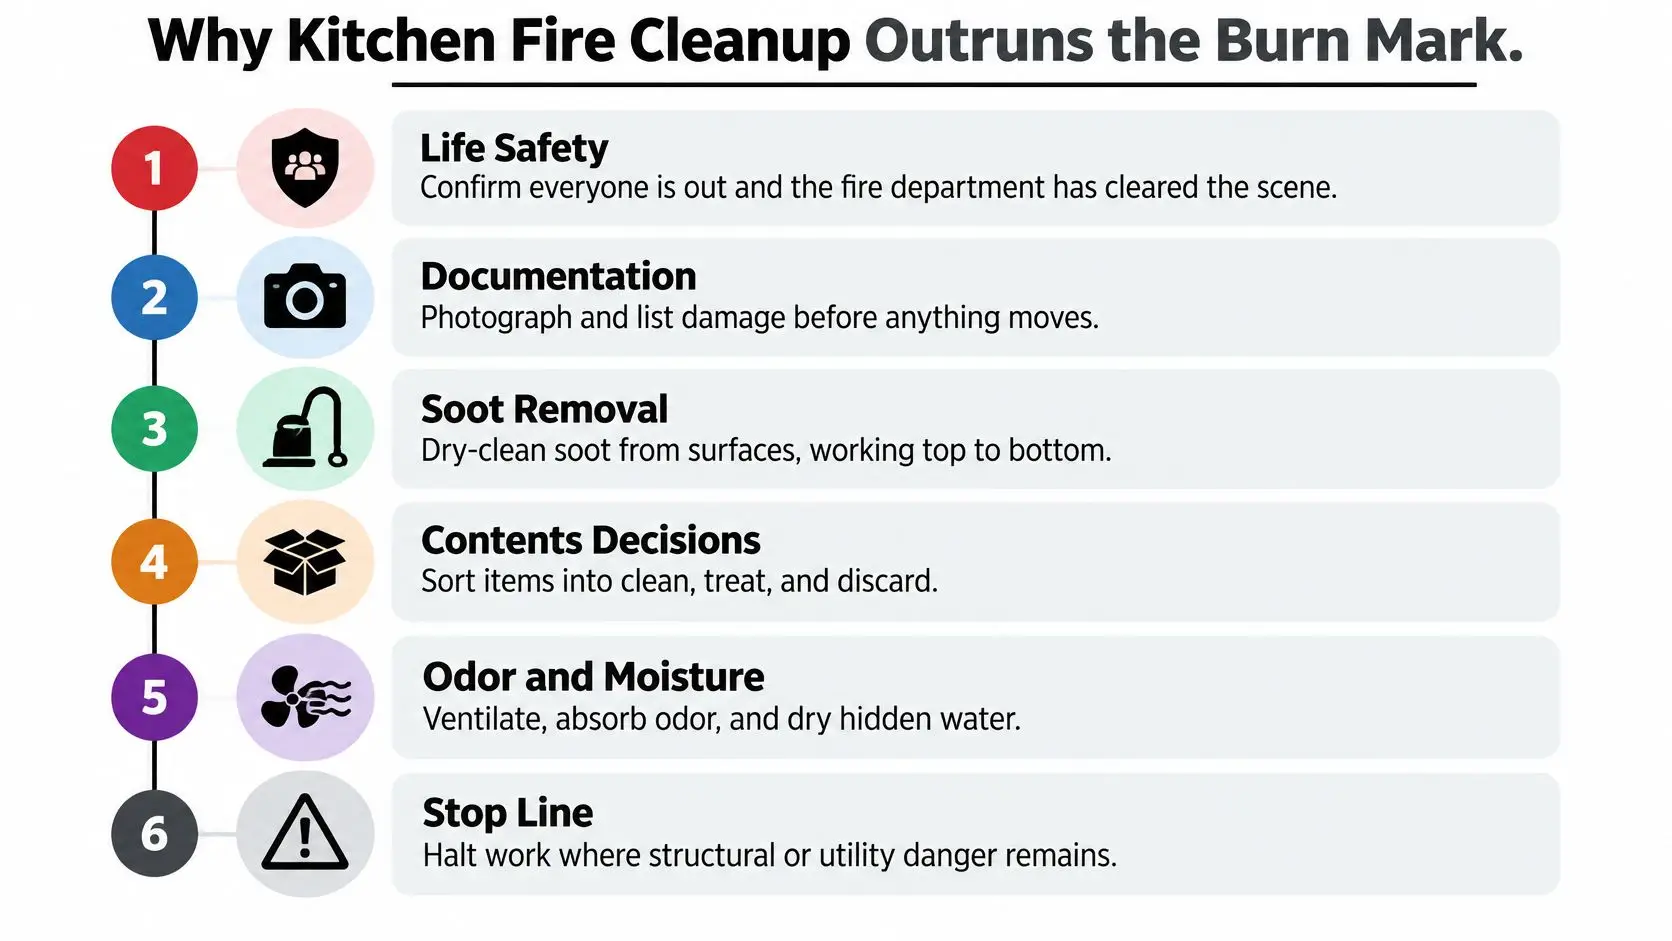
Kitchen fire cleanup follows a fixed order: life safety, documentation, soot removal, contents decisions, odor and moisture treatment, then clearance or professional handoff. A small burn doesn't justify skipping those steps.
Say a grease flare goes out quickly under a lid. The next morning, you find a tacky film on the hood, grit inside an upper cabinet, and a smoke smell in the hall. The pan may be the only burned object, but it isn't the only affected surface.
A confined fire isn't a clean kitchen
For 2017–2019, fire departments responded to an estimated average of 187,500 residential cooking fires annually, according to the U.S. Fire Administration's residential cooking-fire report. Approximately 93% were confined to a cooking vessel, while 83% of nonconfined cooking fires stayed within the object or room where ignition occurred, according to that same report.
Those distinctions describe flame spread, not the boundaries of your cleaning job.
| What stayed limited | What still needs checking |
|---|---|
| Flames stayed inside the pan | Hood, upper cabinets, nearby dishes, and ceiling |
| Fire stayed within the kitchen | Open doorways, hallway surfaces, and HVAC returns |
| Visible damage affected one appliance | Appliance housing, adjacent cabinetry, and stored contents |
The problem remains common: the U.S. Fire Administration estimated 160,300 residential building cooking fires in 2024.
Follow the route out of the kitchen
Start at the stove and trace the smoke's likely route. Check cabinet interiors, food-contact items, open shelving, doorways, and return-air grilles. Don't assume a closed cabinet door kept everything clean.
In apartments, involve building staff early. For 2019–2023, 68% of apartment or multifamily home fires started in the kitchen, compared with 30% in one- or two-family homes, according to NFPA's home structure fire report. Shared ventilation pathways, corridors, and neighboring units may need inspection.
Practical rule: Use the burned area to locate the source. Use residue and smoke travel to set the cleanup boundary.
Keep this sequence in view, but stop immediately whenever a structural or utility hazard appears.
Make the Kitchen Safe Before Any Cleaning
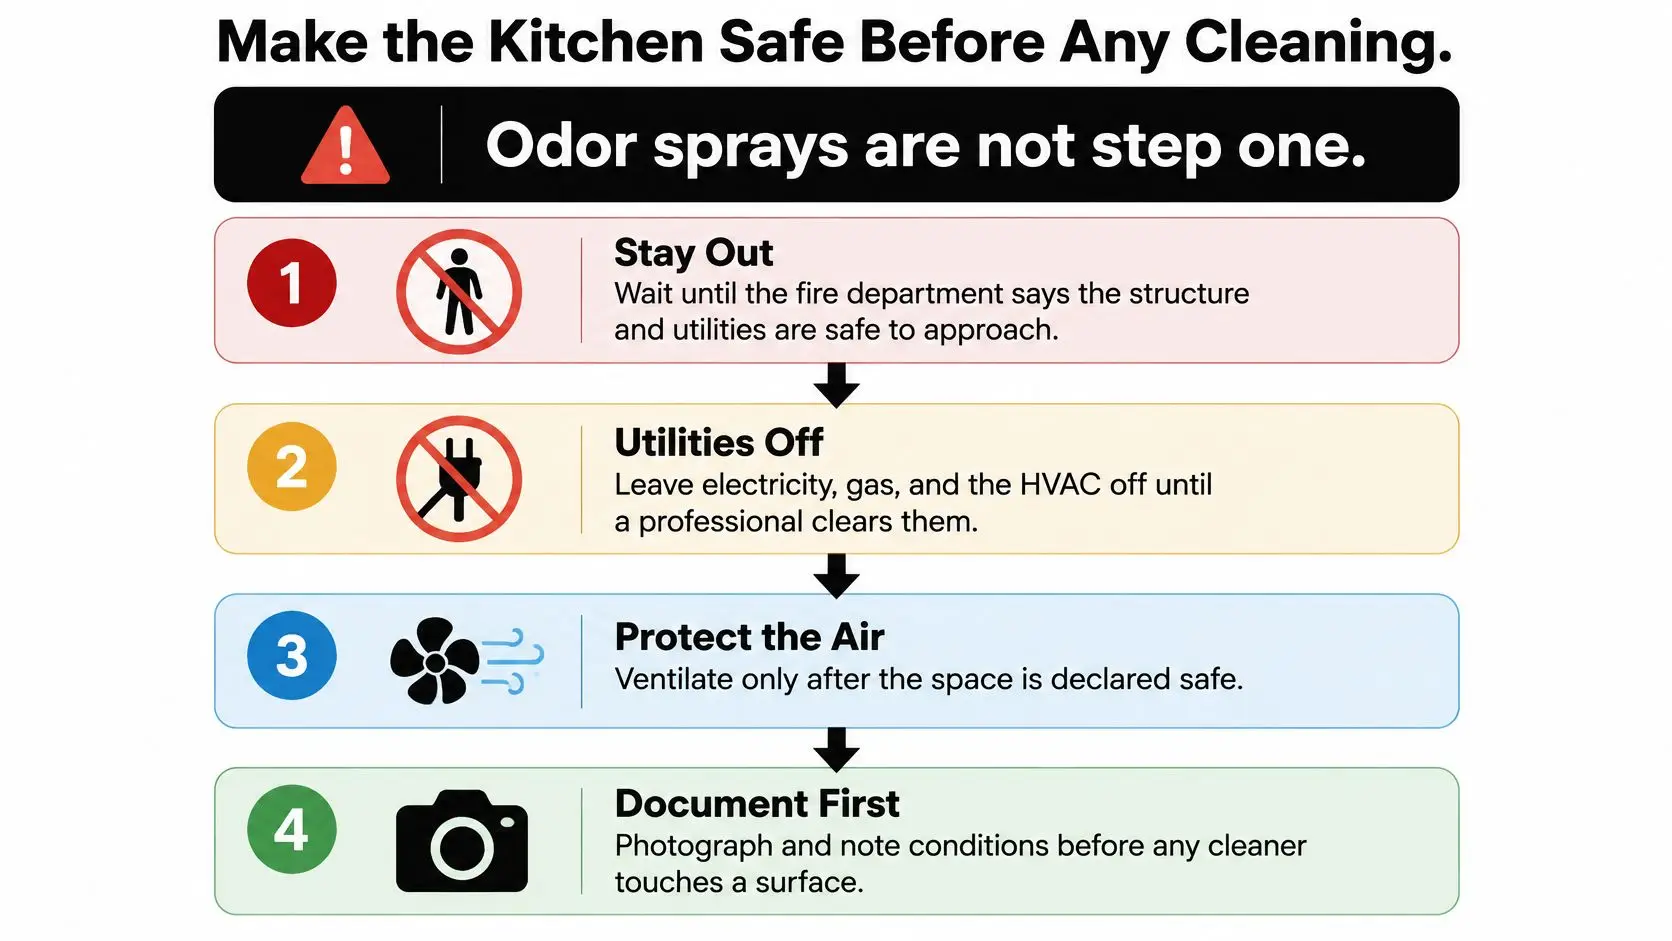
Odor sprays are not step one. Before you touch a cabinet or collect a bag of debris, establish whether you can safely enter and work.
The U.S. Fire Administration's after-a-fire guidance puts safe re-entry, utility precautions, and documentation ahead of cleanup. Fire residues and extinguishing water can contain more than ordinary dirt, including chemical residues, sharp debris, and potentially hazardous building materials.
Establish control before touching surfaces
Wait for permission to enter. Stay out until the fire department says the structure and utilities are safe to approach. Permission to enter doesn't mean every appliance is ready to use.
Leave affected utilities off until inspected. Don't reset a breaker to check the refrigerator or restart the gas range because it looks undamaged. Keep the HVAC off until its condition and contamination risk have been assessed.
Photograph before moving anything. Record soot lines, wet drywall, broken glass, open cabinets, and damaged contents. Work from wide room views toward close-ups without disturbing questionable materials.
Remove people and pets from the work zone. Children, older adults, and people with heart or lung disease, including asthma, shouldn't participate in cleanup because ash can irritate the eyes, nose, and skin and cause coughing, according to EPA's indoor-air guidance.
Wear appropriate protection. Use gloves, eye protection, long sleeves, long pants, and closed shoes. A tight-fitting, NIOSH-approved N95 or P100 respirator reduces particle exposure; a cloth mask isn't a substitute. CDC's cleanup-hazard guidance also explains that workplace respirator use requires exposure assessment, medical clearance, fit testing, and training.
Separate dirty and clean areas. Bag contaminated debris, restrict traffic, and use barriers at unaffected rooms. Change contaminated shoes and clothing before entering your car or sitting on clean furniture.
Skip dry sweeping and household vacuuming. These methods can redistribute fine soot. Control loose debris before using an appropriate HEPA-equipped vacuum or compatible damp-cleaning method.
Use this safety sequence before any cleaner touches the kitchen.
Heat doesn't change the stop line
In Phoenix heat, leaving the air conditioning off can make the house uncomfortable. That's a reason to arrange somewhere else to stay, not to circulate contaminated air through clean rooms. Plan for filter inspection or replacement before recommissioning the system.
If flames or active smoke return, leave and call emergency services. Keep what to do during a grease fire separate from the later cleaning decisions.
Leave immediately for a gas smell, ceiling sag, structural uncertainty, or breathing trouble. Seek urgent medical help for serious respiratory symptoms. An N95 filters particles; it doesn't make gas, electrical hazards, or every chemical exposure safe.
Build the Insurance File While You Work
Treat the camera as part of the cleanup kit. Once debris leaves the house, you can't recreate its original condition for an adjuster.
Start with wide photographs of each wall and the kitchen as a whole. Then photograph the range, hood, cabinet interiors, damaged flooring, and wet drywall. A slow video from the stove toward the hallway return can show the relationship between the source and affected rooms better than isolated close-ups.
Make each disposal decision traceable
Keep a simple inventory beside the photographs. A phone note or spreadsheet is enough if you can match each entry to an image.
- Describe the item plainly. Write stainless saucepan, countertop toaster, or opened flour bag rather than miscellaneous kitchen goods.
- Record approximate age. Use unknown when you don't know. Keep receipts you already have without inventing replacement prices.
- Separate the decisions. Mark items as awaiting assessment, cleaning, or disposal so nobody mistakes a contaminated pile for cleared belongings.
- Record who attended. Note the fire department visit, vendor names, and any electrician or plumber who inspected a utility.
Photograph discard piles before bags leave. If the carrier requests a material sample, ask how to retain it safely; don't keep hazardous debris in an occupied room. Before hauling away major damaged components such as cabinets, seek disposal direction or written permission.
A useful claim file shows what was damaged, what you did to prevent further loss, and what you deliberately left untouched.
Keep mitigation and policy decisions separate
Tell the carrier about protective work as it happens, such as boarding a broken window or drying a soaked floor. Save invoices, messages, and work authorizations together. For an apartment or condominium, retain property-manager correspondence about corridors, shared walls, and building systems.
Our fire damage insurance claims guide can help you organize that conversation. Documentation doesn't guarantee payment: coverage depends on the policy and the insurer's review.
If inventory, wet materials, and cleaning decisions become more than you can manage, hand over the file with the property assessment. A clear record helps the restoration team distinguish completed work from unresolved damage without asking you to reconstruct everything from memory.
Clean Soot From the Top Down
Start with ceilings and high cabinets, then walls, counters, and finally floors. Otherwise, material falling from above can contaminate surfaces you've already finished.
Use the least-aggressive method that removes the residue without damaging the material. FEMA's residential smoke-damage guide supports HEPA vacuuming, compatible dry and wet cleaning, wipe testing, and evaluating smoke-exposed surfaces even when soot isn't obvious.
Remove loose residue before washing
- HEPA-vacuum suitable surfaces. After debris is controlled, use gentle suction on horizontal surfaces and contents that can tolerate it. Don't drag a dirty nozzle across a delicate finish.
- Test a dry-cleaning soot sponge. On lightly affected painted walls or ceilings, try a hidden patch first. A chemical sponge is a dry soot-cleaning tool, not an instruction to soak the wall in solvent.
- Wet-clean compatible materials. Use a residue-controlled detergent and barely damp cloth where appropriate. Replace cloths and solution when they turn gray rather than spreading dirty wash water.
- Evaluate the result after drying. A clean-looking wet surface can hide remaining film or damaged finish. Don't escalate to abrasive scrubbing just because the first pass didn't work.
For painted surfaces, the guide to cleaning soot from walls gives more detail on avoiding smears and finish damage.
Soot cleaning by kitchen surface
| Surface | First method | Stop and replace or call a pro |
|---|---|---|
| Painted ceiling or wall, light film | Chemical sponge, then a damp detergent wipe | Soot ground into the paper, or drywall soft from hose water |
| Sealed cabinet exterior | HEPA vacuum, then detergent on a barely damp cloth | Finish lifted, char, or odor that returns after drying |
| Cabinet and drawer interiors | Empty, HEPA, then wash hard surfaces | Raw particleboard swollen or still smelling after it dries |
| Stainless appliance shell | HEPA, then a cleaner made for steel, with the grain | Controls, insulation, or the cavity behind the panel are smoked |
| Sealed stone or laminate counter | Damp detergent, frequent cloth changes | Heat cracks, lifted seams, or film that won't release |
| Floor, including vinyl, tile, and sealed wood | HEPA last, then wet-clean compatible with the finish | Cupping, ash in the seams, or a soft subfloor |
Open every cabinet and drawer. Check shelf lips, drawer undersides, hinges, and the cabinet top above the hood. Once the appliance is cleared for safe handling, remove the hood filter and inspect the accessible duct collar without dismantling concealed components.
Use a clean white cloth for a wipe test where film is hard to see. Remaining discoloration or smoke odor means more evaluation is needed, not just another coat of paint.
Ventilate only when outdoor air is clean and safe. Otherwise, use portable air cleaning continuously on high; once the central system is cleared, use MERV 13 or the highest compatible filter rating. Fragrance, charcoal, or an ozone machine isn't evidence of successful restoration, and uncertain contamination may require environmental testing before occupancy.
Sort Contents You Can Save From What You Cannot
Judge contents by exposure and cleanability, not by how tidy the room looks. Cabinet doors can hide contamination rather than prevent it.
The EPA-hosted public-health cleanup guide addresses hidden residue and separating washable household items from materials that can't be thoroughly cleaned. That distinction matters most for anything that touches food.
Work through a cabinet without mixing the piles
Start at the top shelf. Remove pantry packages and dishes onto a protective tarp in a designated sorting area, keeping dirty contents away from cleared surfaces. Label the piles for cleaning, assessment, and disposal.
Move down to cups, utensils, and small appliances. Hard, intact glass and metal are better cleaning candidates than absorbent wood or odor-retaining plastic. At the under-sink cabinet, inspect the cabinet base as carefully as its contents, especially if extinguishing water collected there.
Don't wash everything automatically. Cleaning a mug is useful; washing the outside of smoke-contaminated cereal packaging doesn't make the food inside safe.
Kitchen contents to clean or discard
| Item | Usual call | Change the call if |
|---|---|---|
| Pantry goods in paper, cardboard, or thin plastic | Discard exposed goods | Never wash contaminated packaging and keep it; odor and ash remain in the package |
| Canned food with an intact seal | Wash the outside and keep if not heat-exposed | Discard dented, bulging, or heat-damaged cans |
| Glass, ceramic, and metal utensils | Hot detergent wash, then air out | Discard if etched, cracked, or still smelling after washing |
| Plastic containers and wooden utensils | Discard affected items | A sealed item in a closed drawer with no odor may be rechecked, not assumed safe |
| Small appliances | Discard if smoke entered the housing | Exterior-only film, an intact cord, and a later electrical check may allow cleaning |
| Refrigerator and freezer food | Discard smoke-exposed food or food whose safe storage can't be established after power loss | Unopened commercial cans may be assessed as above; never taste-test |
| Towels, curtains, and floor mats | Wash if lightly smoked | Discard for char, heavy soot, or hose-water saturation |
| Cookbooks and paper | Discard affected material | A closed book in a distant room with no odor can stay |
A spice jar with residue around its lid deserves a different decision from an intact, unaffected metal pan. Discard exposed flour, sugar, and open food rather than trying to remove a contaminated surface layer.
For refrigerators, keep power off until the circuit and appliance are cleared. Bag spoiled contents and clean the box only if its interior is intact and suitable for restoration. A melted cord, soaked motor, or smoke inside an appliance housing isn't an exterior wipe-down job.
Save items you can genuinely clean and verify, not items you merely hope are unaffected.
Photograph each sorted pile before disposal. Return cleaned items only to cabinets that have themselves been cleaned, dried, and checked.
Treat Smoke Odor, Hidden Moisture, and Reoccupancy
A kitchen that smells better with the windows open isn't necessarily ready for use. You're resolving separate problems: remaining soot, odor held in materials, and moisture left by firefighting.
Keep those jobs separate when judging progress.
Remove the source before treating the air
The Restoration & Remediation article on evidence-based post-fire assessment discusses HEPA and activated-carbon filtration, ozone's respiratory hazards, and dehumidification after extinguishing water. Air treatment supports cleaning; it doesn't replace removal of contaminated material.
Choose a portable unit with mechanical HEPA filtration and an activated-carbon stage, rather than judging it by an odor-removal claim. If you want to find a smoke air purifier through EcoQuest Purifiers, check the specific model's filtration, room suitability, replacement-filter requirements, and whether it generates ozone before selecting it.
Use clean-outdoor-air ventilation or closed-space filtration according to conditions. Arrange return-filter replacement before restarting the cleared central system, and have ducts assessed if returns were exposed. The guide to removing smoke smell from a house can help identify overlooked odor sources.
Measure moisture rather than guessing
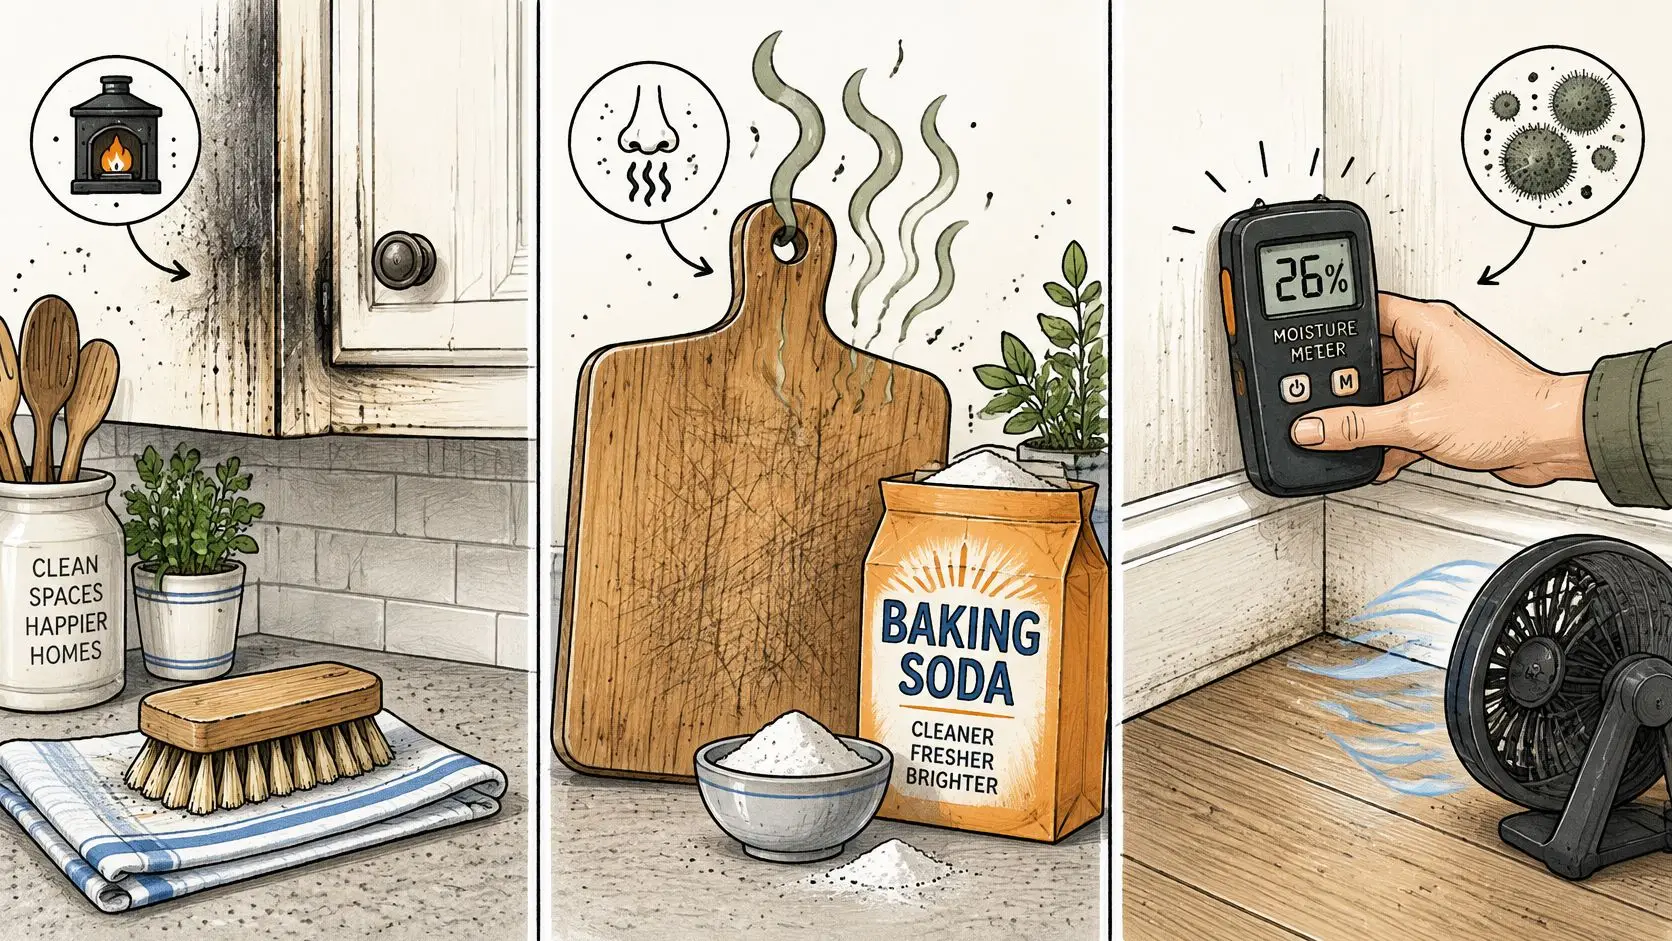
Inspect toe-kicks, the wall behind the range, the sink cabinet, flooring edges, and affected insulation. Use controlled air movement and dehumidification after loose contamination is removed; don't aim a fan through untreated soot.
Soft drywall, wet insulation, swelling cabinet bases, or a musty smell require assessment. Surface dryness doesn't establish that a wall cavity or subfloor is dry.
Our IICRC-certified professionals assess the extent of the damage, develop a customized restoration plan, and make sure all moisture is properly removed. That means checking affected materials rather than relying on how the room feels.
Use the following video alongside the physical inspection, not as clearance to resume cooking.
Clear the kitchen for use
- Surfaces pass inspection. No visible film or residue transfers to a clean white cloth.
- Closed spaces remain odor-free. Check cabinets after they've stayed shut for several hours.
- Materials are dry. Questionable cavities and flooring need moisture measurements.
- Equipment is cleared. Replace the affected hood filter and have the range and hood inspected by a qualified technician.
- Occupants remain protected. Keep vulnerable people and pets away until assessment and cleanup are complete.
No symptoms is a useful observation, not proof of safe air. Breathing difficulty or other significant symptoms require medical attention; persistent odor or uncertain contamination requires further assessment before reoccupancy.
Know When to Hand Off to a Certified Restoration Team
Call a restoration crew when soot reaches the HVAC path, cabinets are charred or swollen, firefighting water reaches drywall or insulation, or odor remains in cleaned, closed cabinets. A household member with asthma or heart disease is another reason to avoid a trial-and-error cleanup.
Structural questions, electrical damage, and gas odors require the appropriate emergency or licensed specialist. Protective clothing doesn't turn those conditions into homeowner tasks.
Ask for a defined scope
A qualified team should assess the loss, map affected materials, measure moisture, and develop a cleaning and dry-out plan. The written scope should distinguish salvageable finishes from materials needing removal and identify appliance or utility inspections that another qualified trade must perform.
Before authorizing work, keep these questions in writing:
- What is included? Identify rooms, contents, concealed areas, and exclusions.
- How will completion be checked? Ask about moisture readings, residue inspection, and unresolved contamination.
- Who handles repairs? Establish responsibility for the transition from cleanup to reconstruction.
- What credentials apply? Confirm licensing, insurance, and relevant certification.
Restore Heroes is IICRC certified, licensed, bonded, and insured. Our IICRC-certified restoration company information explains the credential context, and we handle the process from emergency mitigation and cleanup through repairs and reconstruction in the Phoenix area.
Treat the first visit as an assessment, not a promise of insurance coverage, final price, or completion date. Until help arrives, leave uncleared utilities off, keep vulnerable occupants and pets outside the work zone, and don't run ozone equipment or a household vacuum through soot.
Restore Heroes offers kitchen fire, soot, and smoke cleanup, with a free onsite inspection and estimate and emergency response available 24/7. Visit Restore Heroes to request an assessment through the contact form, or call 480-690-5277 and describe the affected cabinets, appliances, smoke pathways, and any firefighting water.