
You're standing in a Phoenix hallway at night, listening to water run where no faucet is open. The floor feels damp near the baseboard, a ceiling stain is spreading below an upstairs bathroom, or water is pushing between tiles from a slab leak. The first impulse is to grab towels and search for a plumber. That helps, but the decisions you make before help arrives can shape the drying plan, the repair scope, the mold risk, and the insurance record.
Phoenix homes don't need a deep freeze to suffer burst pipe water damage. Aging copper, hard-water corrosion, brittle solder joints, slab leaks, irrigation pressure changes, and failed appliance connections can release water in any season. Frozen-pipe risk still matters during sharp winter cold, with an insurance-industry resource identifying 20°F outdoors as an alert point for vulnerable pipes (The Hanover's frozen-pipe guidance), but Phoenix homeowners also need a year-round plumbing strategy.
When a Pipe Bursts in a Phoenix Home
At 11 p.m., a north-facing wall in an older Phoenix house may be cold enough to expose a weakened copper joint. The pipe has spent years carrying mineral-heavy water, and the joint has endured heat cycles, pressure changes, and ordinary movement in the wall. A small failure can become a steady discharge behind the drywall before anyone notices.
In another house, the warning looks different. During monsoon season, water rises through tile because a copper line beneath the slab has developed a leak. The homeowner may call it a burst pipe, even though the failure is below the foundation rather than inside a wall. The response still begins with the same priorities: protect people, stop the water, preserve evidence, and get moisture out of the structure.
The first hour is not about making the house look clean. It's about controlling water, safety, and information.
Phoenix risk often comes from the plumbing's age and environment. Hard-water scale can contribute to interior corrosion in aging copper, older soldered connections can weaken, and slab plumbing can deteriorate where it's difficult to inspect. Irrigation systems and pressure changes can also stress valves, hose bibs, and connected components. Homes built during earlier construction periods may have vulnerable runs hidden in walls, attics, cabinets, or beneath finished floors.
The next day matters because water doesn't stay where you first see it. It can move through drywall seams, insulation, cabinet bases, flooring layers, electrical pathways, and framing. A homeowner who understands the warning signs can identify the problem earlier, and this guide to signs of a burst pipe can help distinguish an active plumbing failure from ordinary condensation or a small surface leak.
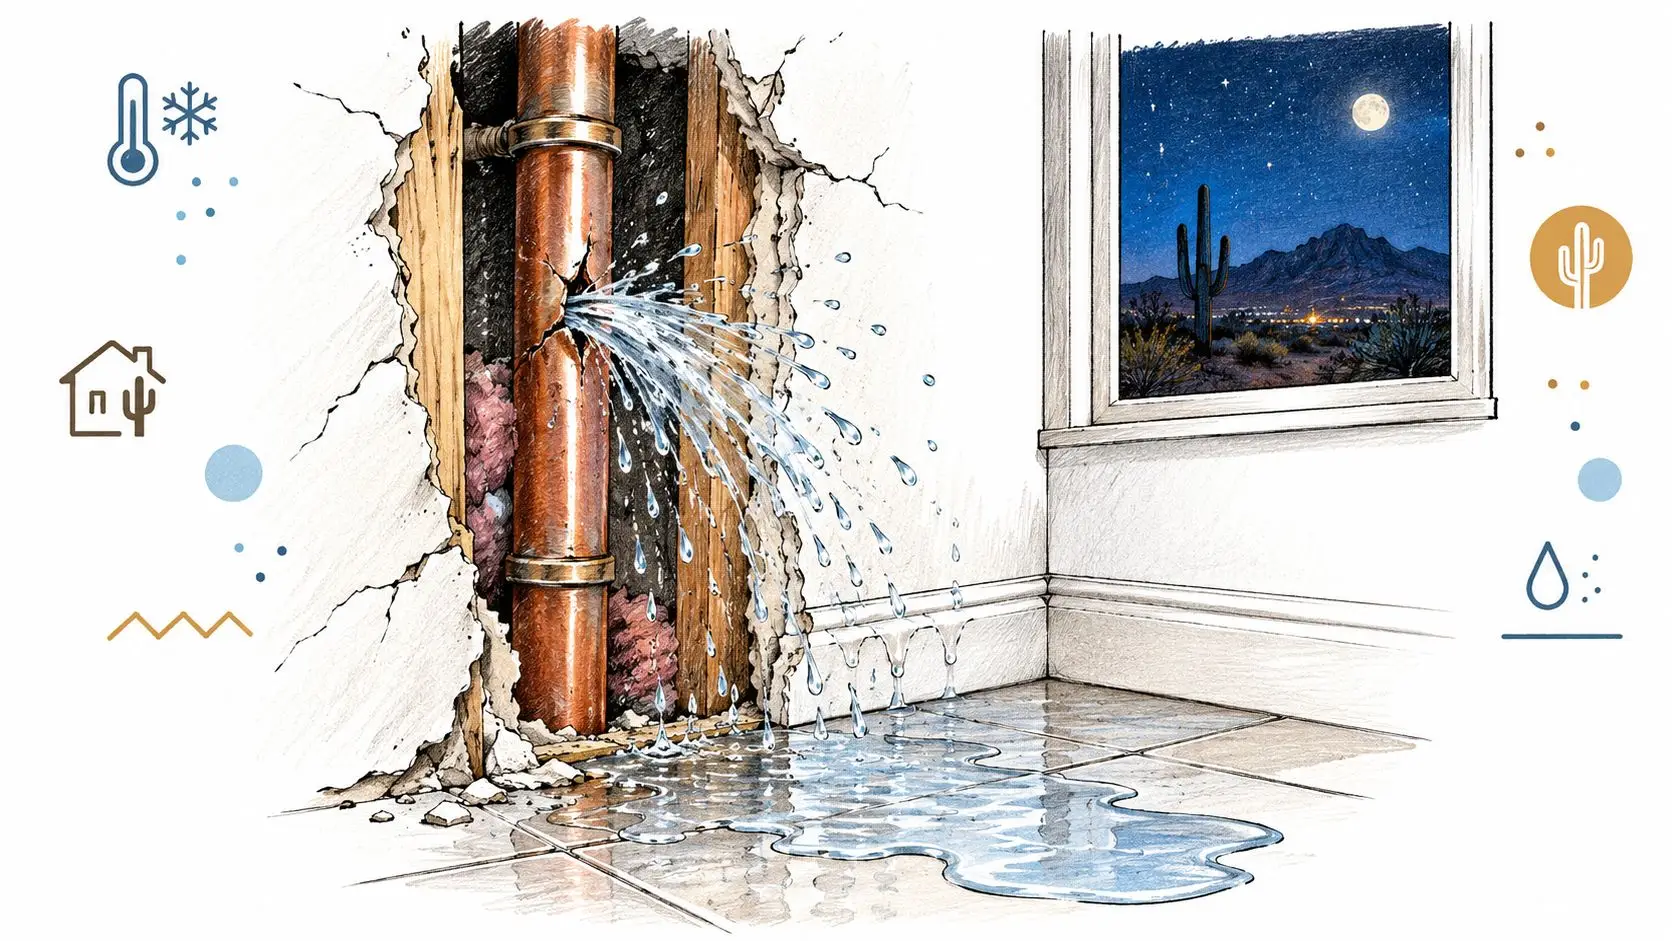
Visible flooring damage is only one part of the job. Water under tile, laminate, or engineered wood can require a different inspection and removal strategy than a wet rug or isolated drywall. If finished flooring needs replacement after the structure is dry, a practical reference on how to fix water-damaged floors in Cumming can help you understand why the visible surface isn't always the full scope.
The First 60 Minutes After Water Starts Pouring
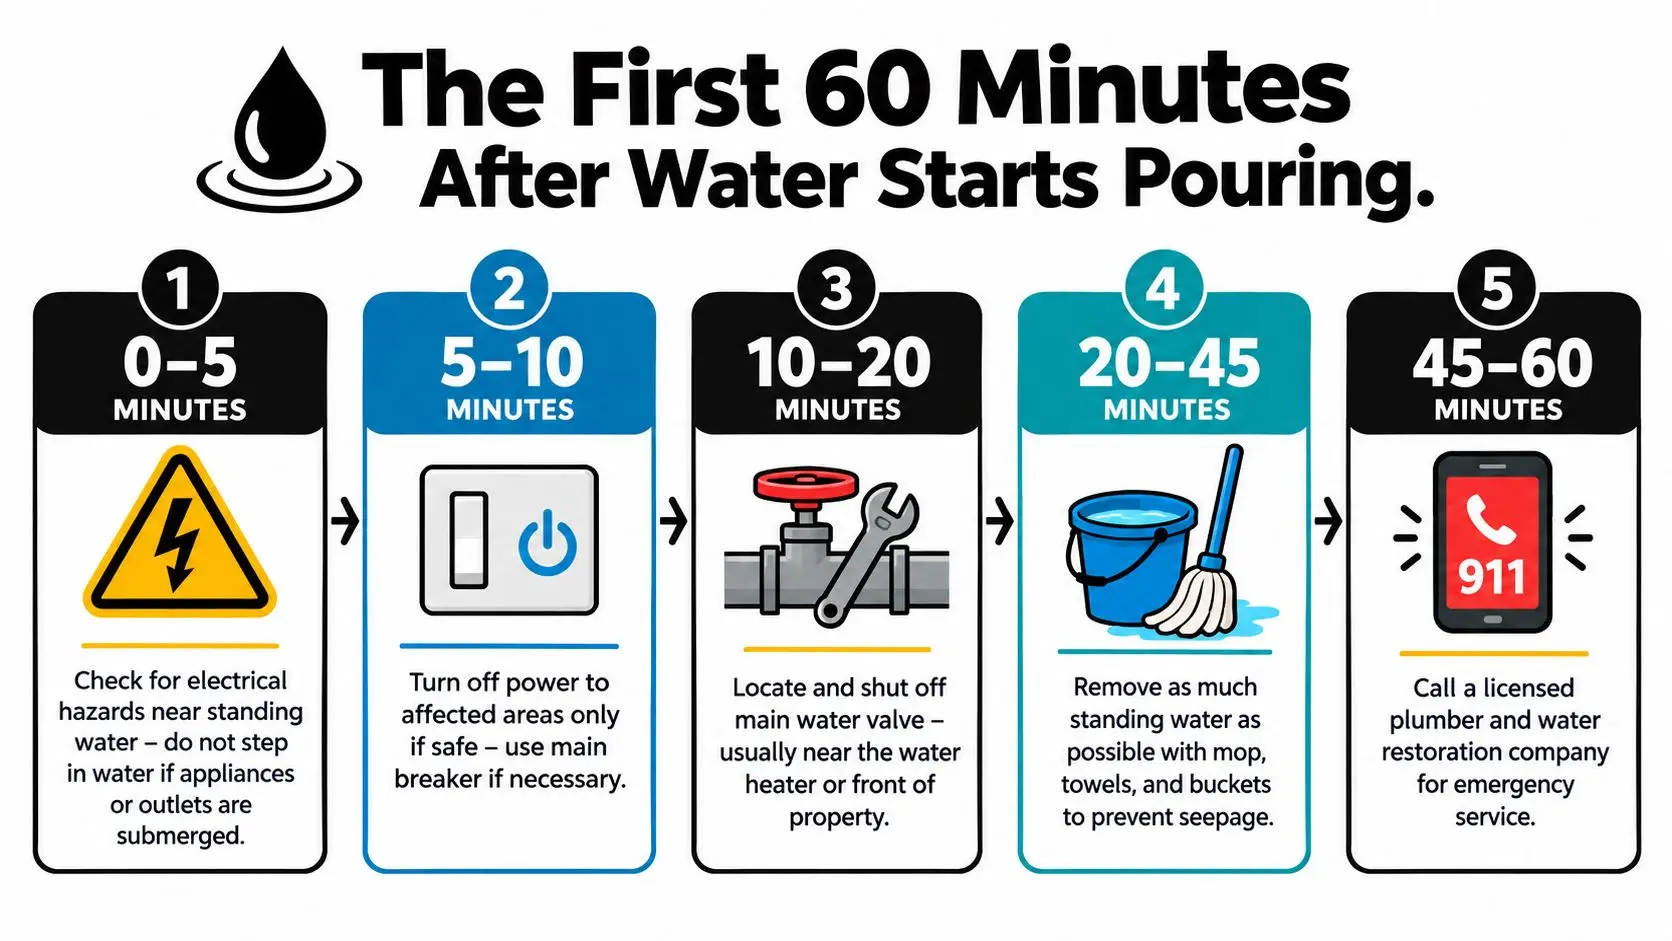
Start with safety, not cleanup. If standing water reaches outlets, appliances, power strips, or electrical equipment, don't step into it. Move people and pets away from the area, and shut off power to the affected zone only if you can do so without entering a hazardous space. Call emergency services if anyone faces an immediate electrical or medical danger.
Stop the source and reduce pressure
Find the main water shutoff. In many Phoenix properties, it's near the front of the house, at the house-side connection, or close to the water heater, although the exact location varies. If the main valve is stuck, don't force it until the handle breaks. Use the curb stop only if you know how to operate it safely and have the proper tool.
Once the supply is off, open a low faucet or another safe fixture to release pressure and drain remaining water from the lines. If the water heater is leaking or the failure is near the unit, shut off its fuel or electrical supply according to the equipment type, but don't touch wet electrical components.
A licensed plumber and a water damage restoration company should be contacted in parallel. The plumber addresses the failed supply, valve, appliance connection, or slab line. The restoration crew focuses on extraction, moisture mapping, drying, and protecting materials that can still be saved. Waiting for one trade to finish before calling the other often leaves wet materials sitting longer than necessary.
Contain what you can without creating new damage
Move valuables, electronics, artwork, documents, and furniture away from the wet zone if they can be handled safely. Use towels, buckets, and a wet vacuum on accessible standing water, but don't use a household vacuum that isn't designed for liquid. Lift items onto blocks or foil barriers where practical so furniture legs don't continue transferring moisture into flooring.
Pulling loose, wet baseboards can release water trapped along the wall edge. Don't start cutting large sections of drywall, opening cabinets, or tearing out flooring before the damage is documented and the affected areas are evaluated. Keep damaged materials on site when possible, because an adjuster may need to inspect them.
Write down the time you discovered the water, when you shut off the supply, who you called, and what you moved. Take timestamped photographs and a short video from wide room views to close-ups. Record the likely source, whether the water came from a clean supply line, and every visible area of damage.
A short demonstration can reinforce the sequence, especially for a household that hasn't located its shutoff before.
If you're unsure where the valve is before an emergency, mark it now and review this guide to finding an emergency water shutoff. That small preparation can save valuable time when water is moving through a wall or ceiling.
Cleaning Up and Drying Out Before the Pros Arrive
The goal before professional equipment arrives is controlled mitigation, not a do-it-yourself demolition. Wet materials can enter a mold-risk window within 24 to 48 hours, according to restoration education based on EPA guidance (water-leak mold timing guidance). That window doesn't mean mold will definitely appear, but it does mean delays make the drying and cleaning problem harder.
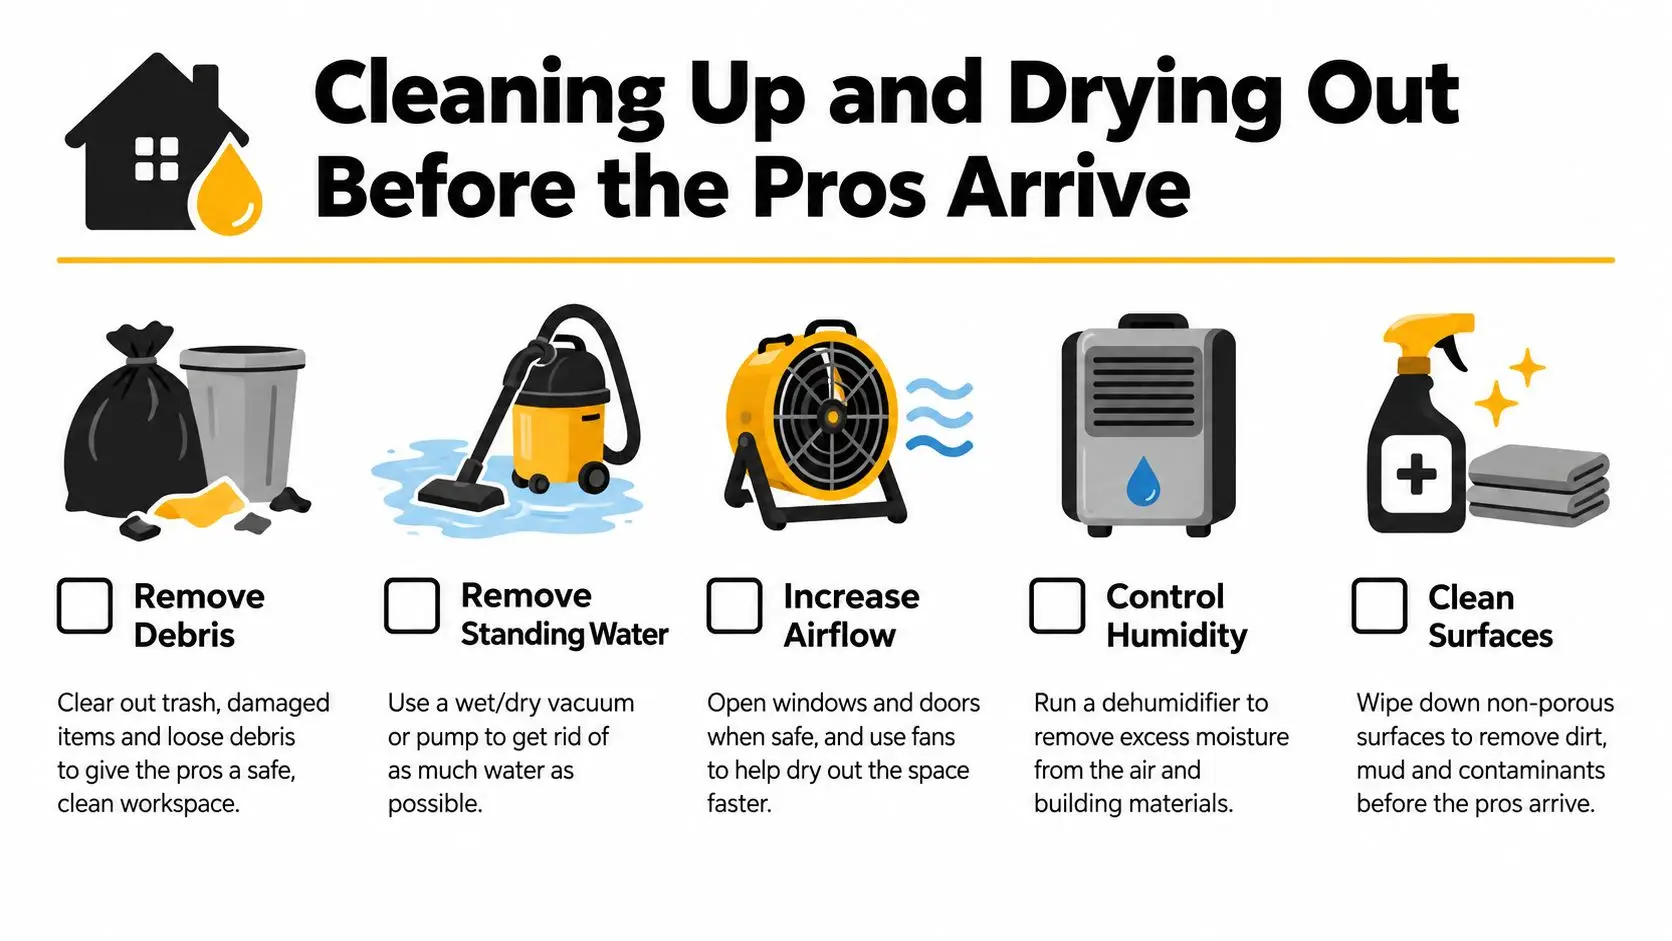
Begin with accessible water. A shop vacuum rated for wet pickup can remove standing water from hard floors, while towels and mops help at edges and transitions. Saturated rugs should be lifted and removed from the wet surface, and carpet pads often need separate handling because they retain water. Blot wet carpet instead of repeatedly walking across it, since foot traffic can force moisture deeper into the pad and subfloor.
Move air across surfaces, not into hidden spaces
Use fans to move air across exposed wet flooring and walls. Run the air conditioner in a dry setting when the system supports it, but don't blast heated air into a wet wall cavity. Directing high airflow into hidden spaces can spread contaminated dust, push moisture into inaccessible areas, or create a false impression that the surface is dry while insulation and framing remain wet.
If baseboards are visibly wet and can be removed without damaging the wall, take them off carefully. Small weep holes behind the lower edge of drywall may help release trapped water, but drilling should be limited to areas a restoration lead or qualified professional has identified. Don't open walls blindly around wiring, plumbing, or gas lines.
Leave soaked insulation behind walls, water beneath tile or laminate, and materials touching a suspected slab leak alone. Those areas need moisture mapping and a controlled plan. A surface can feel dry while the layers below remain saturated.
Keep a drying record
Record ambient temperature and humidity twice daily if you have a reliable meter. Photograph the same affected areas from consistent angles, note when fans or air conditioning were started, and keep a simple log of what was removed. Bag and tag damaged contents rather than throwing them away.
Don't clean porous materials aggressively before the adjuster or restoration lead sees them. Scrubbing can destroy evidence, spread residue, or make it harder to determine whether a material can be restored. The broader principles of controlled extraction, containment, and structural drying are outlined in this guide to water damage mitigation.
What Professional Restoration Teams Do
A professional restoration visit starts with assessment, not demolition. The crew confirms the water source and category, checks nearby rooms, maps moisture through walls and floors, and photographs conditions before removing major materials. In Phoenix, the inspection should include slab edges, cabinet bases, ceiling cavities, HVAC pathways, and spaces where hard flooring may hide water from an aging copper line, hard-water corrosion, or a slab leak.
Extraction removes standing and trapped surface water first. Depending on access and the assembly, technicians may use weighted carpet extractors, truck-mounted systems, portable extractors, or specialty tools for narrow spaces. Removing free water reduces the load on dehumidifiers. It does not prove the structure is dry.
Drying follows with air movers and low-grain refrigerant dehumidifiers. Technicians position equipment to control evaporation and remove moisture from the air, while tracking temperature, humidity, and material readings. Psychrometric readings and moisture logs should be updated at intervals no longer than 24 hours, consistent with industry guidance tied to IICRC S500 (IICRC drying guidance).
The drying target depends on the building
No single moisture percentage confirms that every material is ready for reconstruction. The practical target is the material's dry standard, or the reading from comparable unaffected material in the same structure. Wood framing is often targeted below approximately 19% moisture content, but technicians should compare affected and unaffected areas instead of relying on that figure alone.
| Material | Target moisture content | Typical dry-out time |
|---|---|---|
| Wood framing | Below about 19% or comparable unaffected material | Varies with depth, temperature, airflow, and moisture load |
| Drywall | Comparable unaffected material and dry standard | Varies with saturation and cavity access |
| Flooring layers | Comparable unaffected material and assembly standard | Varies widely under tile, laminate, or engineered flooring |
Crews may remove baseboards, affected drywall, saturated insulation, waterlogged cabinet components, or flooring that cannot dry in place. Removal should follow readings, material type, contamination, and access. Sound materials should remain when controlled drying can preserve them, since unnecessary demolition adds cost and extends reconstruction.
During demolition, HEPA air scrubbers can reduce airborne dust. Antimicrobial products may suit specific conditions, but chemicals cannot replace extraction and drying. Electronics, documents, heirlooms, and other contents may need a pack-out for cleaning or controlled drying.
Reconstruction can include drywall replacement, texture matching, painting, cabinet or flooring repairs, and final cleaning. Phoenix homes commonly use knockdown and other textured finishes, so a repair may require blending across a larger area rather than applying a flat patch. Before the crew leaves, request moisture readings, equipment run logs, the remaining scope, and a completion document for the insurer. This overview of what a restoration company does explains how surface cleanup differs from full restoration.
Costs, Insurance, and Filing a Claim That Gets Paid
A burst pipe creates two separate bills. The plumber repairs the failed component. The restoration team extracts water, dries the structure, removes materials that cannot be saved, and may rebuild the affected rooms. In Phoenix, aging copper, hard-water corrosion, and slab leaks can make access the largest cost driver. Treating pipe repair as the whole loss leaves out the work that protects the house and supports the claim.
Common planning ranges include $250 to $1,500 for an accessible plumbing leak and $2,000 to $6,000 for a break behind a wall or beneath a slab, as described in water damage insurance claim tips. Restoration mitigation is often estimated at $3 to $7 per square foot, while a full rebuild may add $5,000 to $30,000 or more when cabinets, flooring, drywall, texture, paint, and contents are involved. These figures are planning ranges, not quotes. Access, materials, contamination, and the policy determine the actual scope.
Coverage depends on cause and conduct
Homeowner and commercial property policies generally cover damage from a sudden and accidental plumbing discharge, but exclusions, deductibles, maintenance history, and response time can change the outcome (District of Columbia insurance guidance). The structure and failed pipe may receive different treatment. Long-term seepage, repeated leakage, corrosion, neglect, or failure to maintain heat can lead to coverage disputes.
Claim size explains why drying and documentation matter as much as the repair. One major insurer reported more than 20,000 frozen-pipe claims from 2024 through June 2025, with over $628 million in paid losses and an average payment above $30,000 (State Farm's frozen-pipe claims information). Those figures concern frozen-pipe claims, not every Phoenix plumbing failure, but they show how a small break can become a structural and contents claim.
Send the carrier timestamped photos and video, the plumber's invoice, restoration estimates, moisture readings, equipment logs, a room-by-room inventory, and receipts for emergency purchases. Keep damaged materials until the insurer or its representative has had a reasonable opportunity to inspect them. If the policy pays actual cash value, depreciation can reduce the initial payment. Replacement cost coverage may require completed repairs and supporting documentation before withheld depreciation is released.
A public adjuster may be worth evaluating for a complex claim above $25,000, but review the fee, services, and potential conflicts before signing. The insurer's adjuster represents the carrier. A restoration contractor documents and scopes the physical loss. A public adjuster presents the claim for the policyholder. Keep those roles separate when comparing estimates and reviewing settlement offers.
Stopping the Next Burst Before It Happens
Phoenix prevention starts with identifying the failure type, not buying a generic freeze kit. A home with older copper beneath a slab has a different risk profile from a newer property with accessible PEX, and a vacant rental needs more monitoring than a residence occupied every day.
Hard water can contribute to scale and corrosion inside aging copper. In older neighborhoods such as Sun City, Maryvale, older Arcadia blocks, and historic Phoenix areas, a plumbing inspection should look beyond visible fixtures. Pinhole leaks may start inside walls or under foundations, where a small wet spot can be the first evidence of a larger plumbing condition.
Spend first where inspection reveals exposure
Ask a qualified plumber to check the whole-home pressure regulator and measure both static and dynamic water pressure. A static reading shows pressure when fixtures are closed. A dynamic reading shows what happens while water is moving, which can reveal problems that a single resting measurement misses.
An annual inspection should include exposed copper, water-heater connections, angle stops, hose bibs, attic lines, irrigation connections, and signs of slab leakage. If multiple vulnerable copper runs show corrosion, repiping with PEX may be more sensible than repeating isolated repairs, but that decision depends on access, layout, local code, and a plumber's evaluation.
Smart leak detection is particularly useful for second homes and vacant rentals. A system installed at the main can monitor flow and, where supported, automatically shut off water. It won't prevent every failure, and it needs power, connectivity, and testing, but it can reduce the time between a rupture and discovery.
Maintain the parts homeowners forget
Flush the water heater every 6 to 12 months if the manufacturer and plumbing professional support that schedule. Replace angle stops around every 10 years, or sooner when they show corrosion, stiffness, or seepage. Upgrade a water-heater pan where the installation allows it, especially in locations above finished rooms.
Phoenix winters are mild compared with colder regions, but exposed lines can still face sharp overnight cooling. Insulate attic hose bibs and vulnerable exterior plumbing, disconnect hoses, and check exterior shutoffs before cold weather arrives. A freeze-prevention routine still has value, but it shouldn't distract from slab leaks, aging copper, pressure problems, and appliance supply lines that create year-round exposure.
Your Burst Pipe Playbook and Final Takeaways
Keep a short response checklist inside the utility closet and in your phone:
- Locate the main shutoff: Confirm that every adult in the home can reach and operate it.
- Protect electrical safety: Stay out of standing water near outlets, appliances, or electrical equipment.
- Control the water heater: Shut off its power or fuel when a leak is near the unit and it can be done safely.
- Document before moving contents: Photograph wide views, close-ups, source conditions, flooring, walls, ceilings, and damaged belongings.
- Start safe airflow: Use fans across exposed wet surfaces and use air conditioning in a dry setting when appropriate.
- Call both trades promptly: Contact a licensed plumber and an IICRC-certified restoration crew within hours.
- Open the insurance claim: Notify the carrier, ask about emergency mitigation procedures, and keep every invoice and log.
The first 24 hours shape much of the eventual result because drying speed affects material loss and mold risk, while early photographs and records support the claim file. The practical drying goal is not a magic reading. It's documented progress toward the dry standard of each material, verified against unaffected areas.
Phoenix homeowners compound their exposure when they ignore slab-leak warnings, postpone a water-heater pan upgrade, or keep repairing isolated failures in aging copper around Arcadia, Sun City, and historic Phoenix blocks. A smart shutoff, pressure inspection, and targeted repipe can be valuable, but none replaces a fast response after water starts moving.
Fast, documented action is the strongest lever you control. It costs less than waiting for secondary damage to spread, and it often matters more than choosing between insurance products after the loss has already begun.
Restore Heroes provides emergency water extraction, structural drying, moisture assessment, and restoration for burst pipes, appliance leaks, and other Phoenix-area water losses. If you're dealing with active water or hidden moisture, visit Restore Heroes to request help with assessment, mitigation, and the next repair decisions.