
You usually notice it at the worst time. A vinyl floor that looked fine yesterday is suddenly buckled near the dishwasher, stained along a hallway seam, or peeling up at the edge of a bathroom after a leak. The surface is telling you something went wrong, but the underlying issue is often underneath, where trapped moisture can sit in the subfloor long after the top layer looks dry.
That's why vinyl flooring replacement after water damage isn't the same as swapping out a floor for cosmetic reasons. The visible sheet, plank, or tile may be only the symptom. If the subfloor, moisture barrier, or adhesive bed stayed wet, the new floor can fail again fast, even if the room looks clean on install day.
The good news is that vinyl is still one of the most common flooring choices for homes and properties that see moisture, foot traffic, and quick-turn repairs. The global vinyl flooring market is projected to rise from USD 44,256.01 million in 2026 to USD 88,615.72 million by 2035, with annual shipments surpassing 1,250 million square meters in the market forecast. That scale matters because replacement is a routine real-world job, not a rare one.
If you're trying to figure out whether to repair, replace, or open the floor up further, start by tracing the leak source first. An Arizona homeowners' water leak guide can help you think through the kind of inspection that comes before any flooring decision, and if the situation is active, a water mitigation response like emergency water mitigation is the right place to focus before new material ever goes down.
What to Do When Your Vinyl Floor is Damaged
A homeowner calls because a kitchen plank is lifting near the fridge. Another finds a soft spot by the tub and assumes it's just an old seam that needs glue. In both cases, the floor is warning you that the assembly beneath it has been stressed, and the wrong first move is to cover it up and hope for the best.
Start with the source, not the surface
Water-damaged vinyl flooring replacement starts with stopping the leak and figuring out how far the moisture traveled. If the source was a supply line, appliance leak, roof intrusion, or floodwater, the floor can hide more damage than you see from above. A quick patch on the top layer won't help if the underlayment or subfloor is holding moisture.
A practical inspection matters. Walk the room, press along seams, and look for cupping, soft spots, dark staining, or lifted edges. If the floor feels hollow or spongy, assume the problem is deeper than the wear layer.
Practical rule: visible vinyl damage is often the easiest part to fix, but it's rarely the part that matters most.
Think of replacement as a moisture project
Vinyl flooring replacement in a post-damage setting is closer to restoration work than decoration. The goal is not just a clean finish, it's a dry, stable base that won't telegraph defects or trap hidden water. That's why the replacement decision should follow the same logic a restoration tech uses, identify what was wet, what dried properly, and what still needs remediation.
If the damage is limited and the subfloor is sound, a localized repair may be enough. If moisture reached the substrate, the job expands. The floor covering is only one layer of the system.
For homeowners and property managers, that distinction saves time and avoids repeat failures. It's also why a damaged vinyl floor should be treated like a warning sign, not just a surface defect.
Assessing the Damage and Choosing Your Replacement Vinyl
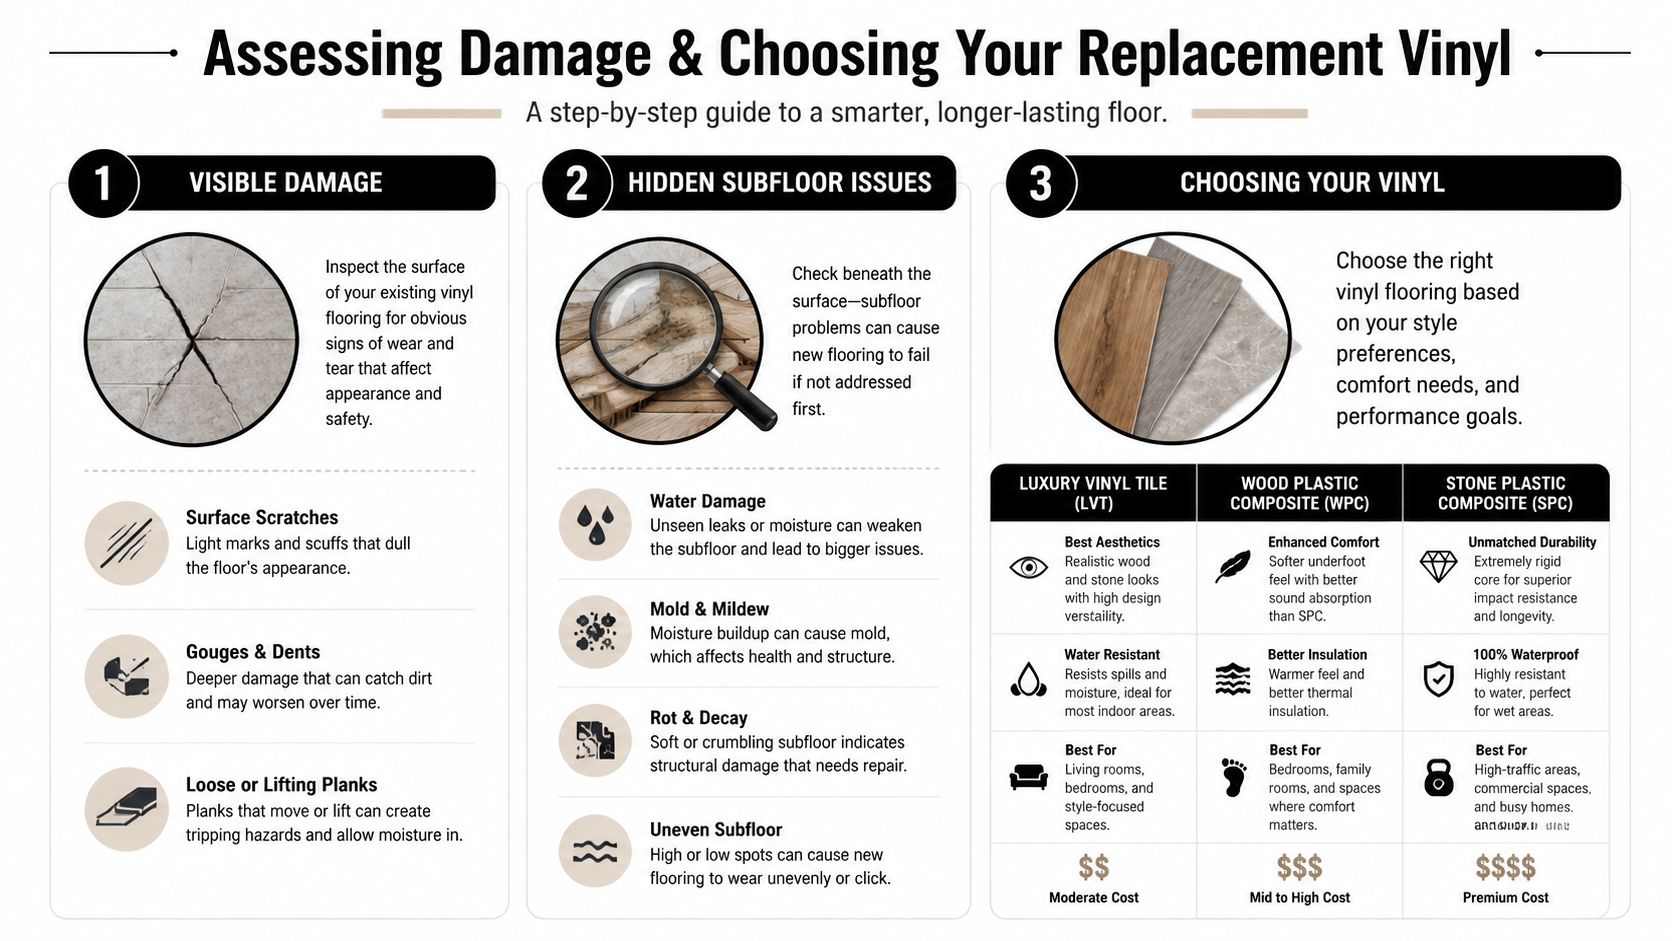
A proper assessment starts with the floor itself and keeps going until you've checked the structure beneath it. The visible damage may be small, but the consequences can be larger if water reached the subfloor, underlayment, or moisture barrier. In post-leak situations, that hidden layer is what usually decides whether the repair lasts.
Read the floor like a damage map
Surface scratches and gouges are one thing. Loose planks, lifted sheet edges, soft spots, and repeated seam opening usually point to movement, adhesive loss, or moisture exposure. If the floor feels uneven or the damaged area keeps spreading, don't assume the vinyl itself is the only issue.
The underfloor needs attention too. Look for discoloration, swollen seams, delamination, odor, or any sign that moisture stayed trapped after the leak. A simple top-layer replacement is risky if the support layer is warped or contaminated.
The part you don't see is often the part that decides whether the new floor stays put.
For a more detailed moisture check, the moisture meter readings resource is a useful companion when you're trying to decide whether the base is ready for new material.
Choose the material based on the room and the repair
In a water-damage context, the main vinyl choices are Luxury Vinyl Plank (LVP), Luxury Vinyl Tile (LVT), and sheet vinyl. Each works differently.
| Vinyl Type | Best For | Water Resistance | DIY Friendliness |
|---|---|---|---|
| LVP | Wood-look rooms, quick plank replacement | Strong moisture resistance | Good for moderate DIY skill |
| LVT | Stone-look layouts, patterned designs | Strong moisture resistance | Good for moderate DIY skill |
| Sheet Vinyl | Bathrooms, kitchens, large continuous coverage | Very good when seams are managed well | More demanding around cuts and fitting |
LVP and LVT are often easier to match visually after a partial repair because individual pieces can be replaced more cleanly than a full sheet. Sheet vinyl can be a smart choice when you want fewer seams, but it asks for cleaner prep and more careful handling at edges and transitions.
For flooded or leak-affected rooms, the choice often comes down to how much old material must come out and how well the subfloor was preserved. The better the base, the more options you have.
Preparing for Removal and Subfloor Remediation
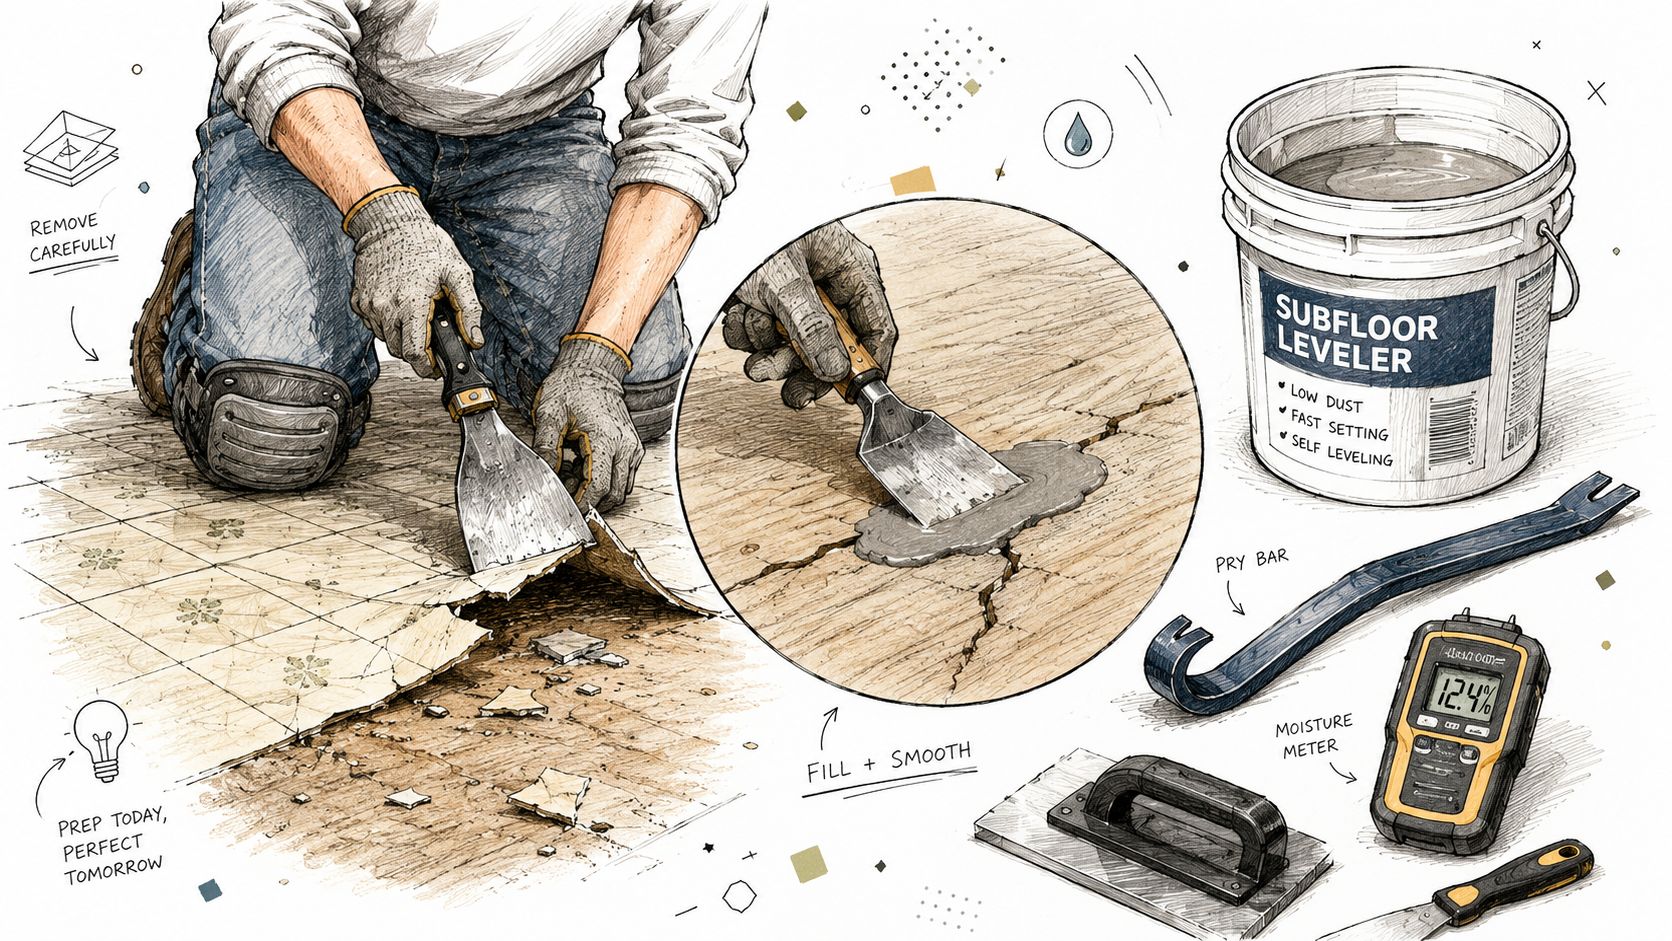
Once the old vinyl is up, the real work starts. A damaged floor can look like a simple tear-out, but the replacement will only hold if the substrate underneath is dry, flat, and clean enough to bond with the new material. That's why rushing this stage usually leads to peeling seams, telegraphed bumps, or hidden moisture problems later.
Remove the old material the right way
For sheet vinyl, cutting it into narrow strips makes removal easier and safer than trying to yank up a full bonded section at once. After that, scrape off residual adhesive and pull away anything loose from the subfloor. For planks, release the locking edges carefully so you're not tearing up the substrate with the old floor.
Damaged adhesive is one of the most common trouble spots. If it stays behind in ridges or patches, it can keep the new floor from laying flat. That's why mechanical scraping and patient cleanup matter more than speed.
Dry, inspect, and repair before anything goes back down
After water damage, it's critical to assess the subfloor and moisture barrier. Many DIY guides miss this, but trapped moisture can ruin the new floor. Repairing the moisture barrier and ensuring the subfloor is fully dry and level before reinstalling is an essential step for a durable replacement, especially in post-restoration contexts as noted in a restoration-focused repair guide.
If the subfloor is wood, check for swelling, soft spots, or rot. If it's concrete, look for cracks, contamination, and uneven areas that need patching. A leveling compound can correct small defects, but it needs time to cure fully before the next step. Skipping that cure window is a common way to trap problems under the new floor.
For a deeper look at drying strategy, the water damage fans resource is helpful when the room still needs controlled airflow before installation.
Don't ignore waterproofing details
A leak can expose weak points that were already there. The expert advice on bathroom floor waterproofing is relevant because bathrooms and laundry areas often fail around transitions, edges, and wet-prone zones, not just in the middle of the room. If the moisture barrier was compromised, the replacement needs to account for that before the new vinyl ever touches the floor.
Installing Your New Vinyl Flooring Correctly

A good install starts before the first plank or sheet goes down. The room has to be ready, the layout has to make sense, and the material needs to be handled in a way that matches the product type. The best-looking floor usually comes from boring discipline, not shortcuts.
Lay out the room before you cut anything
Dry-fit the material and decide where the cuts will fall. That helps avoid tiny slivers at walls and awkward seams in the middle of the most visible path. In a restoration setting, layout matters even more because damaged areas often create irregular edges that need to be blended cleanly into the new work.
For glue-down products, use a notched trowel to spread adhesive evenly. For planks, maintain the recommended 1/4-inch perimeter expansion gap and stagger end joints by at least 10 inches to reduce seam stress and pattern repetition as outlined in manufacturer-aligned installation guidance.
Match the method to the product
Glue-down vinyl rewards careful surface prep and steady pressure. Once the adhesive is ready, set the sheet or tile in place, then roll it with a 75- to 100-pound floor roller or a heavy rolling pin to press the material into the adhesive and push out air. That rolling step matters because trapped pockets can weaken the bond.
Floating planks work differently. Click the boards together, keep the joints tight, and preserve the expansion gap around the perimeter. Around door jambs and vents, score and cut slowly so you don't chip the edge locks.
If a single plank is damaged during a localized replacement, a common repair method is to score the board down the center, cut relief angles from the corners to the center line, remove the center sections first, then trim the side locks and fit the new board. That approach keeps the surrounding floor intact and can make immediate use possible once the repair is done.
Installer's habit: clean cuts around obstacles beat rushed cuts every time. Bad trimming shows up faster than most people expect.
For visual reinforcement, the embedded video below is useful once the layout and prep are understood.
Avoid the mistakes that ruin a clean finish
Don't install over a floor that still has damp patches, dust, or adhesive ridges. Don't compress planks so tightly that they have nowhere to move. And don't rush back onto a glue-down installation before the adhesive has had time to set, because the floor needs that cure window to stabilize properly.
A few careful passes with the right tool are better than a fast install that starts separating near the first humidity swing. In vinyl work, precision shows up in the seams.
Project Costs Timelines and When to Call a Professional
The cost of a vinyl flooring replacement extends beyond the new floor itself. Materials, adhesive, leveling compound, disposal, moisture remediation supplies, and the tools to remove the old floor all add up. If the subfloor needs patching or drying equipment, the project moves from a simple flooring job into a restoration job.
DIY works best when the damage is limited
A small, dry room with a flat subfloor is the best-case DIY scenario. In that setting, the work is mostly cutting, fitting, and following the manufacturer's spacing rules. It still takes time, but the risk is manageable if the leak was caught early and the substrate is sound.
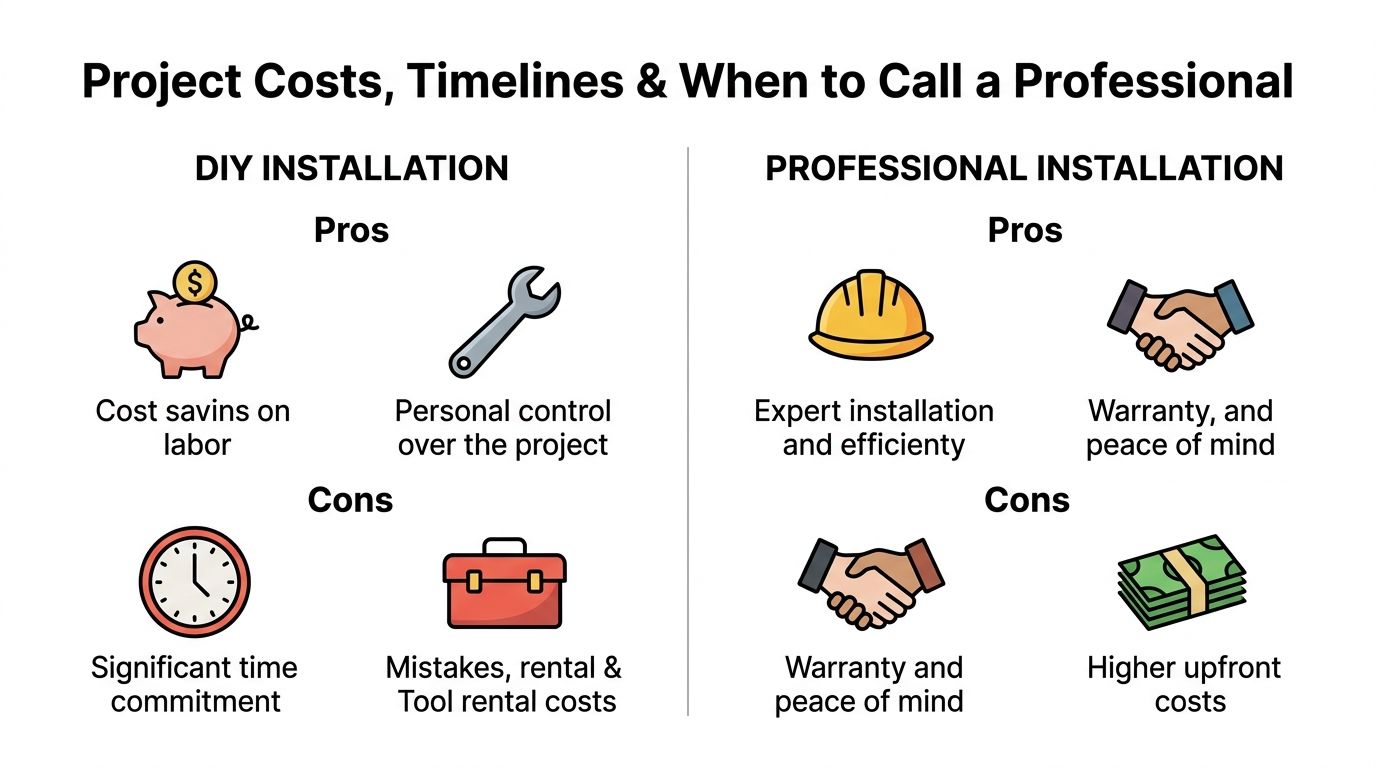
DIY also gives you control over the schedule and materials. The trade-off is that mistakes, tool rental costs, and redo work can erase that advantage quickly.
Professional help makes sense when the base is compromised
The U.S. vinyl flooring market shows that remodeling and retrofit projects are projected to grow at a 7.76% CAGR through 2031, which reflects how common replacement work has become. That matters because the more common the job, the more tempting it is to treat every case like a simple swap. In reality, water-damaged rooms vary a lot.
If you see mold, warped subflooring, recurring dampness, or a leak that reached under cabinets or into wall bases, the problem goes beyond finish carpentry. A professional is the safer choice when drying, repair, and replacement have to happen together.
For a broader view of scheduling and coordination, the project completion timeline resource is useful when you need to plan around drying, repairs, and final install steps.
Compare the path before you start
- DIY pros: lower labor outlay, direct control, flexible pacing.
- DIY cons: more time, more tool handling, and a higher chance of missing hidden moisture.
- Professional pros: faster coordination, better handling of subfloor issues, and less guesswork.
- Professional cons: higher upfront cost and less hands-on control.
That's why the decision isn't only about budget. It's about whether the room is ready for new material or still needs restoration work first.
Protecting Your New Floor and Final Safety Checks
A new vinyl floor only holds up when the leak behind it has been handled first. Once the new flooring is down, let adhesive cure fully, keep foot traffic light while the bond sets, and do not drag furniture across fresh seams. If the room had hidden moisture before, watch the edges, transitions, and perimeter cuts for any early movement or soft spots.
Finish with a simple maintenance routine
Clean the surface with the manufacturer's recommended products, not harsh abrasives or soaking wet mops. Use furniture protectors under chairs and tables so repeated pressure does not puncture the wear layer. If a seam opens or the floor gets a cut or gouge, the WFCA says it should be covered to keep out dirt, which is smart advice for keeping moisture and debris from working deeper into the assembly as noted by the WFCA on vinyl care and reinforced by specialists like Bulls Eye Repair for vinyl care.
The bigger long-term mistake is treating the new floor as the only part of the job. If the leak source was not fixed, or if the room still carries a history of poor drying, the same damage can come back under the surface.
Keep the original cause from coming back
Check under sinks, around appliances, and near plumbing penetrations after the repair is done. If the old damage came from standing water or a slow leak, make those inspections part of routine home care. Preventive maintenance costs less than reopening a floor that should have been done once.
For households that have already dealt with a flood or serious leak, the mold prevention after a flood guide is a smart next step because damp framing and hidden contamination can undermine even a good flooring job. The floor only stays sound when the space below it is stable too.
If your vinyl floor was damaged by a leak, the safest next move is to have the moisture situation checked before anything gets sealed back up. Contact Restore Heroes for help with water damage mitigation, subfloor drying, and a flooring replacement plan built around the condition under the surface, not just what you can see on top.