
You've found water spreading from under the dishwasher, or a dark ceiling stain that wasn't there earlier. You're looking for the source while wondering whether to grab towels, turn off the water, or call someone.
Emergency water leak repair starts with decisions, not tools. Make the area safe, stop the supply, and record what happened before attempting a patch. Then deal with the water already inside the building, including moisture you can't see.
Make the Area Safe Before You Touch the Leak
Say it's late at night and water is dripping through the ceiling below an upstairs bathroom. Before walking underneath it, look for a sagging ceiling, wet light fixtures, and nearby outlets. The Insurance Institute for Business & Home Safety, citing the Insurance Information Institute, reports that approximately 1 in every 60 insured U.S. homes filed an interior water-damage claim between 2016 and 2020.
Treat an active leak seriously, but don't let urgency push you into an unsafe room. A broken pipe can be repaired. Electrical contact or falling ceiling material can injure someone before a plumber arrives.
Check the hazards from a dry location
- Electricity: If water is touching an outlet, light fixture, ceiling fan, or electrical panel, leave the affected area. Call an electrician or the utility before approaching wet electrical equipment.
- Gas: If you smell gas, leave the building without operating switches. Call the gas company from outside.
- Ceiling failure: Keep everyone away from a bulging or sagging ceiling. Don't stand underneath it to catch water or poke a drainage hole.
- Contaminated water: Keep children and pets away from sewage, outside-line toilet backups, and floodwater. Rubber boots and gloves aren't permission to wade through it.
If the breaker panel and the route to it are completely dry, switch off the circuits serving the wet room. Don't touch a wet panel or assume switching off a light makes its wiring safe.
A water leak from a ceiling light needs particular caution because the visible drip may share space with energized wiring above the ceiling.
Safety rule: If any hazard is present, your next job is calling for help, not repairing the pipe.
Stop the Water at the Right Valve
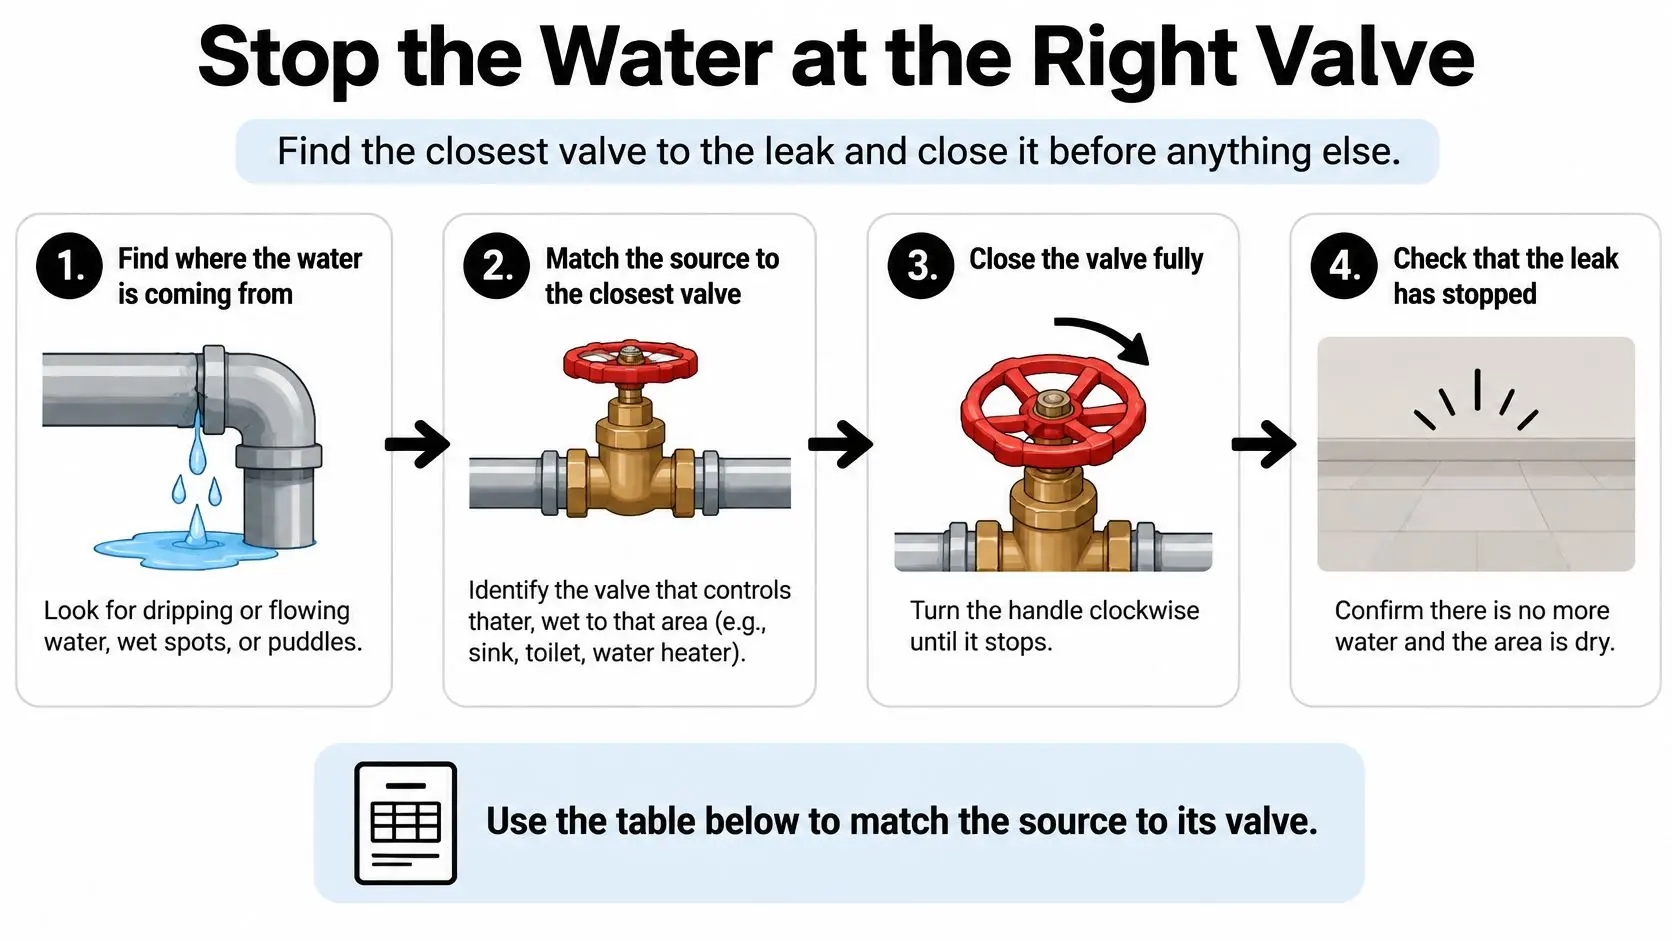
Once the area is safe, find the closest valve to the leak and close it before doing anything else. Isolating a fixture preserves water service elsewhere, but a working main shutoff is better than struggling with a seized local valve.
Shutoff points by leak source
| Leak source | Where to shut off | Note |
|---|---|---|
| Kitchen or bathroom sink | Angle stop valve under the sink | Turn clockwise; if it seizes, use the main |
| Toilet | Supply valve on the wall behind the toilet | Close fully; a loose handle can hide a stuck valve |
| Washing machine | Hot and cold valves behind the machine | Close both; hoses often fail at the connection |
| Refrigerator or ice maker | Small valve behind the unit or under the sink | Unplug the appliance before moving it, only from a dry, safe position |
| Water heater | Cold inlet valve on top of the tank | Cut power or gas first so the tank does not overheat |
| Outdoor hose or irrigation | Hose bib or zone valve | Close the zone valve if the leak is in the sprinkler line |
| Source unknown or several rooms | Main shutoff at the meter or house entry | Mark the valve location while conditions are safe and dry |
Close the supply without forcing hardware
- Locate the source. Look for spraying, dripping, or pooling without opening walls or entering a hazardous area.
- Turn a round valve handle clockwise until it stops. For a lever-style valve, move the handle perpendicular to the pipe; don't force it past its stop.
- Use the main if necessary. If the fixture valve won't close or the leak is concealed, shut off the house supply near the meter or service entry. Don't operate utility-owned hardware you're not authorized to touch.
- Shut off the water heater's energy supply before closing its inlet. Use the electrical breaker or the appliance's designated gas shutoff only if you can do so safely.
- Release residual pressure. Open a nearby faucet and watch whether the leak slows and stops. Continued discharge may mean the wrong valve was closed or a valve isn't sealing.
Use this visual as a quick reminder while locating the correct shutoff.
Speed matters even when the opening looks small. The EPA's Fix a Leak Week guidance says an irrigation opening 1/32 inch in diameter at 60 pounds per square inch can waste about 6,300 gallons monthly, while a continuously running toilet can waste 200 gallons or more daily.
Watch for new water rather than assuming the handle position proves isolation. Write down the valve location, and use this guide to finding your emergency water shutoff if you haven't identified it.
Even a faucet dripping once per second wastes more than 3,000 gallons annually, according to EPA WaterSense statistics. A small drip still deserves isolation and repair.
Temporary Fixes That Hold Until a Plumber Arrives
Temporary fixes buy time. They don't establish that a damaged pipe is sound. Photograph the original defect before covering it, shut off the supply, and choose a product matched to the pipe material and failure.
A patch on sound, straight pipe has a better chance than one pressed against a corroded fitting. If the surrounding metal crumbles, the pipe moves, or the split continues beyond the patch, leave the supply off.
Temporary repair methods and their limits
| Method | Best for | Limit |
|---|---|---|
| Rubber patch clamp | Small pinholes on a straight pipe run | Not for joints, fittings, or high pressure beyond its rating |
| Pipe repair clamp with rubber pad | Split along a straight section | Measure pipe diameter first; holds only until the plumber repairs it |
| Epoxy putty | Small drip at a fitting on a dry surface | Needs the water off and cure time before pressure returns |
| Compression cap | Open end of a cut pipe | Line must be shut off and the cap sized to the pipe |
| Braided replacement hose | Failed sink or washing machine supply line | Quick swap; match thread size and length |
| Duct tape or plumber's tape | Nothing pressurized when wrapped over the leak | Not an external leak repair; fails under pressure and hides the source |
Match the method to the defect
For a pinhole, clean the pipe gently and center the rubber patch over the opening. Tighten the clamp evenly without crushing the pipe. A repair clamp for a longer split needs enough intact pipe beneath its entire sealing surface.
Epoxy putty is more demanding than it looks. The surface must be prepared as the product specifies, and the putty must finish curing before pressure returns. It won't compensate for a loose fitting or moving connection.
A compression cap can isolate an open pipe end, but cutting pipe isn't a sensible emergency experiment. Leave that work to someone who can identify the material, make a square cut, and install a compatible fitting.
Know when replacement makes more sense
A failed flexible supply hose is usually better replaced than patched. Match the connection size, choose enough length to avoid tension, and keep the hose free of sharp bends. Don't overtighten gasketed connections.
Plumber's tape belongs on compatible threaded connections during assembly, not wrapped around an assembled leaking pipe. Duct tape and sealant spray aren't reliable pressure repairs and can obscure the defect.
Keep a small kit accessible:
- Containment: Towels, a bucket, and a flashlight.
- Patch supplies: Compatible epoxy putty and a properly sized clamp set.
- Replacement supply: A braided hose matched to your appliance connections.
A stopped drip under normal operating pressure is a useful check, not permission to leave a temporary patch unattended.
Restore pressure cautiously only when the repair product permits it. If moisture returns, close the valve and wait for the plumber.
Document the Leak Before You Clean Up
The valve is closed and the towels are already in your hand. Photograph the wet pattern before those towels, a shop vac, or a temporary patch change what an adjuster can still see. Documentation sits third in the first hour, after safety and shutoff, and it has to happen before cleanup. Most avoidable disputes start in the same 24 to 48 hours as avoidable material damage: the room gets wiped down, the failed part gets tossed, and the file no longer shows cause or spread.
Keep the phone, a short written log, and every receipt in one place so you can pull them without hunting through texts.
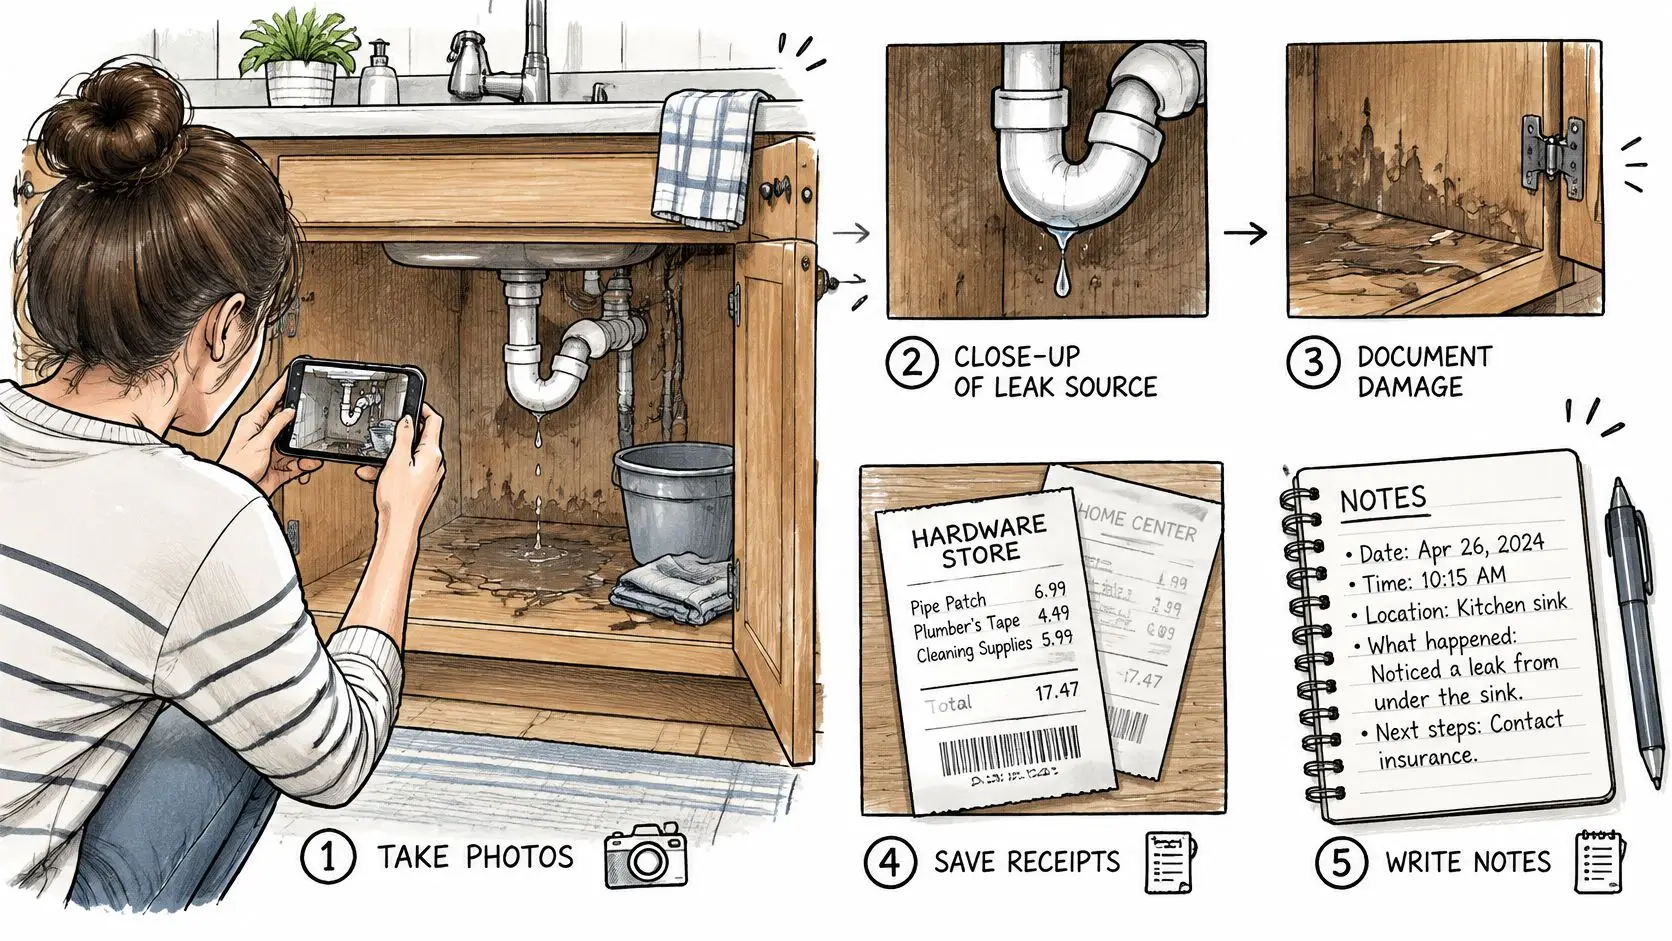
Work through this while the scene is still intact:
- Capture the source and spread. Take close-ups of the failed component and wider views of every affected room, ceiling, floor, and damaged possession.
- Record when you discovered the leak, what you observed, and whom you notified. Separate what you saw from what you only suspect.
- Preserve safe evidence. Ask about retaining damaged components or material samples. Do not store contaminated debris in occupied rooms.
- Keep extraction, equipment, and temporary-repair receipts separate from permanent plumbing and rebuilding invoices.
- Notify the insurer promptly. Say what you must do right away to limit further damage, and ask how to preserve anything they still need to inspect.
Separate the water source from the coverage question
Water on the floor is not automatically treated as insured plumbing damage. Standard homeowners policies generally exclude flooding, which ordinarily needs separate flood protection, commonly through the National Flood Insurance Program. Photograph the damage and contact the insurer before you repair, clean, replace, or discard affected property.
A sudden plumbing failure is evaluated differently from ongoing seepage, wear, or a leak left alone. The Washington insurance regulator's water-damage guidance explains why the cause and the policy wording matter. Coverage is not decided only by how wet the room got.
Landlords and commercial operators should also log tenant notifications, access arrangements, each temporary action, and why that action was necessary. A consistent insurance claim documentation process keeps those details from scattering across texts and invoices.
Notify, photograph, and mitigate the hazard in that order. Waiting for an adjuster is not a reason to leave a live electrical risk or standing water in place.
Limit Damage in the First 48 Hours
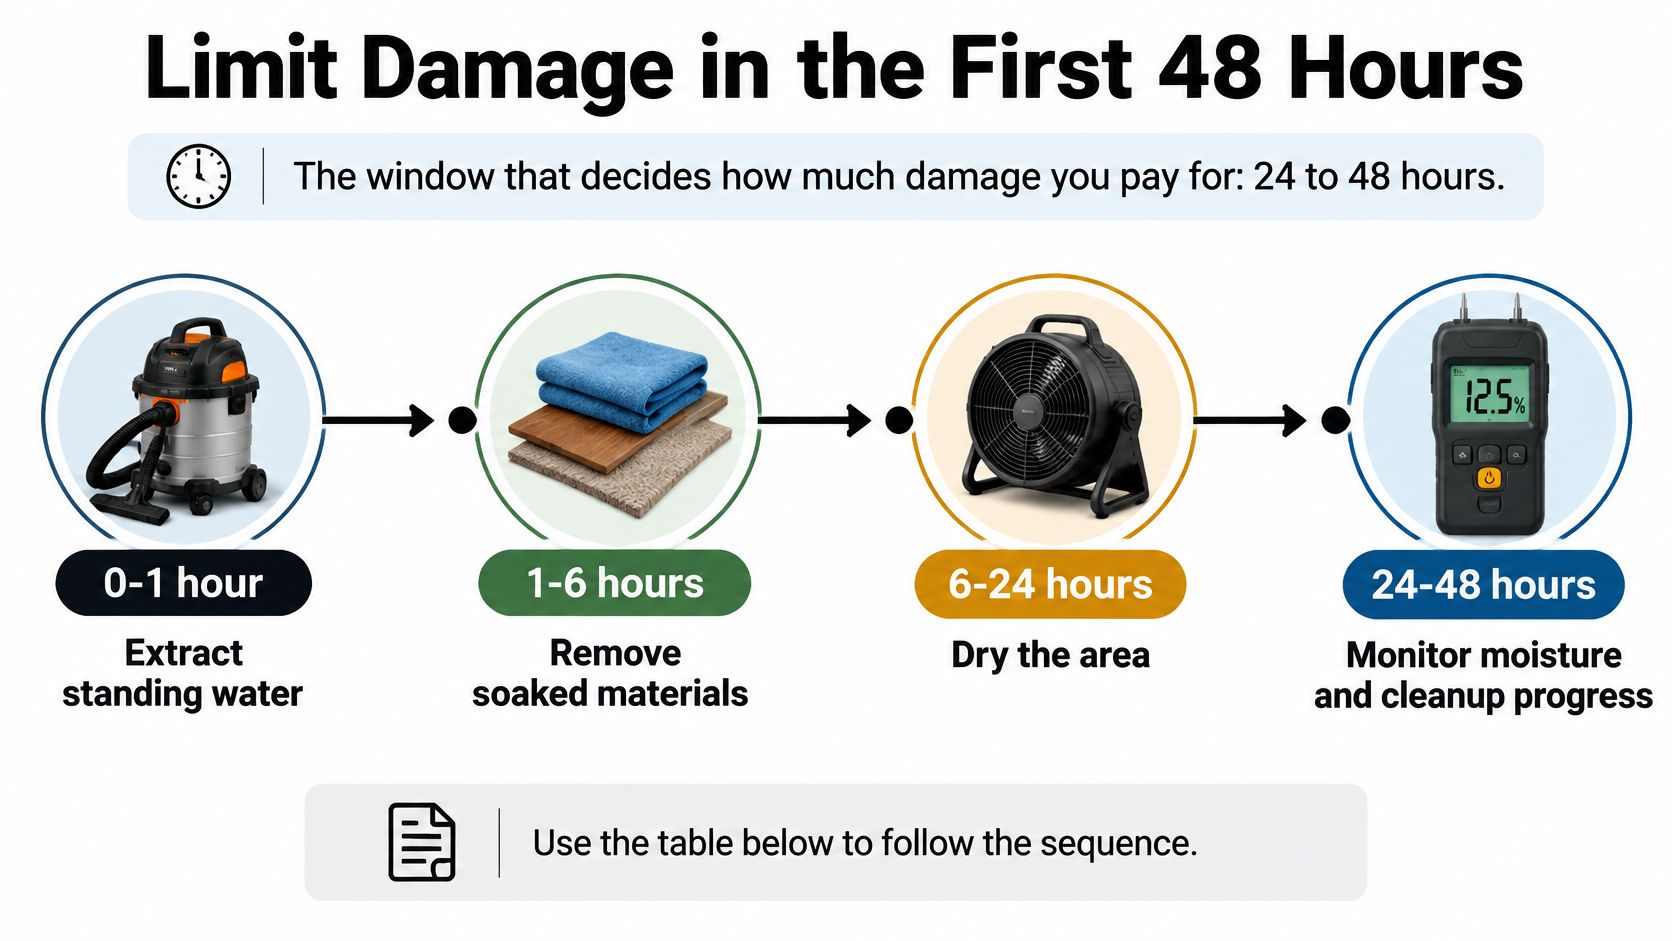
The 24 to 48 hour drying window is a prevention benchmark, not a promise: the EPA's moisture and mold guide recommends drying wet materials within that period and notes that mold often won't grow when drying happens promptly, although growth remains possible.
Follow the sequence below as a work plan, not a reason to postpone extraction or inspection until a scheduled hour.
Drying timeline after a water leak
| Time after leak | What to do | Why it matters |
|---|---|---|
| 0 to 1 hour | Stop the source, extract standing water, move contents, photograph damage | Limits how much water soaks in |
| 1 to 6 hours | Sanitary check, then start fans and dehumidifiers | Early drying slows swelling and staining |
| 6 to 24 hours | Check under flooring and in walls, take moisture readings | Hidden moisture can remain after surface cleanup |
| 24 to 48 hours | Dry carpet, pad, and furnishings, log readings | Prompt drying reduces opportunities for mold growth |
| After 48 hours | Stop treating the job as ordinary drying and call for a mold assessment | Persistently wet materials need a remediation assessment |
Use this timeline to organize the work after safety and source control.
Extract first and verify sanitation
Use a liquid-rated wet vacuum or suitable pump only after electrical hazards are controlled. Never use an ordinary household vacuum. Move dryable possessions off wet floors and remove saturated loose items without spreading contaminated water.
Don't start fans until the water is confirmed sanitary. Sewage and chemically contaminated water need containment and appropriate protective equipment. Air movement can distribute contaminants instead of helping evaporation.
The extraction stage is complete when accessible standing water is removed, not when the floor looks clean. Water may still remain beneath cabinets, flooring, and wall finishes.
Measure the building rather than guessing
Take moisture readings at affected materials and comparable unaffected materials. Compare drywall with drywall and wood with similar wood using the same meter settings. Record locations so follow-up readings describe the same spots.
A restoration technician may need to inspect beneath carpet, behind baseboards, or inside wall cavities. Don't cut blindly into walls or remove suspected hazardous building materials yourself.
The EPA's remediation guidance emphasizes drying underlying materials, including subfloors, and reconsidering ordinary cleanup when materials remain wet beyond 48 hours or mold is present. That calls for assessment, not an assumption that every wet component must be discarded.
Drying checkpoint: Falling moisture readings matter more than a surface that feels dry.
ASHRAE guidance summarized in this moisture-control reference identifies 40% to 60% indoor relative humidity as a preferred comfort range and notes that mold is rarely a problem when material water activity remains below 0.8, approximately 80% equilibrium relative humidity at the surface.
Those are different measurements. Comfortable room air doesn't establish that concealed insulation is dry. Look for readings approaching comparable dry materials, no new staining, and no musty odor, while recognizing that odor alone can't verify completion. Use a measured post-water-loss mold prevention approach before closing assemblies.
Prevent the Next Leak With Simple Sensors
Water sensors are familiar to many homeowners but installed far less often. Independent Agent magazine reports that 79% of homeowners know about water sensors and 76% know about automatic shutoff devices, while only 16% have installed sensors and 13% have installed shutoff systems.
The practical benefit isn't the notification itself. It's discovering water while someone can still isolate the source.
Put detection where water will collect
Place sensors at the water heater base, behind the washing machine, under sinks, and near the HVAC condensate drain. Consider the floor beneath an upstairs bathroom, especially where an unnoticed overflow could affect the room below.
A spot sensor detects water reaching its contacts. It doesn't necessarily detect a slow leak inside a wall, and a whole-house flow monitor may have detection limits of its own. Read what the device measures before buying it.
Build a layered plan:
- Automatic isolation: Have a plumber check pipe compatibility, valve placement, and which supplies must remain operational before installing a shutoff.
- Local detection: Position sensors in likely collection points, not wherever they're easiest to hide.
- Human response: Write down who receives alerts, who has access, and who will close the valve after hours.
Test the failure conditions
Check whether alerts depend on home internet, mains power, a subscription, or a working phone connection. Learn whether the device sounds locally when remote notifications fail. Investigate condensation-related false alarms rather than disabling a sensor permanently.
For rentals and multi-unit buildings, settle owner authorization, tenant access, and responsibility for responding before installation. A shared supply shouldn't be shut off casually.
For seasonal travel or vacant Phoenix properties, choose remote alerts and designate a local responder with access. Sensors don't replace emergency response. They shorten the time between discovery and action only when someone follows through.
Decide When to Call a 24/7 Restoration Team
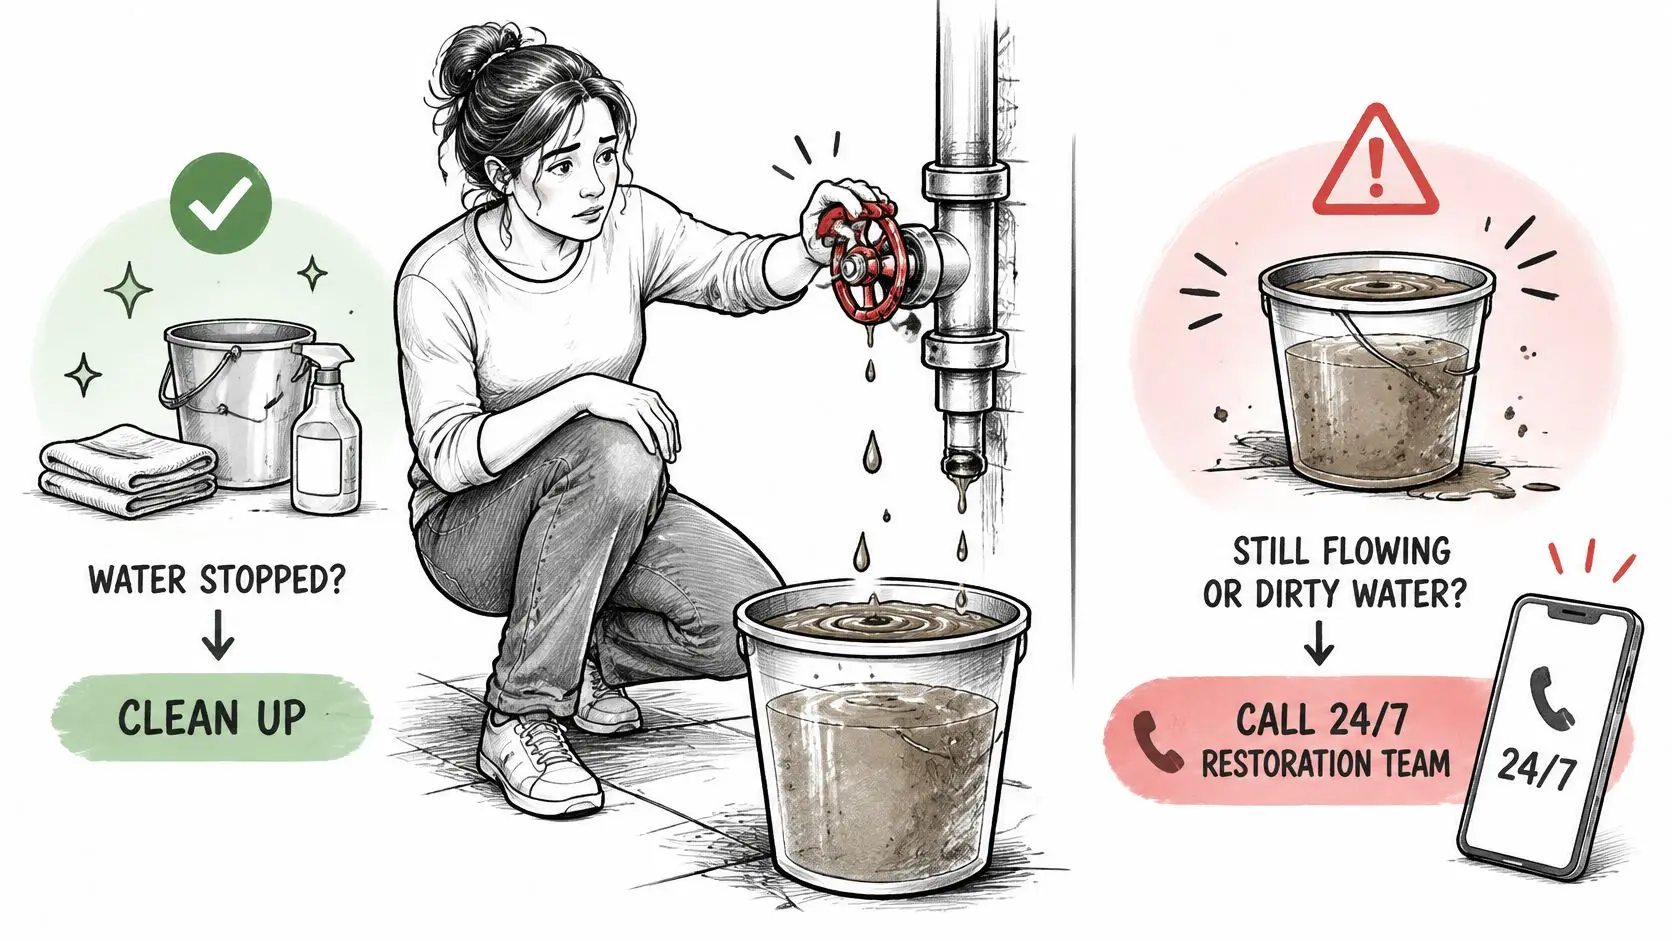
If water continues flowing after isolation attempts, or sewage, gray water, or floodwater is inside, call for professional help now. An active supply failure needs a plumber or utility as appropriate, while a restoration team handles the escaped water and affected building materials.
Don't spend the evening comparing patch products when the wet area is expanding. Tell dispatch whether the supply is controlled and whether anyone can safely enter.
When to call a restoration team now
| Situation | Call a restoration team | Handle it yourself |
|---|---|---|
| Water still flowing after valves are closed | Yes, now | No |
| Sewage, gray water, or floodwater inside | Yes, now | No |
| Water reached walls, ceiling, or under flooring | Yes, now | No |
| Materials wet longer than 48 hours | Yes, now | No, mold risk |
| Small drip stopped, area dry within 24 hours | Optional | Yes, with a plumber for the permanent repair |
These are conservative response decisions, not guarantees that a particular loss needs demolition or will be covered by insurance. When the leak's age is unknown, tell the assessor rather than starting the drying clock at discovery.
Use the following visual as a reminder to separate safe homeowner actions from work needing professional assessment.
Match the help to the problem
Continued flow means the building is still receiving water, even if the visible leak slows. Contaminated water requires controlled handling. Concealed wet assemblies require access decisions and measurements, not just additional towels.
A homeowner can reasonably manage a contained drip when the source is stopped, the accessible surface dries promptly, and there are no electrical, contamination, or structural concerns. Book the permanent plumbing repair and inspect the surrounding cabinet or floor rather than assuming the visible puddle was the entire loss.
When arranging emergency water extraction, ask what areas need assessment, how drying progress will be measured, and what must happen before rebuilding. Request a clear explanation of completed work and remaining wet locations.
Prepare a useful emergency call
Give the dispatcher the address, source if known, affected rooms, shutoff status, access restrictions, and any contamination or electrical concerns. Say whether water is above a ceiling or beneath flooring.
For property managers organizing after-hours contacts, Heyline's plumbing answering service guide is a useful resource for understanding call routing and escalation. An answering arrangement doesn't replace confirmation that the appropriate trade has accepted the job.
At Restore Heroes, we're available 24/7 across the Phoenix metro area. We're IICRC certified, licensed, bonded, and insured, and we offer a free onsite inspection and estimate, requested through our contact form or by calling 480-690-5277.
Save our contact details before an emergency. Keep valve locations accessible and have your photos, timeline, and receipts ready so the call can focus on the conditions that need attention.
Restore Heroes offers emergency water extraction, structural drying, and cleanup for damage from plumbing leaks, appliance failures, and flooding. Visit Restore Heroes to request help, and tell us whether the water is shut off, which rooms are affected, and whether any hazards are present.