
A pipe under the kitchen sink fails while you're away, or a monsoon-driven leak pushes water into an exterior wall. By the time you notice bubbling paint, a musty odor, or dark spotting, the visible mark may be only the edge of the problem. Mold in drywall repair starts with diagnosis, not a sponge and a coat of paint.
Phoenix's dry climate can make a wall look harmless soon after a leak, but a dry surface doesn't prove that the gypsum core, paper backing, insulation, or framing is dry. The practical question is whether the drywall remains sound and whether moisture or contamination is hidden behind it. The wrong decision can either cause unnecessary demolition or leave contaminated material sealed inside the wall.
Why Mold in Drywall Repair Needs a Clear Plan
A wall can look dry while the damage remains active behind it. A plumbing leak may run along the back of drywall, collect at the bottom plate, or spread sideways through insulation and framing. The visible stain may mark only the edge of the wet area, so spraying and wiping the face can leave moisture and contaminated materials inside the cavity.
The first decision is diagnostic: determine whether the surface is sound and sealed, or whether the board, paper, insulation, or framing has been affected. That distinction controls whether limited cleaning is reasonable or whether demolition and professional containment are safer.
Time matters after a leak. The U.S. EPA's mold course guidance recommends drying water-damaged areas and contents within 24–48 hours to help limit mold growth. Drywall can remain in place when it has no obvious swelling and the seams remain intact. Swollen board or failed seams usually require removal because moisture can remain trapped where ordinary airflow cannot reach.
Phoenix homes have several common moisture routes, including air-conditioning systems, bathroom steam, refrigerator supply lines, washing-machine hoses, roof leaks, and storm entry. Hot, dry outdoor air may dry the exposed face quickly, while insulation, closed cavities, and shaded sections behind cabinets stay damp.
Use the material itself to set the pace. Soft or crumbly gypsum, a bowed or sagging face, a musty odor that survives airing out, bubbling or peeling paint, and a stain that returns after cleaning all justify a slower assessment. Together, these signs suggest that the visible finish may be reporting a larger moisture problem.
A sound plan follows the water path rather than the stain alone. Stop the source, identify the affected assembly, decide what can safely remain, and dry the area before rebuilding. Unnecessary removal creates dust and waste, but repainting over unresolved moisture can seal the problem into the wall and lead to recurring damage. When the evidence points beyond surface contamination, demolition or a qualified remediation assessment is the safer choice.
How to Assess Mold in Drywall Before You Start Repair
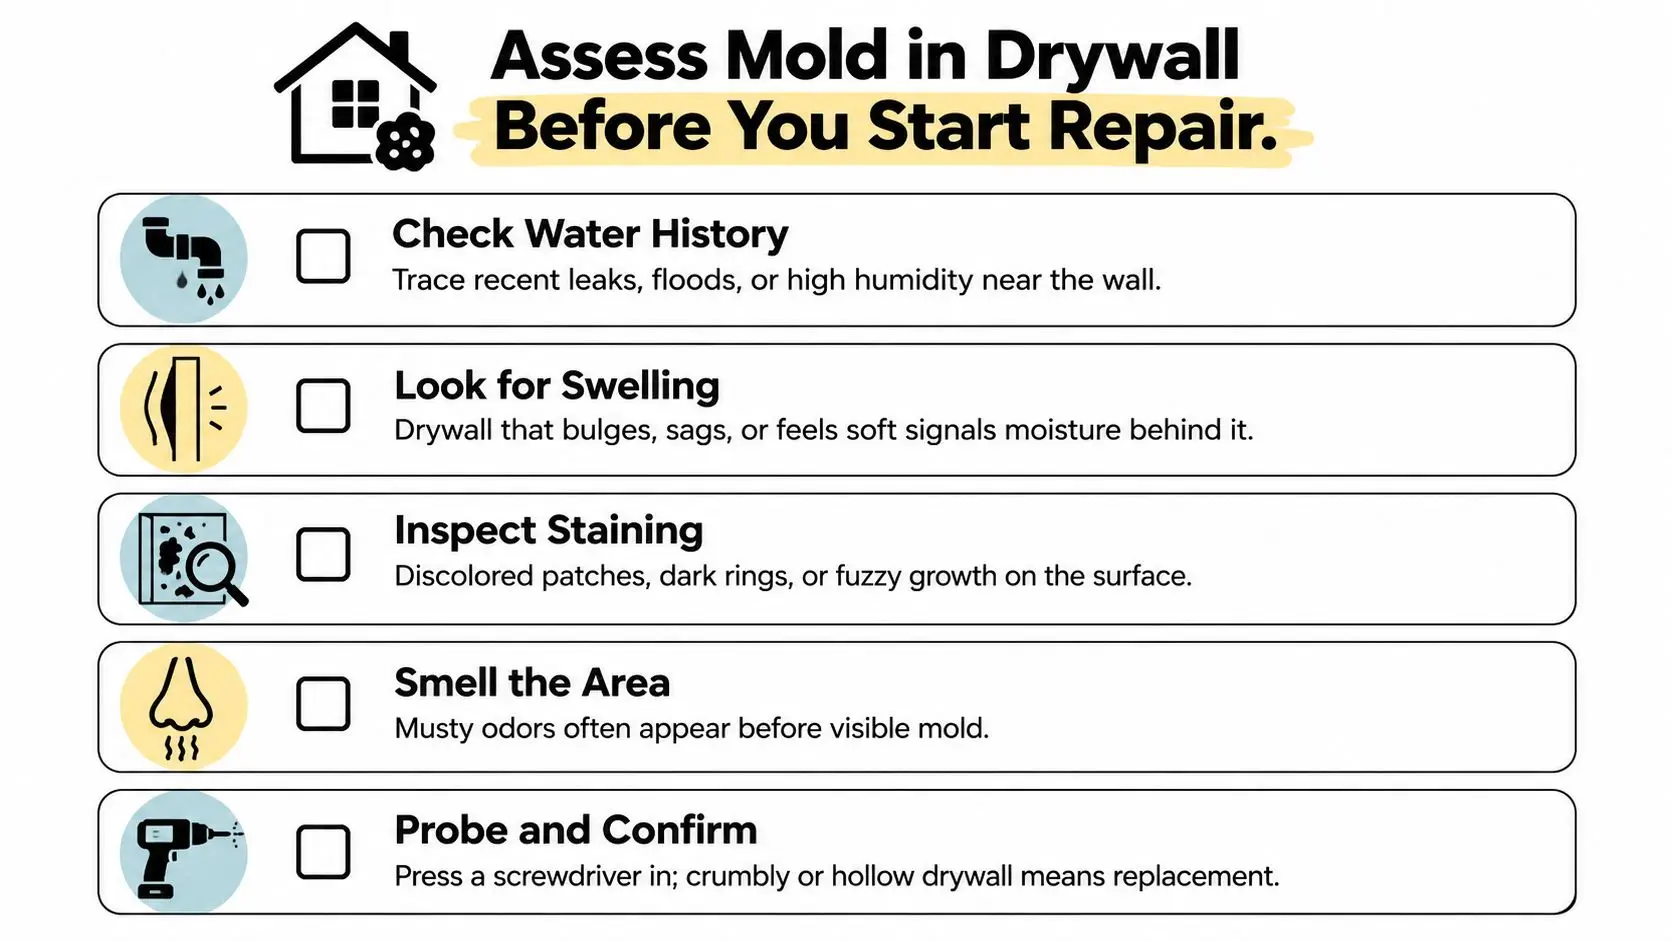
Assessment saves more trouble than aggressive cleaning. Start with the water history. Identify when the leak happened, how long the wall was wet, whether the water was clean or contaminated, and whether the affected section sits near plumbing, an exterior opening, an appliance, or an air-conditioning line.
Next, inspect the panel without disturbing it unnecessarily. Look for swelling, sagging, peeling paper, damaged seams, staining, and soft areas. A musty smell near a wall opening, outlet, baseboard, or cabinet can also point to hidden moisture. Surface mold on sound, sealed drywall may be a limited cleaning issue, but unsealed paper, repeated growth, soft gypsum, or damaged seams shifts the decision toward removal.
Use tools to map moisture, not to make the decision alone
A pin or pinless moisture meter can help compare the suspect area with nearby dry drywall. Readings above roughly 17 percent moisture content in drywall are commonly treated as abnormal indicators of active moisture, according to EPA guidance on moisture and mold assessment. That reading is a reason to investigate further, not automatic proof that mold is present.
Thermal imaging can reveal temperature differences associated with moisture, but it doesn't identify mold by itself. A borescope through an existing opening may show insulation, framing, or visible growth, though a small view can't establish the condition of the entire cavity. Use these tools to locate suspicious zones and decide where a careful opening may provide useful evidence.
The repair sequence should stay disciplined: stop the source, assess the panel, remove affected drywall when it's swollen or seam-damaged, dry the cavity, and rebuild. Practical drywall repair guidance emphasizes this order because trapped moisture can continue feeding growth after visible mold disappears.
A useful companion resource is this mold behind drywall guide, especially when staining and odor don't line up. You can also compare visible symptoms with this drywall mold identification resource.
The deciding question: Is the drywall still structurally sound, and can the cavity be dried and verified without leaving contaminated porous material in place?
Don't cut a large opening just because a stain looks dramatic. Don't preserve a panel just because the face feels dry. The safest choice depends on water history, material condition, moisture readings, odor, and what inspection reveals behind the surface.
Safe Removal and Disposal Steps for Contaminated Drywall
A small surface patch and a contaminated wall cavity require different removal plans. Before cutting, clear people, pets, and unnecessary belongings from the room. Isolate air movement that could carry dust elsewhere, then cover nearby surfaces with disposable sheeting. If the source involved sewage, flooding, or another contaminated water source, stop DIY work and arrange professional assessment.
Wear protection suited to the exposure. The CDC and NIOSH mold remediation guidance advises people removing moldy drywall to use a half-face or full-face respirator. Add eye protection, gloves, disposable clothing, and footwear that can be cleaned or discarded.
Cut cleanly and contain the waste
Remove trim carefully and mark a square or rectangular opening that extends into sound material and reaches framing where possible. Score the drywall face with a sharp utility knife. Limit sawing, and avoid sanding or dry-brushing moldy paper. A household vacuum can spread fine particles, so it cannot replace containment and suitable HEPA equipment.
Keep demolition pieces inside the work area. Place removed drywall into bags before carrying waste through the home, and clean tools before taking them outside the containment zone. Contaminated insulation, damaged cardboard, and moldy paper products are porous and often cannot be cleaned reliably.
The scale of contamination determines the work setup. The EPA's mold cleanup guidance treats areas exceeding 100 square feet as requiring full containment and more formal remediation practices. That threshold is a planning trigger, not proof that a smaller job is safe for DIY. Hidden growth, a damp cavity, or affected insulation can make a limited-looking opening a larger problem.
For practical precautions around the work area, Good Boy Plumbing mold advice provides useful context. This black mold removal guide for drywall also explains why contaminated board should be removed rather than sealed behind new material.
Do not spray bleach on porous drywall and assume it is clean. Do not paint over active growth, sand stained paper, or close a cavity that still smells damp. Bag waste securely, follow local disposal requirements, and keep contaminated materials away from clean areas until disposal.
Patching and Rebuilding Drywall After Mold Removal
Rebuilding begins only after the leak is fixed and the remaining structure is dry and sound. Photograph the opened area if you're documenting a claim, then inspect studs, plates, insulation, wiring, and plumbing for moisture or visible contamination. Remove damaged porous material rather than burying it behind a new patch.
Measure the opening and cut replacement drywall to fit the framing. Match the existing board type and thickness, use appropriate fasteners, and leave the edges supported. If the cavity still holds moisture, pause before installation. New drywall can hide a wet assembly, but it can't make that assembly dry.
Build the patch in the right order
Secure the panel, then reinforce joints with drywall tape and apply joint compound in thin coats. Allow each coat to dry before sanding lightly. Heavy sanding creates unnecessary dust and can damage the paper face, so use controlled passes and keep the work area contained.
Prime the repaired surface before painting. A stain-blocking primer can help with residual discoloration on sound surrounding material, but primer isn't a remediation product and won't correct active moisture or contaminated gypsum. Match the existing wall texture with a small test application before treating the full patch.
A few details determine whether the finish looks deliberate:
- Support the edges: Unsupported seams crack and telegraph through paint.
- Feather the compound: Extend each coat beyond the previous one to avoid a raised outline.
- Match texture gradually: Orange peel, knockdown, and smooth finishes need different application techniques.
- Seal after drying: Paint only when the substrate and compound are fully dry.
- Correct the source: A rebuilt wall remains vulnerable if the plumbing, roof, appliance, or HVAC moisture issue continues.
For a clear explanation of the material risks, see what happens when drywall gets wet. The key issue isn't just appearance. Water can weaken the board, damage the paper, and leave moisture in places paint can't reach.
Professional containment may use negative pressure around minus 0.02 inches of water column, and practice benchmarks for framing use moisture conditions below roughly 19 percent to reduce fungal favorability, as described in professional drywall mold remediation guidance. Those figures aren't a reason to guess at readiness. They're reminders that drying and verification should happen before reconstruction.
Skipping containment, leaving porous contamination behind, or rebuilding before drying is complete creates more risk than an imperfect first coat of paint. Take the time to confirm the assembly is stable, then finish the cosmetic work.
Drying Techniques and Prevention Tips for Phoenix Homes
A wall can feel dry while its cavity remains wet. On Phoenix jobs, the reliable approach combines air movement, moisture removal, and source control. Open windows only when outdoor air will not add humidity. Fans should move air across exposed surfaces, while a dehumidifier removes moisture from the room. Neither solves water trapped behind intact drywall.
Set fans to sweep across the affected area, not blow directly at visible mold. In a closed room, run a dehumidifier continuously, emptying its reservoir or connecting a drain so operation does not stop. Check the wall, floor edge, cabinet backs, and nearby framing. Paint appearance alone cannot show whether the assembly is drying.
As noted in the assessment section, readings above roughly 17 percent in drywall signal active moisture worth investigating. If readings stay high, odor persists, or adjacent materials show damage, continue investigating rather than applying primer. A wet cavity may require an opening, controlled drying, or a different response than surface cleaning.
Prevention depends on a seasonal routine
Once a season, pull the washing machine out and inspect its supply lines. Run bathroom exhaust fans through every shower and allow damp surfaces to dry. Check HVAC condensate pans, drain lines, and nearby drywall. After heavy rain, walk ceilings, windows, and exterior walls for fresh staining. Photograph any new mark so you can tell whether it grows, fades, or returns after cleaning.
Phoenix's dry climate helps recovery, but it does not prevent leaks, condensation, or moisture behind cabinets. Early checks reduce the chance that a small event becomes concealed contamination.
For practical guidance on how to prevent mold after drywall gets wet, focus on drying the board, cavity, and surrounding materials before closing the wall. Properly placed water damage fans support controlled air movement, while source repair keeps new moisture from undoing the work.
When to Call a Professional for Mold in Drywall Repair
Professional help makes sense when the visible patch doesn't represent the full scope. Call for an assessment when mold keeps returning, the wall has widespread swelling, contamination extends into multiple rooms, or the water came from sewage or flooding. A recurring stain after cleaning usually means the source, cavity, or porous material hasn't been properly addressed.
The size of the work zone matters as well. The EPA's 100-square-foot containment threshold for commercial mold work is a useful indicator that a project may be larger than a simple household patch, though the right response also depends on location, occupants, materials, and the contamination source. Work near electrical systems, ceilings, insulation, or occupied bedrooms deserves extra caution.
Choose based on exposure and verification
A professional remediation process typically separates containment, removal, drying, cleaning of remaining sound materials, and reconstruction. It may include moisture mapping, controlled demolition, HEPA cleaning, and documentation of conditions before the wall is closed. That differs from wiping the face of drywall and painting over the mark.
Health concerns should influence the decision. People with respiratory sensitivities, allergies, or other vulnerabilities may not be good candidates for occupying a space during demolition. The CDC's respirator warning is a practical signal that removing moldy drywall carries more exposure risk than ordinary drywall repair.
Use this mold inspection checklist to organize observations before calling anyone. Share the water source, timing, affected rooms, odors, visible growth, and any moisture readings. Ask how the contractor will contain dust, handle porous waste, dry the cavity, and verify readiness for reconstruction. Compare the proposed scope rather than choosing based only on a promise of fast cleanup.
Restore Heroes provides mold inspection and removal services in the Phoenix metro area, including work involving hidden mold behind drywall and contaminated drywall removal. It can also coordinate structural drying and restoration after affected material is addressed, but the appropriate scope depends on the inspection and the condition of the property.
Contact Restore Heroes if a Phoenix-area leak has left you with soft drywall, recurring mold, or a musty wall cavity. Their team can assess the affected area, manage containment and drying, and explain the next repair steps without asking you to guess what should be removed.