
If mold covers less than about 10 square feet, roughly a 3 ft by 3 ft patch, DIY cleanup is usually appropriate; anything larger moves into professional remediation territory and requires formal containment. The deciding factor isn't only what you can see, but whether moisture is still reaching the building materials beneath or behind it.
You may be standing in the kitchen with a cabinet pulled away from the wall, staring at a dark patch that appeared after a slow faucet leak. Or you may have noticed staining along a bathroom ceiling after a roof problem. The natural reaction is to reach for bleach, scrub hard, and repaint. That sequence often treats the appearance while leaving the water source, contaminated materials, and hidden moisture untouched.
Residential mold remediation works best as a controlled process: identify the scope, stop the water, isolate the work area, remove materials that can't be restored, dry the structure, and verify that the conditions supporting growth are gone. A clean-looking wall isn't proof that the job is complete, and no contractor can guarantee that mold will never return if a new leak or condensation problem develops.
Spotting Mold and Deciding Your Next Move
A dark patch behind a cabinet or across a bathroom ceiling can look minor while moisture continues behind it. Discoloration, musty odors, bubbling paint, swollen drywall, and recurring staining are warning signs, not a diagnosis. Photograph the area, record when it appeared, and trace the likely water path before disturbing the surface.
The EPA's homeowner guidance uses less than about 10 square feet, approximately a 3 ft by 3 ft patch, as a practical range where cleanup may usually be handled by a homeowner (EPA guidance on mold cleanup in your home). Treat that figure as a screening point, not a guarantee. A small visible patch can still involve wall cavities, insulation, flooring, or an HVAC system.
Use the size rule honestly
A homeowner may be able to clean a small, isolated area on a hard surface with suitable protection, detergent, water, and thorough drying. Stop and seek professional advice when the material is porous, the moisture source is unclear, the area is growing, or someone in the household has health concerns that make exposure especially undesirable.
Areas from 10 to 100 square feet call for limited containment under EPA remediation guidance. Areas larger than 100 square feet call for full containment and more formal controls (EPA mold course, Chapter 6). A Connecticut mold-abatement guideline also defines Level I as isolated areas of 10 square feet or less and Level II as isolated areas from 10 to 30 square feet (Connecticut mold-abatement guidelines). These categories help set the work method, but they do not replace checking what is wet, damaged, or hidden.
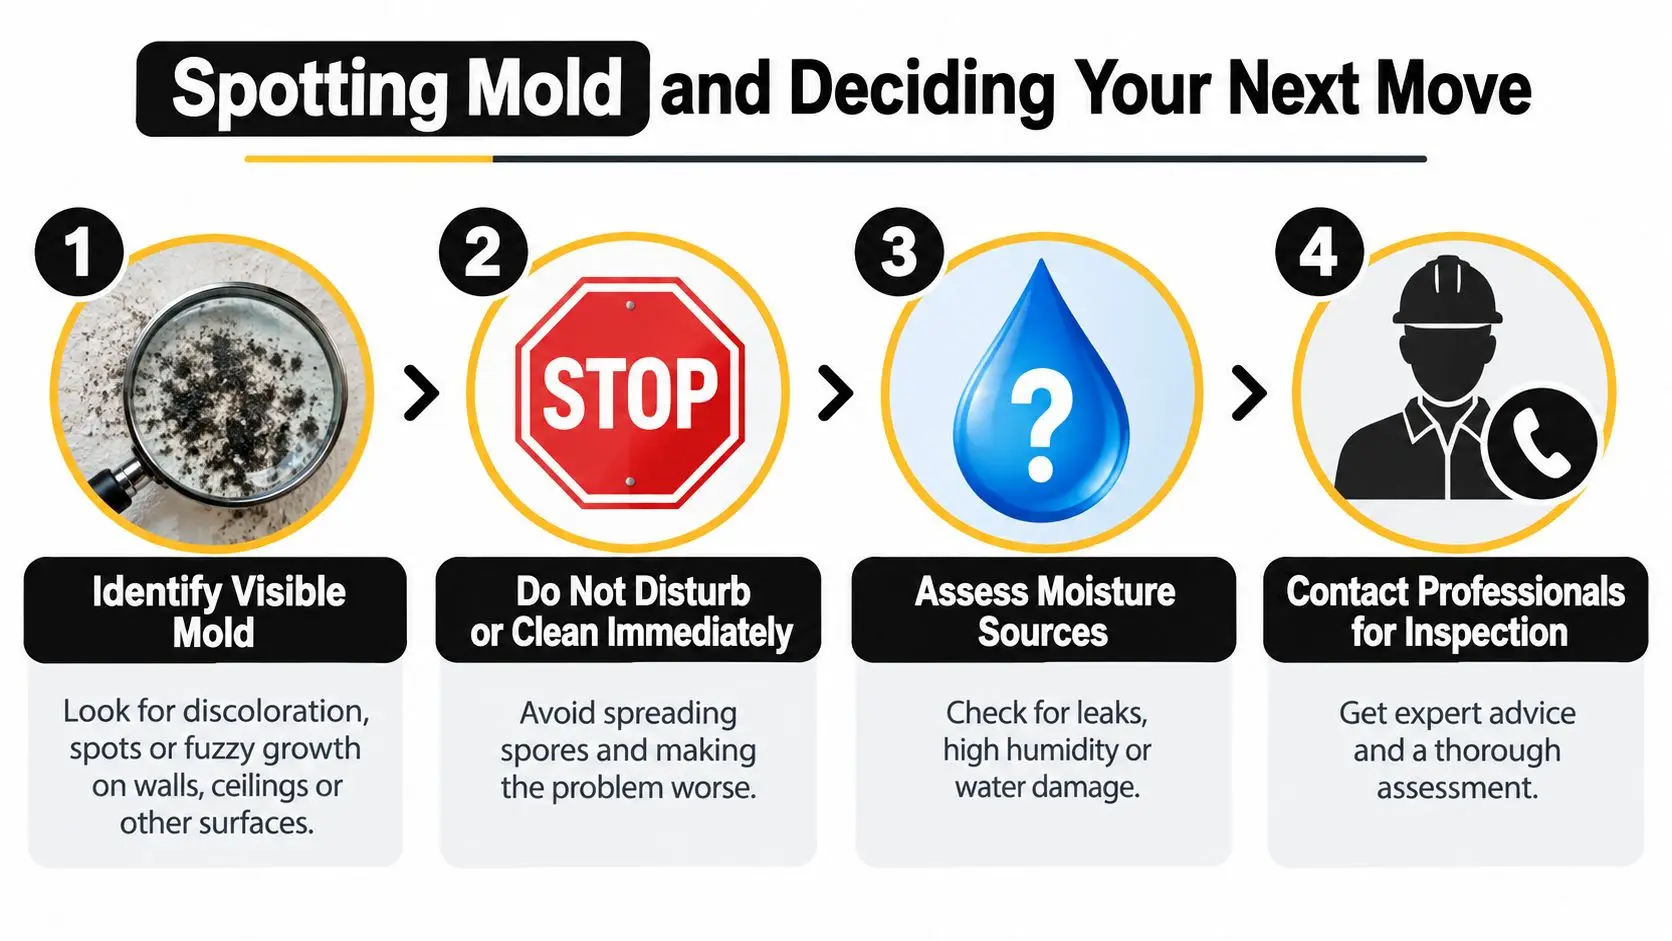
Inspect under sinks, around supply lines, behind appliances, near roof penetrations, around windows, and at HVAC condensate locations. A visual checklist of less obvious warning signs is available in this guide to signs of mold in walls.
The decision should account for what happens after cleaning. If you cannot identify and stop the moisture source, you have found a symptom, not a lasting solution. The job is complete only when the area is dry and the conditions that allowed growth have been corrected and can be checked after remediation.
What a Professional Mold Inspection Actually Looks Like
A professional inspection begins with the moisture problem, not the visible stain. The technician traces how water travels, checks nearby materials, and considers airflow through the home. Mold may appear on drywall while moisture remains around a plumbing fitting, inside a cabinet void, beneath flooring, or near an air-conditioning component.
The assessment usually starts with an interview. The inspector asks about leaks, flooding, roof repairs, odors, condensation, previous cleaning, and staining that keeps returning. Photos and a moisture map record conditions before any demolition, giving the crew a reference for later verification.
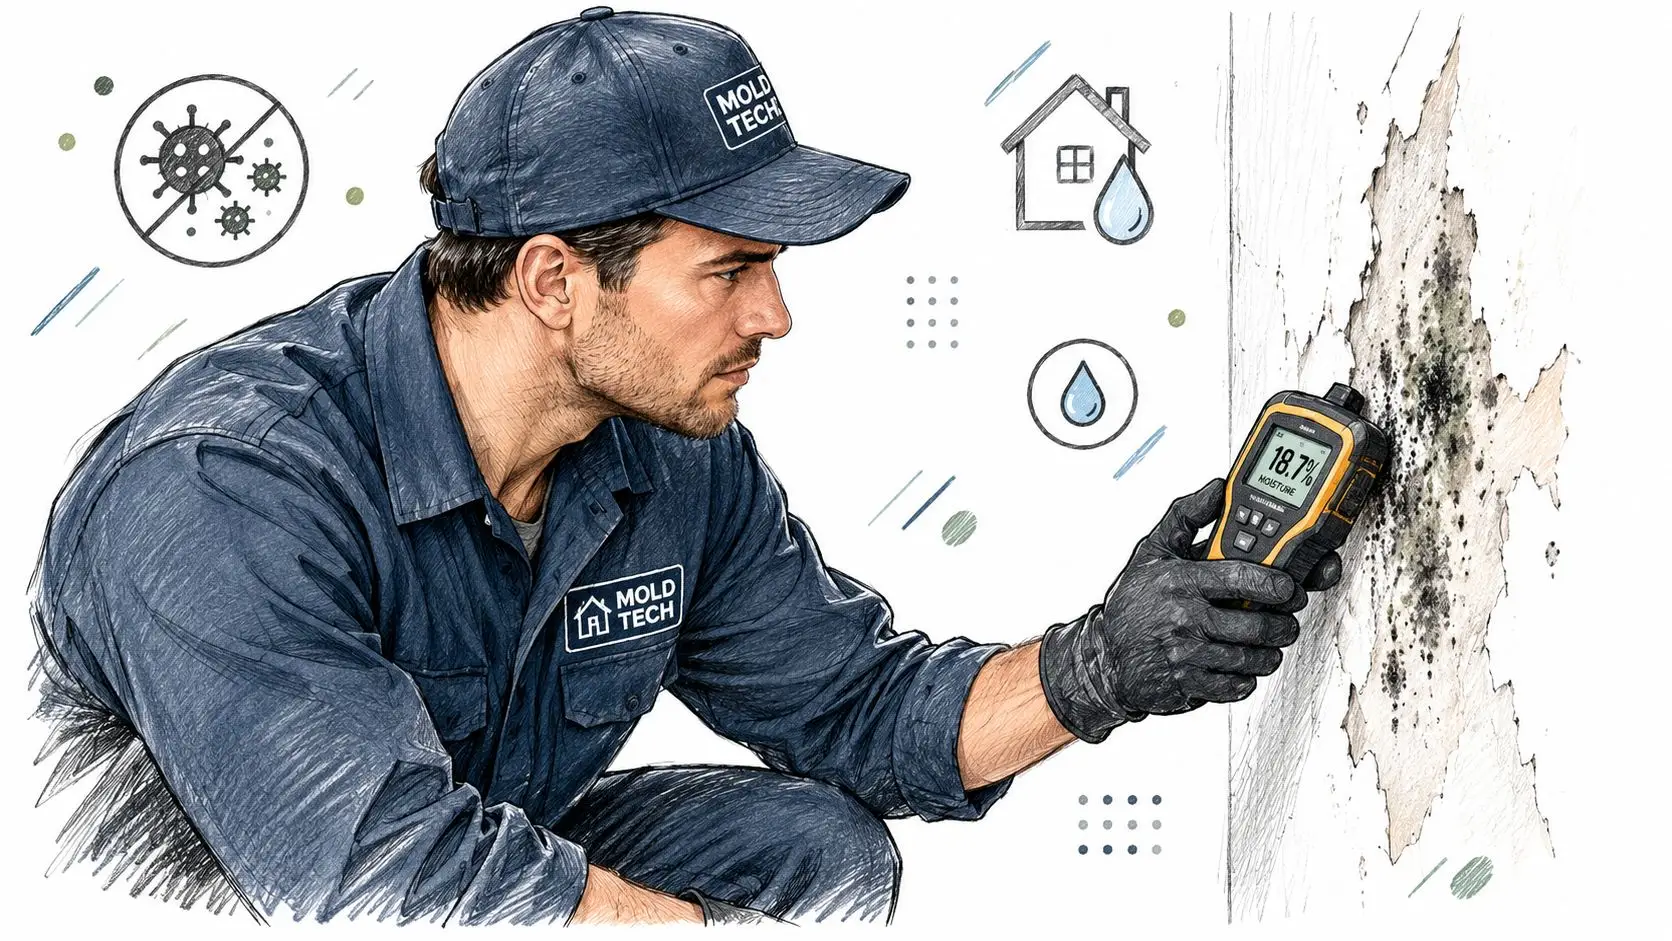
The tools answer different questions
A pin or pinless moisture meter locates wet building materials and compares them with dry reference areas. Thermal imaging shows temperature patterns that may indicate moisture, but it cannot identify mold. It helps the technician choose where to inspect more closely or make a limited opening.
Air sampling has a narrower role than many homeowners expect. The EPA states that visible mold generally does not require sampling, because the work should focus on removing contamination and correcting the moisture source (EPA guide to mold, moisture, and your home). Sampling can still help when growth is hidden, responsibility is disputed, or a formal comparison is needed.
Ask who will perform the work, what credentials they hold, how moisture readings will be recorded, and whether the inspector also controls the remediation scope. The IICRC S520 standard covers professional mold remediation in residential, commercial, and institutional buildings (IICRC S520 standard). For indoor-air-quality context, Engle Services IAQ resources explain how ventilation and HVAC conditions affect the indoor environment. Use this mold inspection checklist to prepare questions and request documentation that can support post-remediation verification.
Containment Strategies That Actually Stop Spore Spread
Containment separates controlled removal from the rest of the home. Cutting drywall, scraping surfaces, or moving contaminated contents can release particles into adjacent rooms. A household fan aimed at an open window is not an engineered system and may push contaminated air through the building.
The setup should match the affected area and the work involved. Small areas may need only basic protection and controlled handling. Larger areas require progressively stronger isolation, including sealed barriers, controlled entry, and managed airflow. The threshold matters less than the condition of the site, the materials being disturbed, and whether air can move into occupied rooms.
Limited containment versus full containment
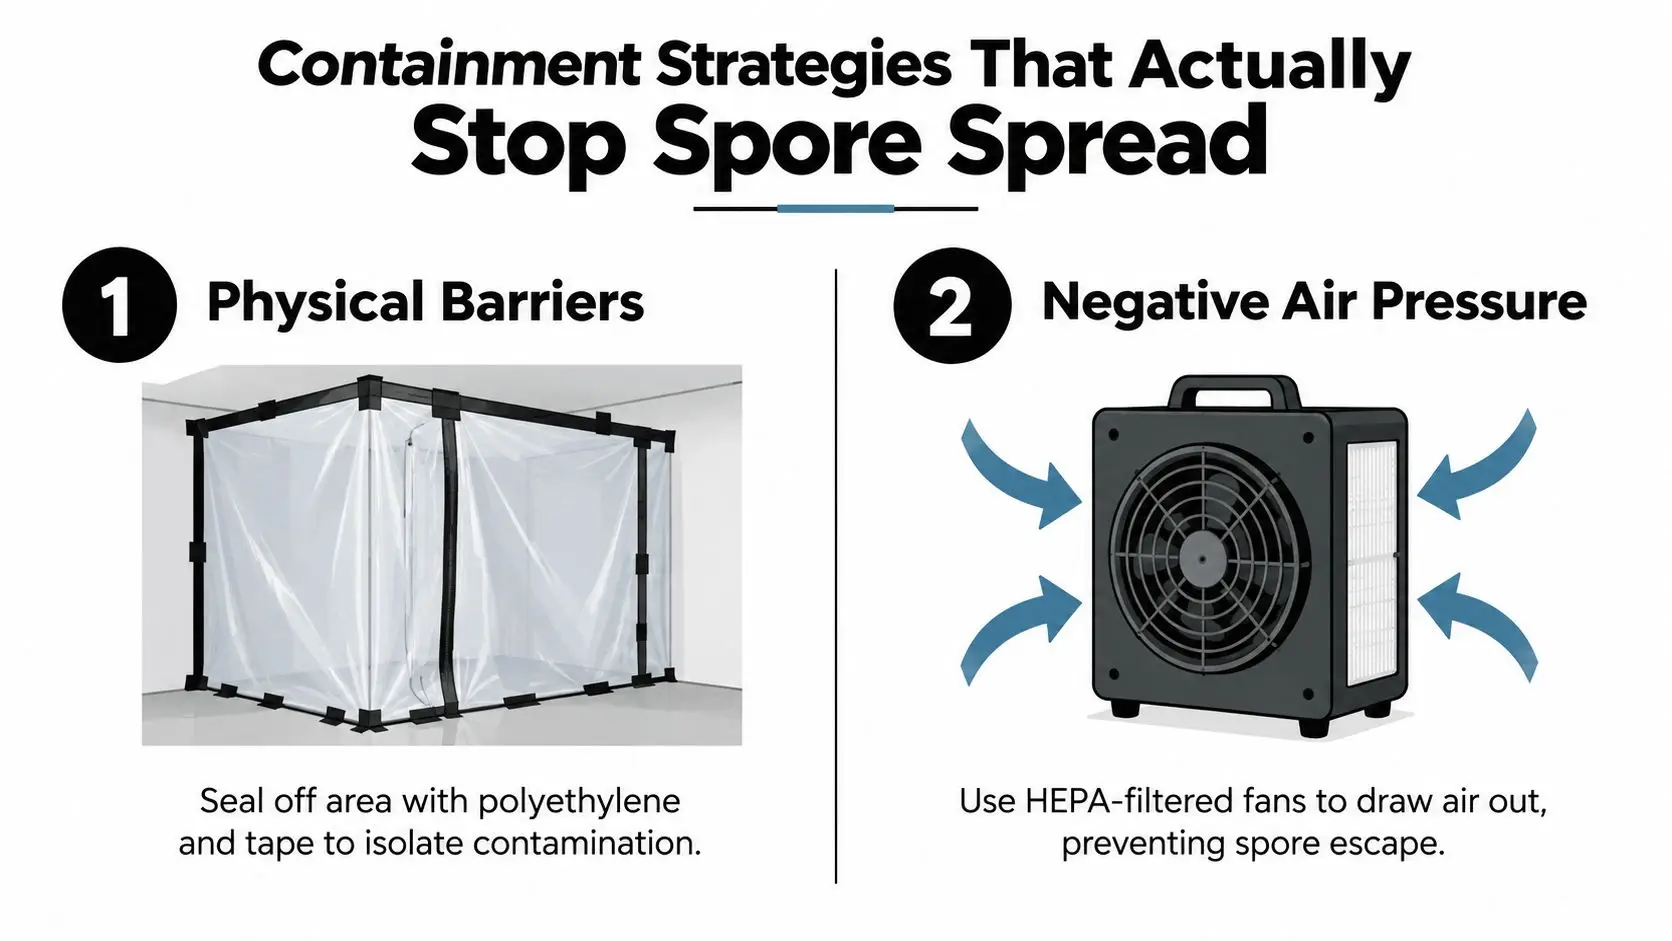
Limited containment usually uses polyethylene sheeting, sealed seams, and one controlled entry point. Technicians cover nearby contents, restrict traffic, and keep tools and waste inside the work zone. The barrier must stay intact while contaminated materials are disturbed, not only during final cleaning.
Full containment adds another layer of control for larger or higher-risk work areas. Professionals may install double layers of 6-mil polyethylene sheeting and use a negative-air machine with suitable filtration. The machine draws air from the contained zone toward a controlled exhaust path, maintaining airflow into the work area and reducing the chance that particles escape.
Check the HVAC system before demolition begins. Return-air pathways can carry particles from the work zone to occupied rooms. Technicians may need to isolate or protect those pathways, otherwise a localized removal can expand into a wider cleaning project.
Containment adds labor, materials, and setup time. Skipping it may reduce the initial invoice while increasing the risk of spreading contamination and extending cleanup. Antimicrobial treatment can support a remediation plan, but no treatment product replaces physical isolation, removal of damaged material, or correction of the moisture source. Those controls also make post-remediation verification more meaningful because the work area and cleaned boundaries are clearly defined.
The Actual Removal Process and What Gets Discarded
Once the work area is isolated, technicians decide which materials can be restored and which must be removed. Tile, glass, metal, and other hard, non-porous surfaces can often be cleaned and dried. Drywall, ceiling tile, carpet pad, insulation, and similar porous materials are harder to save because moisture and contamination can extend below the visible surface.
A typical removal sequence is:
- Protect the work area: Technicians confirm containment, protect access paths, and put on suitable PPE before disturbing damaged materials.
- Remove unsalvageable materials: Damaged drywall, insulation, carpet padding, and other porous items are cut out, bagged inside containment, and carried out through a controlled route.
- Clean the remaining structure: Salvageable framing and other surfaces may be HEPA vacuumed, physically cleaned, and damp-wiped with an appropriate detergent-based method.
- Check before rebuilding: Remaining materials are monitored until the moisture source is corrected and readings support reconstruction.
The disposal decision depends on material condition, contamination depth, and whether complete cleaning and drying are practical. Removing more material increases repair costs, while leaving concealed damage can allow the problem to return.
Why bleach isn't the main answer
Bleach may change the appearance of a stain on a hard surface, but it is not a dependable primary method for porous building materials. EPA guidance emphasizes detergent and water for hard-surface cleaning, followed by complete drying, rather than treating biocides as the central removal method (EPA mold and moisture resource directory).
Bleach can create a false sense of completion. It may lighten a visible mark while drywall remains wet or contaminated underneath. Painting over moldy or water-damaged material hides the condition rather than correcting it, and CDC guidance warns against painting over those surfaces (CDC homeowner and renter mold guide).
The useful test is whether contaminated material was removed, the moisture source was corrected, the remaining structure was cleaned, and drying was verified. For wall-specific guidance, see removing black mold from drywall. Those records and moisture readings provide a stronger basis for deciding whether mold can return.
Structural Drying and the Critical Moisture Window
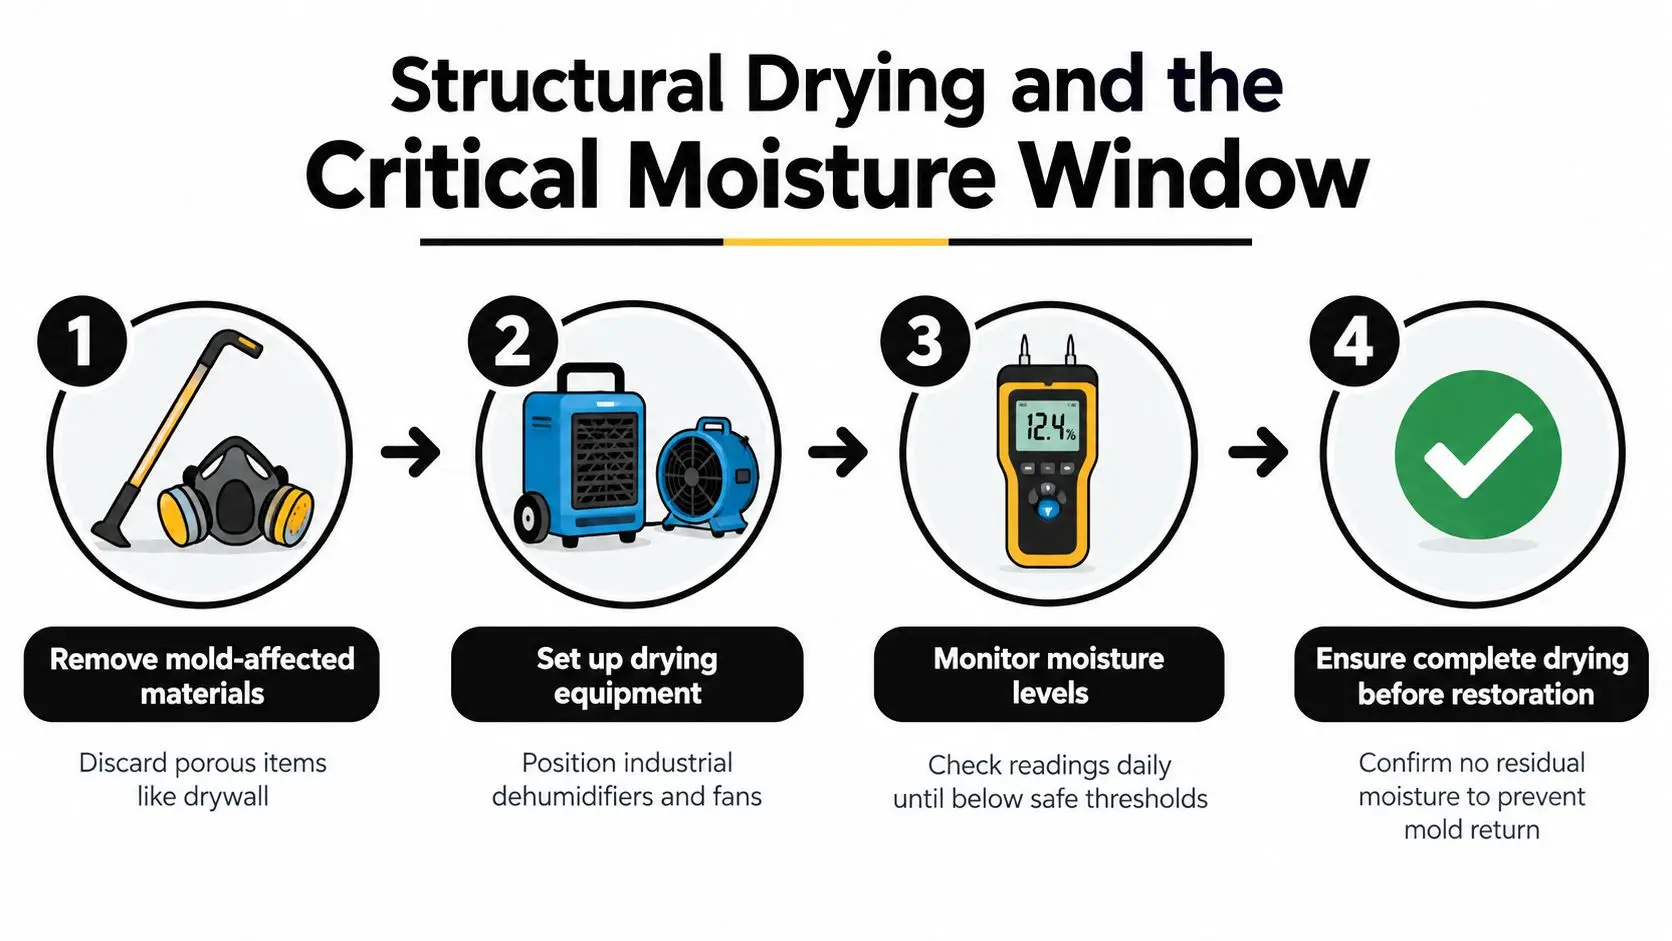
A wall can feel dry while moisture remains inside its drywall, insulation, framing, flooring assembly, or cabinet base. That hidden moisture is enough to support renewed growth after cleanup. Restoration technicians check the material itself with moisture meters rather than relying on touch, appearance, or a dry room surface.
The early drying window matters. Wetted materials should be dried promptly, and items that cannot be cleaned and dried completely within 24 to 48 hours may need to be discarded. The practical decision depends on the material, how far water entered it, and whether technicians can verify complete drying. Porous materials with trapped moisture often require removal instead of repeated surface treatment.
Drying is a measurement process
Professionals place air movers to increase evaporation and use dehumidifiers to remove moisture from the air. They take repeated readings from affected materials and compare them with dry reference areas. A single low reading at the surface does not prove that the wall cavity or flooring assembly is ready to close.
Drying equipment cannot overcome an active water source. A dripping supply line, roof intrusion, or HVAC condensation problem continues feeding moisture into the structure. The source must be controlled before equipment readings can show meaningful progress.
Watch for signs that drying is incomplete:
- Readings remain high: Affected areas stay wetter than comparable unaffected materials.
- Odors return: Musty smells reappear after equipment is removed or the room remains closed.
- Staining spreads: Discoloration extends beyond the original damage.
- Surfaces change: Drywall swells, paint blisters, trim separates, or flooring buckles.
Do not close damp materials behind paint, primer, flooring, or cabinets. Keep the moisture readings, affected-area map, and drying log with the project records. Those records help answer the question homeowners need resolved: whether the structure is dry enough to prevent the same conditions from supporting mold again.
Repairs and Prevention That Keep Mold From Returning
Remediation removes contamination. Prevention starts with correcting the building defect that supplied moisture. That may mean repairing a plumbing connection, replacing failed roof flashing, correcting drainage near the foundation, addressing window leakage, or fixing an HVAC condensate issue.
In Phoenix-area homes, air-conditioning systems deserve close inspection. Condensation around coils, drain pans, lines, or poorly insulated ducts can wet nearby materials even when there hasn't been a dramatic leak. A bathroom exhaust fan that doesn't move humid air outside can create a recurring ceiling or wall problem, while poor airflow behind cabinets can leave cool surfaces damp.
Make the repair part of the scope
Before the job is considered complete, ask for a clear answer to four questions:
- Where did the water come from: Which plumbing, roof, drainage, ventilation, or HVAC condition created the damage?
- What was repaired: Who completed the source correction, and what evidence shows the repair addressed the entry path?
- What was dried: Which structural materials were measured, and how were affected areas compared with dry reference areas?
- What changes reduce recurrence: Does the plan include ventilation, condensate management, drainage correction, or access for future inspection?
The CDC's guidance places source correction at the center of remediation, not at the end of an optional maintenance list (CDC mold remediation guidance). That distinction matters because a freshly cleaned surface can become contaminated again if the leak or condensation pattern remains.
Keep records of repairs, photos, moisture readings, replaced materials, and follow-up observations. In a rental or multi-unit building, give the property manager a written description of the leak and the affected locations so responsibility for the source isn't reduced to a surface-cleaning request.
Post-Remediation Verification and Why It Matters
A wall can look perfect and still fail the test. Post-remediation verification asks whether the moisture source was corrected, affected materials were removed or cleaned, the work area is free of visible contamination, and the structure is suitable for restoration or re-occupancy.
Verification commonly combines a visual review with moisture readings and a check of the containment and cleaning scope. Sampling may have a role when a project requires independent documentation, but the EPA notes that visible mold generally doesn't require sampling before remediation. The more useful evidence is often the combination of source repair, documented drying, clean surfaces, and no unexplained recurrence.
Choose verification that matches the risk
For a small, isolated cleanup, a homeowner may be able to document the source, cleaning, drying, and final condition. A larger project, hidden moisture event, dispute, rental turnover, or health-sensitive household may justify an independent assessor who wasn't paid to perform the removal.
Ask for records rather than a verbal “all clear”:
- Moisture documentation: Readings from affected materials and nearby reference areas.
- Scope comparison: A record of what was removed, what was retained, and why.
- Final visual review: Confirmation that visible growth, dust, debris, and damaged materials were addressed.
- Source correction evidence: Photos, invoices, or contractor notes showing the leak or condensation issue was repaired.
- Reoccupancy reasoning: A clear explanation of why the area is ready for use.
A post-remediation verification review can help homeowners understand this final stage. Persistent odor, renewed staining, unexplained moisture readings, or new growth are signs to pause reconstruction and investigate further.
Health symptoms also require judgment. If symptoms continue after the building work is complete, don't assume more bleach, fogging, or repeated surface cleaning is the answer. Discuss ongoing symptoms with a qualified medical professional while an appropriate building assessment addresses environmental questions.
Making the Right Decision for Your Home
Start with four facts: area size, material type, moisture source, and access to the affected space. A small patch on a cleanable bathroom tile after a repaired fixture leak is a different problem from mold behind a cabinet, under flooring, or throughout a wall after a roof failure.
A Phoenix homeowner might find a small bathroom patch beside a leaky faucet. If the patch is under about 10 square feet, the leak is fully repaired, the surface is non-porous, and there are no signs of hidden spread, careful homeowner cleaning may be reasonable under EPA guidance. The homeowner should still protect the work area, avoid dry disturbance, clean with detergent and water, dry completely, and keep records of what changed.
A different homeowner discovers growth after a roof failure. The visible area is larger, the drywall is swollen, and the ceiling cavity has remained damp. That combination points toward professional remediation because the job involves source correction, material removal, containment, structural drying, and verification rather than surface cleaning.
Use this decision filter
- Small and isolated: Consider DIY only when the area is under the EPA threshold, the material can be cleaned, and the moisture source is known and fixed.
- Hidden or recurring: Arrange an inspection when staining returns, odors persist, or moisture appears behind finishes.
- Large or spreading: Call professionals when the affected area exceeds the small-patch threshold or requires containment and controlled demolition.
- Complex household conditions: Seek professional guidance when occupants have health concerns, the property is multi-unit, or HVAC pathways may connect the work area to other rooms.
In the Phoenix metro area, Restore Heroes is one residential option that handles assessment, containment, contaminated-material removal, structural drying, cleaning, and restoration. No service provider can guarantee permanent prevention or a particular insurance outcome, so ask for the proposed scope, documentation, exclusions, and verification process before work begins.
Restore Heroes can assess the moisture source, contain the affected area, remove damaged materials, dry the structure, and coordinate restoration for residential mold problems in the Phoenix metro area. Visit Restore Heroes to request an inspection and discuss the next practical step for your home.