
You step into the utility closet and find a puddle spreading beneath the water heater. There's a faint hiss, a steady drip, or water tracking toward the wall. The safest response isn't to grab the first wrench you see. Treat the event as a triage problem: stop the flow, remove electrical and gas hazards, identify the actual source, and protect the building before deciding whether the heater needs a part or a full replacement.
A leaking tank can create far more than a plumbing bill. One widely cited industry source reports that 69% of water-heater-related insurance claims involve a tank leak or burst, while the average water-damage cleanup cost after deductible is $4,444 (water-heater failure and replacement statistics). The next hour matters because a controlled fitting leak and a failed tank shell require very different decisions.
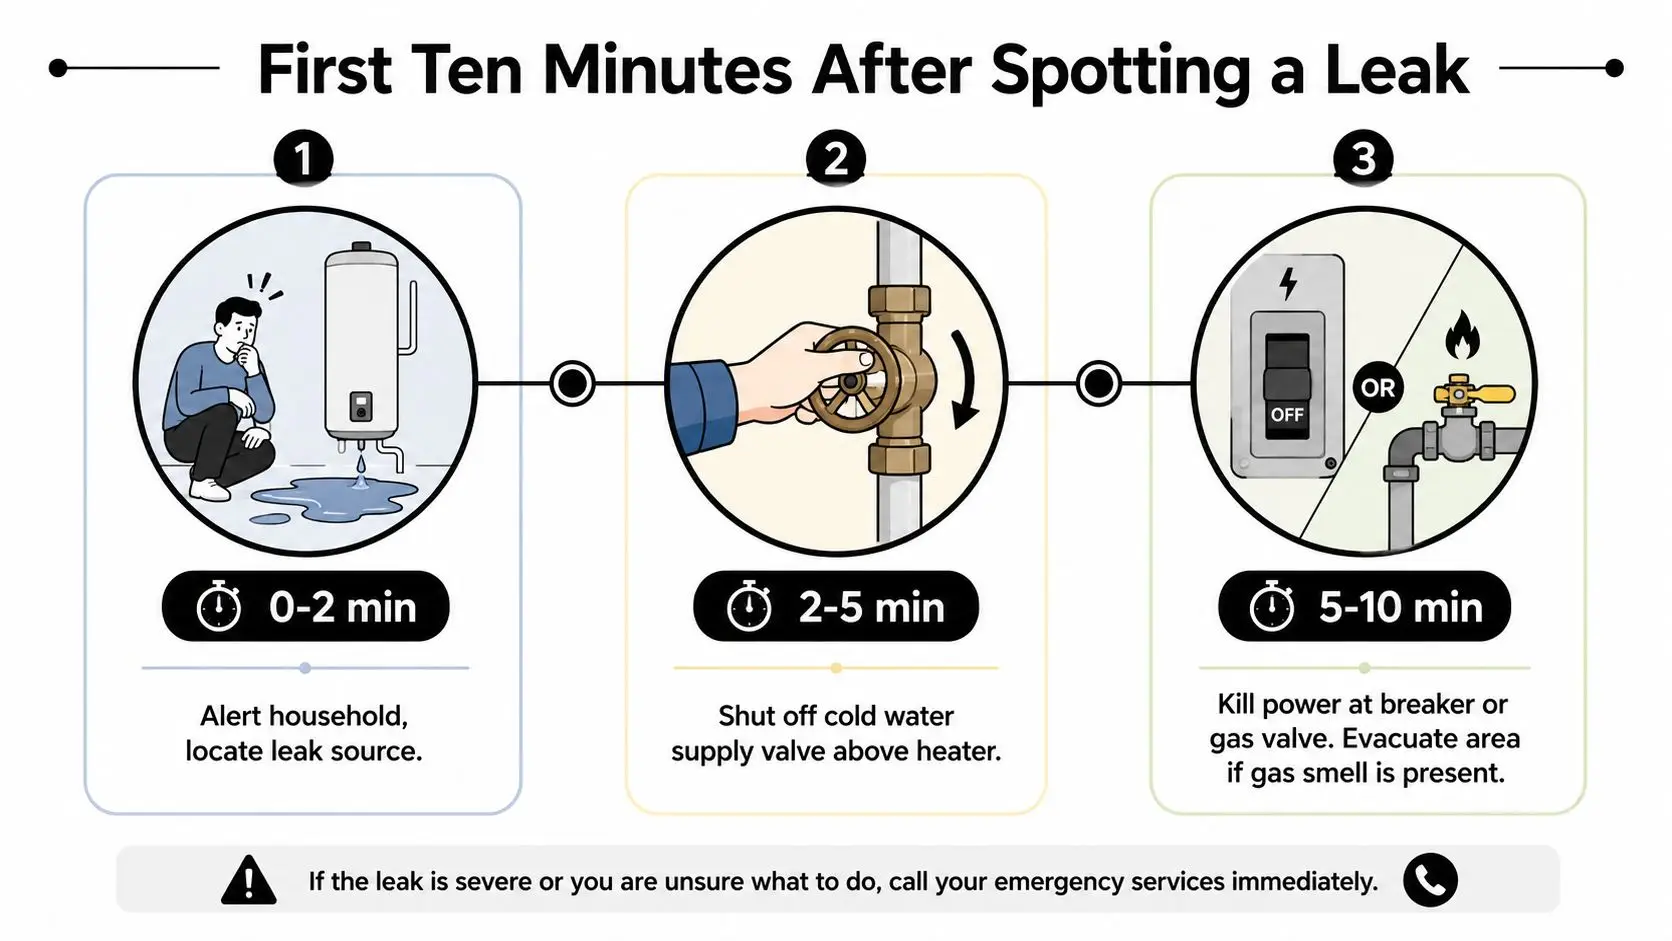
What to Do in the First Ten Minutes After You Spot the Leak
Start with observation, not disassembly. If the floor is wet, keep children and pets out of the area, and don't touch the heater, outlet, wiring, or breaker if water may have reached energized equipment. Look from a dry position and determine whether water is falling from a top connection, escaping from a valve, coming from the drain, or appearing beneath the tank itself.
If you can do so safely, move stored belongings, cardboard boxes, tools, and rugs away from the puddle. Lay towels around the edge to slow spread, but don't let cleanup distract you from shutting down the source. Water that reaches drywall, flooring, cabinets, or insulation needs prompt drying, not just surface wiping. A restoration overview such as water damage mitigation guidance can help you recognize when the incident has moved beyond a simple plumbing repair.
The three priorities
Locate the source. Follow the wet trail upward. Check the cold-water inlet, hot-water outlet, relief-valve discharge pipe, drain valve, nearby unions, and the tank base. Don't assume the heater is responsible until you've ruled out nearby piping or appliances.
Remove people from danger. Keep away from standing water near electrical components. If you smell gas, don't operate switches, use a flame, or remain in the area. Leave the building and contact the gas utility or emergency services from a safe location.
Stop secondary damage. Move undamaged contents and use towels, a bucket, or a watertight pan to contain small amounts of water. Don't place yourself beneath a wet ceiling or climb over wet surfaces to reach a valve.
Practical rule: If water is moving quickly, reaching electrical equipment, or spreading into multiple rooms, call for emergency help while another adult handles only safe containment.
The first ten minutes aren't about proving you can complete the repair. They're about limiting exposure and preserving choices. Once the area is safe, shut down the heater as described below, then document what you found before the scene changes.
Shutting Down Water, Power, and Gas Safely
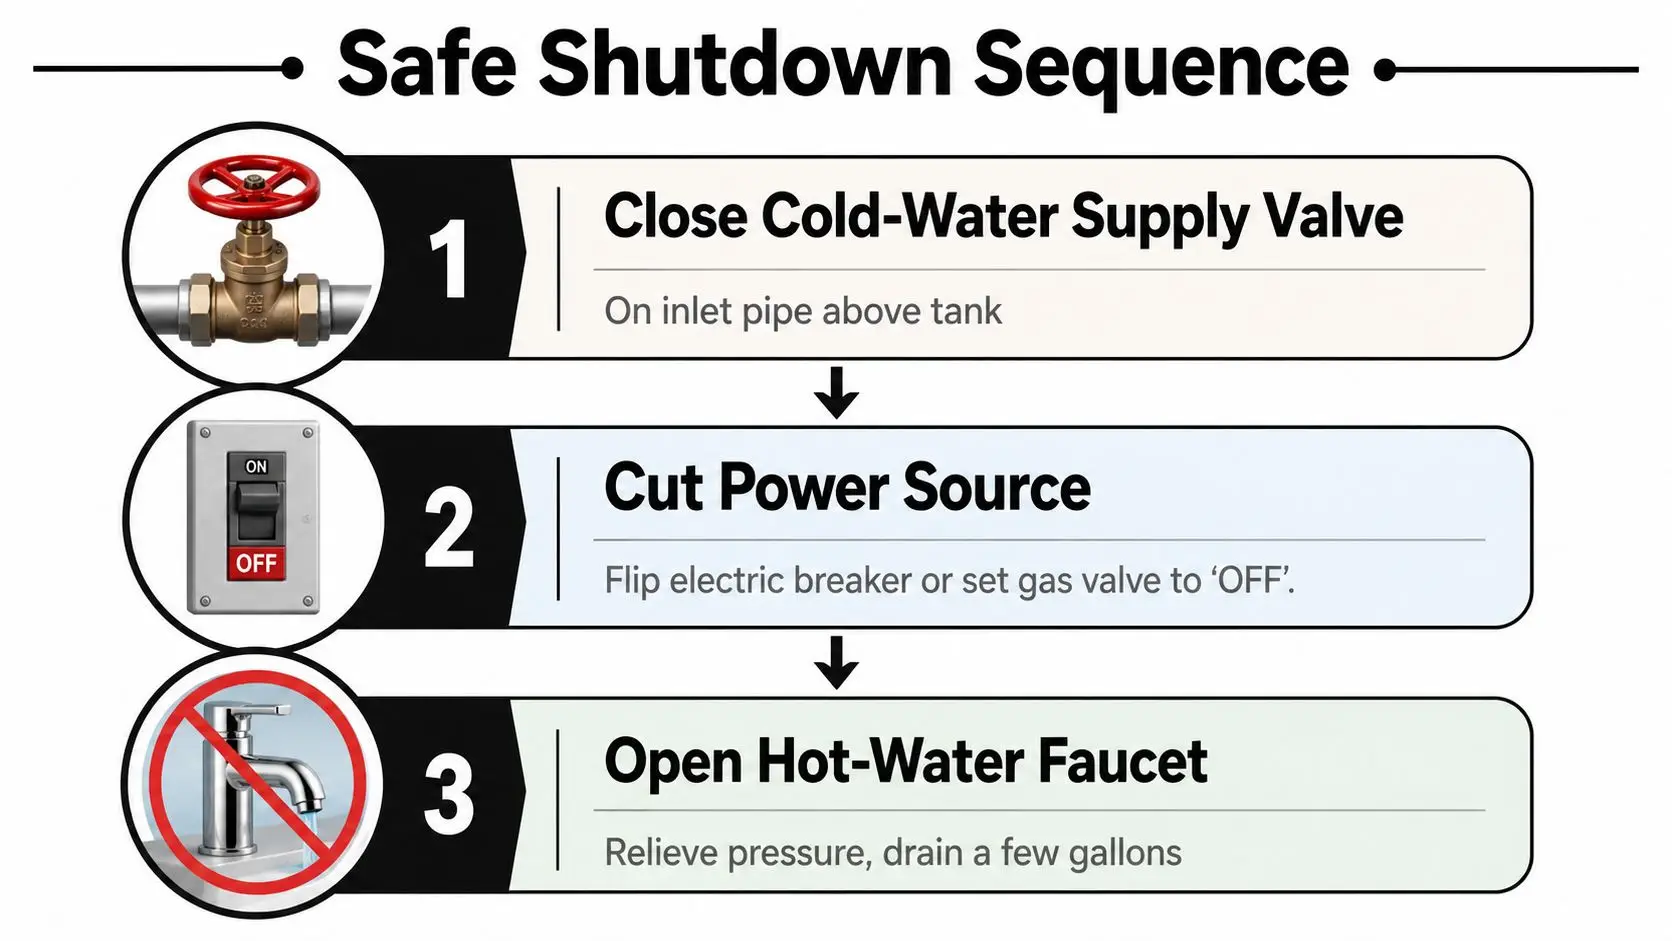
Close the cold-water supply valve on the pipe entering the top of the heater first. This stops new water from feeding the tank while leaving the rest of the home's plumbing available. Turn the handle clockwise until it stops, or move the lever so it sits across the pipe. If the local valve is stuck, corroded, or begins twisting the pipe, don't force it. Shut off the home's main water supply if you can reach it safely, and call a plumber.
Next, remove the energy source. On a gas model, turn the gas control dial to Off and confirm that the burner stops. Don't adjust the gas piping or attempt to relight the pilot while water is actively leaking or the area is unsafe. If you smell gas, leave immediately and contact the utility from outside.
For an electric tank, trip the dedicated breaker at the electrical panel. Don't open access covers, touch thermostats, or handle wiring while standing on a wet floor. If water has reached the panel, the panel is inaccessible, or you can't confirm the circuit safely, leave the electrical shutdown to a qualified electrician or emergency professional.
Relieve pressure without creating a hazard
After water and energy are isolated, open a hot-water faucet. This can relieve pressure and help the tank cool, but don't drain a hot tank onto a wet floor or toward electrical equipment. If you need instructions for locating a difficult main shutoff, use this emergency water shut-off guide.
Verify the shutdown by checking that water is no longer entering at the heater, the burner is silent on a gas unit, and the faucet stops delivering hot water within about a minute. Don't assume the system is safe merely because the puddle has slowed. Residual water can continue draining from the tank, piping, pan, or discharge line.
The sequence is also shown in this short video:
Confirming the Leak Is Actually Coming From the Heater
A puddle under a water heater doesn't prove the tank is leaking. Nearby pipes, a washing machine supply line, a pan drain, or condensation can send water to the same low point. Confirming the source before ordering parts prevents a fitting repair when the tank shell has failed, or a costly replacement when the actual problem is a loose connection.
Wait until the unit and surrounding piping are safe to approach. Dry the floor, tank exterior, connections, pan, and visible drain line completely. Then watch for the first place where water reappears. A practical diagnostic method is to wait about 10 minutes after drying and observe the earliest wet point (leaking water-heater diagnostic guidance).
Follow the water uphill
Water from a top connection may run down the outside of the tank and look like a shell leak. Check the cold inlet, hot outlet, unions, threaded nipples, and the temperature and pressure relief discharge pipe. A steady drip directly beneath one connection generally points toward that fitting, while water emerging from the bottom seam or shell is much more serious.
Condensation behaves differently. In humid conditions, a cold inlet pipe can sweat and create scattered moisture without a single active drip point. Feel only from a dry, safe position. A cold, even film on piping suggests condensation, while a warm or hot trail may point to water from the tank or hot-water connections.
Inspect the drain pan and pan drain separately. If the pan contains water but the tank and fittings remain dry, the pan may be collecting runoff from another source. Listen for intermittent discharge from the relief line, and check nearby washing machine hoses, ceiling areas, and wall penetrations before assigning blame.
| Leak Source | Visible Signs | Likely Fix |
|---|---|---|
| Tank shell or base | Water returns from the bottom seam, shell, or base after fittings are dry | Replacement evaluation |
| Cold inlet or hot outlet | Drip begins at a threaded connection or union and tracks downward | Fitting, washer, or connection repair |
| Temperature and pressure relief valve | Water appears at the valve or discharge pipe, sometimes intermittently | Pressure and valve evaluation |
| Drain valve | Moisture starts at the drain outlet or hose connection | Close, service, or replace the valve |
| Condensation or nearby line | Even moisture on a cold pipe, or a wet trail from another appliance or ceiling | Correct the actual source |
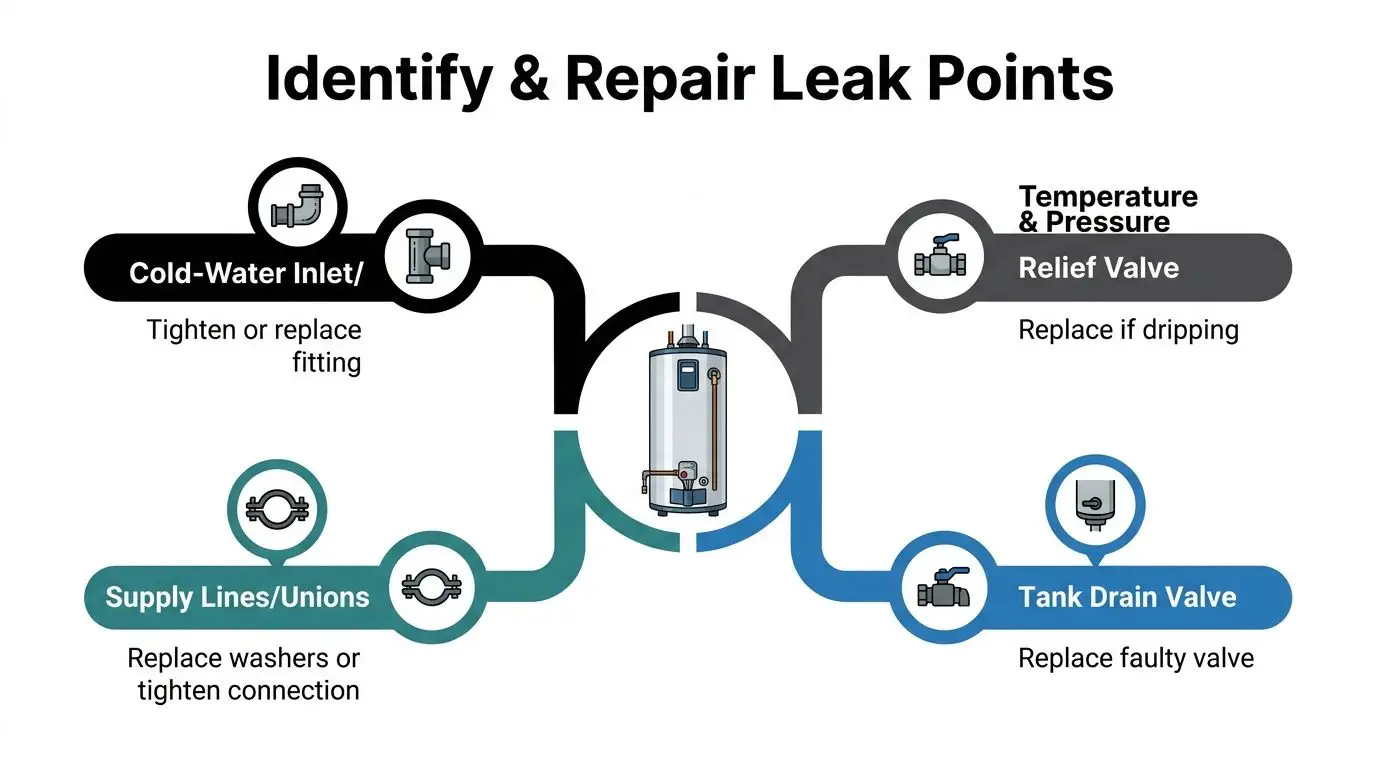
A tank-origin leak usually means replacement, while a fitting or valve leak is often repairable. If the source remains unclear, professional leak detection services can help separate heater failure from hidden plumbing or building-envelope water.
Common Repairable Leak Points and How to Fix Them
Only work after the heater is shut down, the tank is cool, and the area is dry enough to approach safely. An electric unit must have its breaker off, and a gas unit must have its control set to Off. Identify the exact water path before loosening anything. Replacing the wrong part can turn a manageable drip into a larger release.
For a valve or fitting repair, partially drain the tank below the leaking component. Open a hot-water faucet, connect a hose to the drain valve, and direct the discharge to a safe location. If drainage is slow, don't remove the anode rod or add salt to force it. Those actions don't solve a blocked drain and can create additional problems.
Start with the accessible connections
A cold-water inlet, hot-water outlet, union, or threaded fitting may leak because a connection has loosened or a washer has failed. Tighten a serviceable union only slightly, and stop if the threads or nipple are badly corroded. Small supply-line leaks may be addressed by replacing the line or washer after the water is isolated.
A drain valve should first be checked for full closure. If it continues dripping, replacement is usually more reliable than repeatedly tightening the handle. Use a manufacturer-approved part with the correct rating and connection type.
The temperature and pressure relief valve deserves greater caution. Excessive pressure, a missing or failed expansion tank in a closed plumbing system, overheating, and sediment can all contribute to discharge (TPR valve guidance). If the valve leaks, don't cap or plug it. A licensed technician should evaluate the valve and the system conditions.
A relief valve is a safety device, not an annoying leak to silence.
System pressure above 80 psi is considered high, and correction typically brings pressure into the 50 to 60 psi range through a pressure-reducing valve (water-heater repair guidance). Test and replace a leaking valve only with one rated for the heater. Stop work if the shell, nipples, or adjacent pipe is heavily rusted, the hot water is cloudy with rust, or the leak continues after the connections are dry.
For local trade context, homeowners can review a resource on water heater repair in Las Vegas when comparing the type of plumbing work involved. The key is still diagnosis first, followed by a properly rated part and a safe pressure check.
When Repair Stops Making Sense and Replacement Is the Better Call
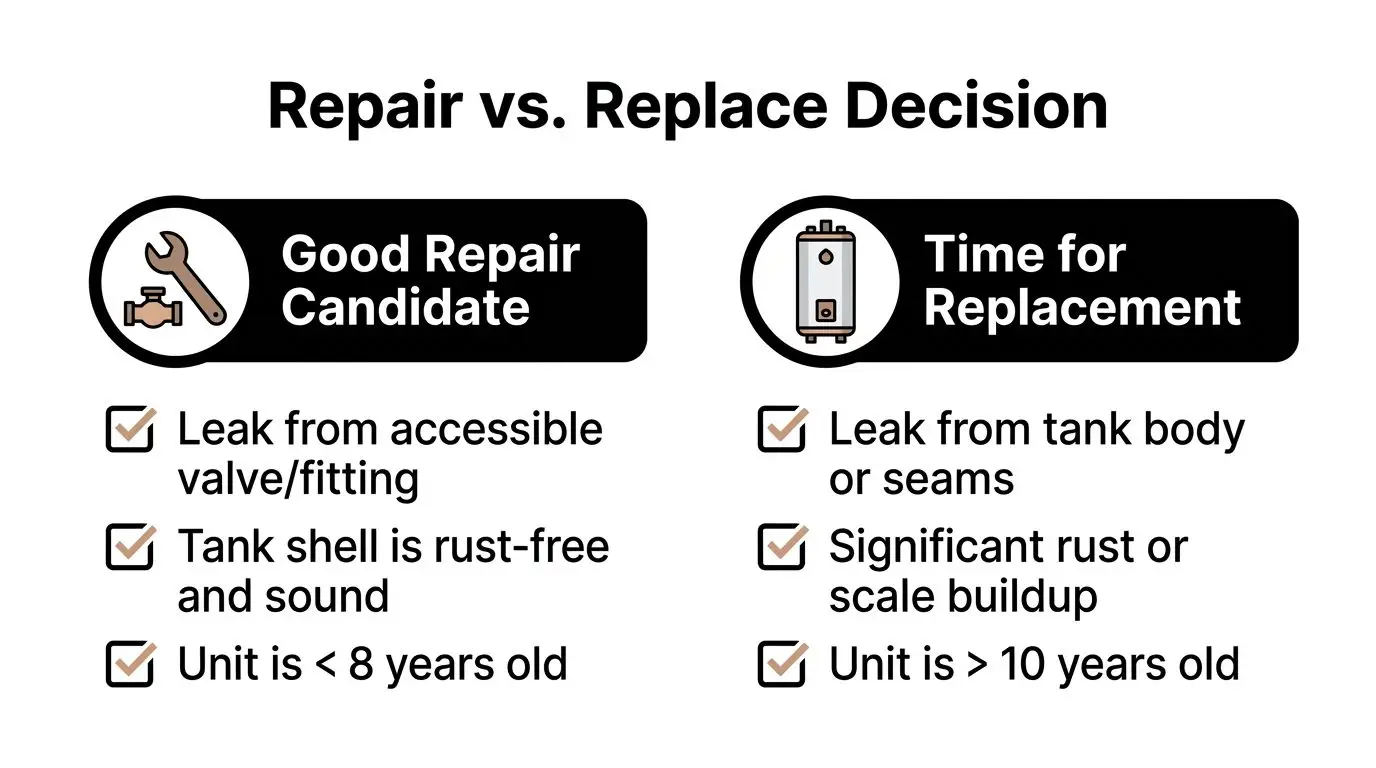
Repair is reasonable when the tank shell remains sound and the failure is limited to an accessible valve, supply line, union, or fitting. Replacement is safer when water escapes through the tank body, base, seam, or visibly corroded shell. Sealant, epoxy, and improvised patches cannot restore a compromised tank wall reliably.
Age also affects the decision. Secondary reporting connected to Insurance Institute for Business and Home Safety research says about 30% of water-heater failures are age-related, and 95% of those age-related failures involve heaters in use for more than 20 years (water-heater failure research summary). An older unit does not automatically require immediate replacement, but a leak on an aging heater deserves a replacement quote alongside the repair estimate.
Compare the whole consequence, not just the part
A low-cost valve repair may be sensible if the tank is structurally sound. It becomes poor value when the heater has repeated relief discharge, rusty hot water, heavy sediment, rumbling, rising energy use, or a record of recurring repairs. Compare the repair price with the chance of another failure, emergency labor, damaged finishes, and disruption for tenants or commercial operations.
As noted earlier, industry cost data places standard plumbing repair work from $150 to $750, emergency repair work from $225 to $975, and average water-damage cleanup after a water-heater failure at $4,444 after deductible. These figures are reference ranges, not quotes. Local access, timing, equipment, code work, and the extent of damage can change the actual scope. Include those consequences before approving a repair that only postpones replacement.
Before replacement, a licensed plumber should assess fuel type, efficiency, warranty, venting, drainage, and code requirements. In locations subject to earthquake provisions, guidance calls for straps at two points, one within the upper third and one within the lower third, with the lower strap at least 4 inches above the controls (California-style water-heater installation guidance). Where leakage could damage the building, model guidance also calls for a watertight, corrosion-resistant pan, a drain opening of at least 3/4 inch, and a pan depth of at least 1 1/2 inches (water-heater installation handout). A replacement decision should account for safe installation and the cost of the surrounding damage, not only the failed component.
Containing the Damage and Building Your Paper Trail
After shutting down water and energy, contain what remains without delaying professional help. Place a sturdy bucket or watertight pan beneath a manageable drip, and use absorbent towels around the perimeter. Plastic sheeting can protect nearby cabinets and finished flooring, but keep it away from electrical panels, outlets, burners, and anything that could become a trip hazard.
Don't step into standing water near live electricity. Don't climb onto a wet roof or enter a space where water has reached the ceiling. If water has spread toward circuits, shut off affected breakers only when the panel is dry and safely reachable. Otherwise, leave the area and call a qualified professional.
Document before removing evidence
Photograph the heater, source of the leak, valve positions, active dripping, pan, flooring, walls, ceilings, and affected belongings. Take both close images and wide room views. A short video can show the water path or intermittent discharge better than a still image.
Keep a simple incident record:
- Timeline: Note when you discovered the leak and when water, power, or gas was shut off.
- Materials: List affected rooms, flooring, drywall, insulation, cabinets, and contents.
- Documents: Save model and serial numbers, receipts, service history, estimates, invoices, and communications.
- Temporary measures: Record buckets, towels, plastic, equipment, and other supplies purchased.
- Failed components: Preserve removed parts when practical, especially if a plumber identifies a specific failure.
Don't discard soaked drywall, flooring, insulation, or personal property before documenting it. Report the loss promptly according to the policy, but don't guess about coverage or assign fault. A detailed insurance claim documentation checklist helps keep the record factual.
For a useful overview of what happens after water enters building materials, review this water damage restoration process. Contact a certified restoration professional when walls or floors are wet, multiple rooms are affected, water has remained for more than a few hours, or hidden moisture is possible.
Bringing In a Certified Restoration Professional
The plumber stops or repairs the source. A restoration professional addresses what the water reached afterward. That handoff becomes important when moisture has entered drywall, flooring systems, cabinets, insulation, wall cavities, or other materials that can't be evaluated by looking only at the puddle.
A typical restoration scope may include water extraction, structural drying, dehumidification, moisture mapping, content protection, antimicrobial decisions, and final moisture verification. The exact work depends on the material, water source, affected area, and time since discovery. Restoration teams shouldn't promise a result before inspecting the building.
What the first visit should include
Expect an inspection of the heater area and adjacent rooms, photographs, moisture readings, and a written explanation of recommended work. Technicians may place air movers and dehumidifiers, protect contents, and establish drying points based on moisture mapping. Ask how often readings will be taken and how the company will decide when materials are sufficiently dry.
Credentials matter, but they're only one part of a sound choice. Look for:
- IICRC certification: Ask whether the technicians handling drying and remediation hold relevant IICRC credentials. You can review the role of an IICRC-certified restoration company.
- Licensing and insurance: Confirm the company's state licensing and insurance status before work begins.
- Equipment and staffing: Ask whether the team has extraction, air-moving, and dehumidification equipment available for the size of the loss.
- Subcontractors: Find out who will perform demolition, drying, repairs, and specialized work.
- Documentation: Request moisture maps, photographs, readings, scope details, and invoices.
Choose the contractor who can explain the next decision clearly, not the one who skips the inspection.
Ask how the restoration company coordinates with the plumber, insurer, property manager, and occupants. The strongest workflow keeps the water source repair separate from drying and documents each handoff. That makes it easier to distinguish plumbing work from mitigation, preserve evidence, and decide whether additional materials need removal.
Restore Heroes provides emergency water-damage assessment, extraction, structural drying, odor removal, and sanitation for residential and commercial properties in the Phoenix metro area, with coordination among homeowners, plumbers, and insurers. If a water heater leak has reached walls, flooring, cabinets, or other building materials, visit Restore Heroes to request help assessing the affected area and planning the restoration response.