
You scrubbed the kitchen, washed the curtains, and lit a candle strong enough to cover a restaurant. For an hour, your Phoenix home smelled fine. Then you left, came back after the air conditioner had been running with the doors closed, and the same musty, smoky, or sour note hit you at the entry. That's not a cleaning failure. That's a reservoir you haven't found yet.
Don't buy another fragrance or device until you know what's holding the odor. The work below follows one rule for effective odor removal house decisions. Find the source, remove or isolate it, clean what can be cleaned safely, ventilate to the outdoors, and verify after the home has been closed and reopened.
Why House Odors Require a Source First Approach
A plug-in freshener can hide a musty hallway through dinner. It can't dry wet carpet padding, remove smoke residue from upholstery, or fix a leaking drain under a vanity. When the fragrance fades, the original smell returns because the material producing it is still in place.
That's the difference between masking and remediation. Masking adds a stronger scent to the air. Remediation asks a harder question. Is the reservoir smoke residue, pet contamination, moisture-related growth, sewage, spoiled material, or a building problem you can't see from the surface?
Start With Observation, Not Aggressive Cleaning
Your first move should be careful observation, not bleach, fogging, or a rented machine. Note where the odor is strongest, when it appears, and whether it changes with air conditioning, bathing, cooking, or closed doors. Those details tell you whether you're chasing a surface spill or a hidden pathway.
For example, a smell that builds in a closed lower room points you toward trapped moisture, stored materials, and poor air movement. If that pattern sounds familiar, this guide to a basement that smells musty can help you think through lower-level moisture clues before you start scrubbing.
Practical rule: If an odor returns after normal cleaning and ventilation, stop treating the air and start inspecting the materials.
The Route That Actually Works
Use this sequence as your decision path:
- Identify: Locate the likely reservoir and the conditions feeding it.
- Contain: Keep the problem from spreading to clean rooms, fabrics, or HVAC pathways.
- Clean or remove: Clean compatible surfaces and remove materials that can't be made safe or odor-free.
- Ventilate: Move contaminated air outdoors, not into another room.
- Verify: Recheck after the space has been closed, then reopened.
No honest advisor can promise every odor will disappear, that a service will cover your situation, or that two homes will need the same work. Porosity, moisture, temperature, and how air moves through the house change the outcome. What you can control is the order of operations, and source control always comes first.
Identify the Odor Before Cleaning
Don't start with a product. Start with a notebook. Walk in from outdoors, stand still for a moment, and rate the smell before your nose adapts. Then check room by room, because the strongest location is often not where you first notice it.
Use this visual checklist to organize your first pass through the house.
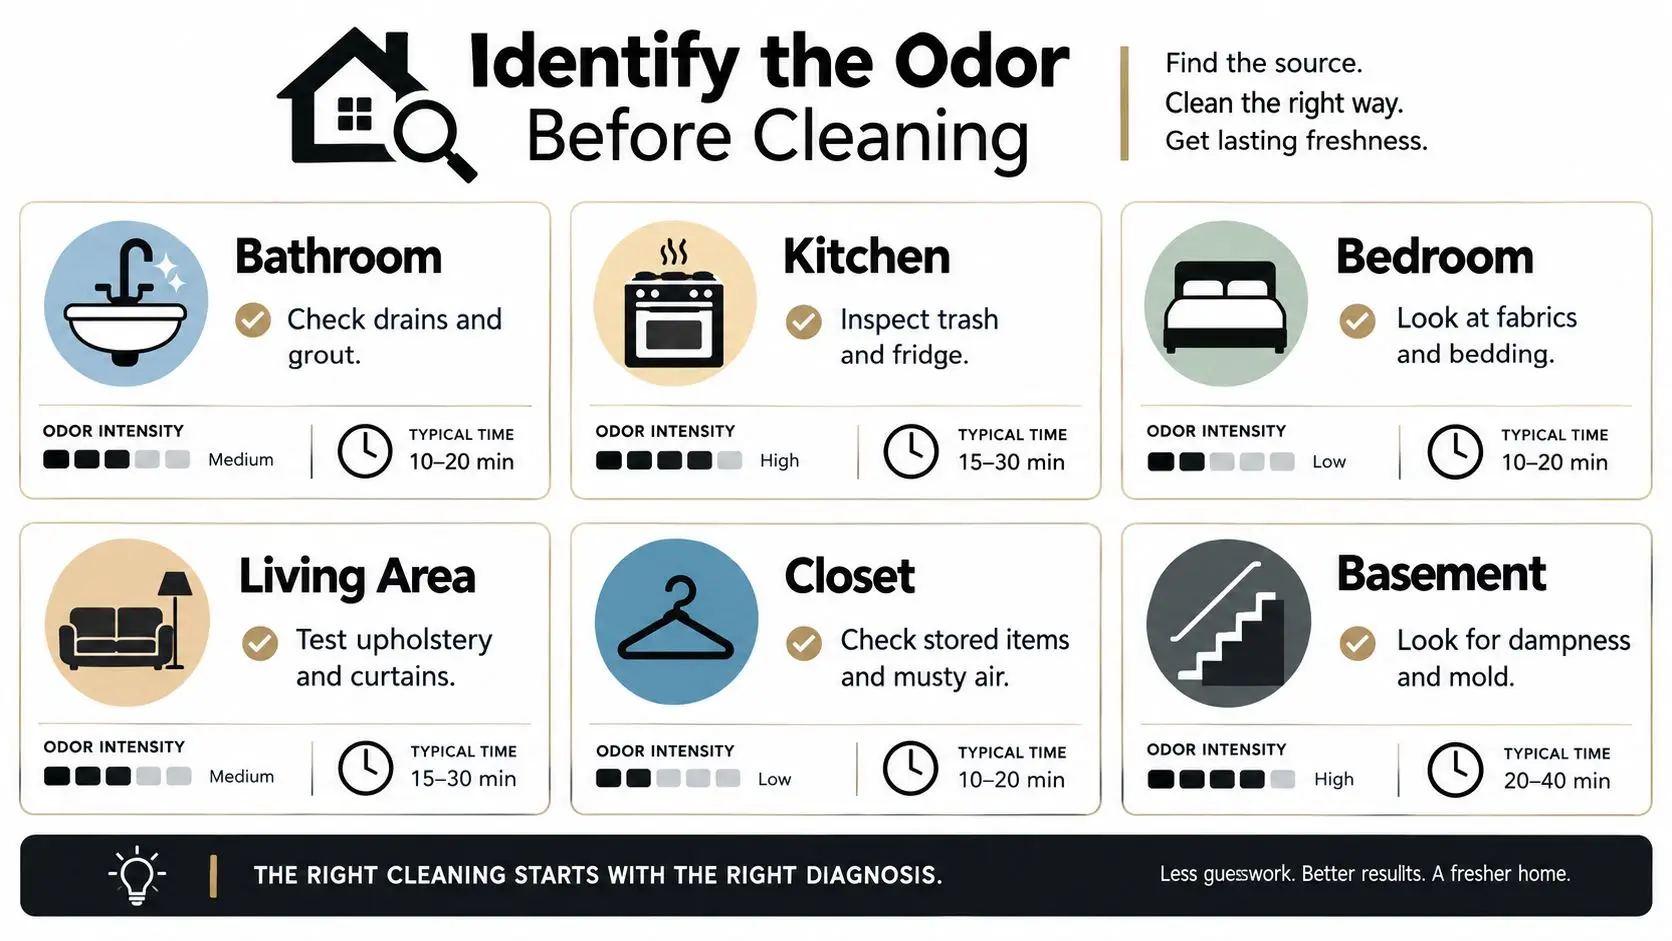
Record location, intensity, timing, and likely source for each area. A bathroom odor after showers suggests moisture and exhaust problems. A kitchen smell that spikes when cabinets open points to trapped grease, trash, a drain, or spoiled material. A bedroom odor that lives in bedding and carpet is a fabric reservoir, not an air problem.
Room by Room Checks That Matter in Phoenix
Desert homes still get localized moisture. Air-conditioning condensation, plumbing leaks, evaporative coolers, bathrooms, and poorly ventilated closets can create damp pockets while the rest of the house feels dry.
- Bathrooms: Check drains, grout, caulk lines, vanity bases, toilet seals, and whether the exhaust fan vents outdoors.
- Kitchens: Inspect trash areas, refrigerator drip pans, sink cabinets, dishwashers, and drains for leaks or trapped organic material.
- Bedrooms and living areas: Smell upholstery, curtains, bedding, carpet, and padding close to exterior walls or bathrooms.
- Closets: Look for stored items against damp walls, musty air, and condensation near HVAC runs.
- Basements and utility areas: Look for water stains, damp drywall, floor drains, and water heater or laundry leaks.
- HVAC equipment: Check filters, condensate pans, drain lines, and returns near the odor source.
In a CDC-indexed dataset involving 219 rooms, 52% had water stains, 31% showed water damage, and 17% had a moldy odor, which shows odor often sits inside a wider pattern of moisture intrusion and material deterioration in the ASHRAE Standard 62.1 addenda document. Treat stains and swelling as evidence, not background details.
This video walkthrough is useful after your written inventory, when you're deciding which suspect area to inspect first.
Classify the Pattern Before You Act
Smoke clings to porous materials and can travel through HVAC pathways. Pet odor often remains in upholstery, carpet, padding, and flooring after the surface looks clean. Mold-related odor may accompany damp drywall, insulation, or furnishings. Sewage odor can signal a plumbing failure or contaminated porous material that needs careful handling.
A sharp chemical smell needs its own caution, because cleaning products, paints, and building materials can add their own emissions to indoor air. If that description fits, review these notes on chemical odor removal before mixing products or sealing surfaces.
Separate a one-time event from a returning condition. A spilled drink cleaned the same day is different from an odor that persists after drying, returns when humidity rises, or appears only when the HVAC system starts. Your inventory should end with suspect locations and conditions, not a shopping list.
Remove Odors With a Practical Remediation Workflow
Once you've identified likely reservoirs, work in phases. Don't jump to filtration or fragrance while contaminated material is still feeding the room. EPA guidance identifies source management, ventilation, and filtration as complementary indoor air quality strategies, with source removal or isolation generally serving as the primary intervention in its office building occupants guide to indoor air quality.
Remove, Clean, Then Isolate What Remains
Start by removing the reservoir when you can do it safely. That may mean discarding spoiled material, removing a saturated rug pad, taking out smoke-damaged contents, or pulling a leaking supply line out of service until it's repaired. Bag contaminated waste before carrying it through clean rooms.
Next, clean affected surfaces with a method that matches both the contaminant and the substrate. A sealed tile floor after a minor spill can usually be cleaned directly. Raw wood, drywall, insulation, carpet padding, and upholstered furniture behave differently because they absorb and hold contamination. Aggressive scrubbing can damage finishes, push residue deeper, or spread particles into the air.
If a material can't be cleaned safely, isolate or seal it only after you've addressed moisture and contamination. Sealing over an active leak or wet wall cavity traps the problem. For smoke work, some homeowners ask about thermal fogging for odor removal, but fogging shouldn't replace physical removal of residue and damaged porous materials.
For ordinary cooking buildup on accessible kitchen surfaces, a gentler routine may be enough before you escalate. This resource on how to remove cooking smells naturally is a useful starting point for light, non-contaminated kitchen odors, provided you've already checked for grease traps, drains, and hidden leaks.
Ventilate Outdoors and Use Filtration as Support
Direct exhaust outdoors. A bathroom fan that vents into an attic, a recirculating range hood, or a fan blowing air into a hallway doesn't remove the load from the house. Open windows can help when outdoor conditions allow, but mechanical exhaust gives you more control.
Filtration comes last in this workflow. It can support cleanup by capturing suitable airborne particles while you work, but it can't extract odor from wet insulation, sewage-contaminated padding, or smoke residue embedded in drywall. Treat filtration as a supplement, not the main event.
| Likely source | First response | Why caution is needed |
|---|---|---|
| Minor spill on sealed surface | Remove residue and clean the surface | Confirm liquid didn't reach grout, trim, or subflooring |
| Damp carpet or padding | Stop the water source and dry or remove affected material | Padding can stay wet after the surface feels dry |
| Smoke residue | Remove contents and clean compatible surfaces | Porous materials and HVAC components may retain residue |
| Sewage contamination | Keep people away and get professional assessment | Porous materials may not be safely cleanable |
| Musty wall or closet | Find and correct the moisture pathway | Surface deodorizing won't fix concealed dampness |
You can reasonably inspect, ventilate, and clean accessible nonporous surfaces after a minor event. Escalate when you find saturated porous materials, repeated moisture, sewage, heavy smoke residue, or an odor source you can't reach without opening walls or handling contaminated material.
Handle Smoke Pet Mold and Sewage Odors Differently
Four homes can all smell bad for completely different reasons. Treating them the same wastes time and can make the reservoir harder to remove. Match the response to how each contaminant behaves in materials.
These common household sources look different up close, and they should trigger different first moves.
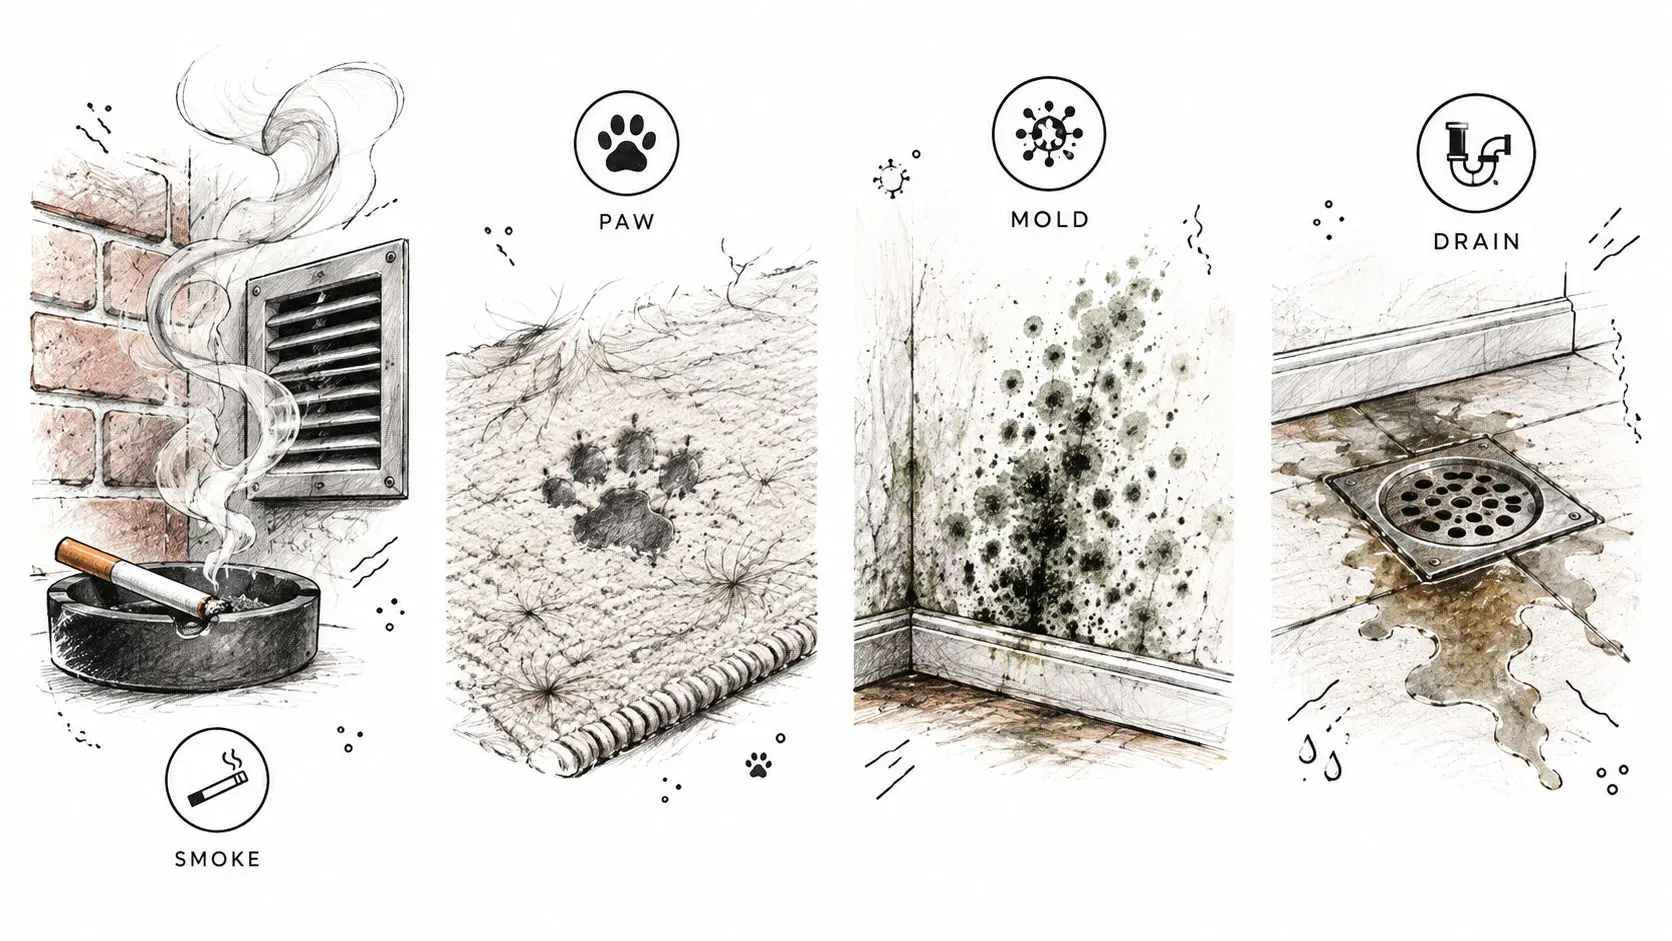
Smoke Leaves Residue, Not Just Smell
A Phoenix homeowner airs out a room after a small kitchen fire. The air clears, but the odor returns every afternoon when the house warms up and the air conditioner cycles. That pattern points to residue on walls, ceilings, fabrics, and possibly HVAC components.
Ventilation helps, but it doesn't wipe soot from porous surfaces or remove contaminated insulation. Clean compatible hard surfaces, launder or remove affected fabrics, replace loaded filters, and inspect returns and nearby duct surfaces. If you're working through that sequence, this guide on how to remove smoke smell from a house will help you separate surface cleaning from deeper residue problems.
Pet Odor Usually Lives Below the Surface
Pet odor is often a dried contamination problem. A carpet can look clean while urine residue remains in padding, tack strips, or subflooring. Dogs and cats also load odor into bedding, upholstery, and the lower edges of furniture where they sleep or rub.
Find the exact spots before you treat the whole room. Smell at floor level, check seams and corners, lift removable cushions, and inspect the back side of rugs when it's safe to do so. Wash removable fabrics, clean hard flooring at joints and edges, and be prepared to remove padding or sections of flooring that stay contaminated. Spraying the air while the pad remains loaded won't change the result.
Odor that intensifies close to the floor is usually telling you the reservoir is in flooring, padding, or base materials, not floating in the room.
Mold Odor Means Moisture Control Comes First
A musty guest bathroom may have clean tile and still smell wrong. The source could be a slow supply-line leak inside the vanity, wet drywall behind the tub surround, or a condensate problem nearby. Deodorizing the room without correcting moisture leaves the growth conditions intact.
The CDC advises drying a home, including furniture and other contents, within 24 to 48 hours, and materials that remain wet beyond that period should be treated as potentially mold-affected in its homeowners and renters guide to mold cleanup. Dry quickly when electricity is safe. Don't run fans across visible growth, because moving air can spread spores to cleaner areas.
Routine air sampling usually doesn't change the decision. Finding and correcting moisture, then cleaning or removing affected materials, gives you actionable information. A species name doesn't dry a wall cavity.
Sewage Odor Is a Plumbing and Contamination Problem
Sewage smell near a floor drain, toilet base, or lower-level bathroom shouldn't be handled as a fragrance problem. It can point to a dry trap, a failed seal, a blocked or damaged line, or contaminated porous material after a backup. Repeated air freshening only delays the repair.
Check simple plumbing clues if there's no visible contamination, such as unused drains and fixtures that may have dry traps. If wastewater has reached carpet, padding, drywall, or insulation, keep occupants away from the area and get professional assessment. Those materials may require removal and decontamination rather than surface cleaning.
Avoid Misleading Air Cleaners and Ozone Treatments
A stronger smell doesn't call for a stronger chemical reaction in your living room. That's the flawed assumption behind many ozone, ionizer, hydroxyl, and UV device purchases. You're told the technology attacks odor at the molecular level, but the contaminated pad, wet insulation, or smoke residue is still sitting in the building.
Ozone Is Not a Safe Default for Occupied Homes
EPA reports that ozone concentrations high enough to remove many odors exceed levels generally considered safe for human exposure, while ozone can react with indoor chemicals to create irritating or corrosive by-products in its guidance on ionizers and ozone-generating air cleaners. At concentrations within public health standards, ozone has little effect on many indoor contaminants and odors.
Ozone can also deaden your sense of smell. That creates a false clearance test. You walk back in, notice less odor, and assume the work succeeded, while the reservoir and residual ozone exposure risk remain harder to judge.
If ozone is considered at all, it belongs in a controlled, unoccupied, isolated space after physical source removal. People, pets, and plants need to be out. The zone should be labeled, run under a written safety protocol, ventilated thoroughly outdoors afterward, and verified safe before re-entry. Don't treat a home while your family sleeps down the hall.
Filtration Helps Particles, Not Embedded Reservoirs
Mechanical filtration has a legitimate role. A suitable portable air cleaner or HVAC filter can reduce airborne particles during cleanup and after source removal. That's useful support, especially when you're protecting children, older adults, and people with asthma from unnecessary exposure.
It cannot pull smoke residue out of upholstery, dry a wall cavity, decontaminate sewage-soaked drywall, or correct microbial growth in insulation. Electronic cleaners, photocatalytic oxidation, hydroxyl generators, and UV-component devices also shouldn't be treated as interchangeable with mechanical filtration. Some technologies may produce ozone or other harmful pollutants and aren't designed to remove airborne particles.
- Choose low or zero ozone equipment: Don't add a new pollutant while trying to solve an odor.
- Protect occupants first: Keep sensitive people away from contaminated work areas.
- Verify with inspection: Confirm source removal, dryness, and ventilation, not just a temporary change in smell.
Prioritize source removal, outdoor ventilation, mechanical filtration where appropriate, and verification. A quiet filter doing measurable particle work is more defensible than a device that makes the room smell different for a day.
Choose Between DIY Cleanup and Professional Service
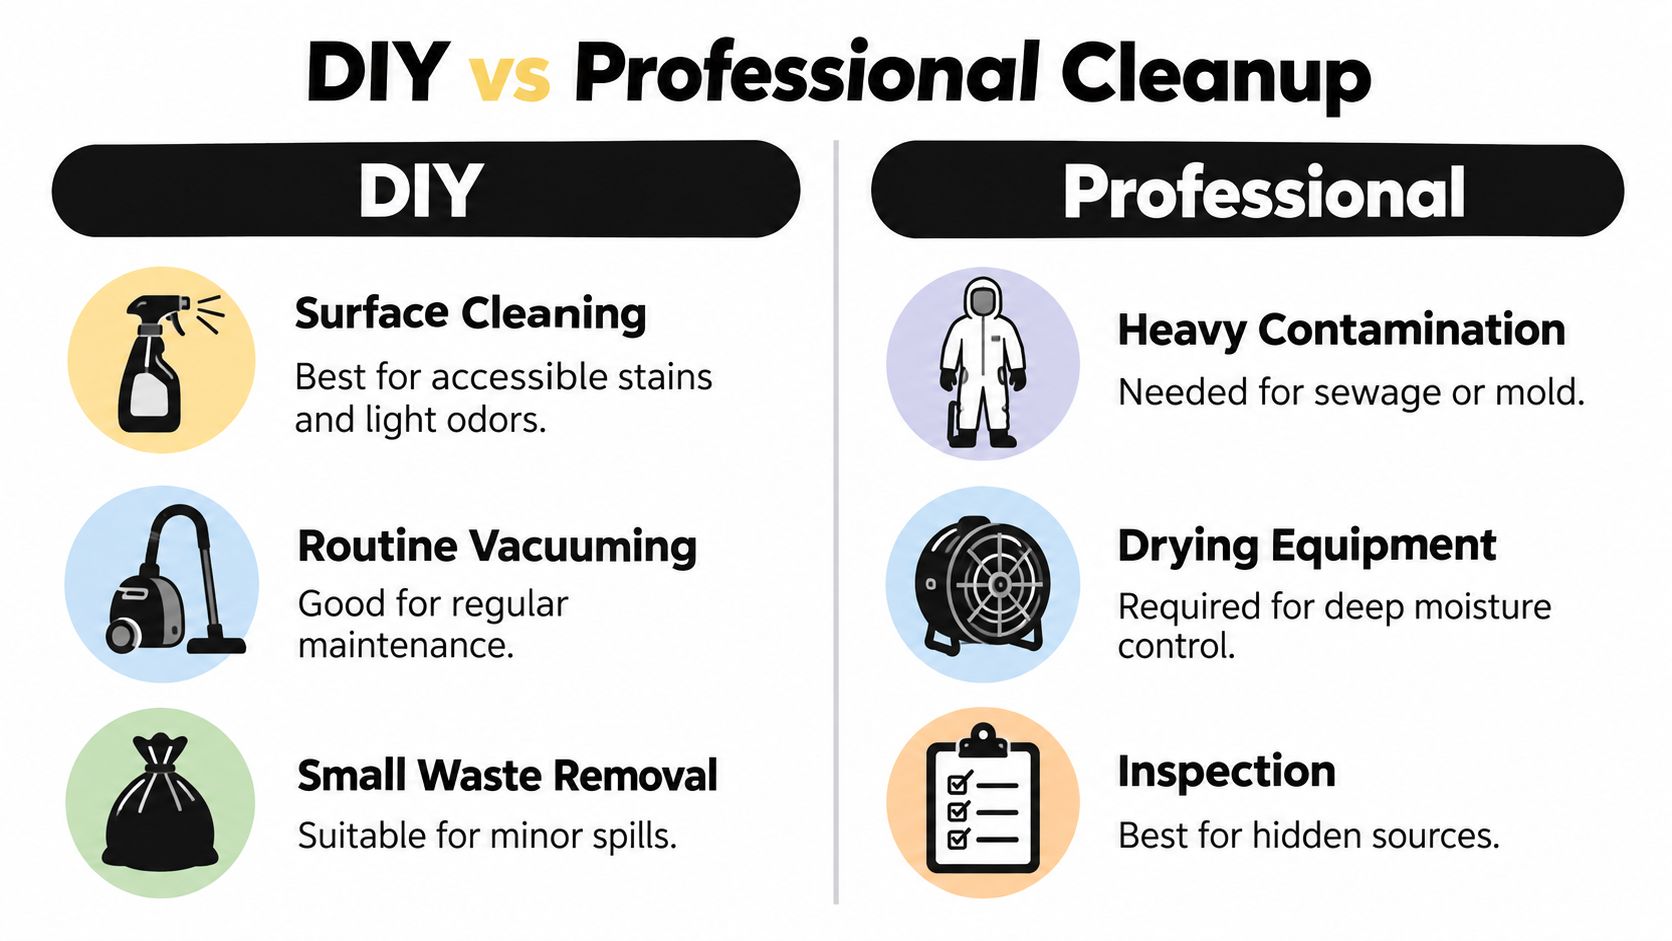
Your decision should turn on access, contamination type, and whether the reservoir is still active. DIY cleanup makes sense for a minor, known event on surfaces you can reach and clean safely. Professional service makes sense when the source is hidden, hazardous, saturated into porous materials, or returning after drying.
This comparison can help you sort routine maintenance from conditions that need trained assessment and equipment.
Work You Can Usually Handle Yourself
You can clean sealed counters, tile, glass, and other accessible nonporous surfaces after a small spill. You can launder removable fabrics, replace a loaded HVAC filter, discard spoiled trash, and run exhaust ventilation. California public-health guidance recommends using a bathroom exhaust fan or opening a window while bathing and keeping ventilation running for 20 to 30 minutes afterward, with similar outdoor exhaust or window guidance for cooking areas in its mold and moisture guidance for homes.
You can also document conditions. Photograph stains, note dates, save plumbing repair records, and write down where the odor is strongest. That record helps any professional scope the job later.
Conditions That Warrant Professional Evaluation
Call for assessment when you suspect sewage contamination, significant smoke residue, hidden moisture, saturated insulation or padding, biohazard conditions, or odor that returns after thorough drying. The same applies when the source may be inside wall cavities, under flooring, or in HVAC components you can't inspect safely.
A persistent drain or sewer smell deserves that same discipline. Before anyone proposes deodorizing, review the plumbing possibilities in this guide on how to get rid of sewage smell and ask whether the problem is gas entering through plumbing, wastewater contamination, or both.
Professional work commonly moves through assessment, mitigation, structural drying, cleaning or removal of affected materials, decontamination, and final communication. In Phoenix, that scope may connect to water, fire, smoke, mold, or biohazard restoration depending on the source. Don't assume availability, response timing, insurance coverage, or pricing. Ask directly.
Before hiring anyone, ask these questions:
- Scope: Which materials will you clean, remove, isolate, or leave in place, and why?
- Documentation: How will you record moisture, contamination, and material decisions?
- Ventilation: Where will exhaust air go during and after the work?
- Verification: How will you confirm the source is gone after the home is closed and reopened?
Prevent Odor Return After the Home Is Reopened
Prevention isn't a scent schedule. It's moisture control, exhaust discipline, and early attention to the same pathways that created the problem. If you reopen the home without changing those conditions, you're inviting the odor back.
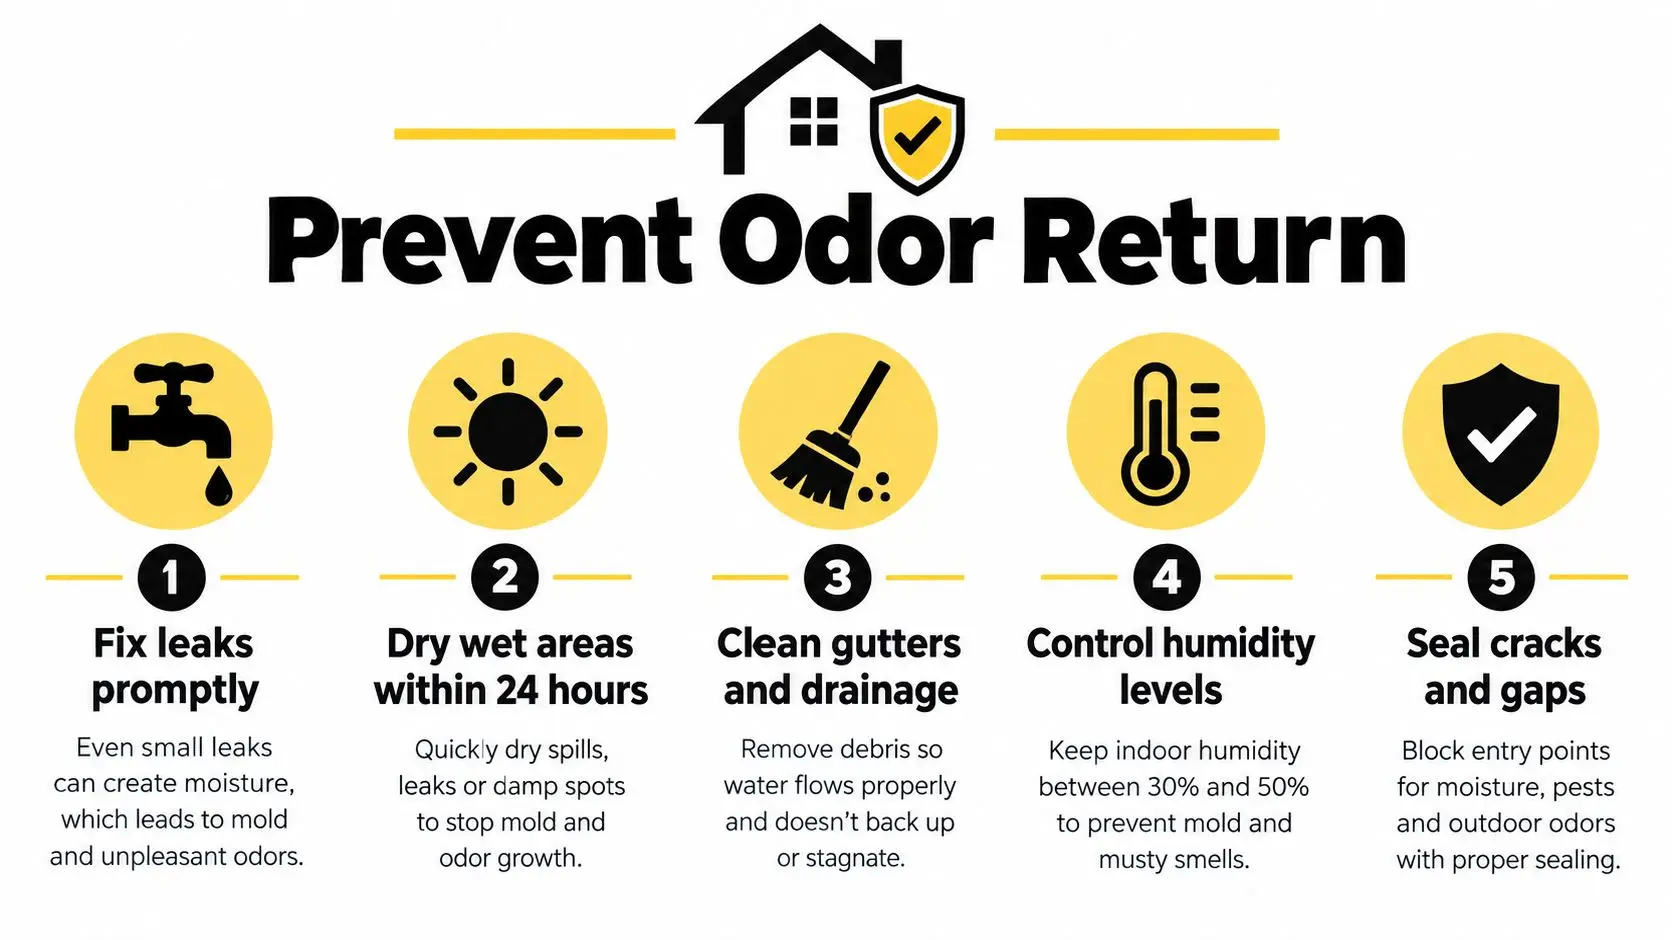
Use these prevention priorities as a maintenance checklist after cleanup is complete.
Control Water and Humidity Every Week
Fix leaks promptly, including slow drips under sinks, refrigerator lines, water heater fittings, and HVAC condensate drains. After flooding or a plumbing failure, dry the structure and contents quickly and safely. Fans and dehumidifiers help only when electricity is safe, and fans shouldn't blow across areas where mold is already growing.
CDC and related guidance recommend keeping indoor relative humidity at or below 50% during the day, while NIOSH and EPA guidance identify 30 to 50% relative humidity as a preferred range for reducing mold growth in the CDC overview of mold and health. Use air conditioning or a dehumidifier when indoor air stays damp, especially in bathrooms, laundry areas, and rooms served by evaporative cooling.
Porous materials need hard decisions after future water events. Carpet, upholstery, drywall, and similar absorbent contents that stay wet can become the next reservoir. Don't keep a saturated pad or swollen cabinet base just because the surface eventually feels dry.
Maintain Exhaust, Drains, and HVAC Pathways
Run bathroom and kitchen exhaust to the outdoors during moisture-producing activities and long enough afterward to clear humid air. Confirm exterior vents open and aren't blocked. A fan that hums but moves little air isn't doing the job.
Inspect drains, traps, condensate pans, filters, and returns on a routine schedule. Refill infrequently used traps with water where appropriate, clean removable drain covers, and replace filters before they load with dust and residue. These small checks prevent odor pathways from reopening unnoticed.
Verify Before You Call It Finished
Do a final visual and moisture inspection. Confirm contaminated materials were removed or isolated, repaired leaks stay dry, and exhaust moves outdoors. Then close the space for a period of normal non-use, reopen it, and smell at entry before your nose adapts.
The most useful final test is simple: leave, let the house sit closed under normal conditions, then judge the air in the first moments after you return.
If odor persists, moisture repeats, or contamination remains uncertain, don't add another layer of fragrance. Get a qualified professional evaluation and insist on a source-based explanation for what happens next.
If your Phoenix home still smells after cleaning, drying, and ventilation, Restore Heroes can assess water, fire, smoke, mold, sewage, and biohazard related odor sources and explain which materials need cleaning, removal, drying, or decontamination. Visit Restore Heroes to request an inspection and get a clear, source-first plan for your property.