
The house is finally quiet, but nothing feels settled. You may be looking at black residue on walls, a sour smoke smell in soft furniture, and water still sitting where firefighters worked. In that moment, the biggest mistake is rushing into cleanup without knowing what you're touching.
Cleaning fire damage is part safety job, part chemistry job, and part judgment call. Some light residue can be handled carefully. Some contamination needs trained restoration work immediately. The difference usually comes down to three things: how safe the structure is, what type of soot is present, and how far smoke and water traveled.
A calm, methodical response protects both your health and your home. That's the standard professionals follow, and it's the same approach homeowners should use when deciding what to do next.
Your First 24 Hours After a Fire
The first day after a fire is about control, not speed. If you're standing outside your home waiting for clearance to go back in, focus on the decisions that prevent injury and stop damage from spreading.
Start with these three actions
Wait for safe re-entry approval. Don't go inside until fire officials or other qualified authorities say the structure is safe to enter. Smoke residue, unstable materials, and hidden electrical hazards can still be present even when flames are out.
Document before moving anything. Take photos and video of every affected room, including ceilings, walls, contents, appliances, and wet areas. That record helps with insurance and prevents confusion later about what was damaged by fire, smoke, or water.
Secure the property and contact your insurer. If windows, doors, or roof sections are exposed, the home needs to be protected from weather and unauthorized entry. It also helps to review a practical checklist of essential steps following a residential fire so nothing important gets missed while you're under stress.

Avoid these three mistakes
- Don't turn utilities back on yourself. Electricity, gas, and HVAC systems need the right inspection before use.
- Don't start wiping soot with water or household spray cleaners. Early wet wiping often drives residue deeper into paint, drywall, and fabrics.
- Don't sleep in the home just because the fire is out. Lingering particulates, odor compounds, and moisture from suppression efforts can still create an unsafe environment.
First principle: If you haven't identified the residue yet, don't try to scrub it off.
The restoration side also has to follow a recognized standard. Fire and smoke damage restoration is governed by the ANSI/IICRC S700 Standard, which requires visual inspections, wipe-testing, and odor assessments to confirm that visible combustion particles are removed according to the IICRC standard announcement. That's why credible restorers avoid blanket promises about service outcomes, coverage, or pricing before they've inspected the site.
A simple rule for the first day
If the damage is limited to a very small area and there's no structural concern, no heavy smoke odor, and no HVAC involvement, your role is mostly documentation and protection. If the damage is broader than that, use a detailed after-house-fire checklist and treat the property like a contamination site until proven otherwise.
Wear gloves, eye protection, and a proper respirator if re-entry has been approved and you need to retrieve essentials. Then stop. The next decision depends on the kind of soot you're dealing with.
Assessing the Damage and Understanding Soot Types
Not all soot behaves the same way. That's where many homeowners get bad advice. One wipe with the wrong cleaner can turn removable residue into a permanent stain.
A key problem with many online guides is that they skip the difference between dry soot, wet soot, and protein residue. That matters because wet soot is oily and resists plain water, while protein residue from kitchen fires calls for specific enzymatic cleaners as explained in this guidance on soot and fire residue types. Generic soap-and-water advice often smears or embeds residue instead of removing it.
Identifying soot by look and feel
Here's the practical version homeowners can use during an initial visual check.
| Soot Type | Appearance | Common Source | Cleaning Challenge |
|---|---|---|---|
| Dry soot | Fine, powdery, often black or gray | Fast-burning, high-oxygen fires | Lifts easily at first, but smears if rubbed |
| Wet soot | Sticky, greasy, dense residue | Low-oxygen fires, smoldering materials, residue mixed with firefighting moisture | Resists water and spreads into porous material |
| Protein soot | Thin, greasy film, sometimes less visibly dark but strongly odorous | Kitchen fires, especially burned food and cooking oils | Hard to see, easy to miss, requires specific cleaning chemistry |
What you can safely observe
Dry soot often sits on the surface like charcoal dust. If you barely touch it, it may transfer onto a glove or tissue immediately. This is the only category where very limited DIY work may be possible on small, non-porous areas, and only with dry methods first.
Wet soot is different. It feels tacky, smears easily, and tends to cling to painted walls, cabinets, and synthetic surfaces. If you wipe it with a damp rag, you usually spread the stain wider and push residue into the finish.
Protein residue causes some of the most frustrating odor complaints after kitchen fires. You may not see much blackening, but cabinets, painted surfaces, and fabrics can carry a stubborn burnt smell because the residue is thin and greasy.
A wall that looks lightly affected can still be heavily contaminated if the fire involved cooking oils, plastics, or a long smoldering burn.
The DIY decision point
A homeowner may be able to handle minor dry soot on a small, cool, non-porous surface if all of these are true:
- The fire was limited. Damage stayed in one small area.
- The residue is loose and powdery. It doesn't feel oily or sticky.
- There is no strong lingering odor. Heavy odor usually means deeper contamination.
- No HVAC registers were involved. Once soot enters the system, the job changes.
By contrast, professional assessment is the safer call when you see oily films, widespread wall staining, residue on ceilings, contamination inside cabinets, smoke odor through multiple rooms, or soot near electronics and air returns. Homeowners in that situation usually benefit from understanding how soot from fire affects different materials before trying any cleanup.
The Professional Fire Damage Cleaning Process
Professional cleaning fire damage follows a sequence for a reason. The order is what prevents avoidable smearing, cross-contamination, and odor rebound.
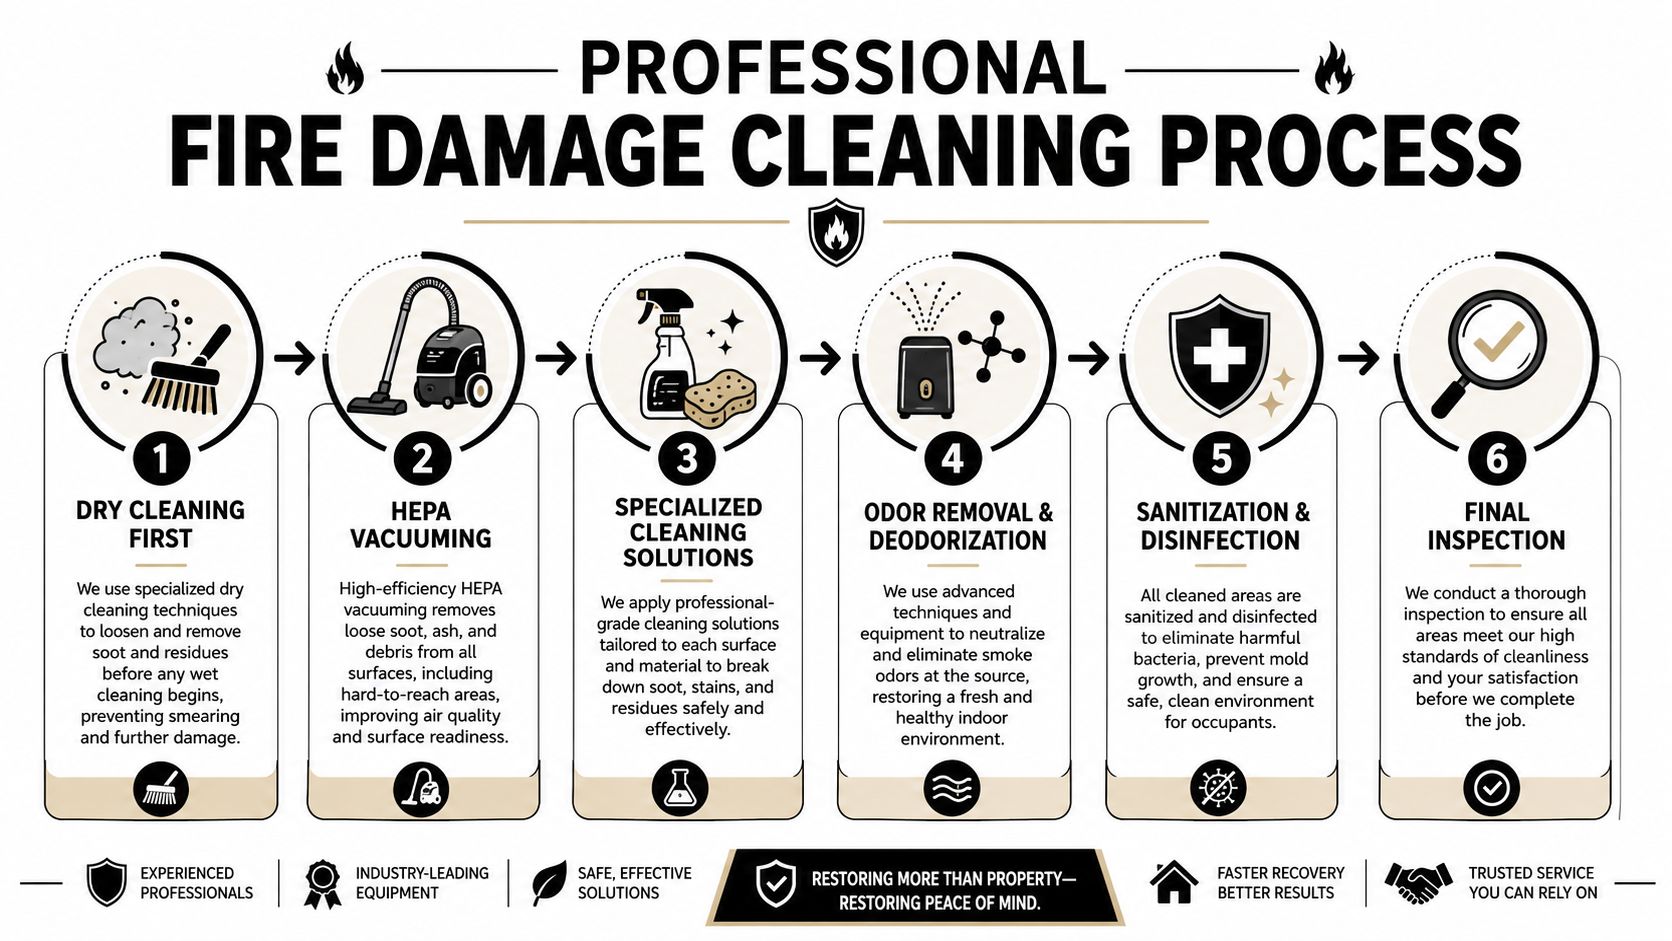
Dry cleaning comes first
At the trade level, the process starts with physical dry removal before any wet cleaning begins. That sequence is not optional in a competent fire cleanup. The restoration method described in R&R Magazine's fire damage cleaning guidance specifies that dry cleaning should precede wet cleaning to prevent cross-contamination.
Professionals typically begin with HEPA-filtered vacuums and chem sponges. The HEPA vacuum removes loose particulates without blowing them back into the air. The chem sponge lifts powdery soot from walls, ceilings, and other surfaces without introducing moisture too early.
Why this matters: A wet rag used too soon can turn surface soot into a stain that sinks deeper into paint, drywall, and fabric.
Then the cleaning method gets more specific
Once loose particulate is removed, the restorer tests the surface and chooses a cleaner based on the material itself. Painted drywall, sealed wood, metal, upholstery, and masonry don't respond the same way. The same source explains that professionals move to pH-specific chemical neutralizers selected for the surface composition.
That means there isn't one "best fire cleaner" for every room. A product that works on one finish can damage another or leave behind residue that interferes with sealing and repainting.
Testing is mandatory, not optional
In moderate-to-heavy fire conditions, the process shouldn't jump straight to whole-room cleaning. The same restoration guidance states that pre- and post-cleaning testing is mandatory, and professionals should test a 1-foot by 1-foot area first to verify particulate removal before full cleaning or reconstruction begins.
This small test tells you several important things:
- Whether the method removes residue
- Whether the finish can tolerate the cleaning
- Whether odor is likely to remain trapped
- Whether the surface may need sealing, specialty treatment, or replacement
If a contractor can't explain how they test before and after cleaning, ask more questions before authorizing the work.
Odor treatment isn't just fragrance
After visible contamination is addressed, odor work begins. On more complex losses, restorers may use ozone or hydroxyl generators to oxidize odor-causing molecules rather than cover them with a scent. That treatment supports cleaning, but it doesn't replace it. If soot is still on the surface, deodorization alone won't solve the problem.
A full fire damage restoration process also usually includes containment, debris removal, targeted cleaning of contents, and clearance checks before reconstruction starts. Restore Heroes is one example of a company that provides that kind of fire and smoke cleanup in the Phoenix area.
Tackling Smoke Odor and Hidden Residues
Smoke odor is often what homeowners remember longest. The walls may look cleaner, but the house still smells burned every morning, especially when the air conditioner kicks on or the sun heats a room.
That happens because odor lives where residue lives. It settles into fabrics, carpet pad, unfinished wood, concrete pores, insulation cavities, and HVAC dust. Air fresheners don't remove that. They only sit on top of it for a while.
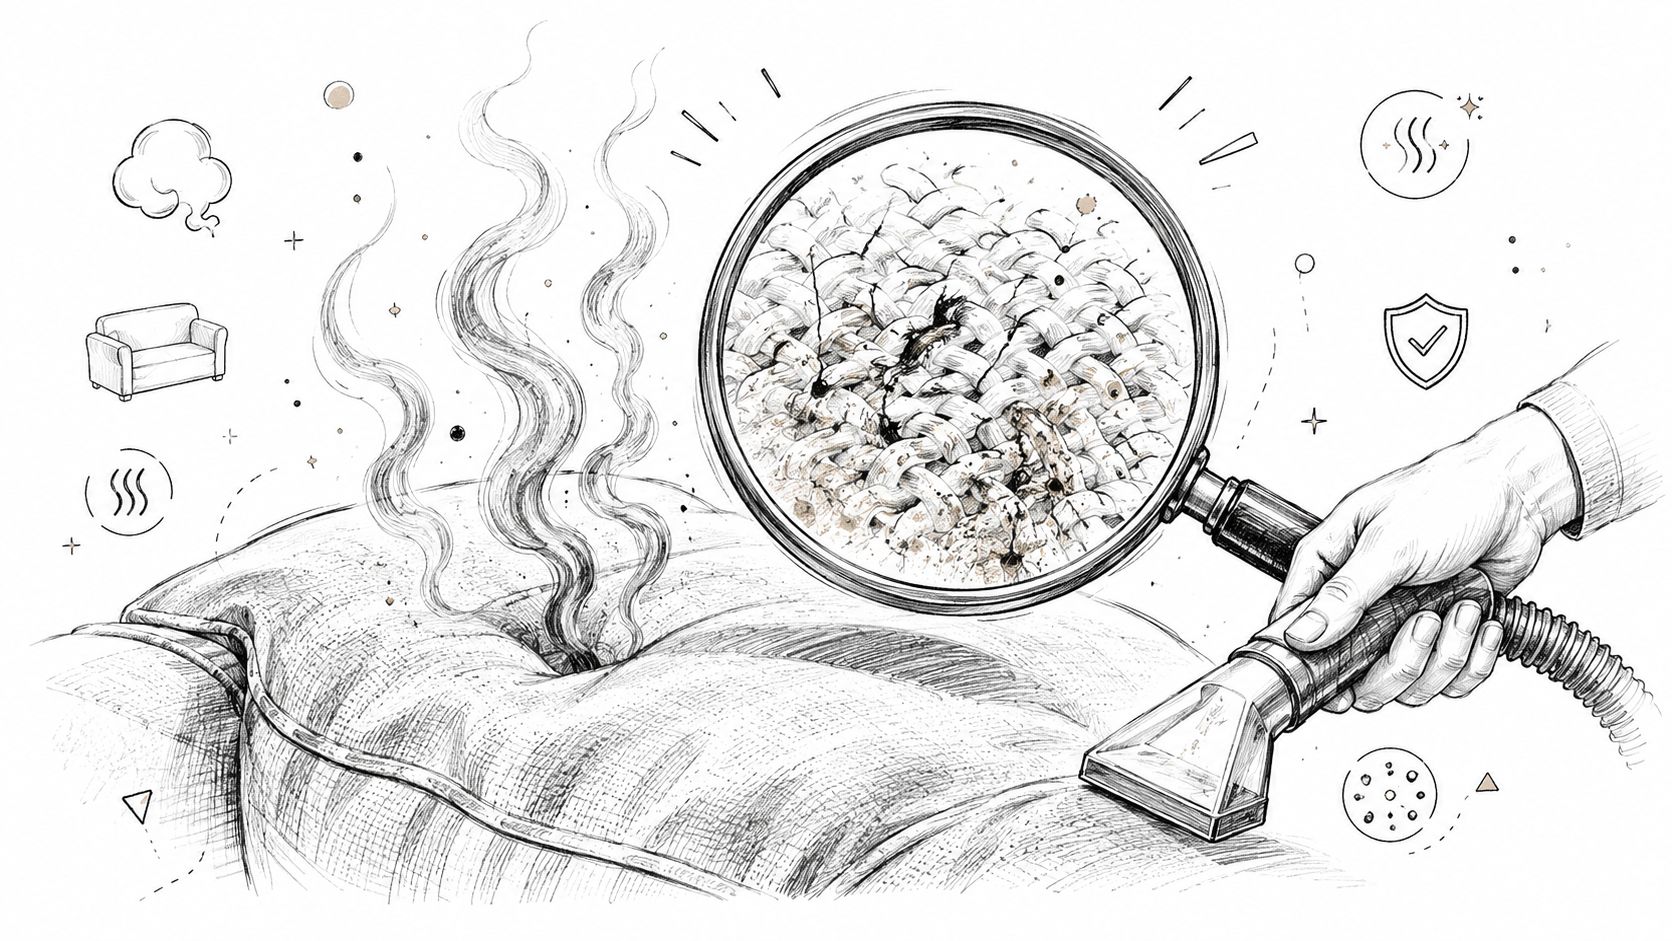
Why odor returns after "cleaning"
A common homeowner complaint is, "We wiped everything down, but the smell came back." Usually one of three things happened:
- Residue remained in porous materials
- Soft contents were cleaned superficially but not decontaminated
- Subfloors, cavities, or HVAC components kept reintroducing odor
The IICRC Technical Guide for Wildfire Restoration describes a two-step surface cleaning process of thorough HEPA vacuuming followed by damp cleaning with a mild detergent and water solution in its wildfire restoration technical guide. The same guide also notes that heavily fire-impacted carpets in Near-Zone areas should be replaced along with the pad, followed by subfloor cleaning. That's an important judgment point. Some materials can be restored, and some become odor reservoirs.
What works better than sprays
Professional odor control uses tools that reach where smoke went.
Thermal fogging sends deodorizing particles into porous spaces in a way that helps them travel more like smoke did. Ozone and hydroxyl generators work differently, but both are used to alter odor-causing molecules at the chemical level when conditions are appropriate.
That doesn't mean every house needs every odor treatment. The correct approach depends on where the smoke traveled, what burned, what materials were affected, and whether porous materials can be salvaged.
For homeowners dealing with recurring smell through supply vents, it may also help to understand when to clean your air ducts after smoke contamination. Duct cleaning is not the whole answer, but in the right situation it can be one part of stopping re-circulation.
A short visual explanation can help if you're trying to understand why smoke smell lingers in surfaces and contents:
Salvage versus replacement
The right question isn't "Can this be cleaned?" It's "Can this be cleaned enough to be safe and acceptable?"
Soft goods, rugs, upholstered furniture, and carpeted areas need an honest evaluation. If odor has penetrated thoroughly, repeated surface cleaning can waste time and still leave the home smelling burned. Homeowners trying to judge those cases usually need a more complete view of how to remove smoke smell from a house before deciding what stays and what goes.
Common Mistakes That Worsen Fire Damage
The wrong first cleaning step can turn a manageable surface problem into permanent damage. After a fire, homeowners usually face the same hard question. Is this something I can safely clean myself, or am I about to make it worse?
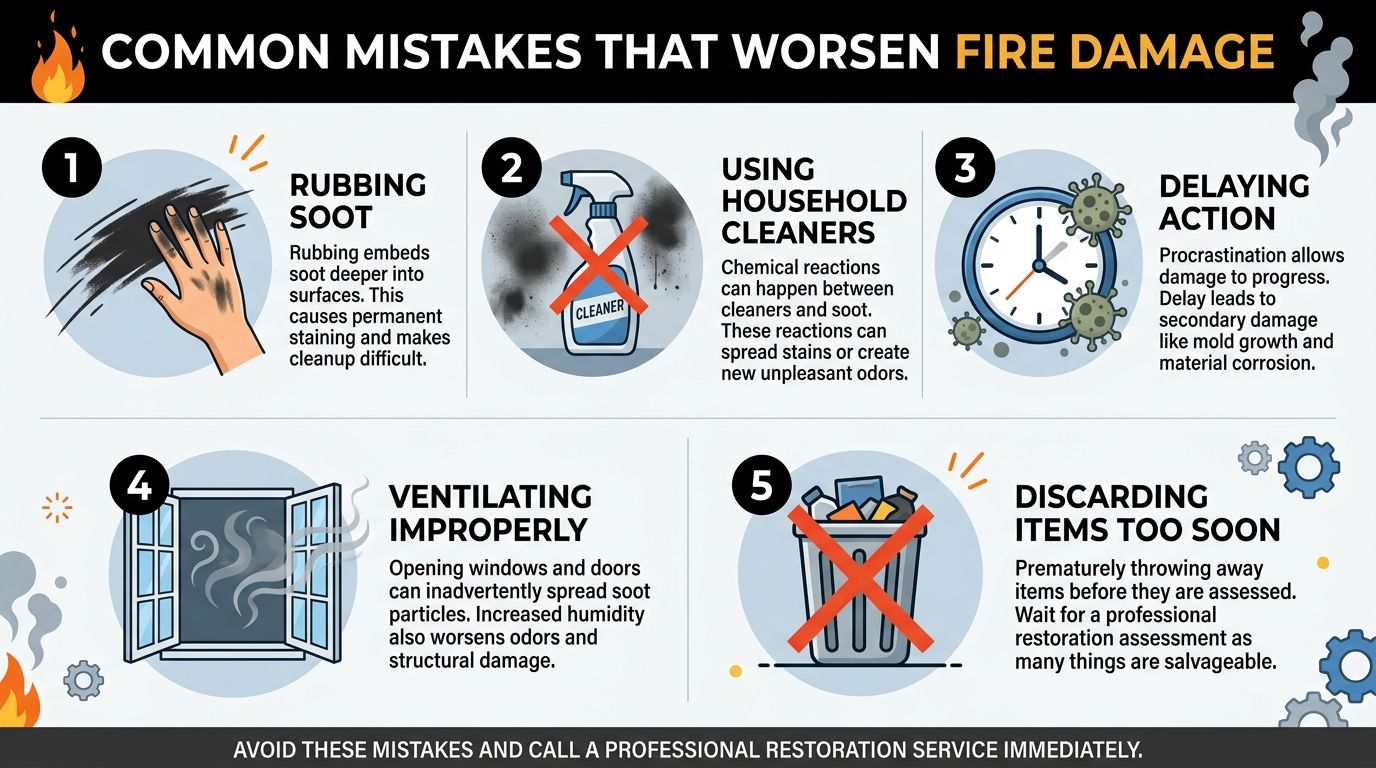
The answer depends on the residue. Dry, loose soot on a small non-porous area may allow limited DIY cleanup with the right sponge and light technique. Oily soot, sticky residue, heavy odor, or contamination spread across multiple rooms usually needs professional cleaning. Effort alone does not fix fire damage. The method matters.
Mistake versus reality
Mistake: "I'll just scrub the soot off."
Reality: Scrubbing grinds soot into the surface. I see this most often on painted walls, drywall texture, grout lines, upholstery, and unfinished wood. What started as removable residue can become staining that no amount of later cleaning fully corrects.
Mistake: "A coat of paint will seal everything."
Reality: Paint covers color. It does not remove contamination. If smoke residue is still on framing, drywall, masonry, or trim, odor can bleed back through the finish later, especially in warm or humid conditions. Sealing only makes sense after proper cleaning and, when needed, the right odor-blocking primer.
Mistake: "Once the water is gone, the fire part is over."
Reality: Fire losses often become smoke, soot, and moisture losses at the same time. Wet insulation, damp framing, and trapped moisture behind baseboards or cabinets need attention before they create a second restoration problem. Homeowners should also review whether homeowners insurance covers fire damage before discarding materials or paying for major cleanup decisions out of pocket.
Mistake: "If the ceiling looks mostly okay, I'll clean around it."
Reality: Ceilings tell you where smoke traveled. Acoustic texture, flat paint, and older popcorn finishes hold residue deep in the surface. Washing them aggressively often causes streaking, breakdown, or partial collapse of the texture.
Mistake: "Any degreaser or household cleaner will do."
Reality: Fire residue is not one uniform substance. Protein residue from a kitchen fire behaves differently from dry soot after a fast-burning paper fire, and both clean differently than oily furnace soot. Using the wrong cleaner can smear residue, set stains, strip finishes, or react poorly with delicate surfaces.
Household cleaners are made for everyday dirt. Fire residues are chemically different and often require dry cleaning methods, specialty sponges, alkaline or solvent-based cleaners, or controlled demolition.
Small DIY jobs versus the point where you stop
A homeowner can sometimes handle a very limited cleanup job. An example would be a light layer of dry soot on a metal surface or a sealed countertop in one contained area, after the fire department has cleared the home for entry and power or gas hazards are addressed. Even then, the work should start with dry soil removal, careful testing, gloves, and a plan to stop if the residue smears.
DIY should end quickly if soot is sticky, if residue returns after wiping, if odor is present in cabinets or closets, or if porous materials are involved. Those are the jobs where IICRC-trained crews separate salvageable items from unsalvageable ones, choose cleaning methods based on the soot type, and document the loss before anything important gets thrown out.
The disposal mistake people regret later
Cleanup piles create their own problems. Burned food, medications, cosmetics, electronics, children's items, and soft goods should not all be treated the same way. Some items are unsafe to keep. Some need specialty cleaning. Some should stay in place until they are photographed and listed for the claim.
I tell homeowners to slow down before making irreversible decisions. Throwing everything away feels productive, but it can erase evidence your adjuster needed and mix contaminated debris with items that could have been restored.
If you are unsure whether an item needs cleaning, sealing, or disposal, leave it alone until a qualified restorer has inspected it. That pause prevents a lot of expensive mistakes.
Navigating Insurance and Knowing When to Call a Pro
Insurance moves faster when your documentation is clear. Start with room-by-room photos, a written inventory of damaged items, and notes about visible soot, smoke odor, water intrusion, and any areas you haven't touched. Keep damaged items when it's safe to do so until your insurer or adjuster confirms next steps.
The hard part for many homeowners isn't paperwork. It's deciding when DIY stops making sense.
Call a professional when any of these are true
- The soot is oily, sticky, or hard to identify. That usually means the cleaning method matters more than effort.
- More than one room is affected. Once smoke migrates, contamination becomes a house problem instead of a spot-cleaning problem.
- The HVAC system may be involved. Registers, returns, and duct pathways can spread residue and odor.
- You see ceiling contamination, cabinetry residue, or odor inside closets and drawers. That points to broader smoke travel.
- Firefighting water is still affecting materials. Drying and contamination control now overlap.
- Electronics, appliances, or structural materials are affected. These need more caution than surface wiping.
A good restorer doesn't just clean. They document, test, explain what can and can't be saved, and give your adjuster a clearer picture of the loss.
What a certified restorer does for the claim process
A qualified fire restoration company typically documents conditions, identifies affected materials, separates salvageable from non-salvageable contents, and records the cleaning methods used. That helps the insurance side because the file reflects observed conditions instead of guesswork.
If you're trying to understand the policy side before authorizing work, this overview of whether homeowners insurance covers fire damage is a useful starting point. It can help you frame the conversation with your carrier without assuming that every item, treatment, or rebuild step will be handled the same way.
No one should promise coverage, pricing, or outcomes before the property is inspected. But you can expect a careful assessment, clear documentation, and honest guidance on where DIY is reasonable and where it isn't.
If you need help making those calls, Restore Heroes provides fire and smoke damage cleanup for Phoenix-area properties, including inspection, soot removal, structural drying, odor treatment, and claim documentation. If the damage is beyond light surface residue, getting an expert assessment early can prevent avoidable staining, odor rebound, and secondary moisture problems.