Water damage restoration costs typically average between $1,200 and $5,000 nationally, though many jobs also fall within a broader $1,300 to $5,600 range depending on what got wet, how contaminated the water is, and how much of the structure absorbed it. If you’re standing in a damp hallway, looking at a stained ceiling, or hearing a shop vacuum run in your head before anyone has even arrived, the biggest question is usually simple: what is this going to cost me?
That question gets stressful fast because water damage never feels simple in the moment. A pipe bursts behind a wall. A water heater leaks overnight. Monsoon rain pushes water where it shouldn’t go. You see the mess, but you can’t yet see what’s inside the drywall, under the flooring, or trapped in insulation.
That hidden part is why water restoration cost can swing so much from one home to another. The bill isn’t just for “drying things out.” It reflects contamination level, demolition needs, drying equipment, labor, monitoring, cleanup, and sometimes repair work after mitigation is complete. Phoenix homeowners also face a local wrinkle. The dry climate can help some materials dry faster, but it doesn’t make contaminated water safer, and it doesn’t prevent hidden moisture from causing trouble.
Your Guide to Navigating Water Damage Costs
You might have found this article right after discovering water under a baseboard, a ceiling bubble over the kitchen, or soaked carpet in a back room. In that moment, most homeowners ask two things almost immediately. What do I do first, and how expensive is this going to be?
A useful starting point is the national cost range above, but that number only makes sense once you understand what restoration includes. A small clean-water leak in one room is a very different project from a sewage backup, a long-hidden slab leak, or a storm-related intrusion that reached multiple materials.
Water restoration also overlaps with other damage categories more than people expect. If water came in through the roof after a storm, it helps to understand related repair costs too, including the cost of hail damage roof repair when roofing damage played a role in the loss.
For a plain-language overview of the process itself, this primer on what water damage restoration means is a helpful companion. It explains the difference between emergency mitigation and the later repair phase, which is one of the biggest reasons homeowners feel confused when estimates don’t all look the same.
Water damage is one of those home problems where speed matters, but blind panic doesn’t help. A calm, documented, professional response usually leads to better decisions.
What matters most right now is understanding that price follows scope. Scope follows diagnosis. Once you know how professionals classify the water and the damage, the rest of the estimate becomes much easier to read.
Why Water Damage Costs Vary So Much
A good way to think about water damage pricing is to compare it to a medical diagnosis. Two people can both say, “I’m in pain,” but one needs rest and the other needs surgery. Two homeowners can both say, “I have water damage,” while one needs a basic dry-out and the other needs protective gear, material removal, and deep decontamination.
The category tells you how contaminated the water is
The IICRC S500 standard groups water into three categories. That classification has a direct effect on labor, protective equipment, cleaning methods, and disposal requirements. According to HomeAdvisor’s water damage cost guide, Category 1 clean water typically runs about $3.50 to $4 per square foot, Category 2 gray water runs about $5.25 to $6.50, and Category 3 black water can reach $7 to $7.50 or more.
Here’s the practical version:
- Category 1 clean water usually starts from a sanitary source, such as a supply line or other potable-water source. The work often focuses on extraction and controlled drying.
- Category 2 gray water contains more contamination. Think appliance discharge or water that can carry enough contaminants to require more aggressive cleaning and antimicrobial treatment.
- Category 3 black water is the most serious. Sewage backups and floodwater fall into this group. Crews often need hazmat-level precautions, HEPA filtration, and disposal of porous materials that can’t be safely saved.
If you’re dealing with sewage or heavily contaminated floodwater, this overview of Category 3 water damage gives useful context on why those projects are handled so differently.
The class tells you how much the structure absorbed
Category is about what the water is. Class is about how far it spread and what it soaked into.
The same HomeAdvisor data also organizes losses by Classes 1 through 4:
- Class 1 runs about $150 to $400
- Class 2 runs about $500 to $1,000
- Class 3 runs about $1,000 to $3,000
- Class 4 can range from $20,000 to $100,000
That range surprises people, but the reason is straightforward. A little water on a non-porous floor is one level of work. Water that moved through drywall, padding, cabinetry, insulation, framing, hardwood, plaster, or low-permeability materials is a much bigger project.
Practical rule: The more water that got past the surface and into materials, the more your estimate shifts from cleanup to controlled demolition, drying science, and reconstruction planning.
Phoenix conditions can help and complicate
Phoenix homeowners sometimes assume dry air means a simpler project. Sometimes it helps. Dry ambient conditions can support evaporation. But the climate doesn’t cancel the need for professional moisture mapping and monitoring.
A wall cavity can stay wet even when the room feels dry. A cabinet toe-kick can trap moisture even when the tile looks normal. Monsoon-related losses can also bring in highly contaminated water, which changes the job immediately.
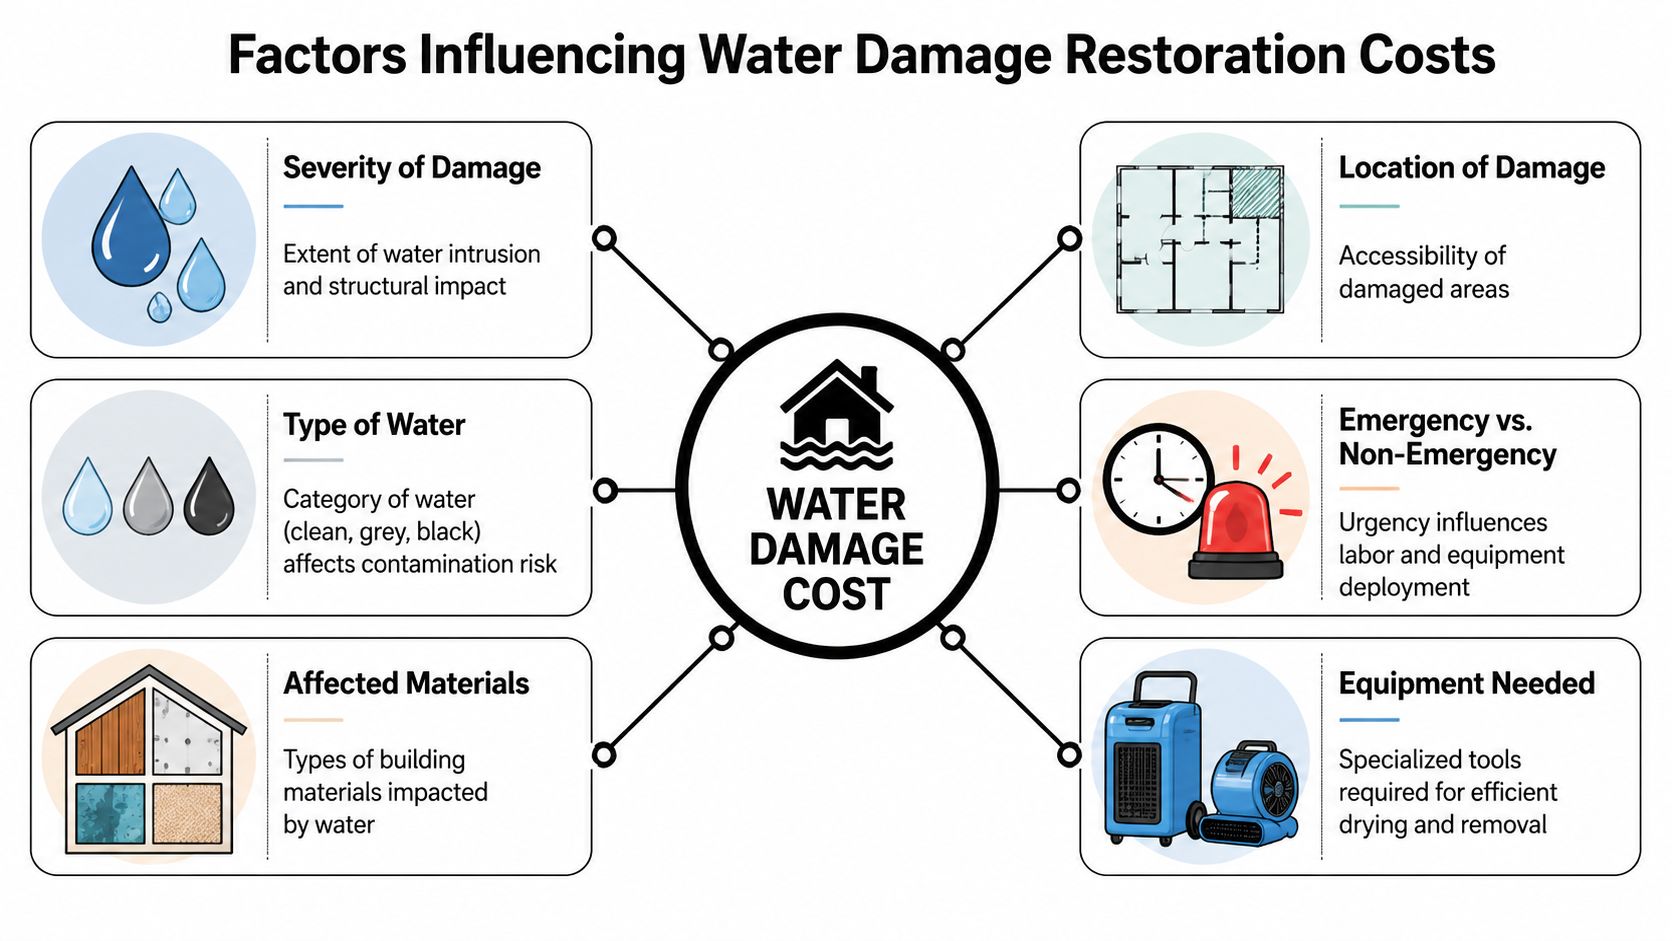
The real cost drivers people overlook
Most homeowners focus on the visible puddle. Professionals focus on what the water touched, how long it sat, and what has to happen to return materials to a safe condition.
A final price usually moves because of a combination of factors:
- Contamination level affects sanitation, PPE, and disposal.
- Material type matters because carpet pad, drywall, insulation, and engineered wood all react differently.
- Access difficulty changes labor. A wet garage wall is easier to reach than water inside a tight chase or behind built-ins.
- Urgency matters because emergency response often requires immediate equipment deployment.
- Equipment load rises with saturation and room count.
- Repair scope grows if swelling, staining, or deterioration makes materials unsalvageable.
Once you understand category and class, the estimate stops looking arbitrary. It starts reading like a work plan.
An Itemized Look at Your Restoration Bill
A water damage invoice can look intimidating because it combines several kinds of work on one document. Some charges deal with emergency mitigation. Others cover monitoring, sanitation, demolition, or repairs. If you don’t know what each line means, it’s easy to assume the bill is padded when it may be itemized in industry language.
According to Angi’s water damage cost guide, national averages for water damage restoration generally range from $1,300 to $5,600. That same source lists common service components such as water extraction at $500 to $3,000, drying equipment at $50 to $200 per day, and repairs like drywall or flooring at $100 to $1,500 or more per area.
What the line items usually mean
The first line is often the assessment and setup work. That includes locating moisture, deciding what can be saved, and planning equipment placement. Good estimators don’t just count wet rooms. They trace the migration path of the water.
Next comes extraction. This is the physical removal of standing water or water trapped in flooring and other materials. The goal is to remove as much liquid water as possible before the controlled drying phase begins.
Then you’ll usually see drying and dehumidification charges. These are often the least intuitive part of the bill because they continue over several days. The invoice may reflect equipment use, technician monitoring, moisture readings, and adjustment of the drying setup as conditions change.
For a fuller explanation of the services behind those charges, this guide to what a water restoration company does for your home helps decode the process in homeowner-friendly terms.
Estimated Water Restoration Service Costs
| Service Component | Typical Cost Range |
|---|---|
| Water extraction | $500 to $3,000 |
| Drying equipment | $50 to $200 per day |
| Drywall or flooring repair | $100 to $1,500 or more per area |
Why drying often feels expensive
Drying isn’t just leaving fans in a room. Professionals use air movers, dehumidifiers, moisture meters, and regular monitoring to bring materials back toward a safe moisture level. If a crew skips this step or under-equips the job, the cost may look lower at first but the risk of later damage rises.
Drying charges usually reflect time, equipment count, and monitoring. You’re paying for controlled moisture removal, not for a few machines making noise.
Repairs are separate from mitigation more often than people expect
This is one of the biggest homeowner pain points. “Restoration” sounds like one all-inclusive service, but many estimates separate the emergency dry-out from the build-back phase. That means a contractor may first bill for extraction, sanitation, demolition, and drying, and only later scope the work needed to replace baseboards, drywall, paint, flooring, or trim.
A few examples help:
- A small clean-water leak may need extraction, a couple days of drying, and minor drywall repair.
- A kitchen overflow may require cabinet toe-kick drying, floor removal, antimicrobial cleaning, and replacement of affected finishes.
- A basement or lower-level intrusion can combine extraction, cleanup, mold prevention steps, and multiple repair trades.
Angi also notes that specific repair components can add up quickly. Mold remediation may run $500 to $6,000, and structural fixes such as drywall or flooring repairs can significantly change the final total when materials can’t be saved.
When you review an estimate, ask a simple question: Is this mitigation only, or does it include repair work too? That one distinction clears up a lot of confusion.
The Water Damage Restoration Timeline
Most homeowners don’t just want to know the cost. They want to know how long their house will feel disrupted. The answer depends on the source of the water, the affected materials, and whether the project is mitigation only or includes repairs, but the sequence tends to follow the same pattern.
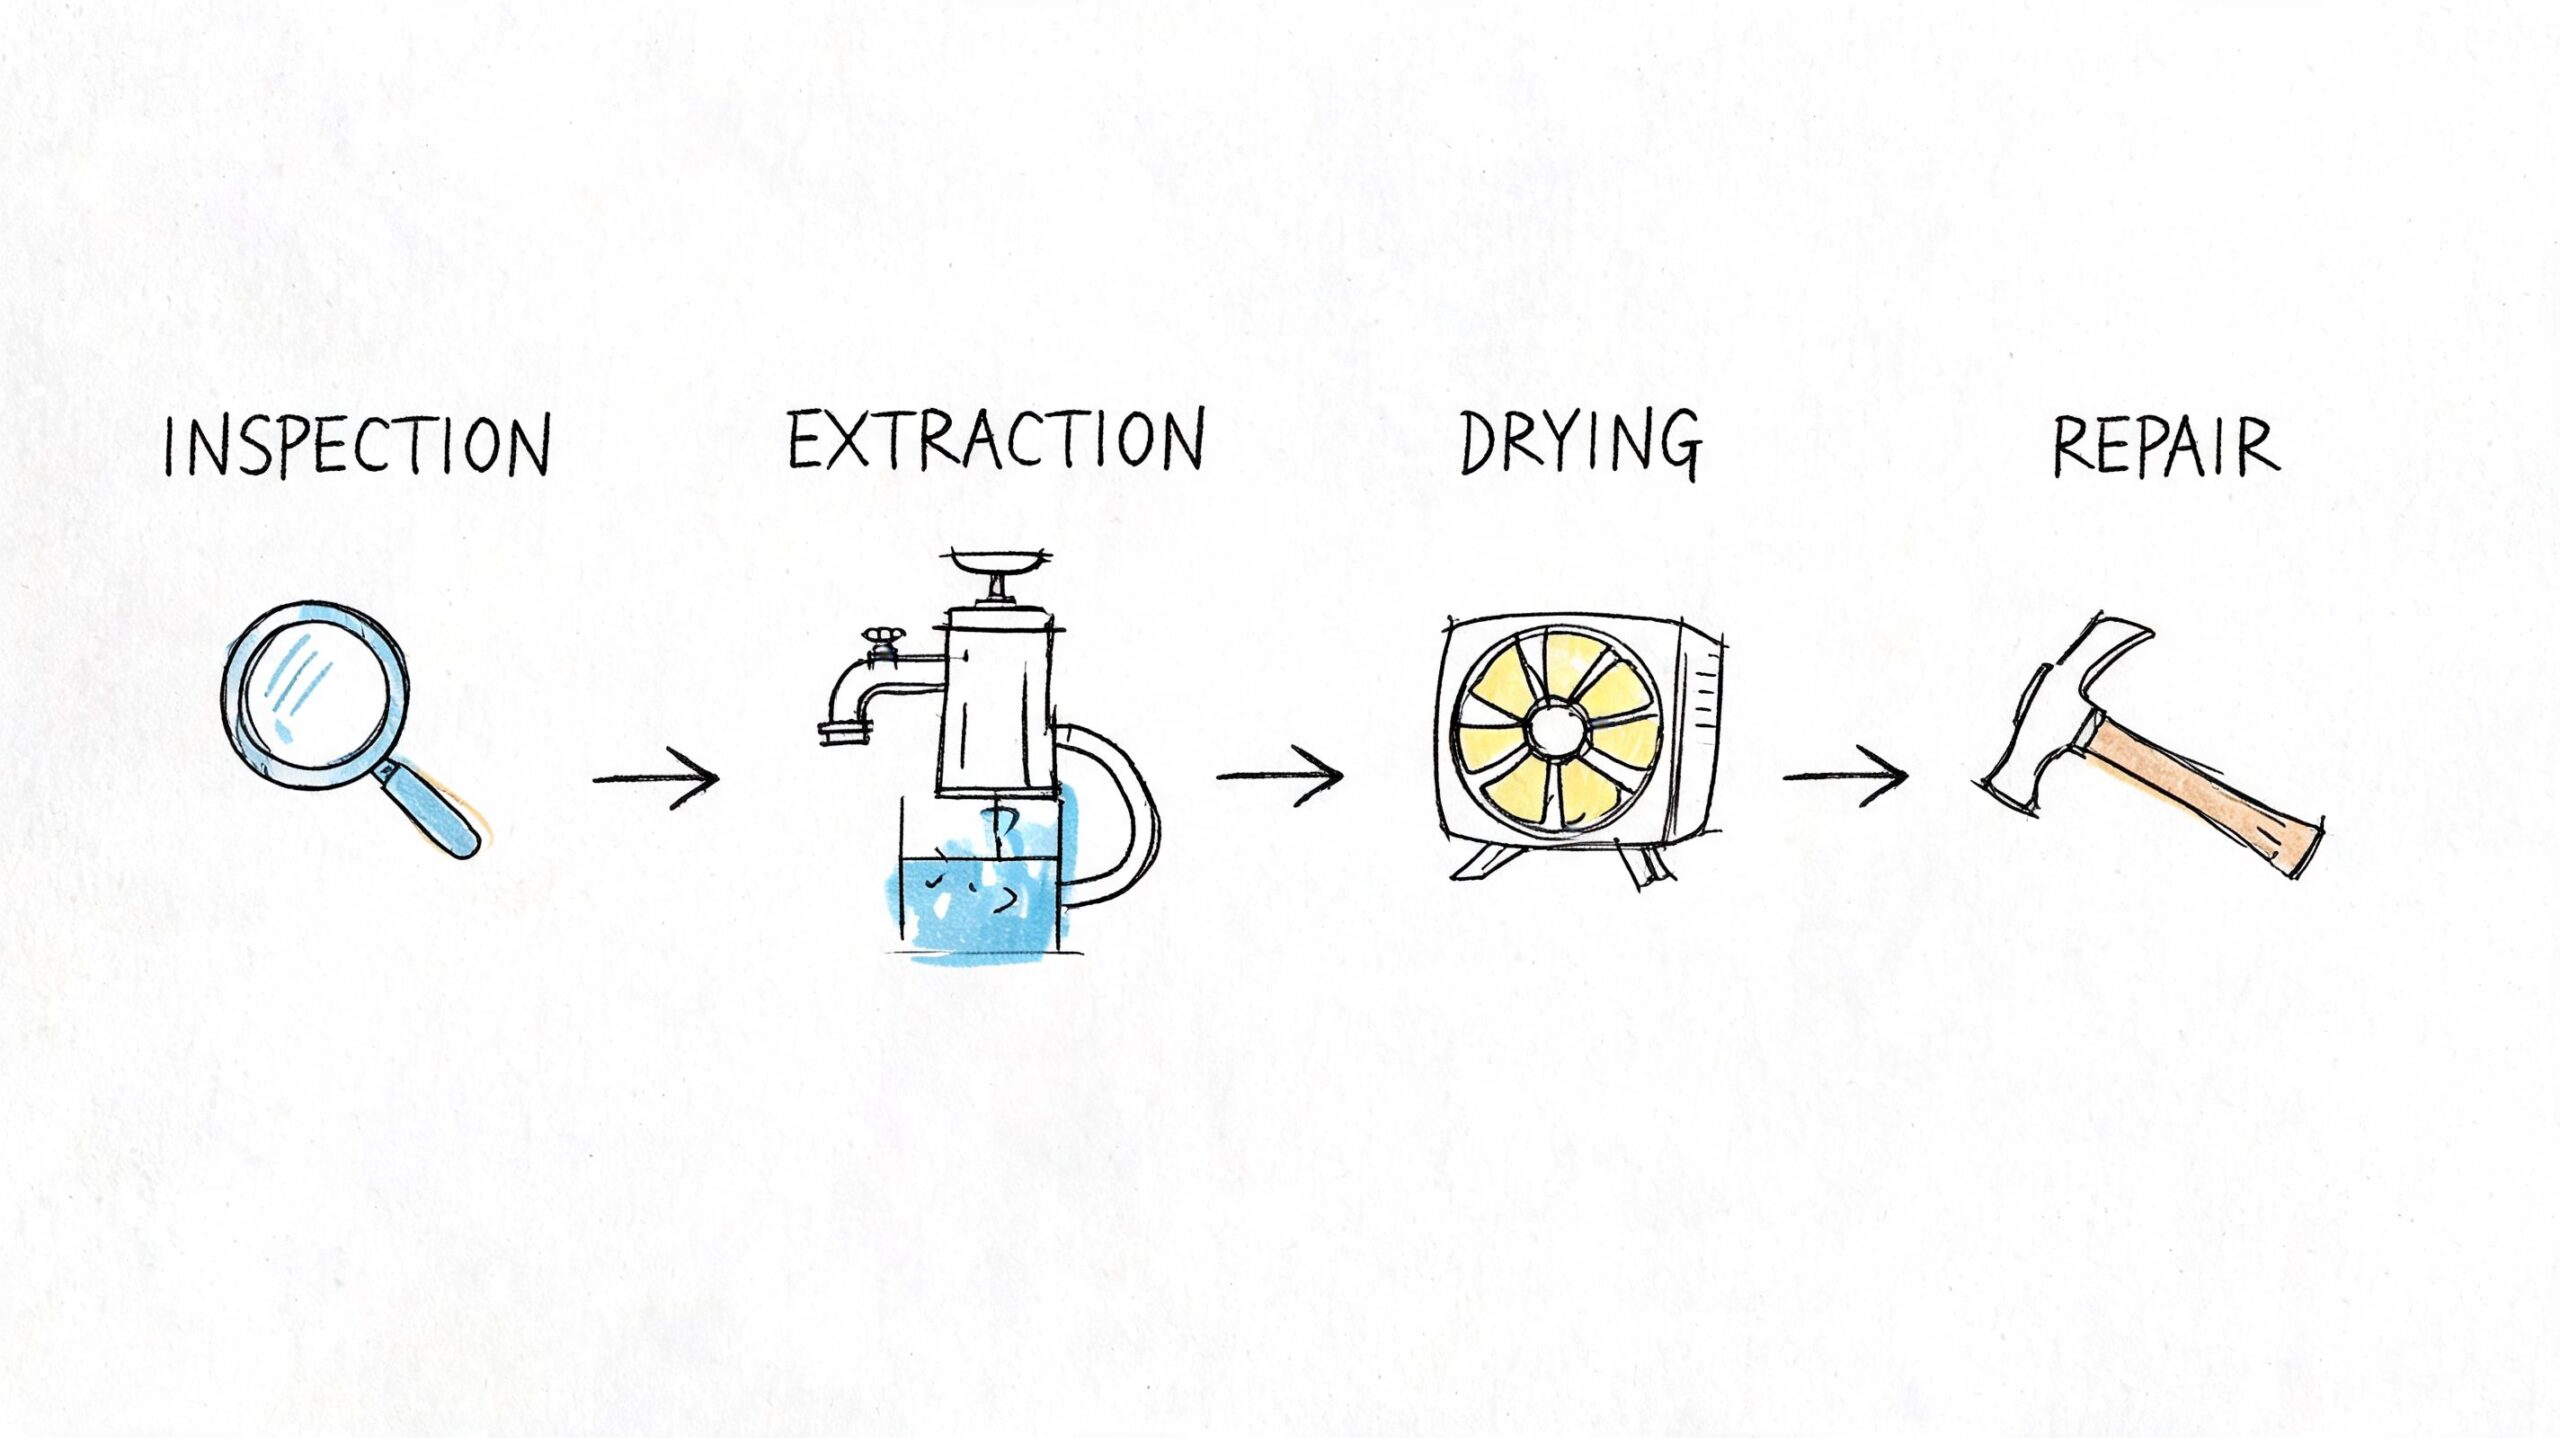
First response and stabilization
The early stage is about preventing further spread. A crew identifies the source, checks affected rooms, documents moisture, and starts extraction if standing water is present. If materials are unsafe or heavily contaminated, they may remove selected sections early so trapped moisture doesn’t stay hidden.
The first day often feels fast because there’s a lot of visible activity. Water gets pulled out. Baseboards may come off. Wet padding may be removed. Equipment arrives. This is the part homeowners usually imagine when they think of restoration.
Drying is where the science comes in
The next phase is quieter, but it’s often the most important. Professional drying uses psychrometrics, the science of temperature, humidity, airflow, and evaporation. According to San Francisco Flood Repair’s water damage price sheet, a 1,000 square foot Class 2 job typically needs 10 to 15 air movers and 2 large dehumidifiers for 3 to 5 days, with the equipment and monitoring phase costing about $1,000 to $3,500.
That explains why the job can’t be rushed just because surfaces look dry. Materials dry from the inside out. A subfloor may still hold moisture even after the top looks normal. Framing behind drywall can stay wet longer than the paint surface suggests.
If you want a more detailed sense of what affects duration, this page on how long water damage restoration takes is useful for setting realistic expectations.
Surfaces can look fine before the structure is actually dry. Moisture meters, not appearance, decide when the drying phase is complete.
Final cleanup and repair
Once readings show the structure has dried appropriately, the mitigation phase winds down. Equipment comes out. The property gets cleaned again. Then the repair phase begins if materials were removed or damaged beyond saving.
Repairs may be straightforward, like replacing a small drywall section and repainting. They may also involve flooring replacement, trim work, cabinetry, or other finish restoration. That’s why one homeowner says the job took a few days, while another says the house felt under repair for much longer. They may be describing different phases of the same kind of loss.
Working with Your Homeowners Insurance
Insurance adds another layer of stress because homeowners are trying to manage a wet house and paperwork at the same time. The main point to understand is that coverage depends heavily on the source of the water and the policy language, not just on how bad the damage looks.
According to Krapf Legal’s water damage statistics overview, water damage makes up nearly 24% of all homeowners insurance claims in the U.S., and the average claim payout exceeds $11,000. The same source also notes that coverage is not automatic. Policies often treat sudden events differently from gradual leaks or floodwater.
What usually causes confusion
Homeowners often assume “water damage is water damage.” Insurance usually doesn’t see it that way.
A pipe that bursts unexpectedly may be handled very differently from a slow leak under a sink that went unaddressed for a long time. Water entering from rising floodwater may also fall outside a standard homeowners policy. That distinction can affect whether the claim is covered, partially covered, or disputed.
What you should do early
In the first stage, focus on documentation and mitigation. Take clear photos and video. Keep notes about when you discovered the loss and what happened. Save receipts for reasonable emergency steps you took to reduce further damage.
A restoration contractor can also help by documenting moisture readings, affected materials, contamination concerns, and the work needed to stabilize the property. That documentation matters because adjusters need a defensible scope, not just a verbal description of “wet walls.”
For a practical homeowner checklist, this guide on water damage insurance claim tips can help you organize your next steps.
Where the contractor fits into the claim
A good restoration company doesn’t decide coverage. That decision belongs to the insurer under the terms of your policy. What the contractor does is document the loss thoroughly, describe the necessary mitigation work, and communicate in a format adjusters can review.
Some companies use estimating platforms such as Xactimate to organize the scope in insurance-friendly line items. That doesn’t guarantee payment, but it can make the claim easier to evaluate because the work is described in a standardized way.
Keep two ideas separate in your mind. Necessary restoration work and insurance coverage are related, but they are not the same thing.
That separation helps homeowners ask better questions. Instead of “Will insurance pay for all this?” start with “What work is necessary to stabilize and restore the property, and how is each part being documented?” That puts you on firmer ground no matter how the claim unfolds.
How to Choose a Contractor and Lower Your Bill
The fastest way to lose control of water restoration cost is to wait too long or hire the wrong company. The right response doesn’t always make the job cheap, but it can prevent a manageable loss from turning into a much larger one.
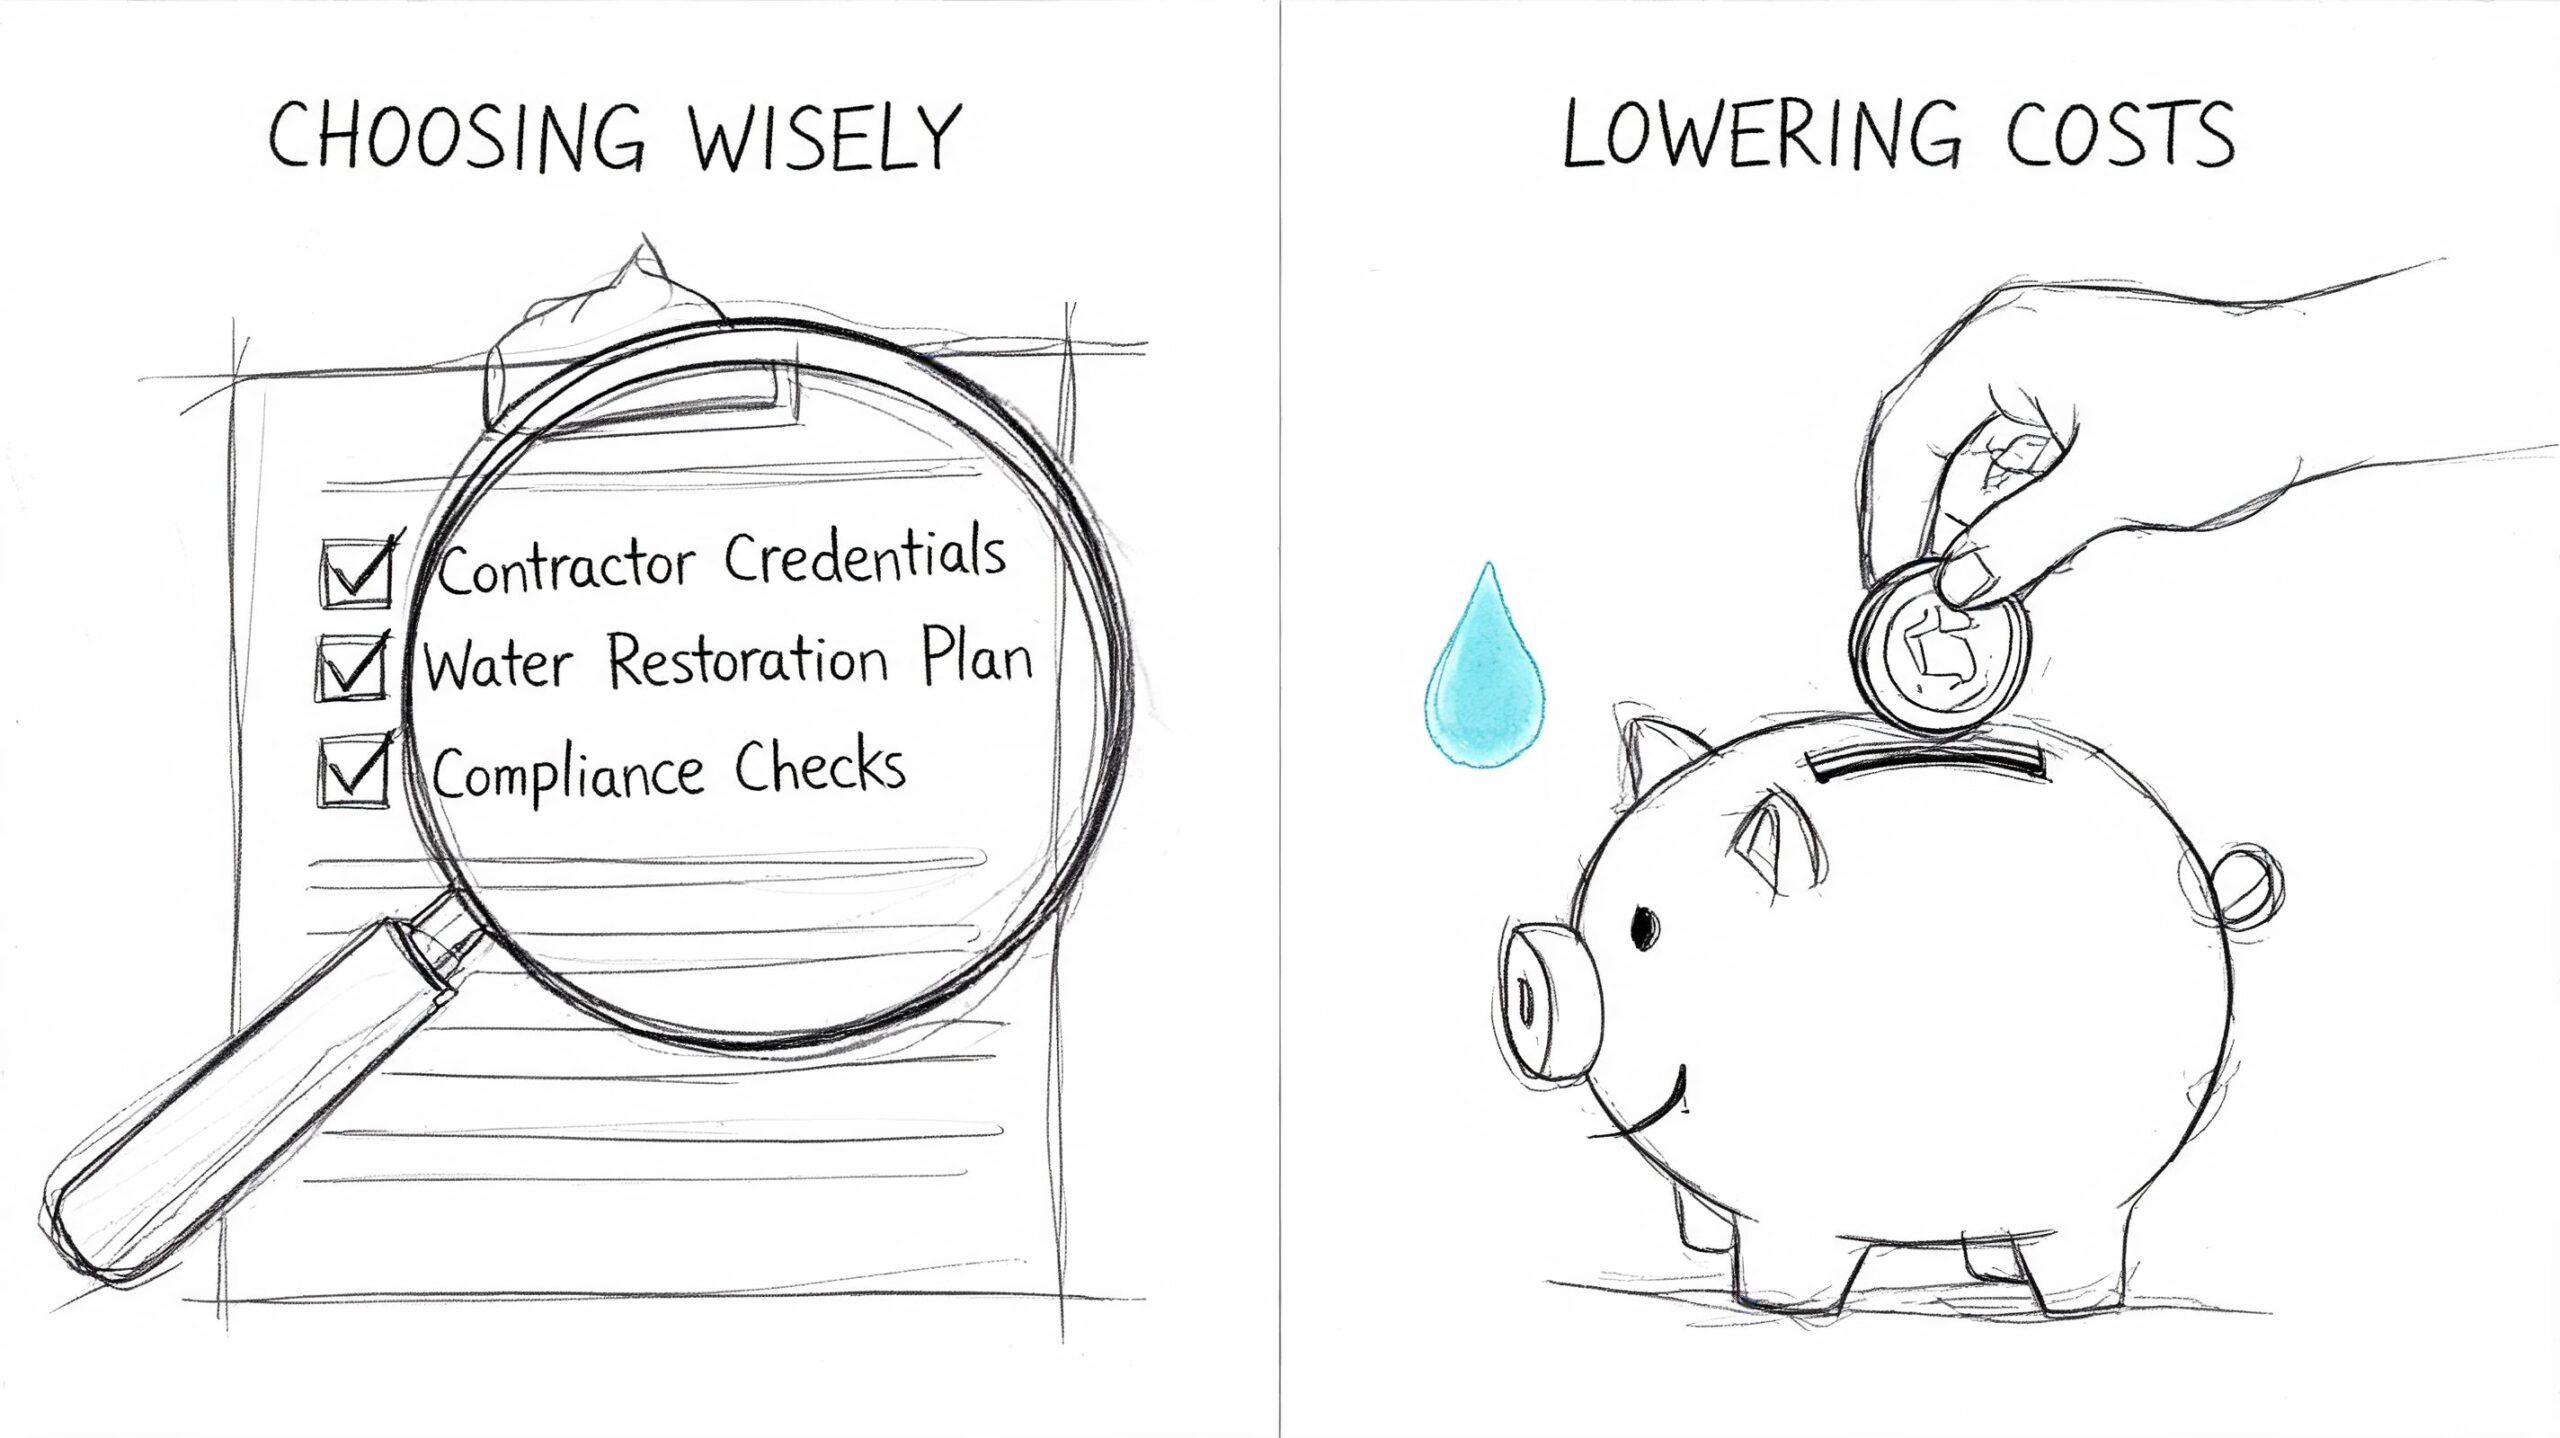
What lowers the final cost
Speed matters, but smart speed matters more. Homeowners sometimes grab a few box fans and hope for the best. That can help on a tiny surface spill, but it doesn’t answer the essential questions. Did water get under the flooring? Into drywall? Behind cabinets? Into insulation?
These steps usually give you the best chance of controlling cost:
- Stop the source if you can do so safely. Turning off a valve or shutting down the appliance can prevent a small event from spreading.
- Document before moving too much. Photos, videos, and notes help both the restoration scope and any insurance discussion.
- Ask for moisture readings. A contractor should be able to explain where materials are wet and how they’re tracking drying progress.
- Request clarity on salvage versus removal. Some materials can be dried in place. Others can’t. You want the reason, not just the decision.
- Separate mitigation from repairs on the estimate. That makes quotes easier to compare.
How to vet the contractor
Not every company advertising emergency cleanup follows the same standards. You’re not just hiring for speed. You’re hiring for judgment.
Look for these basics:
- IICRC certification. That shows the company is trained in recognized restoration standards.
- Proper licensing and insurance. Ask directly.
- Phoenix-area experience. Local knowledge matters with slab leaks, monsoon intrusions, and common regional building materials.
- Clear documentation habits. Moisture maps, meter readings, and written scopes protect you.
- Actual emergency capability. Some companies market urgent response but mainly operate like a remodeling firm.
Here’s a short explainer that helps homeowners think through those decisions in plain language:
Questions worth asking before you sign
You don’t need to sound like an adjuster or an estimator. A few direct questions can reveal a lot:
- How are you determining the category and class of this loss?
- What materials do you expect to save, and what might need removal?
- How often will you check moisture readings?
- What does this estimate include right now, and what would be a separate repair scope later?
- Who will communicate updates during the drying process?
The lowest bid isn’t always the lowest cost. If a company underestimates moisture, skips monitoring, or misses contamination, the second round of work is usually harder on the home and the budget.
A careful contractor protects both the structure and your decision-making. In water damage, that’s often where true savings are.
Restoring Your Home and Your Peace of Mind
Water damage feels chaotic at first because you’re seeing symptoms before you understand the full scope. Once you know what drives water restoration cost, the situation becomes more manageable. The type of water matters. The materials matter. The drying process matters. The paperwork matters too.
The biggest shift is this: restoration pricing isn’t random. It follows the contamination level, the amount of absorbed moisture, the equipment and labor required, and the repairs needed after the structure is dry.
If you take one lesson from all of this, let it be simple. Act quickly, document carefully, and work with a certified professional who can explain the why behind every line item. That’s usually the clearest path back to a safe, dry, normal home.
Frequently Asked Questions About Water Restoration
Can I handle water damage myself to save money
Sometimes homeowners can handle a very small, clean, visible spill. The trouble is that many losses only look small at first. Water travels under flooring, behind drywall, into base plates, and inside cabinets. A household fan can dry the room air while hidden materials stay wet.
DIY attempts also tend to miss category issues. If the water came from a sanitary source at first, that doesn’t mean it stayed low-risk after sitting, soaking materials, or mixing with contaminants. If you can’t verify the source, the spread, and the moisture inside materials, a professional inspection is often the safer move.
A practical middle ground is to stop the source, protect belongings, and document the damage right away. Then get a professional assessment before deciding the loss is minor.
What hidden costs tend to surprise homeowners
The most common surprise is that mitigation and repair are often separate scopes. A homeowner expects one “restoration” number, then learns the emergency dry-out is one phase and the rebuild is another.
Other unexpected costs can come from things discovered after the job starts, such as:
- Hidden moisture behind walls or under floors
- Material removal that wasn’t obvious at first glance
- Sanitizing needs when water is contaminated
- Mold remediation if the area stayed wet too long
- Finish work after demolition, such as paint, trim, or flooring transitions
That doesn’t mean every project grows. It means the clearest estimates come from thorough inspections, moisture mapping, and plain discussion about what is known now versus what might be uncovered once wet materials are opened up.
Will filing a water damage claim raise my premium
That’s a policy and insurer question, so no contractor should promise what will happen to your premium. The effect can vary based on your carrier, claim history, policy terms, and the details of the loss.
What you can control is the quality of your documentation and the speed of your response. Clear records, a well-documented mitigation scope, and prompt action usually put you in a stronger position than vague timelines and incomplete evidence.
If you’re unsure whether to file, it often helps to gather facts first. Understand the source of the water, the visible damage, the likely hidden damage, and whether the loss appears to be sudden or gradual. That gives you a more informed basis for talking with your insurer.
If you need help assessing a water loss in the Phoenix area, Restore Heroes offers IICRC-certified restoration services for homes and commercial properties. Their team handles emergency mitigation, structural drying, documentation, and communication with insurers, which can make a stressful situation feel much more manageable.